Once you’re creating a website based on WordPress and are using Elementor, you expect to go without coding. Yet, sometimes you can’t exactly create the content you want or need, completely without any basic understanding of HTML or CSS, or using PHP queries.
That’s where Crocoblock comes into play! It provides you with the set of completely free tools that can easily help you regardless of your coding skills in creating more complex content without any real need for extra effort.
This summer we have already added a brand new WP Query Generator tool. It was already described in a complete overview at our blog.
This week our team has decided to extend the set of developer tools available at CrocoBlock with the brand new Contact Form 7 Layout Builder.
What For Do I Need Contact Form Builder
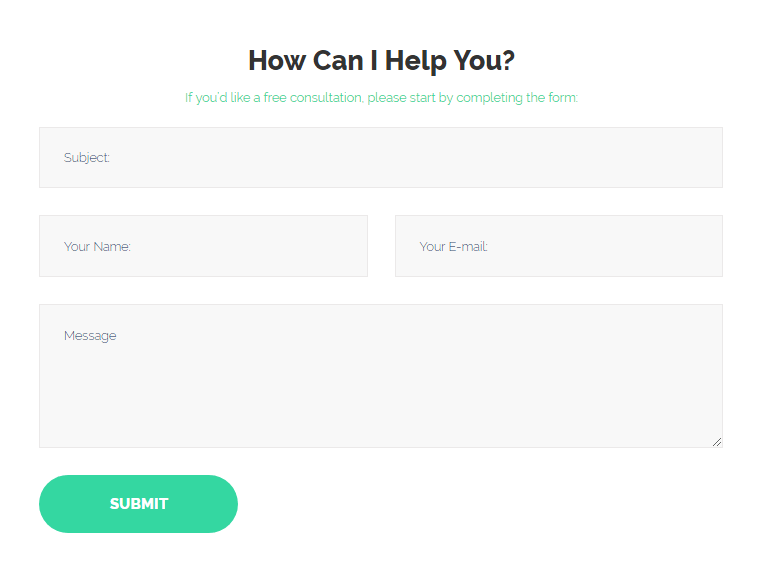
In case you’re looking for an easy way to create a contact form, by default you’d be using Contact Form 7 plugin, that adds a contact form to the pages built with Elementor.
When it comes to displaying the existing contact forms on pages built with Elementor, you’d naturally take a look at Contact Form 7 widget available in JetElements plugin.
However, your default contact form will have the fullwidth fields occupying the whole rows, and you’d have to use HTML markup in order to display the contact form with several columns, and the rows that have different number of columns and column layouts.
While this task might seem easy for an experienced coder, the beginner will have a bit of trouble creating a more complicated structure for the contact form. Also, you’d have to make sure that the form has a responsive layout and won’t break when you resize the browser’s window, or view the site from mobile device.
With Contact Form 7 Layout Builder tool you get the ultimate solution for creating contact form HTML markup, that will be fully responsive, and perfectly suit your needs.
Actually, Contact Form Builder will help you generate the code that introduces the needed layout to your contact form.
How to Use Contact Form 7 Layout Builder
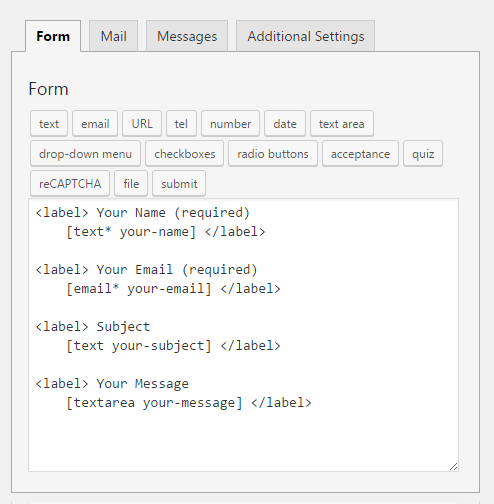
- In order to create a new contact form with the needed layout, first, navigate to Contact > Add new in WordPress Dashboard. Here you can see the block where you can add your own markup for the form and apply different shortcodes.

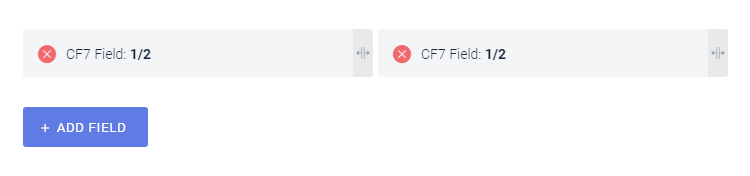
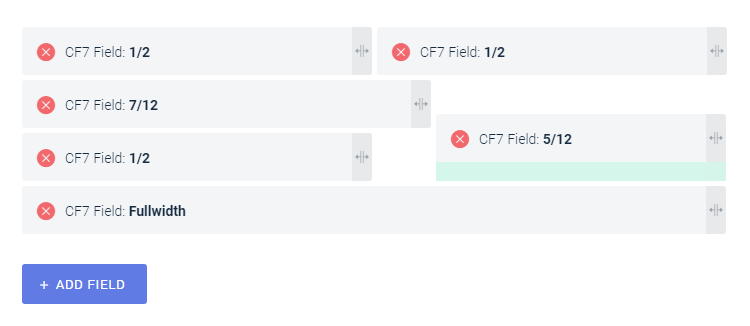
- To create the desirable HTML markup open Contact Form 7 Layout Builder tool. By default, there is a single row consisting of two columns occupying ½ of the whole row space. However, you can create any number of rows and fields put in the columns using drag and drop method.
- To create a new field click +Add Field button. The new field by default occupies the 100% of the row.

- Drag the field’s right border control to the right and to the left to change the size of the field.
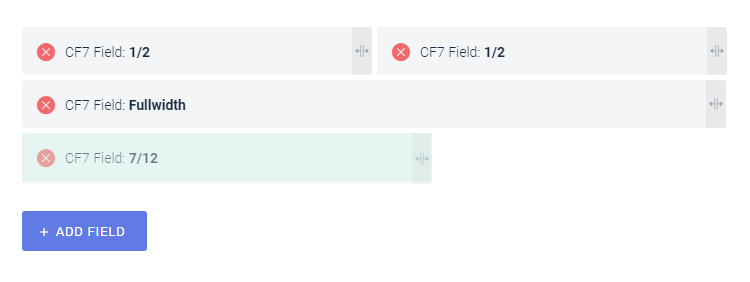

- Drag the field around to position it in the row according to your needs.

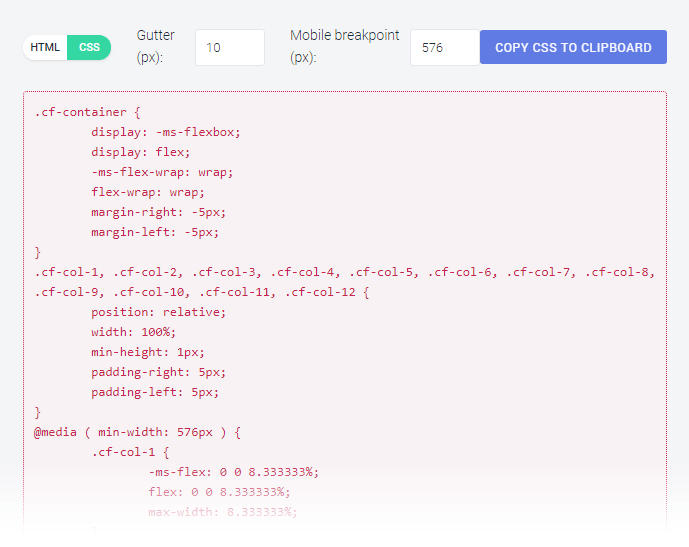
- Fill in the gutter value in px to add a gutter space between the fields.


- Change the mobile breakpoint for the contact form to create responsive layouts.
- When everything is done you get the HTML and CSS code that helps add the layout to the contact form. Copy the HTML markup to the clipboard and paste it to the Form block of your contact form.
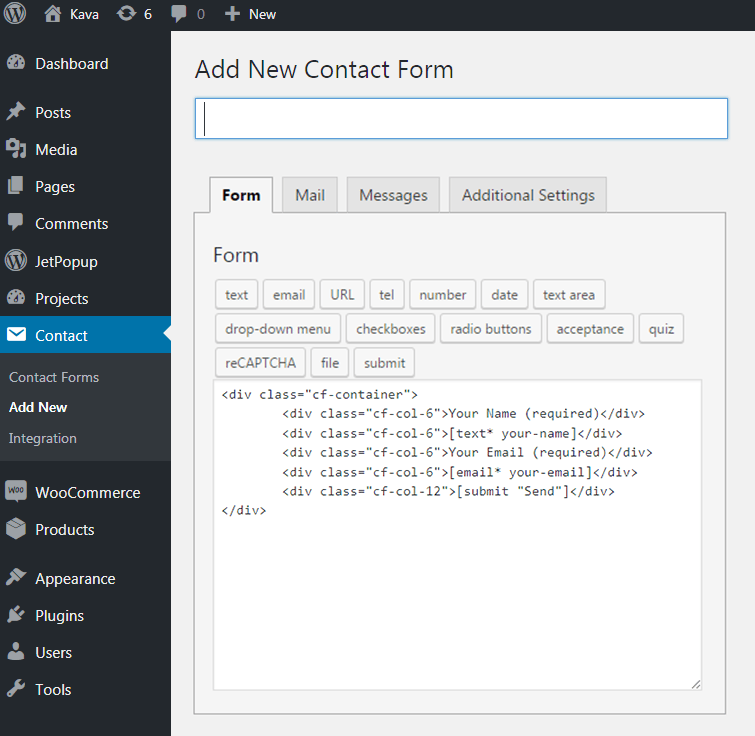

- Place the shortcodes for displaying contact form content into the markup instead of the default label text.
- Return to the Contact Form Builder and here switch to CSS and copy the code to the clipboard.

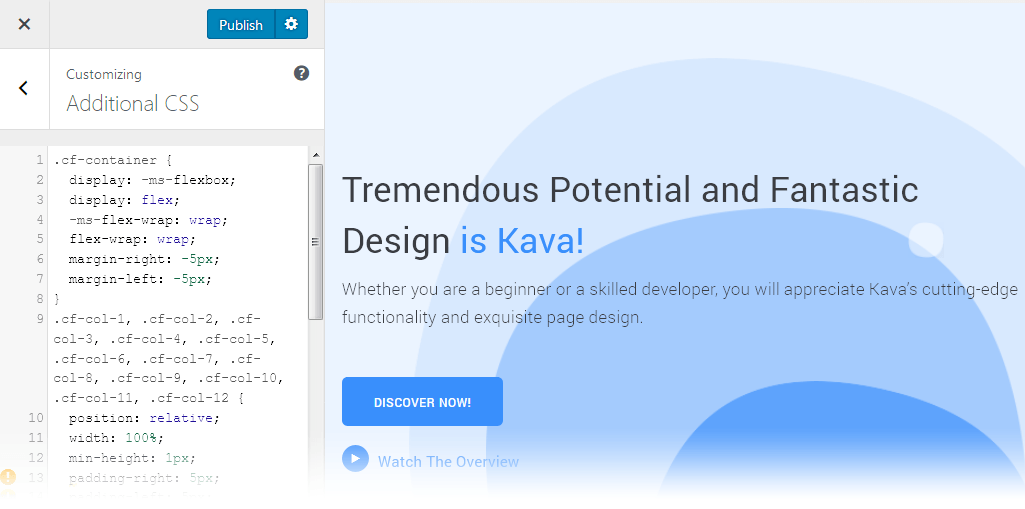
- Then navigate to Appearance > Customize > Advanced CSS in WordPress Customizer and add the code into the field. Save the changes.

- After that, you can drop Contact Form 7 widget to the page built with Elementor and select the newly created contact form. It will be displayed with all the needed content and using the defined structure.
As you can see, the time spent on creating more complex contact form structures can be easily cut short with Contact Form 7 Layout Builder tool provided by Crocoblock.
With it, you’ll be able to build contact forms of any complexity and use them on your site.
