What do you need to create a full-fledged car dealer website? In fact, this is a complex digital architecture. There are custom post types with cars and their specifications, which can be filtered by VIP and Popular ads, Types of Transport, etc. Filters that contain a good deal of parameters. Not to mention user accounts and a workable communication form between advertisers and buyers.
We know your pain. That’s how it struck us – why not create a dynamic website template, which you could grab, customize a little, and hit the road?!
In this article, we’ll be showing you the template’s ins and outs, share some tips, and explain the role of every included plugin. Ready, steady, go!
Table of Contents:
Car Dealer Website Functionality
Our Car Dealer website is a pre-coded and pre-designed dynamic template made with Elementor, Gutenberg, and several Crocoblock plugins. To better understand how it all works together, we opted to explain every plugin in isolation.
Wrapper
As a teaser, we’ll take a look at the website’s exterior, represented by the header and footer.
JetBlocks: adding a login form to the header
The JetBlocks plugin will help you create the following key elements – header and footer – fast and easy. As to the header, we opted for a minimalist yet functional design, adding the opportunity to navigate around the website and place ads quickly.
To implement the navigation functionality, you’ll need to open Elementor and seek the Navigation Menu widget. Adjust and style the menu items as you need.
Next, there’s a green “Place an Ad” button that’s made with the help of the Dynamic Link widget. Once clicked, it redirects a user to the login page or My Account page. The login form anticipates several scenarios and suggests possible user actions. If the user has no account, the form encourages them to sign up via a corresponding message.
The login form is created with the JetFormBuilder plugin in the Gutenberg editor and added to the page with the JetForm widget. Drag and drop it to the desired page area and customize the style settings using the free JetStyleManager plugin. All the necessary fields like Email, Password, the Login button, and “Forgot Password?” links are included.
Moving on to the footer, it contains the Subscribe to Newsletter form created with the JetFormBuilder plugin. Below the subscription form, you’ll spot links to different website pages broken down into several categories. To the right of the Solutions sections, there are social media icons, brought into being by Elementor Social Icons widget.
To recreate the footer on your own, you’ll need the abovementioned JetBlocks, JetStyleManager, and JetFormBuilder plugins.
Core
Car Dealer is a complex system with a lot of internal correlations. Since this dynamic template is deemed to push the buy-and-sell activities within a car dealer niche, it will be advertising the available vehicles.
To make it work, we are going to create custom post types (aka CPTs) and beautiful layouts to showcase them. Next, we’ll be setting custom user meta box WordPress items storing additional meta fields applicable to the Edit User & Profile pages. It’s necessary to output all the car-related details dynamically, too. Last but not least, the cars should be broken down into categories, and that’s what taxonomies are for. You guessed it right – we’re going to use JetEngine to shape the core.
JetEngine: adding dynamic content
This plugin gives you power beyond the imaginary. To take off, you’ll need to create a Custom Post Type, name it, and add as many posts to it as there are cars to be sold. Make sure to fill in the meta fields correctly, it’s vital. The meta fields allow for the dynamic output of the car parameters. All the data must be input in the admin panel with due attention; afterward, you’ll manage to display everything on the single page template.
JetEngine’s dynamic widgets help to automate the process a lot. Pull out the car parameters from the meta fields to the front end using Dynamic Field and Dynamic Terms. As to images, you can use Dynamic Image or the Product Gallery Slider widget from the JetProductGallery plugin to showcase them.
The next step is creating taxonomies, which are meant to categorize the posts and simplify the filtering routine. Imagine finding a car by a specific color, model, and year. It’d be convenient and fast, wouldn’t it? Keep that in mind and proceed to create taxonomies. Feel free to add any categories you might need; we opted for Color, State, Models, Makes, and Types of Transport.
NOTE:
Take your time to configure the taxonomy settings properly. They’ll take the pain out of filtering in the long run, allowing you to sort all ads quickly and customize the output.
The next checkpoint is layouts. We want our ads to be showcased in style; therefore, it’s crucial to create a new listing, which will serve as a template for the remaining CPTs.
Done? Now, add it to the Listing Grid widget and customize the item until it looks like you want it to. The best part is that you do it once, and all the style settings apply to the rest of the ads automatically. Pure magic!
Listing Grid can display ads in a number of different ways. For example, the search results page can contain a filterable car catalog, where advertised vehicles are presented as a grid showing the car image and details.
Except for that, we can showcase a lot more in the front. Take blog posts. They are conveyed as rectangles with images and text areas. At first glance, it doesn’t seem to be a listing grid; however, such a layout is achieved thanks to that widget.
The same applies to VIP Ads, Recent Ads, Types of Transport, and Popular Car Brands. In fact, take a look at the back end to spot the exact number of active listing items.
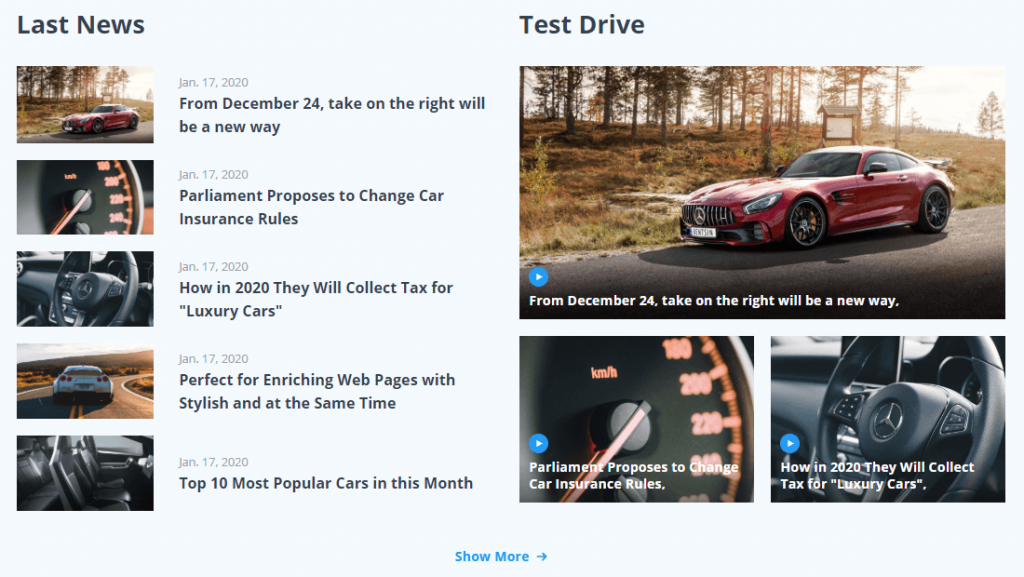
If you scroll down the Home page, you’ll see the Last News and Test Drive sections. These were created using the JetEngine plugin as well.
Besides, you can filter a ready-made listing grid and bring up any given posts. A VIP list, for instance, can be sorted by toggling on the Is VIP Switcher field. We pre-filled this meta field in each custom post type manually. Once you try to filter by this category, the dynamic template will readily output the posts having this toggle switch enabled.
Data Stores
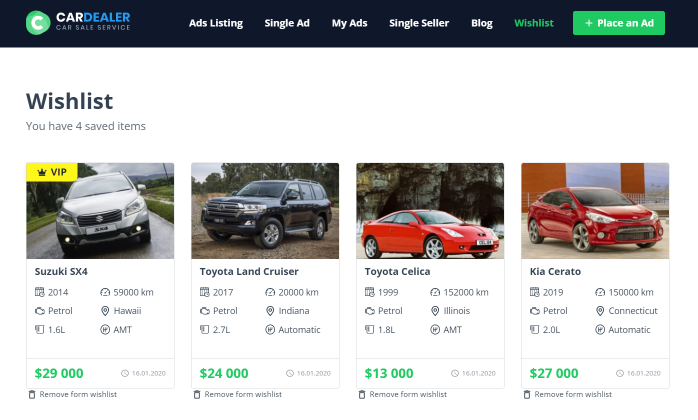
Another helpful feature implemented on the Car Dealer dynamic template is Add to Wishlist. The functionality is implemented thanks to the JetEngine module named Data Stores.
Data Stores allow website users and visitors to save the items/objects they like to a separate database (on the back end) and then return to those items, previewing them on the front-end page. Let’s see how it works on the dynamic website template.
There is a clickable Star icon on all Listing items in the Listing Grids throughout the website. When clicked, the car you like is automatically added to the Wishlist. It’s a separate page where you can view all saved items and delete those you are no longer interested in.
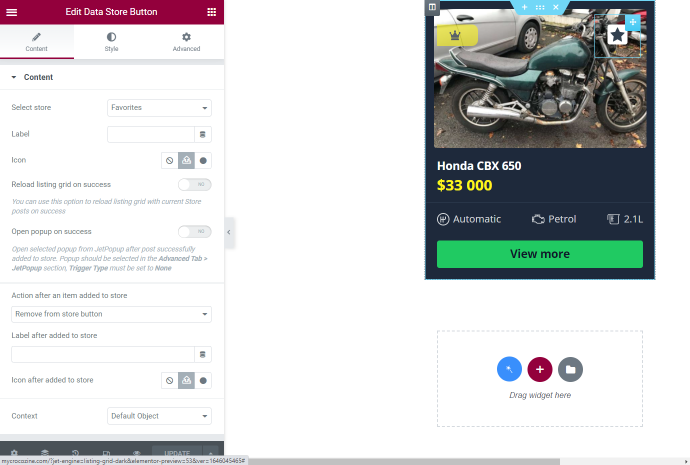
Regarding technical settings, both the Add to Wishlist icon and Remove from Wishlist link are added to the Listing items thanks to the Data Store Button widget. It is configured to show the “Remove from Wishlist” button once the car is added to Favorites. Alternatively, the “Remove from Wishlist” button deletes the chosen vehicle from Favorites and reloads the page.
Profile Builder
JetEngine’s functionality stretches far beyond, and we are about to spill the tea. It allows transforming the regular car dealer website template into a full-fledged marketplace. There will be two main categories of users:
- ad owners, who are supposed to place and edit ads;
- potential buyers, who are meant to view the car selling ads and reach out to their owners.
Although we do not deprive you of the administrator role, the main intent behind the car dealer website is to bridge the gap between ad owners and customers. It is going to be a dynamic ecosystem, where users can contact one another, oftentimes, with no supervision. To make it happen, we’ll be using the Profile Builder module from JetEngine.
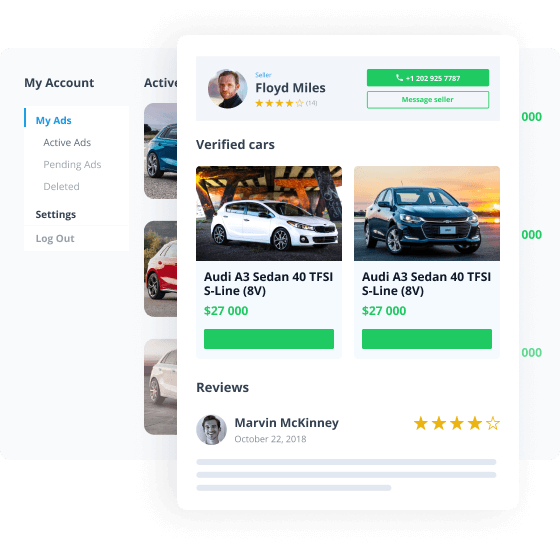
Here’s the outward of a personal user account:
As you can see, users get three default tabs; the first houses ads that the users have added themselves. The second tab with the account settings redirects the user to a new post addition form, and the third tab allows users to add and edit their bio.
When editing a placed ad, the user sees a form where he/she can edit all the data, added previously to the meta fields.
If the user wants to place new ads, he/she is supposed to fill out a form with the necessary meta fields. Right afterward, the ad post will be created automatically. It will contain the outlined meta fields, which will be storing the data from the form that the user has already filled. More to it, these data will be pulled into the single page template, which makes the ad look its best on the front end.
You can also edit and delete the existing ads. After saving the changes, the advertisement CPT will be either displayed with the updated details or removed completely from the website.
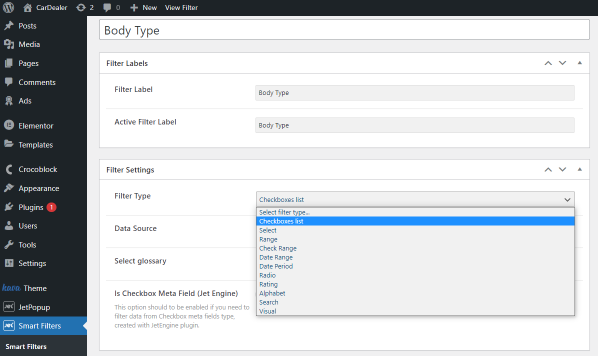
JetSmartFilters: setting advanced filters
Sure, there can’t be a car-selling website without the opportunity to search for the needed item almost hands down. Multi-level filtering tools are the next big thing for the Car Dealer template. To create those, we’re going to need JetSmartFilters.
For this particular template, we’ve added two Color filters, a Sorting filter, Mileage, Engine Type, Drivetrain, Transmission, Engine Capacity, Body Type, Location, Year, Price, and Model Hierarchy. Let’s check out where they are located.
On the Home page, there is one hierarchical filter embracing four levels represented by the Select field type. It means that every new filtering level becomes available after you select the previous one. Besides that, we’ve added three range filters for price, year, and engine capacity.
With the help of the Apply button widget, we’ve made it possible to select all filtering parameters and apply them at once. Once activated, the hierarchical filter will redirect the user from the Home page to the catalog page with the list of filtered cars.
Here’s what it looks like in the front. As soon as we hit the “Search” button, we’ll change over to the Car Catalog page with the filtered results:
Now, it’s time to make sure the filtering tool works even better from the catalog page.
As you can see, this page contains a lot more filters than the Home page does. Here, we spot the following:
- 1 hierarchical select filter for car model selection;
- 2 checkboxes filters for Body Type and Transmission;
- 4 range filters for Price, Year of Issue, Mileage, and Engine Capacity;
- 2 checkboxes filters for Engine Type and Drivetrain;
- 1 visual filter for car color selection;
- 1 select filter for picking location.
Moreover, there’s the Reset All Filters button, which clears all filters you might have applied. To showcase the variety of ads, we’ve used the Pagination widget, so the users always know there are more cars to view and choose from. All filters are AJAX-based, which means they apply automatically.
JetSmartFilters works absolutely great with JetEngine. Besides, there are many more filters to add to YOUR website.
JetThemeCore: creating single pages & site structure
Another pillar plugin that’s been used to put this dynamic template into practice. Gently, JetThemeCore helps us work out the entire site structure. Moreover, this plugin is indispensable for creating single pages for advertised cars, where all details will be pulled out from the admin panel dynamically.
Here’s what a single page looks like in Elementor:
We can see from here that important information is mainly displayed by means of JetEngine’s dynamic widgets. Basically, it’s necessary to create the Single Ad template just once, and it will be further applied to the remaining ads. To fine-tune the CPT content, you’ll simply need to fill in the meta fields by hand. Like so, you won’t be wasting time on the creation of a thousand lookalike Single Ads.
For example, let’s take the Suzuki SX4 post type. We’ll be filling in the meta fields that had been created previously with JetEngine. The entire process takes place in the admin panel:
Once we open this post on the front end, we’ll see a ready-made page created automatically. The single page template will be applied to it, and the dynamic widgets will pull out all the advertisement details from the post types. How cool is that? See for yourself:
What else can we do using JetThemeCore?
Since it’s good for replicating blocks and sections, we can use it to affix the header & footer on every webpage. The catalog of cars called Ads is a JetThemeCore archive template. You can customize it as you like since all Theme Builder templates are extremely versatile.
Plus, JetThemeCore was used to create a template for blog posts. This means that every new article will be subject to the established structure.
Don’t freak out. 😉
The working principle remains the same: you just add the needed widgets to make it work as desired. If you take static widgets, they will be displayed in the same fashion everywhere you add them. As to dynamic widgets, they’ll be showing different data on different pages depending on the filled meta fields.
JetReviews: adding dynamic reviews
A dynamic Reviews and Comments section was embedded onto the Single Seller page. It showcases feedback about a particular car seller left by the customers. In addition, website users can comment on other users’ reviews.
To add reviews to the needed post, you must install the JetReviews plugin. JetReviews has got the Reviews Listing widget, which creates a dynamic reviews section on the car dealer website.
JetPopup: adding a contact form
We’ve already mentioned efficient seller-buyer communication, so here’s another useful thing to achieve it. On the single page, you can find the Send a Message option, which lets a potential customer contact a car owner.
What makes it even handier? It’s the format. The message can be sent via a pop-up, designed with the help of JetPopup.
Once a user hits the “Send a Message” button, he/she will see a contact form created thanks to the JetFormBuilder plugin.
NOTE:
You can create as many pop-ups as you want, add them to pages of your choice, and set various visibility conditions. Just don’t go overboard. 😄
Bonus Features
Kava theme
Want to embellish the website’s exterior? Opt for a laconic and functional theme. As a dynamic template owner, you get access to a variety of themes that can be applied in no time. For those of you, guys, who value usability over everything else, there’s a second to none suggestion – Kava.
Why you’ll love it:
Our Kava theme is lightweight and highly customizable. You can juggle all its blocks and sections freely, and it’s your content that will be more noticeable whatsoever. Besides, you can install it hands down.
Visual effects plugins
All functional elements and visual effects are delivered thanks to JetElements and JetTricks plugins. Take buttons, for instance; they are made using the same-named JetElements widget. Perhaps, the best part of JetElements is the ability to output the information both statically and dynamically.
As to JetTricks, it helped to add the sticky section to the Single Ad page using the Sticky Column widget.
How to Get Crocoblock Car Dealer Template

Believe it or not, there are two case scenarios:
1. You are a Crocoblock user.
If you’ve already been a paid member, you can simply upgrade to All-Inclusive. In this case, you will be paying the difference between your current plan and the desired All-Inclusive set (a yearly package for either one or unlimited projects). And there’s more to it. The All-Inclusive set grants access to all Crocoblock Dynamic Templates, not just Car Dealer. 😎
2. You are not a Crocoblock user yet.
Go to the Pricing page and get yourself a lovely All-Inclusive Yearly/Unlim or Lifetime subscription. You’ll access all Crocoblock plugins alongside Dynamic Templates, Design Templates, and Interactive Pop-ups.
Any trouble during installation? Go check out the Installation Wizard tutorial.
Bottom Line
That’s all folks! The dynamic template exploration has come to an end. Now you know exactly how the Car Dealer website works. All plugins are fully compatible and can be easily merged to meet your goals. The pre-set functionality saves you time and effort.
Sure, we didn’t manage to cover ALL the little things but hey, it would have taken us more than 7 hours. You don’t buy it? Here’s a video by Ferdy Korpershoek.
One more thing. We strived to pack the template to the greatest extent saving room for development. The result you see is a replica of our vision, but you can get creative and rework the suggested architecture. Rush into the car dealing world quick as the wind!
