How to Create a Featured Listing
Learn how to display featured posts at the top of the list and how to show featured posts only after successful payment, using the JetEngine, JetFormBuilder, and JetPopup plugins for WordPress websites.
Before you start, check the tutorial requirements:
- Elementor (Free version), Block Editor (Gutenberg), or the Bricks theme
- JetEngine plugin installed and activated
- JetFormBuilder plugin installed and activated, with the JetFormBuilder PayPal Recurring Payments addon activated
- JetPopup plugin installed and activated
In this tutorial, we will focus on two cases: displaying featured posts at the top of the list and showing featured posts only after a successful payment.
Show Featured Posts on Top of the List
This method involves ordering the Listing Grid according to the “Featured” meta field, so the featured posts are shown at the top of the list.
Add “Featured” meta field
In this tutorial, we use the “Switcher” meta field to define if the post is featured.
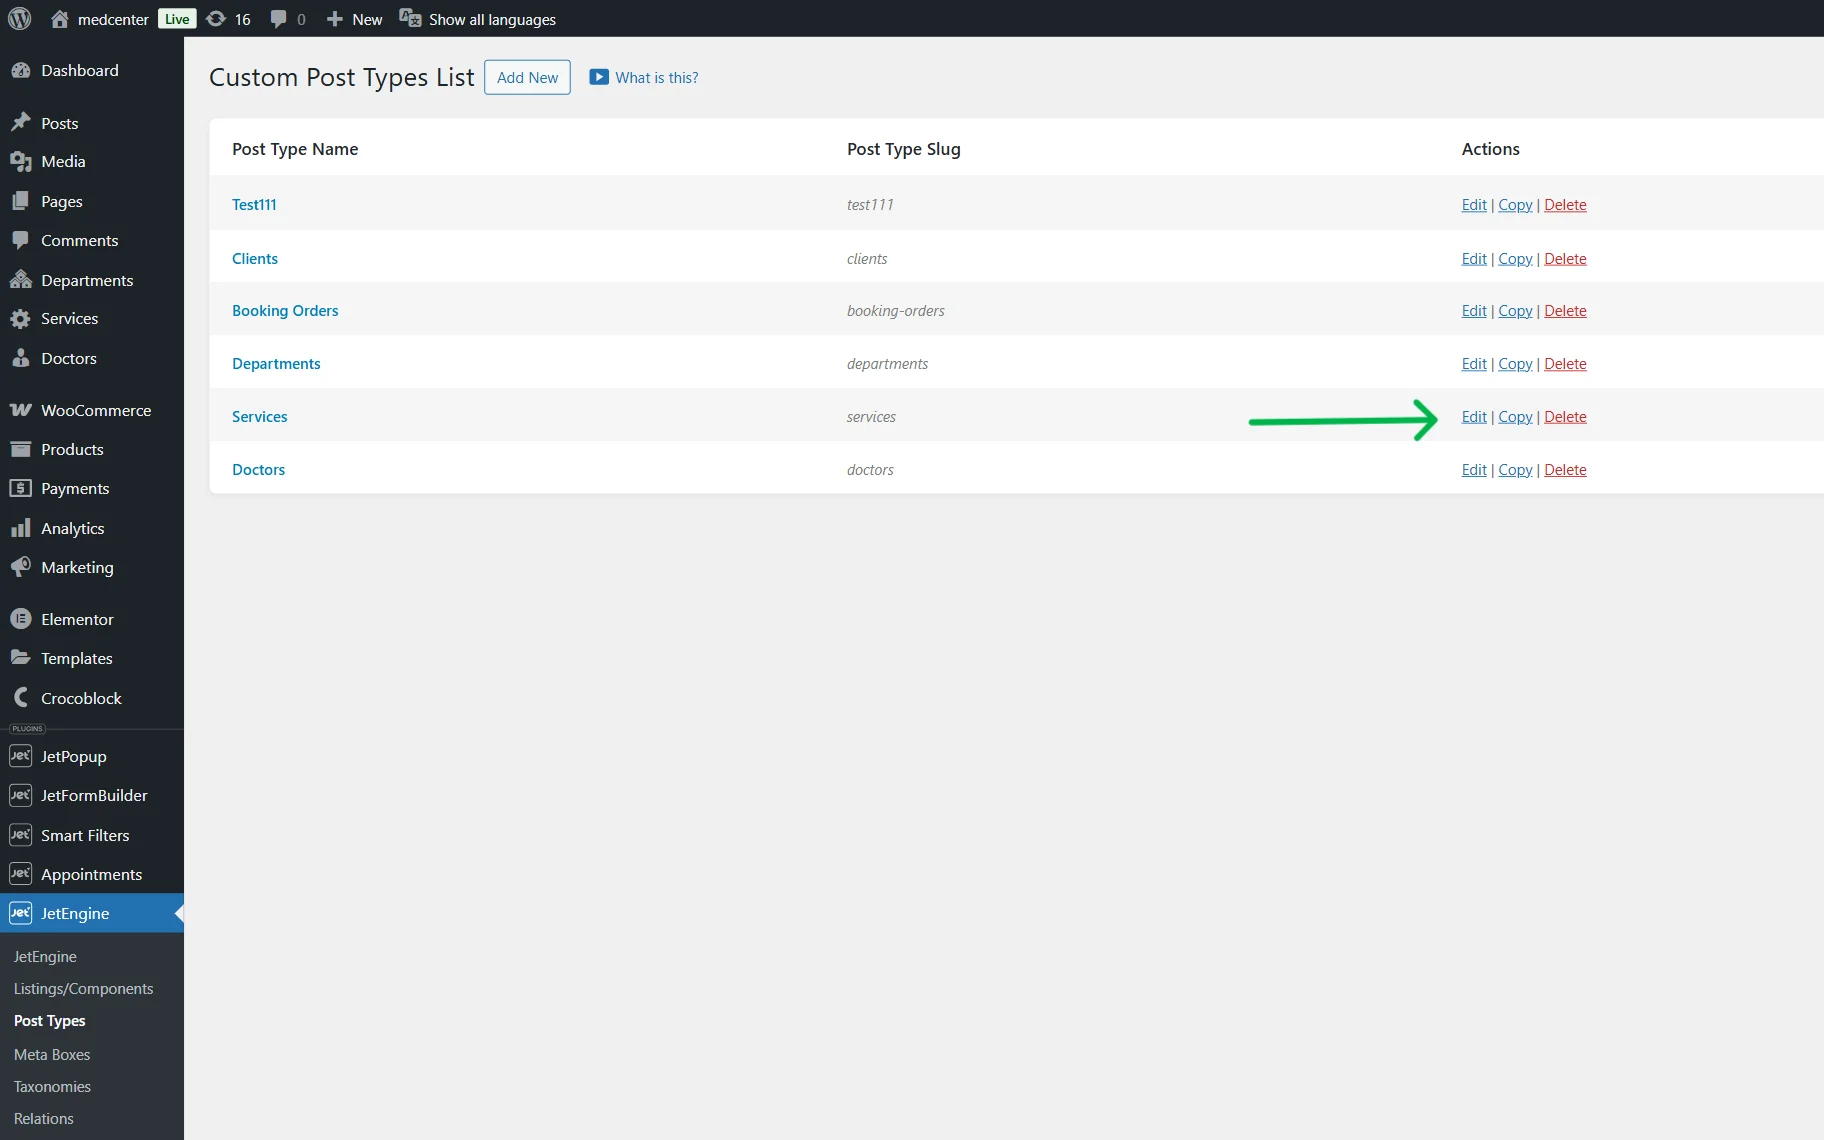
To add the field, proceed to WordPress Dashboard > JetEngine > Post Types, click the “Add New” button, or edit the already existing post type. You can check the details on setting up a new Custom Post Type (CPT) from our How to Create a Custom Post Type tutorial. In our case, we will add the “Switcher” meta field to the “Services” CPT.
On the newly appeared page, scroll down to the Meta Fields tab and click the “New Meta Field” button.
Fill out the Label and select the “Switcher” option in the Field Type dropdown.
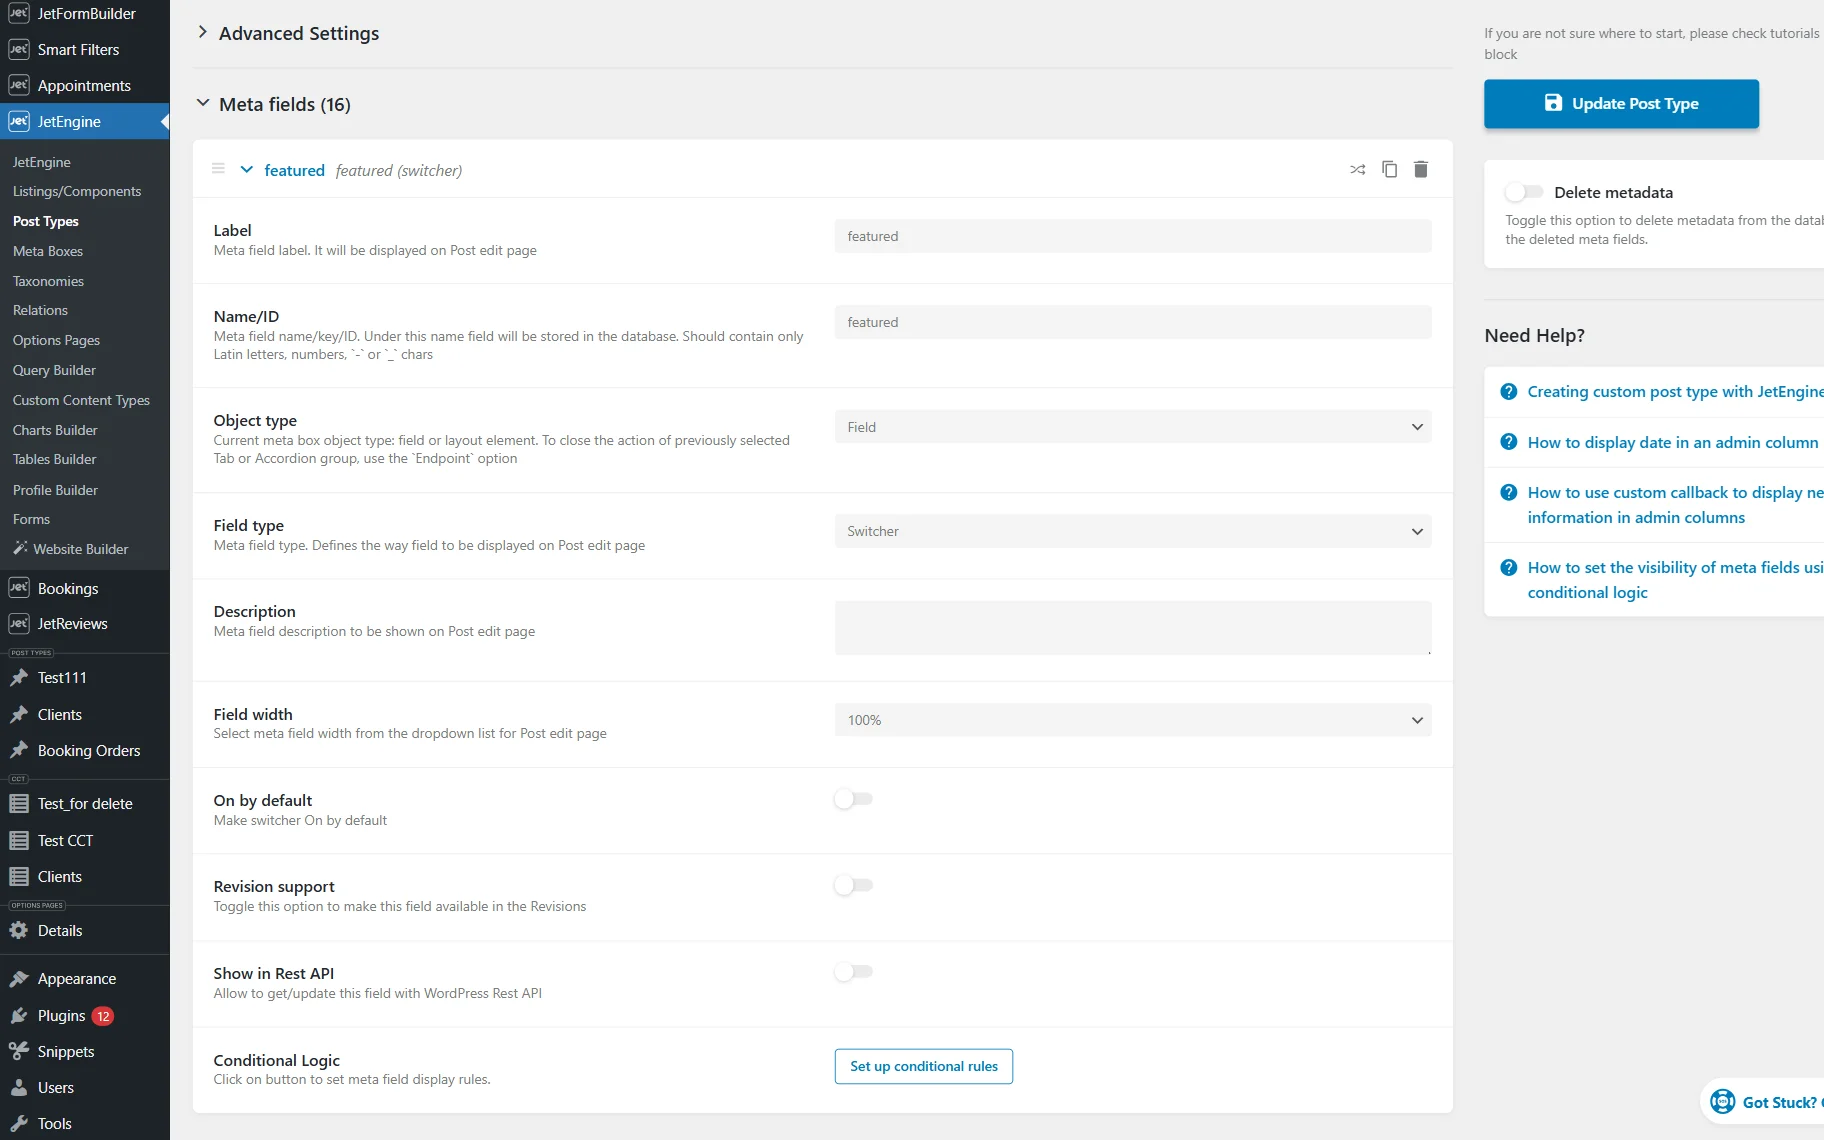
Once you have adjusted the settings, click the “Add/Update Post Type” button.
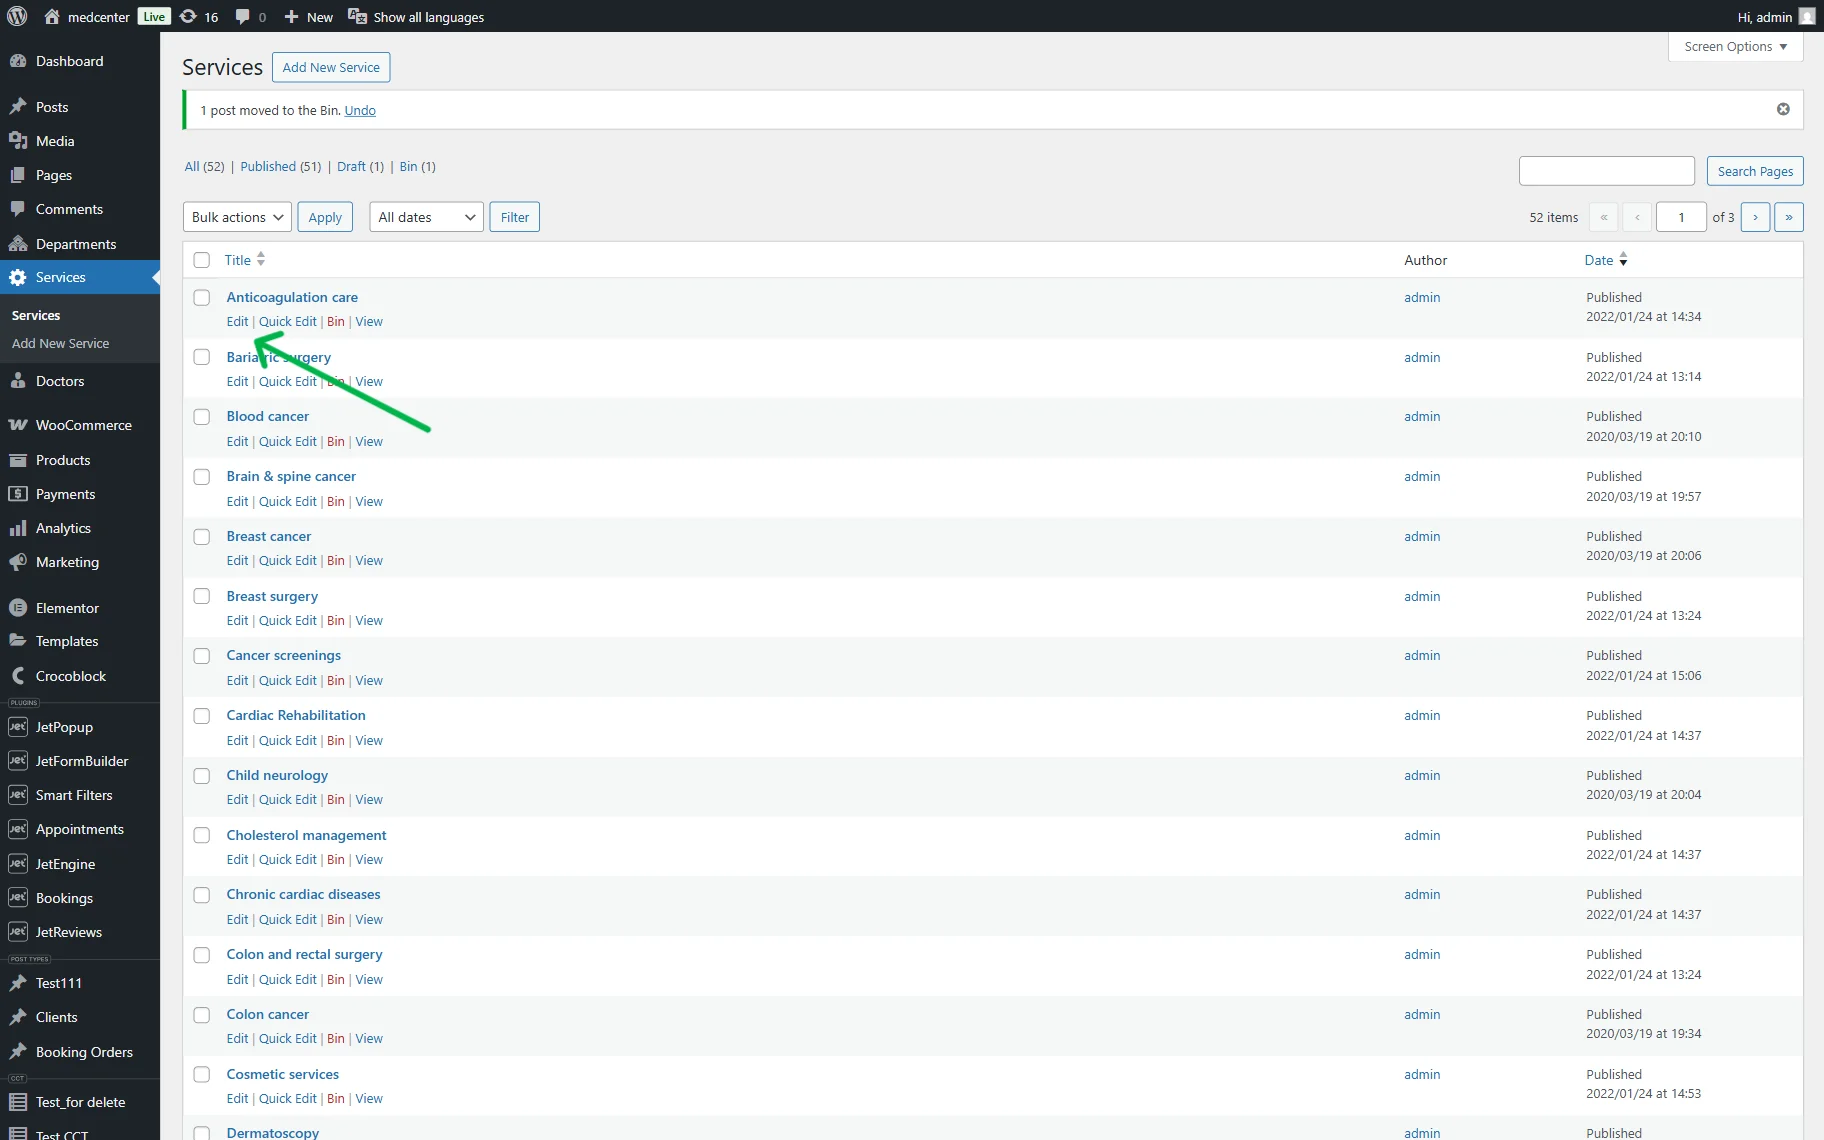
Now, we need to set the values for the posts. From the WordPress Dashboard, proceed to the needed post type and either click the “Add Page” button or edit the existing post.
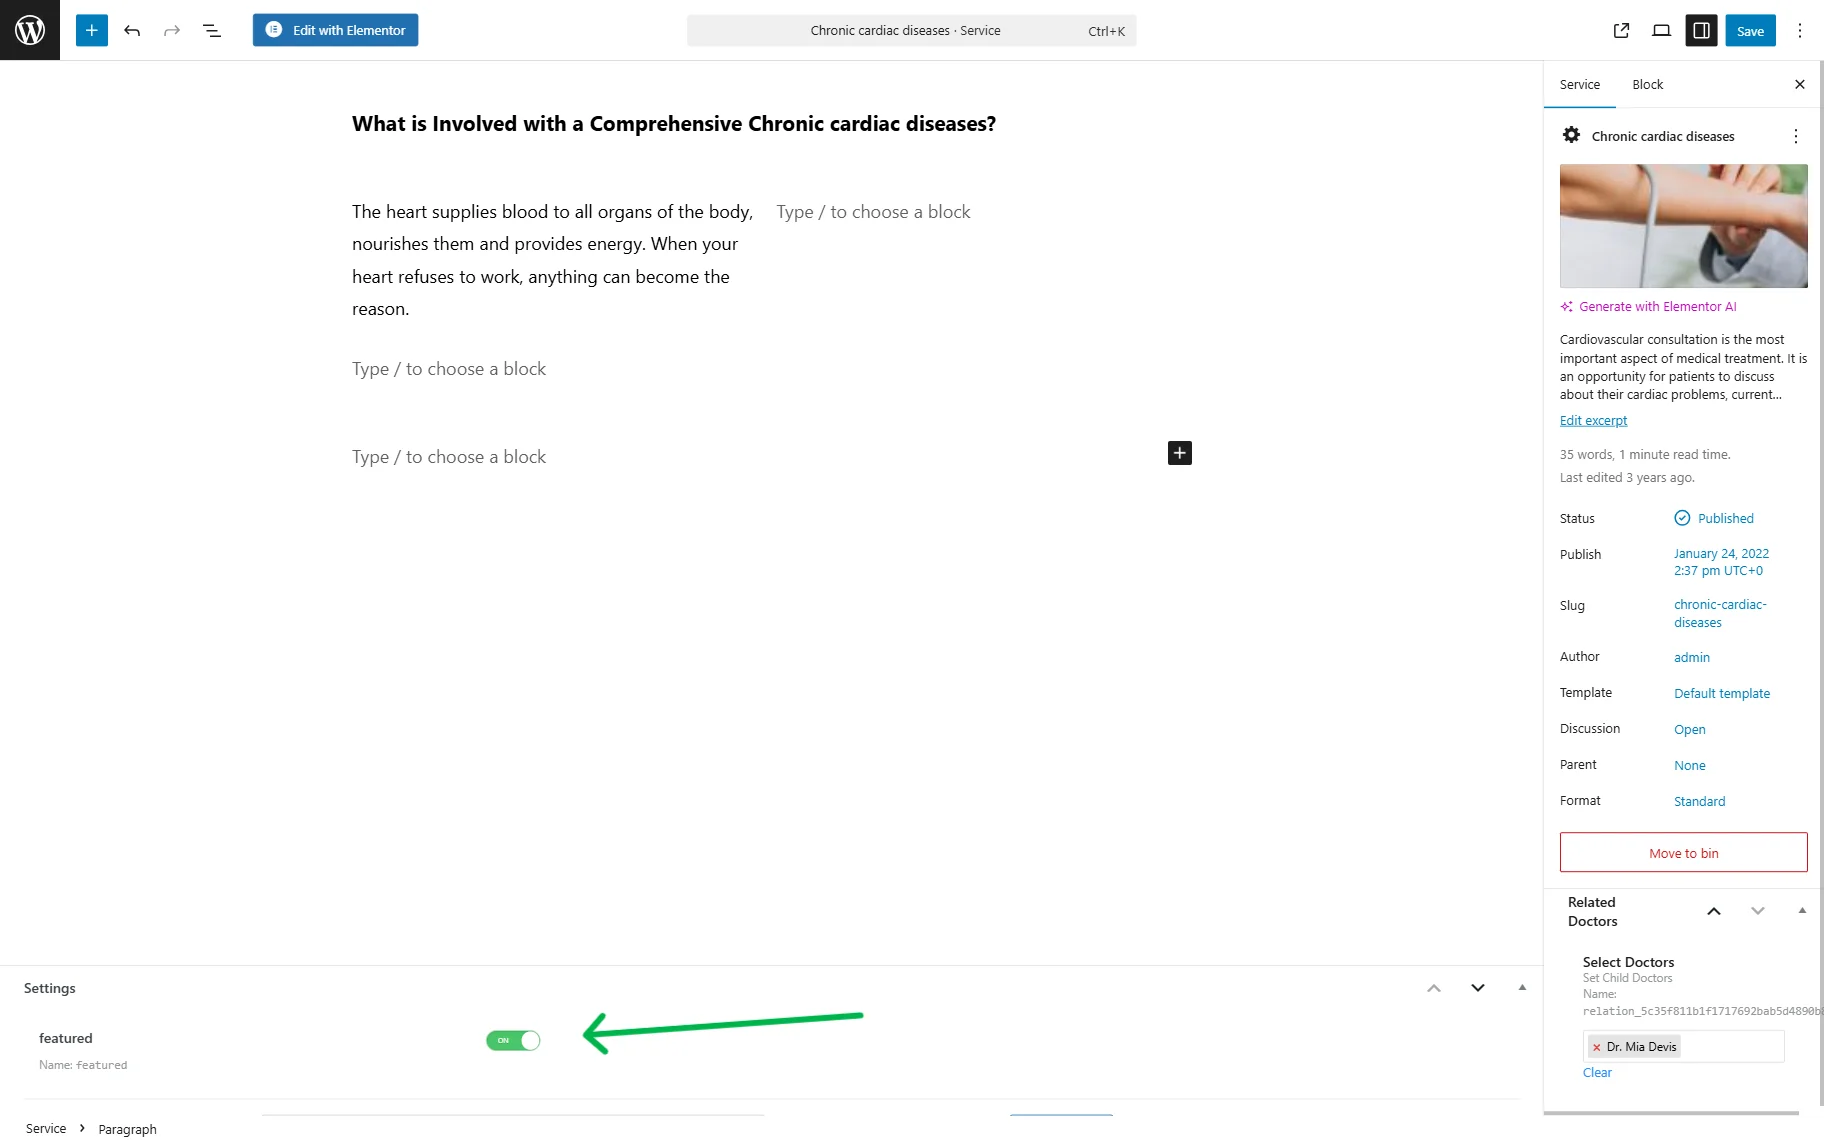
Enable the “Switcher” field toggle or leave it disabled, and click the “Save” button once you are ready.
Create a listing template
Following the How to Create a Listing Template for Post Types in Elementor tutorial, we created the Listing Template for the Post Type.
In this case, we added Dynamic Field widgets to display the title of the post and a meta field with a short description.

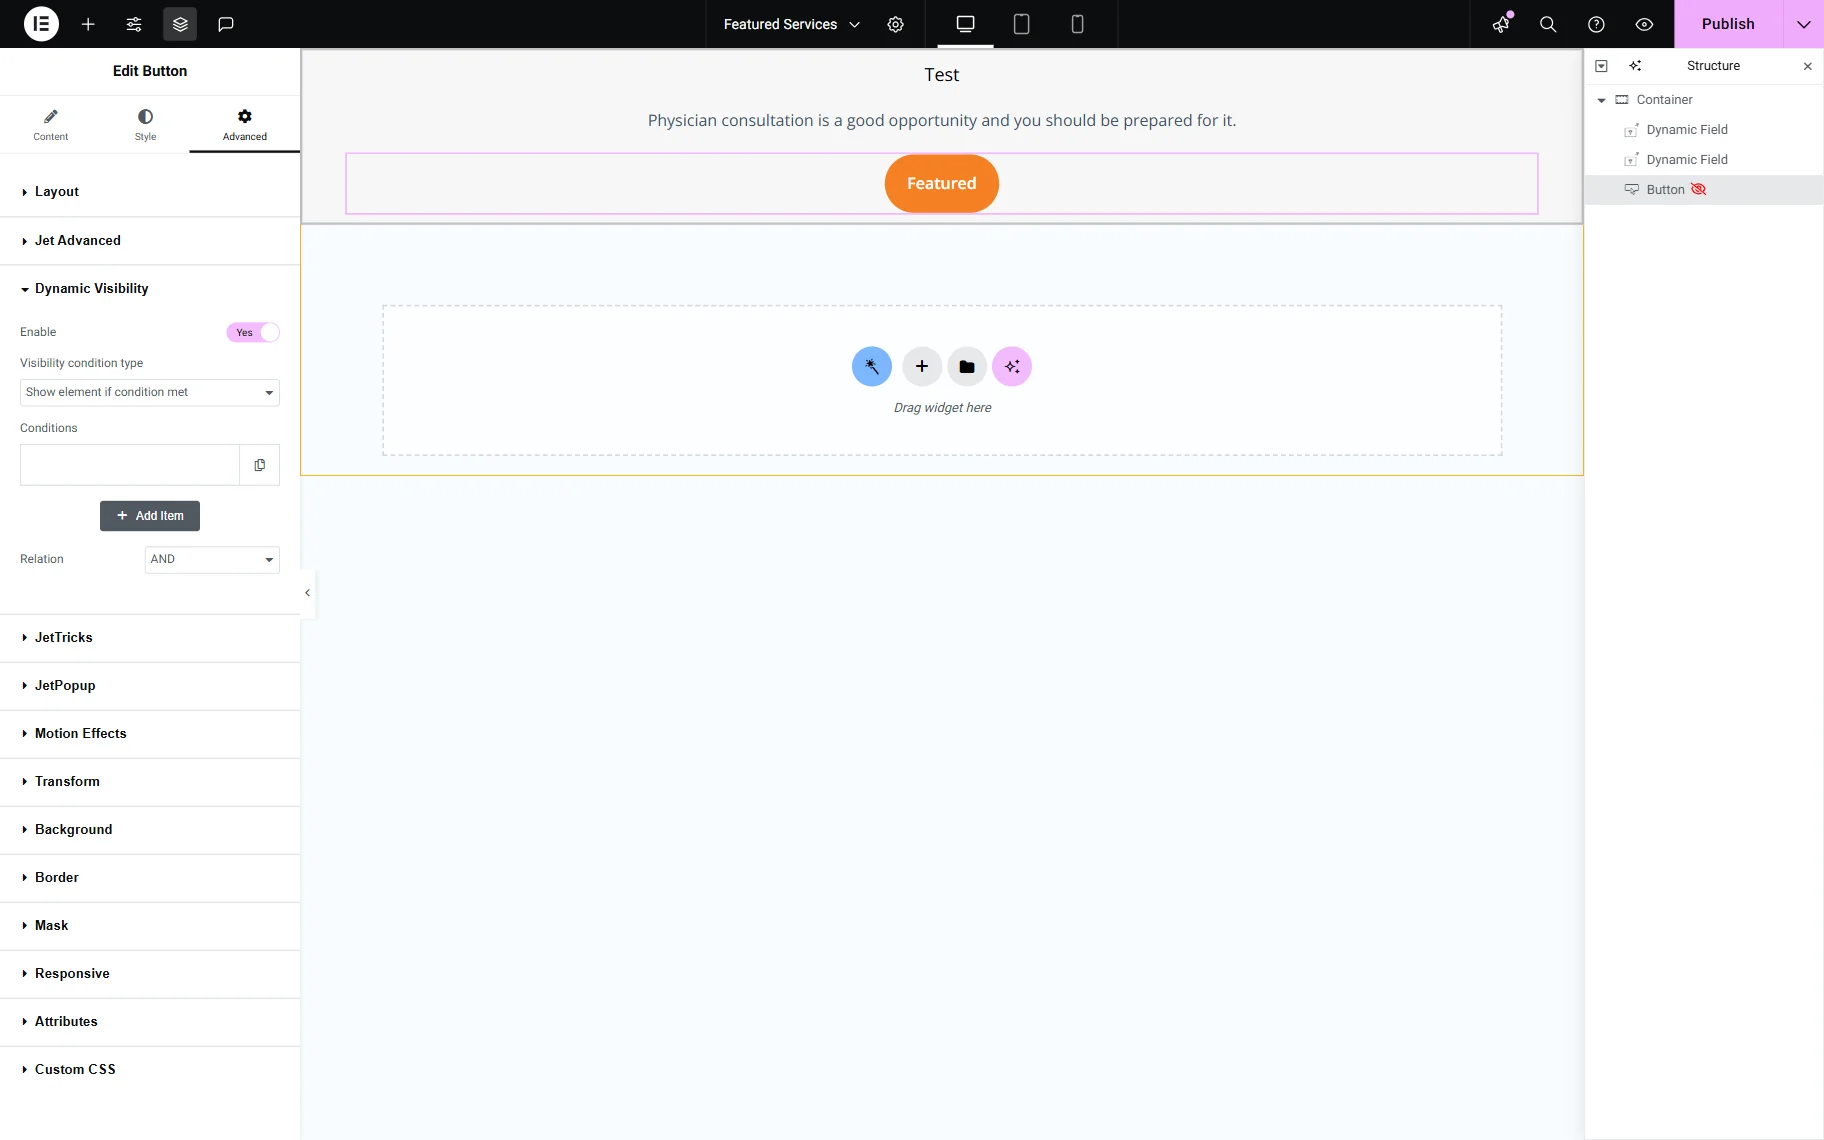
In our case, we would like to add a label for the featured posts to be shown on the featured posts only. For this, we used the Elementor Button widget and styled it according to our needs.
Now, proceed to the Dynamic Visibility section in the Advanced tab and activate the Enable toggle.
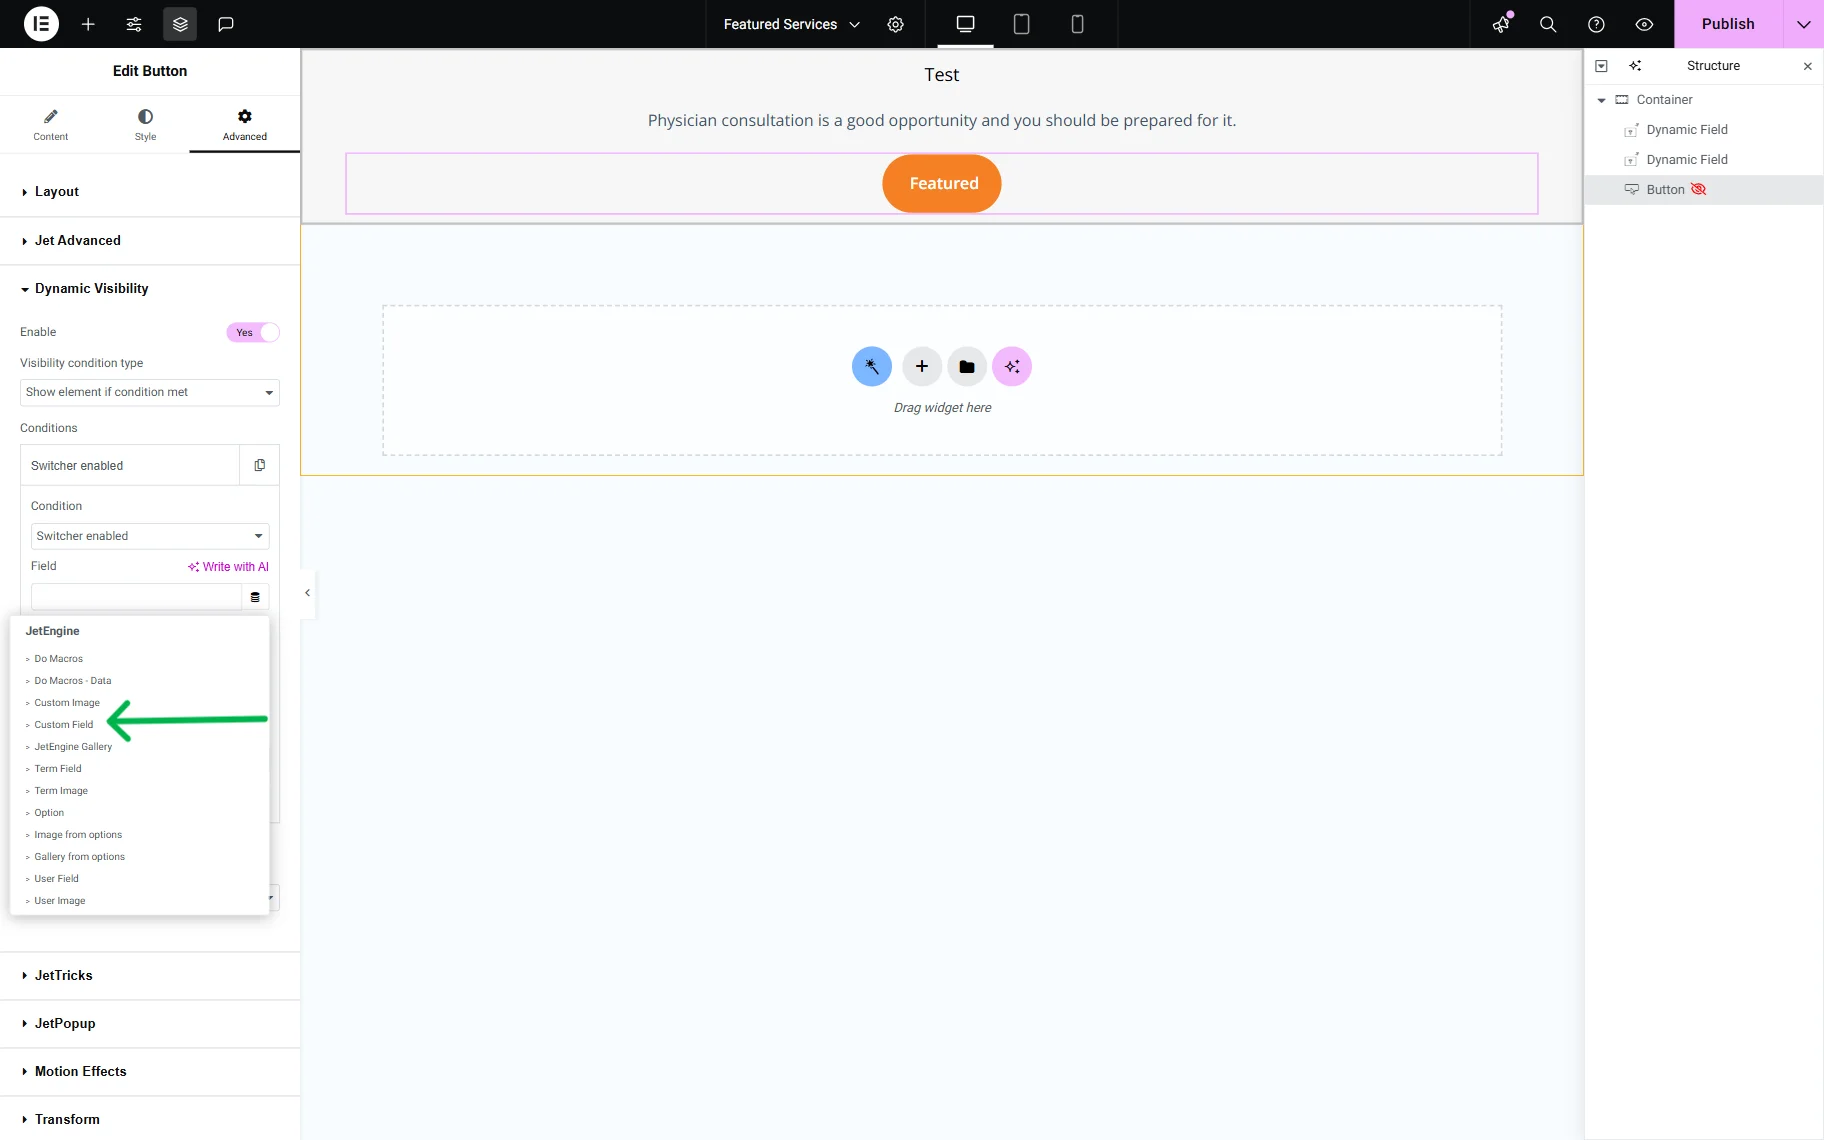
Then, select the “Switcher enabled” Condition.
Click the “Dynamic Tag” icon on the right side of the Field selector. Scroll down to the JetEngine section and choose the “Custom Field” option.
In a newly appeared pop-up, pick the meta field from the dropdown (the “Featured” field in our case).
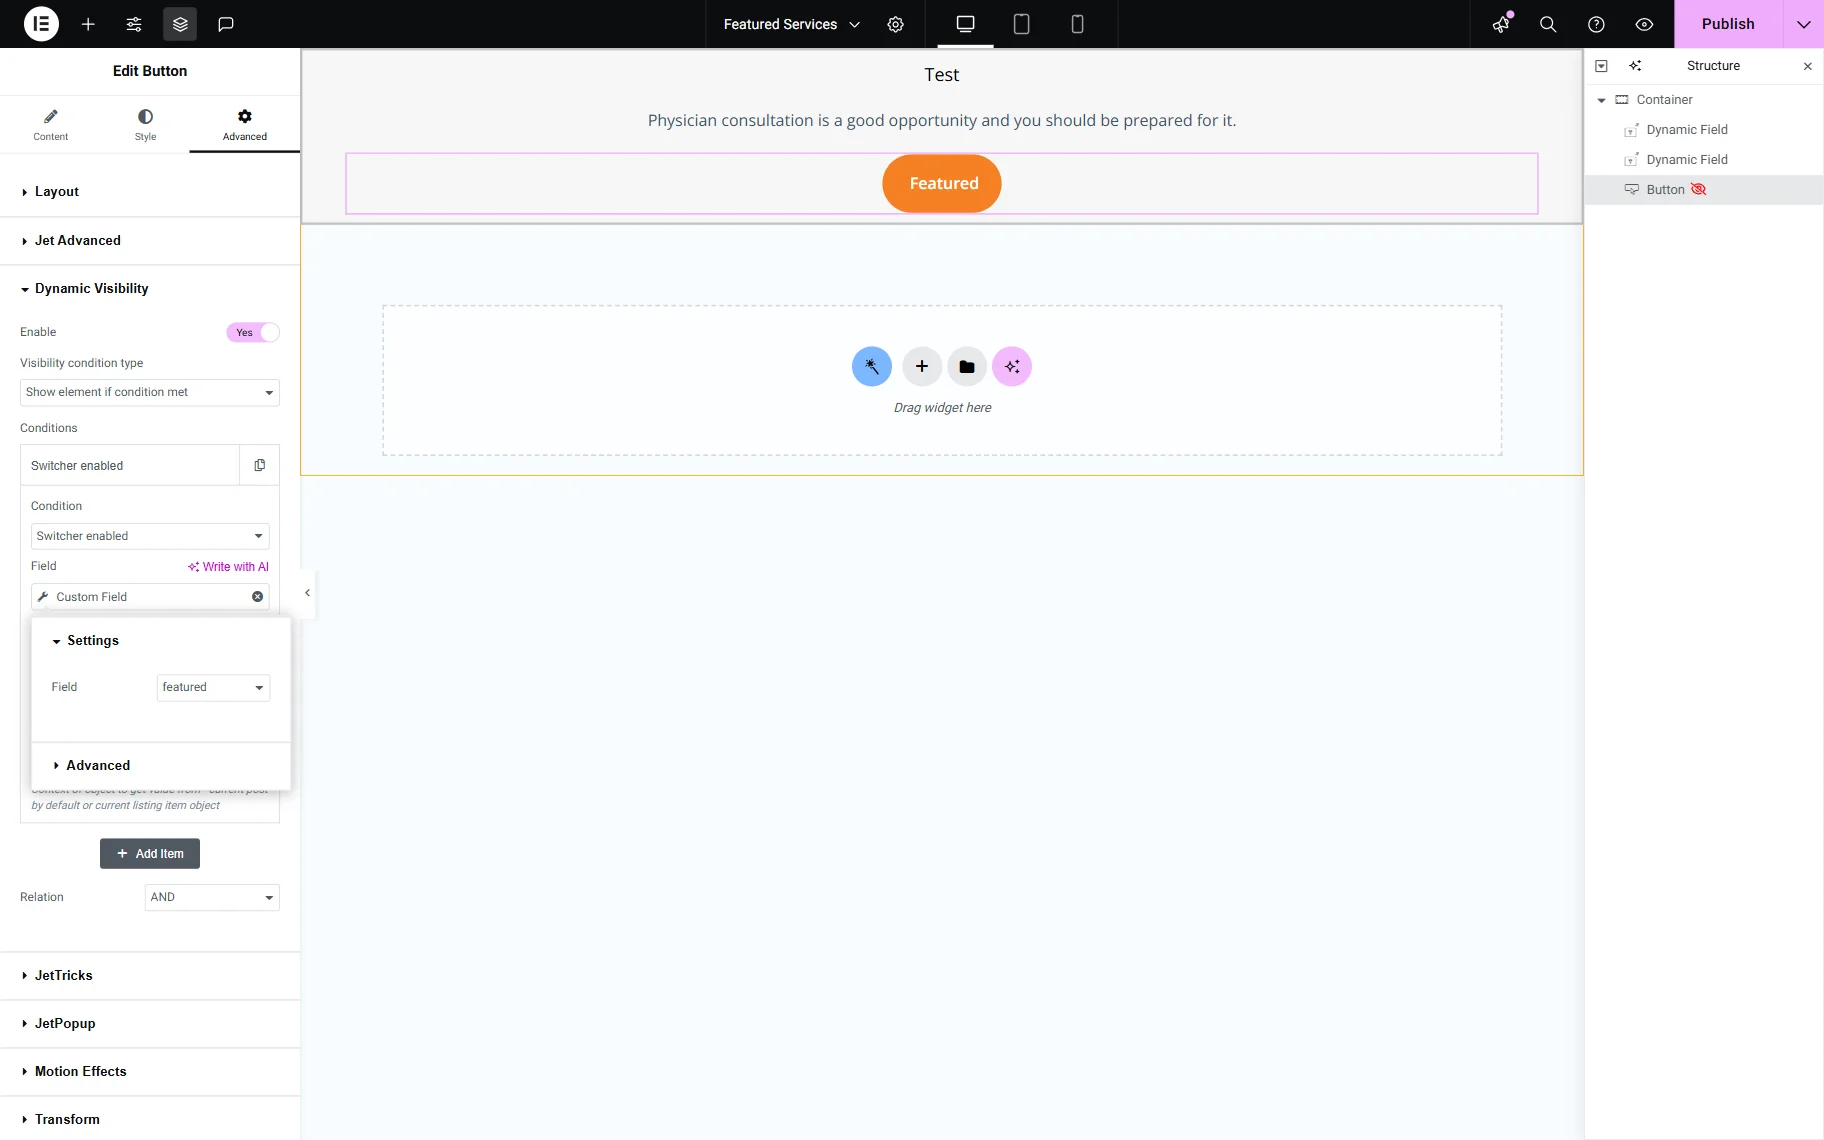
Once you are ready with the settings, click the “Publish” button.
Adjust a custom query
Now, we need to create a Posts Custom Query to order the posts by the “Switcher” meta field, so the featured posts are shown at the top of the list.
Proceed to the WordPress Dashboard > JetEngine > Query Builder and click the “Add New” button.
Add the Name for the query and keep the “Posts Query” option in the Query Type field. In the General tab, select the needed CPT in the Post Type field (in our case, it is “Services”).
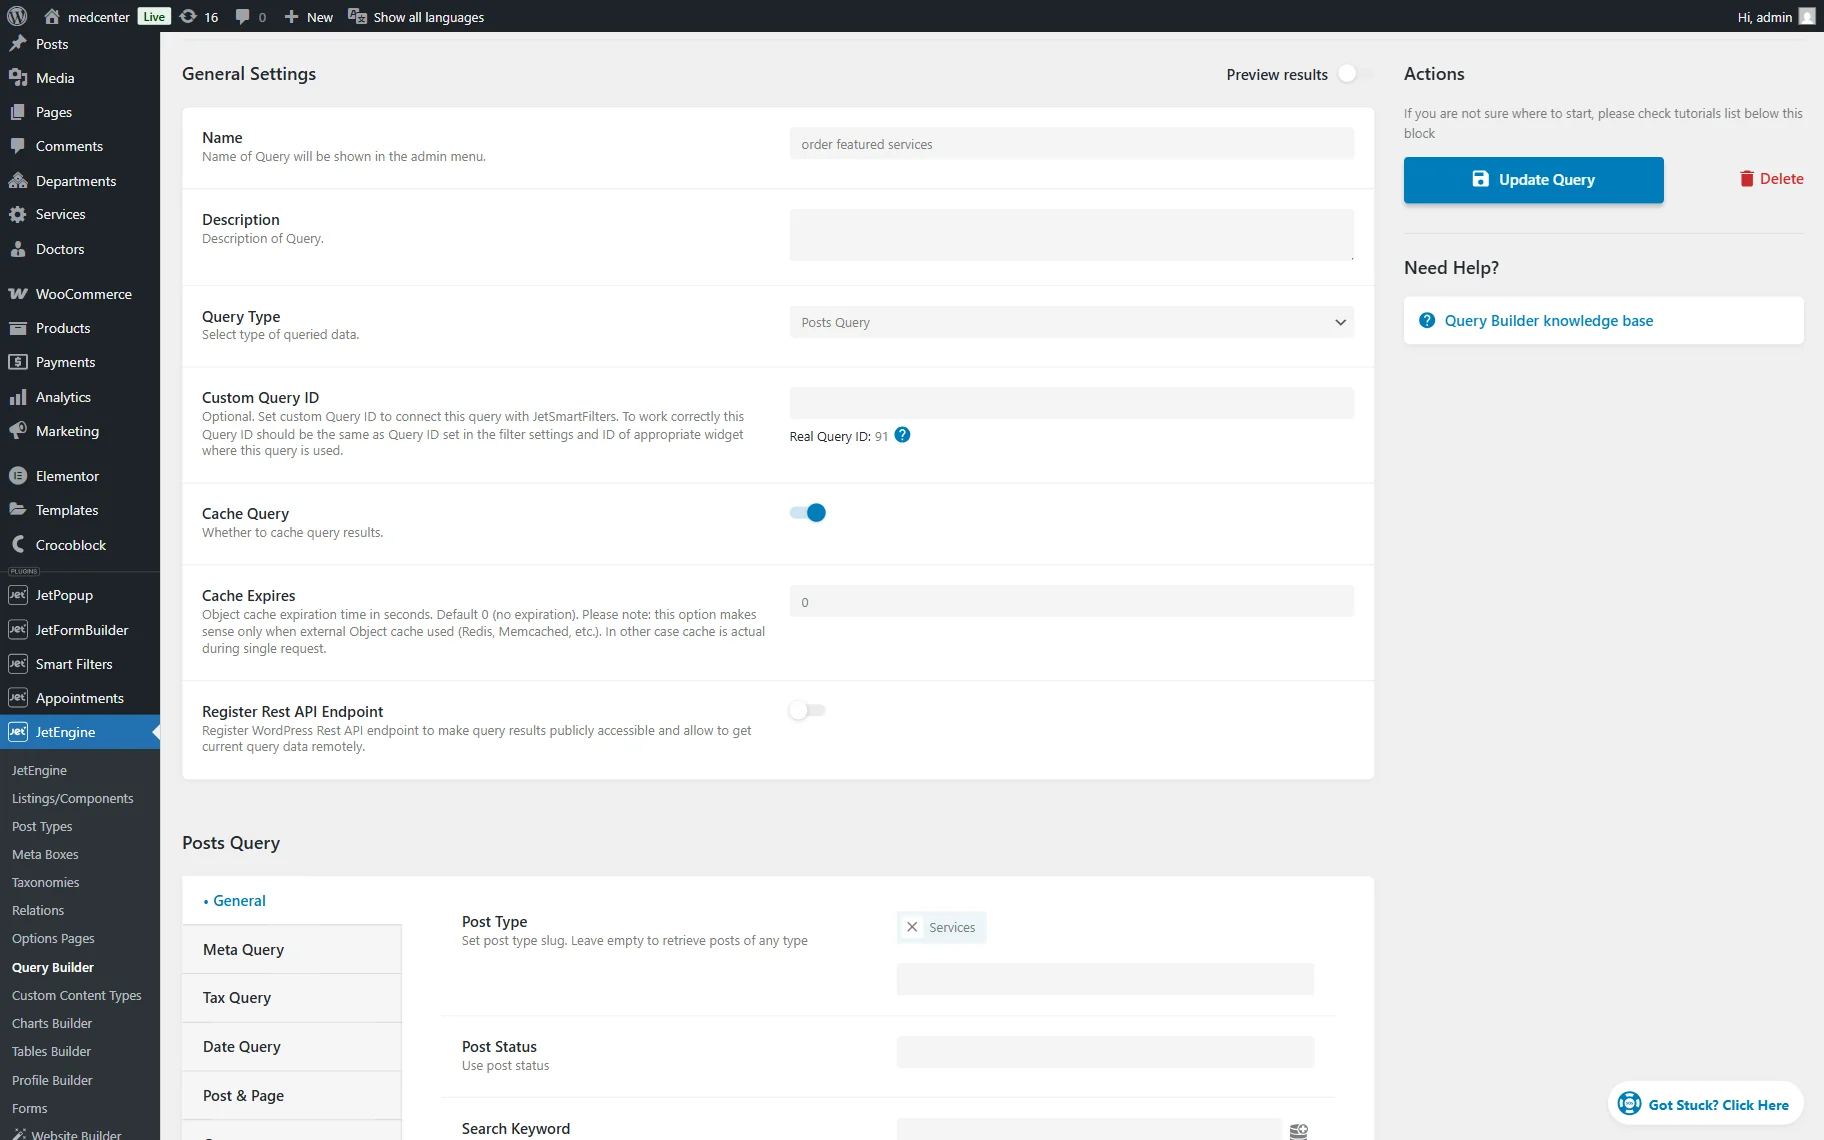
Scroll a bit down to the Order & Order By section.
In the Order By field, choose the “Order by string meta value” option. In the newly appeared Meta Key field, type the name of the “Switcher” meta field (“featured” in this tutorial). Select the “From highest to lowest values (3,2,1; c, b, a)” option from the Order dropdown.
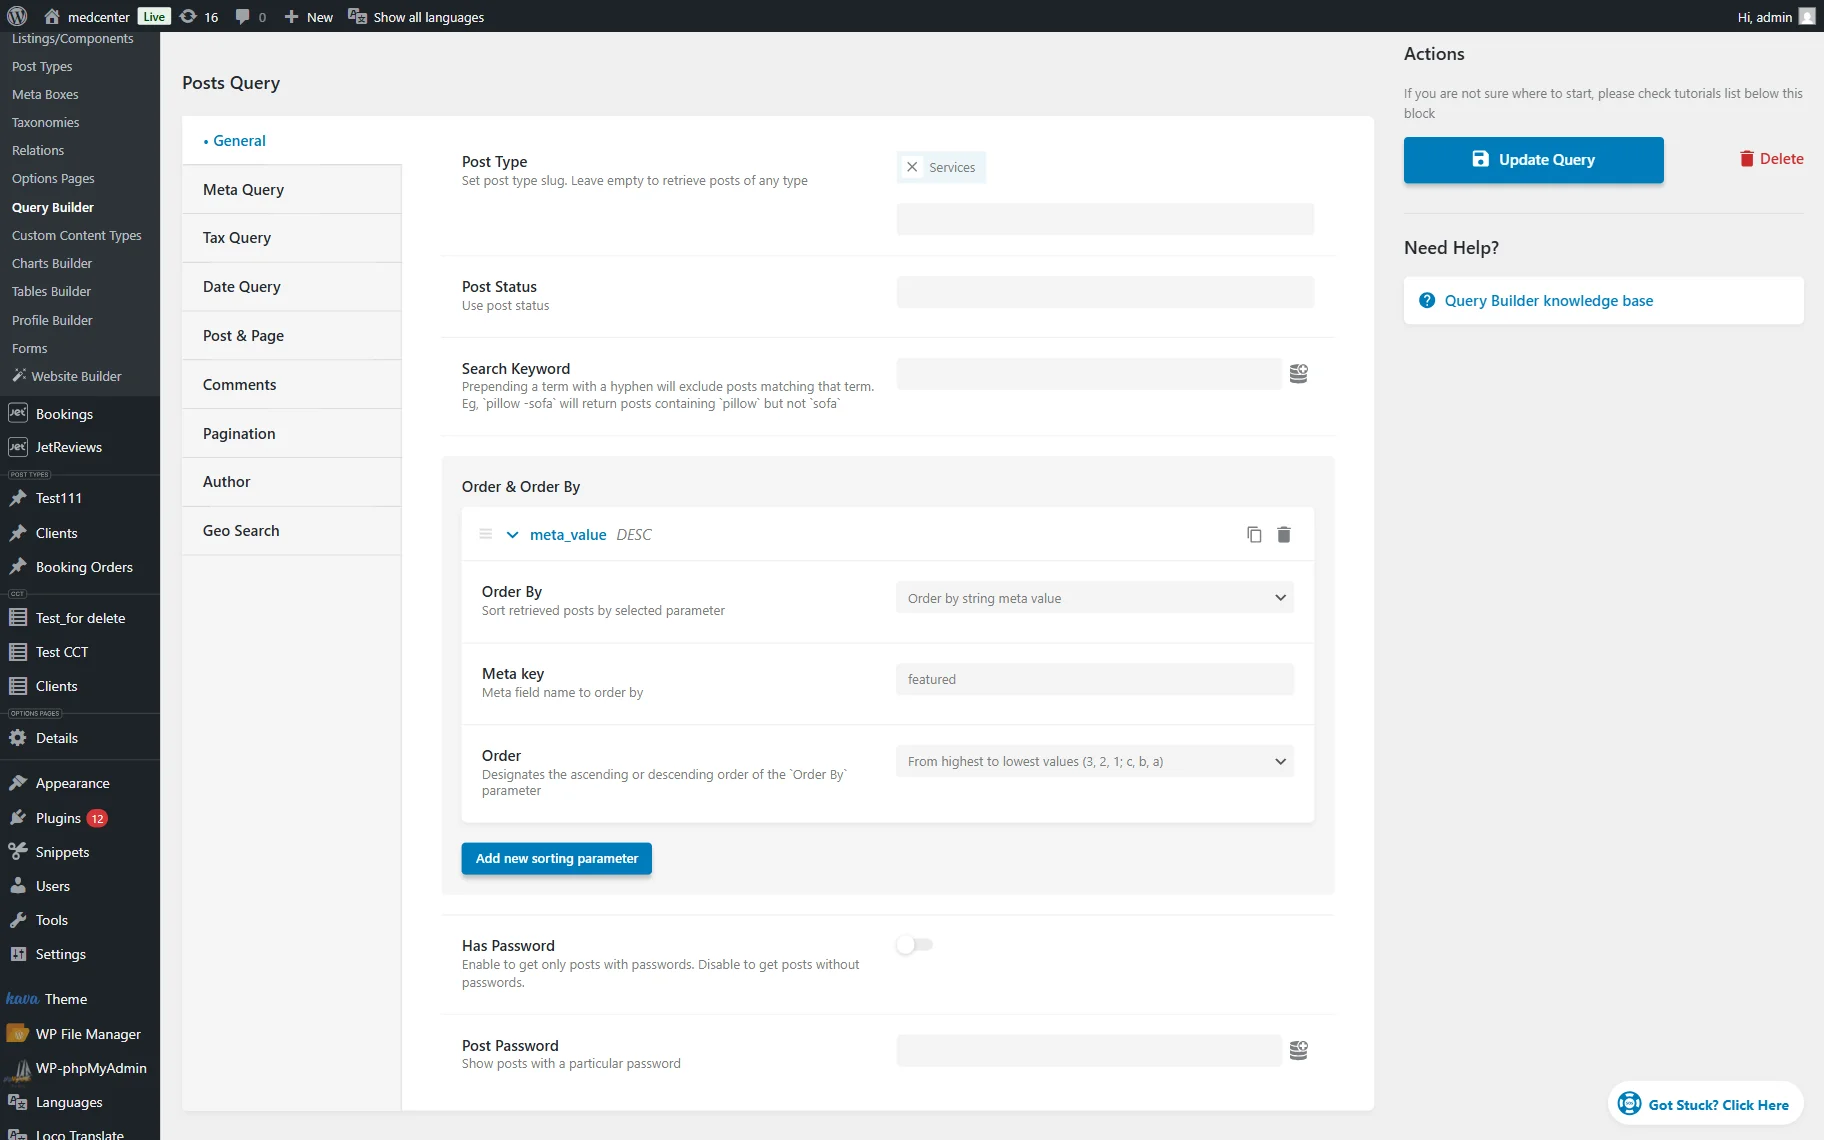
Click the “Add Query” button.
Add the listing to the page
Now, let’s proceed to the page where the posts should be displayed. Open it in the page editor.
Add the Listing Grid widget and in the Listing field, select the Listing Template we created earlier. After setting all the basic fields in the General tab, open the Custom Query tab and enable the Use Custom Query toggle.
Select the Custom Query you have just created in the newly appeared dropdown.
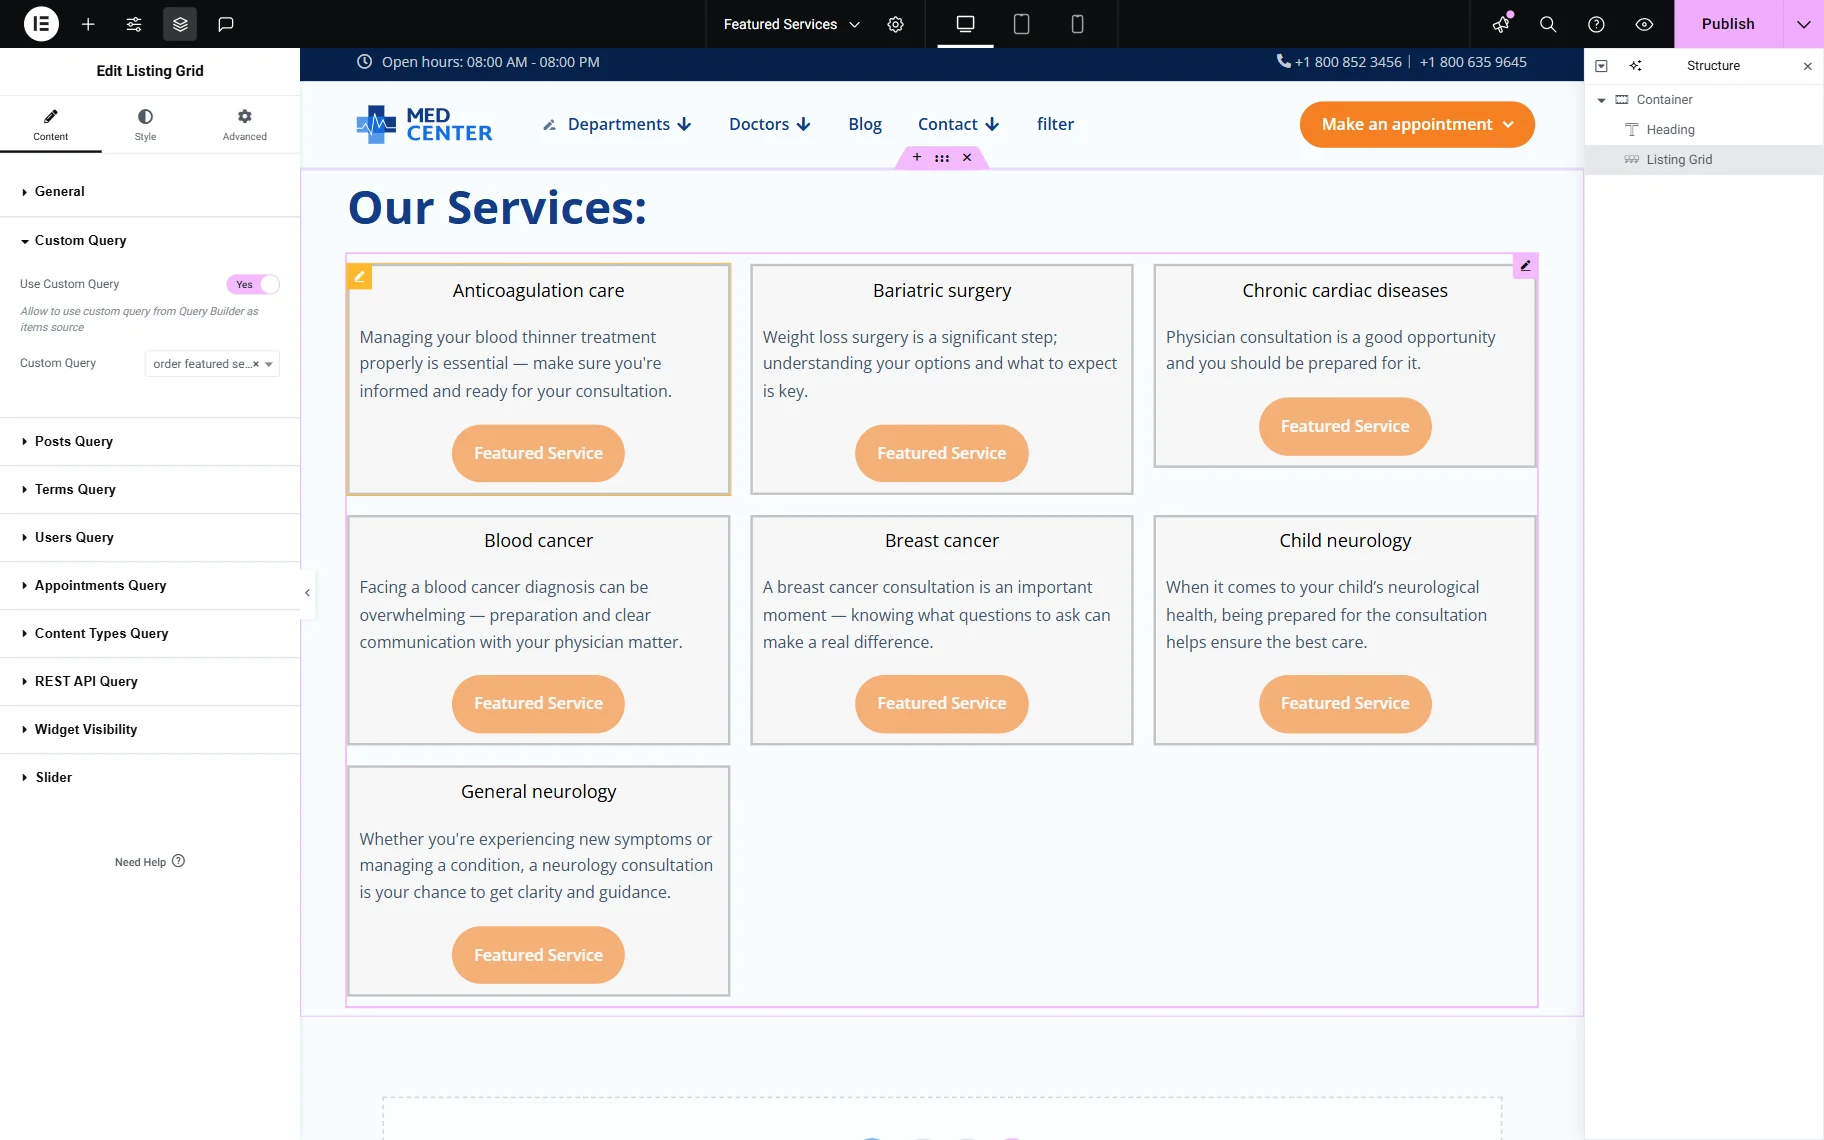
Click the “Publish” button once you are ready with the settings.
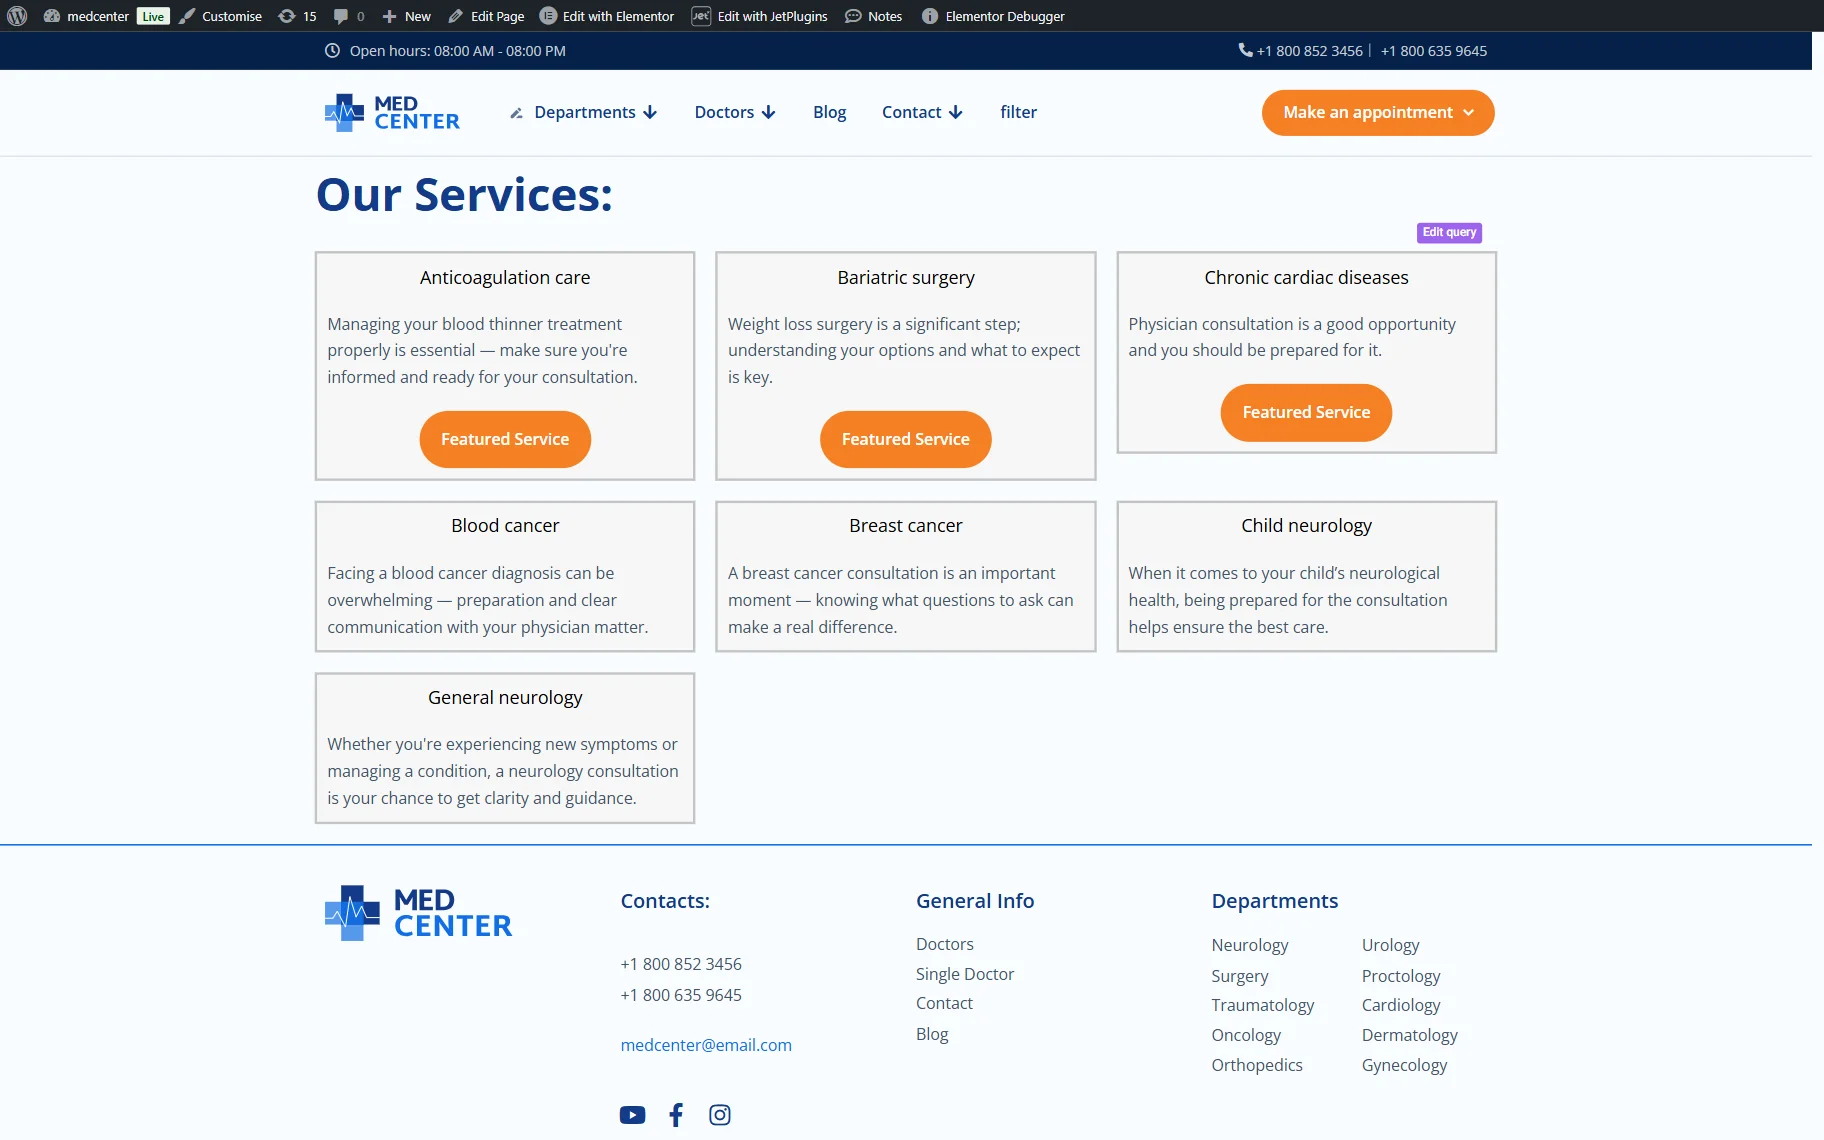
Check the result
When we proceed to the frontend of the page, we see that the posts with the enabled switcher have a special label and are shown at the top of the list.
Display Featured Posts After Payment
This part of the tutorial focuses on displaying featured posts after a successful payment. We will achieve this with the help of Dynamic Visibility, which will show the featured posts only to users with a specific role.
Therefore, we need to set up a form that allows users to change their role after payment, so they can view the featured posts.
Set up the form
Following our How to Change User Role After Successful Subscription Payment tutorial, we created a form to update the user’s role to subscriber.
For this, we used a Hidden Field to retrieve the current user’s ID, a Checkbox Field for users to confirm or deny that they have read the terms and conditions, and the Action Button.
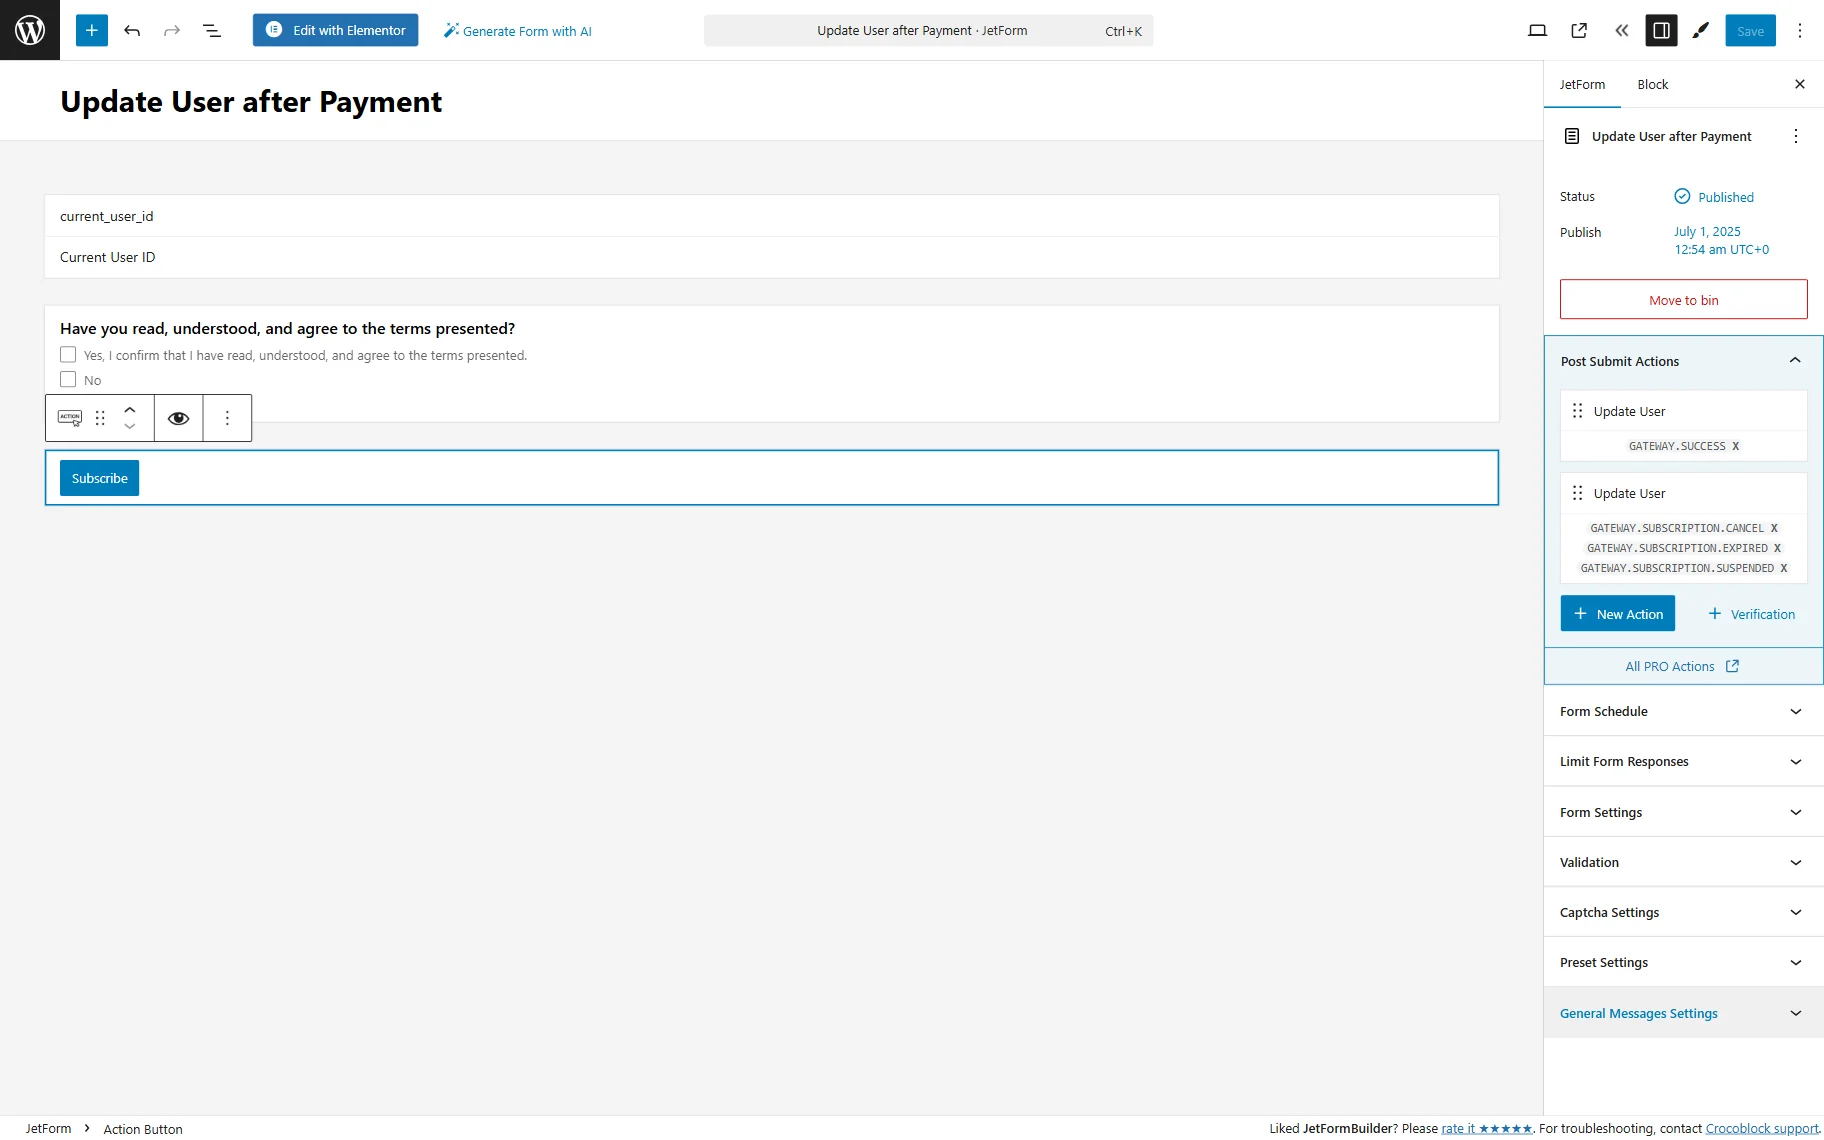
Click the “Save” button to update the form settings.
Create a pop-up
You can place the form directly on the page or set it up as a pop-up. In this tutorial, we used the JetPopup plugin to create a pop-up.
For that, proceed to the WordPress Dashboard > JetPopup > Create New Popup tab, enter the title, and hit the “Publish” and then “Edit with Elementor” buttons.
Drag and drop the JetForm widget to the pop-up and select the recently created form.
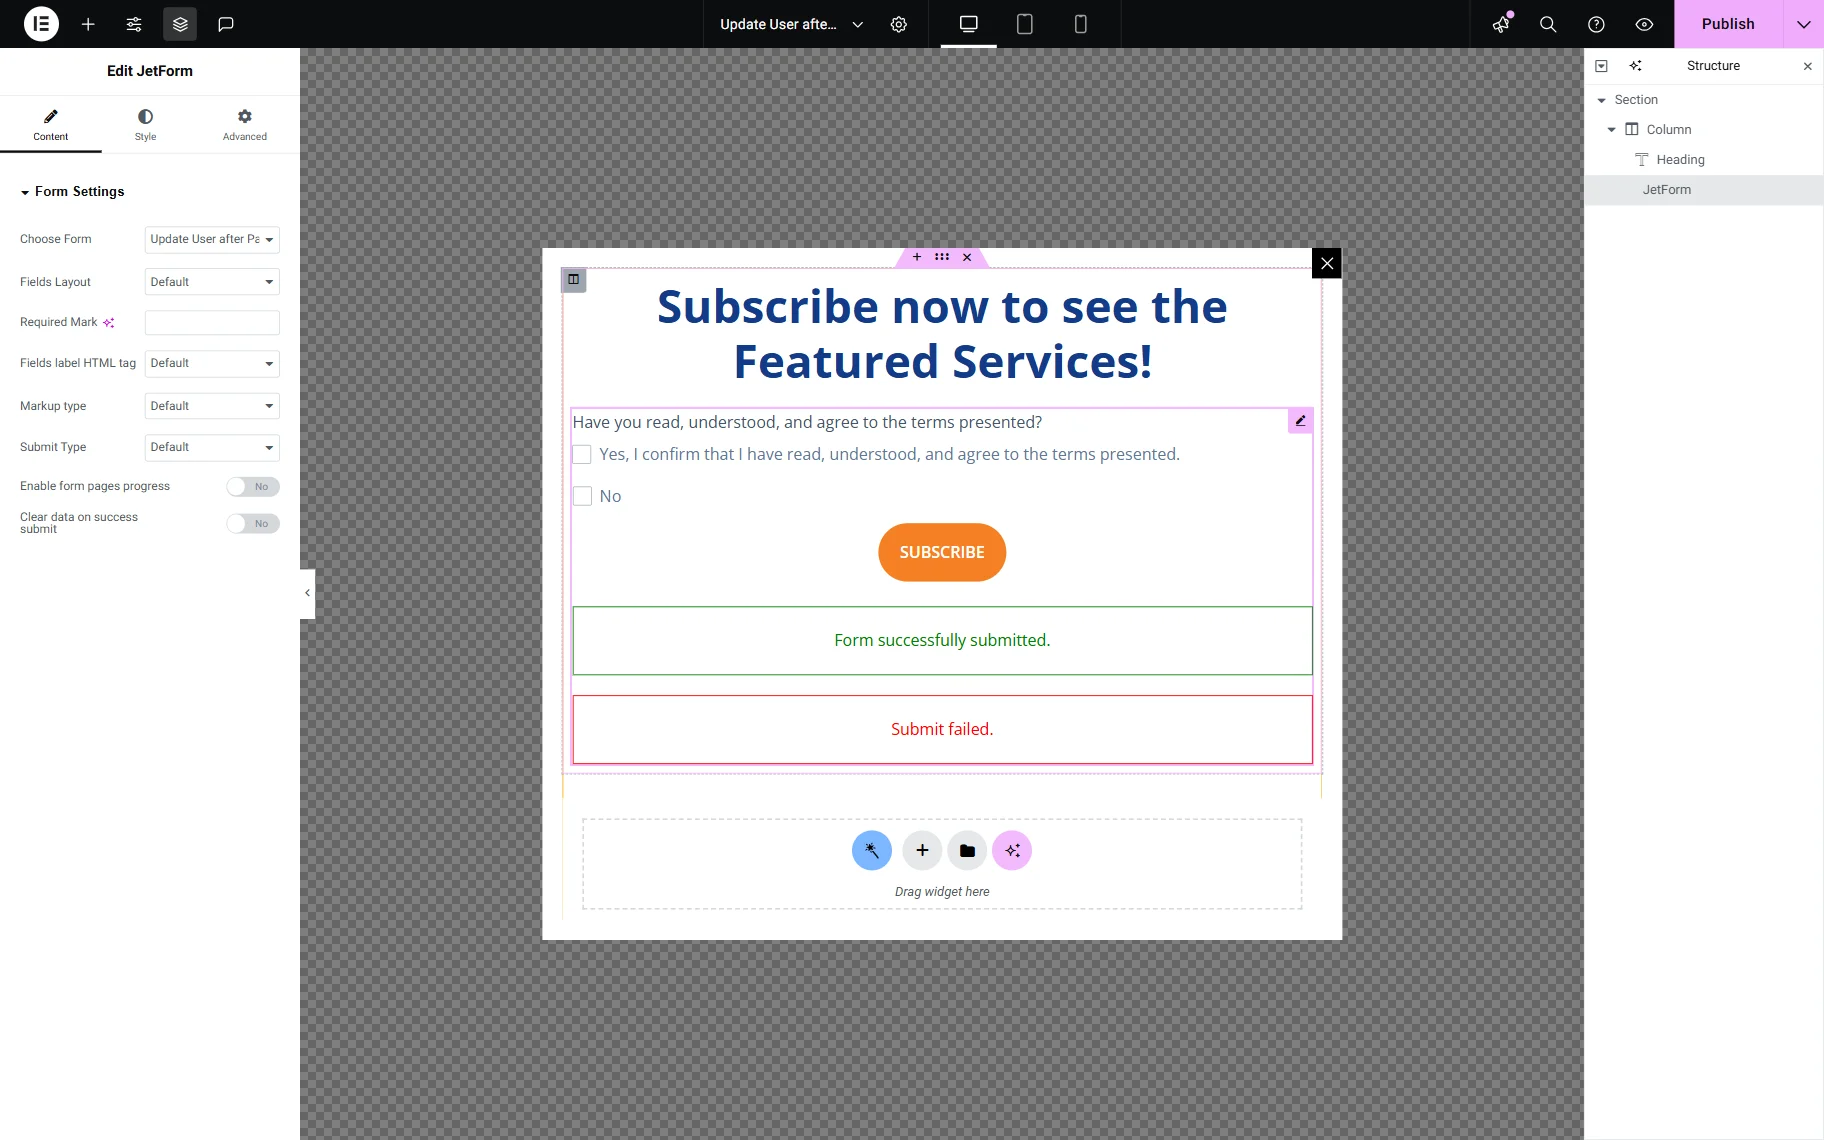
When you finish, press the “Publish” button.
Create a listing template
We will use the listing template created in the Create a listing template step of this tutorial.

You can refer to our How to Create a Listing Template for Post Types in Elementor tutorial to ensure the setup of a new Listing Template.
Adjust custom query
In this case, we need two Posts Queries: one to show featured posts only and another to show ordinary posts.
So, proceed to the WordPress Dashboard > JetEngine > Query Builder and click the “Add New” button.
Add the Name for the query and keep the “Posts Query” option in the Query Type field. In the General tab, select the needed CPT in the Post Type field (in our case, it is “Services”).
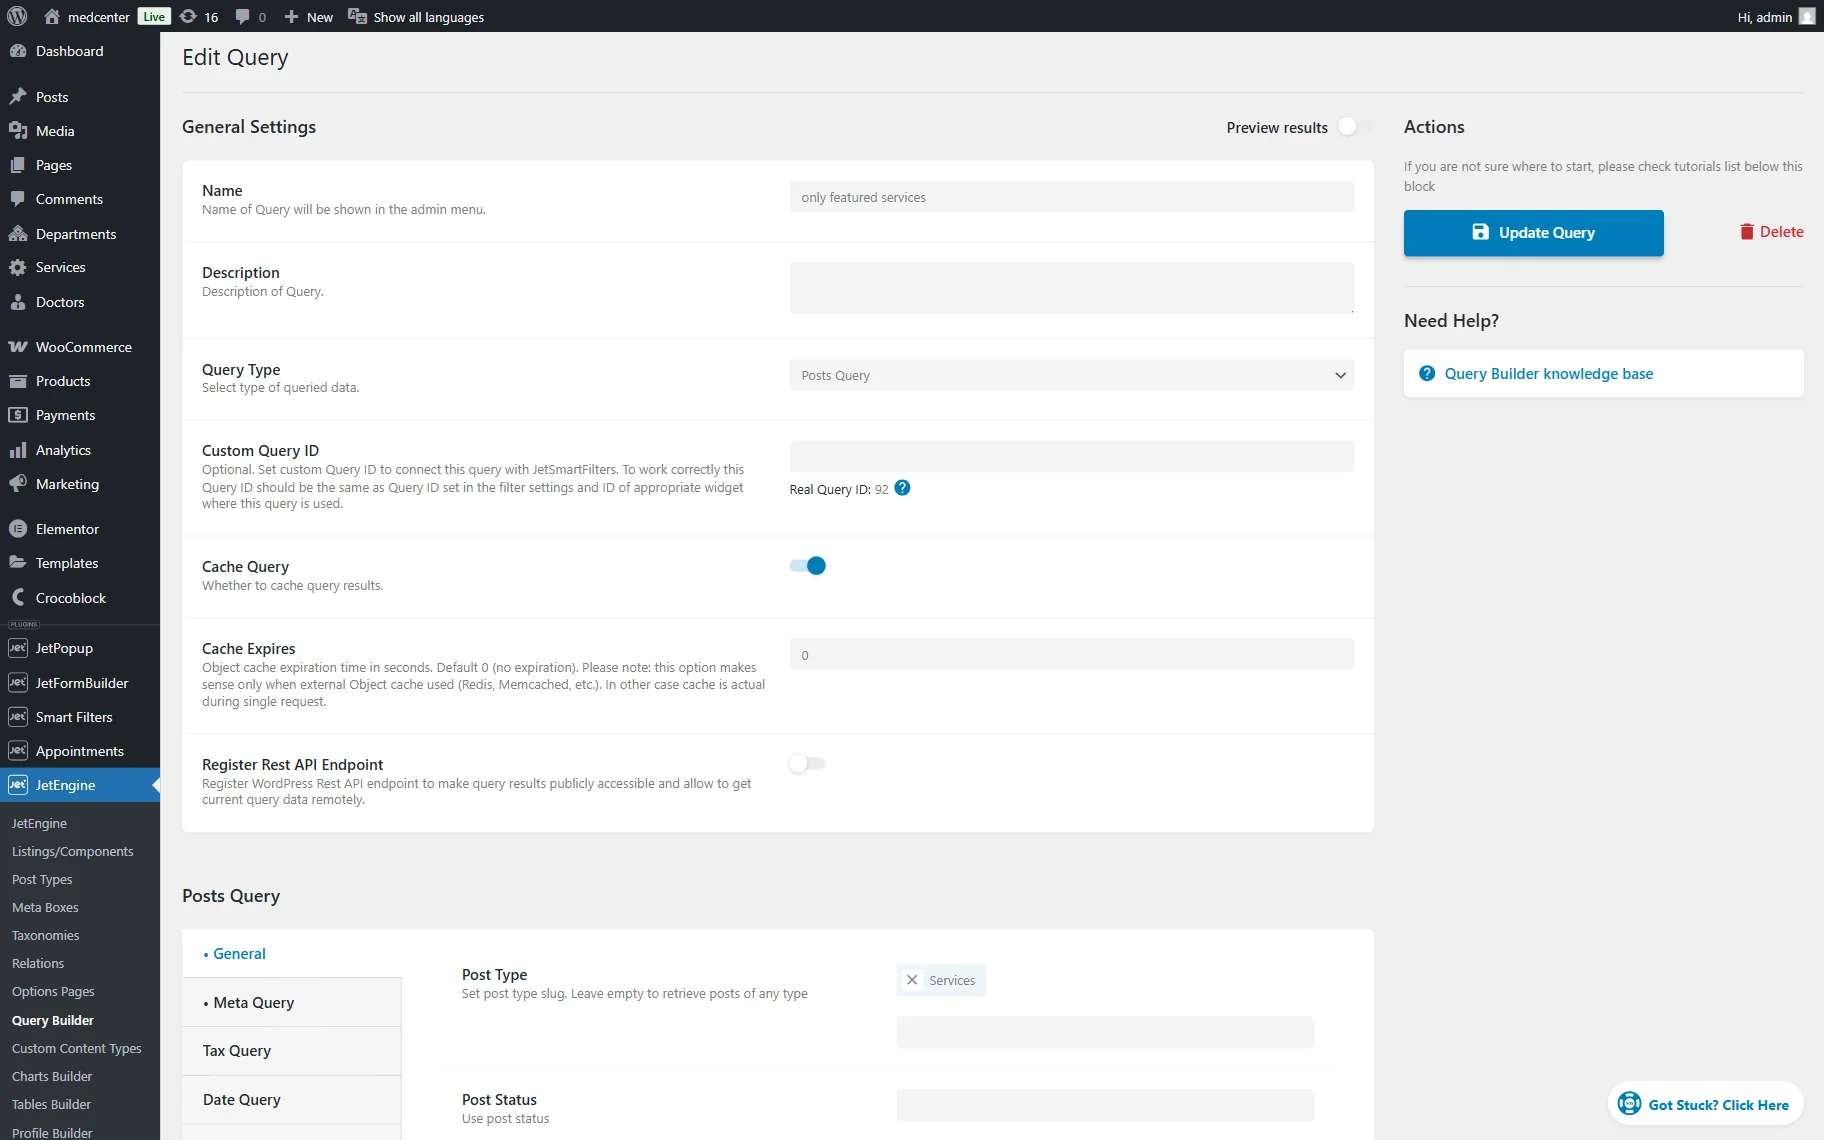
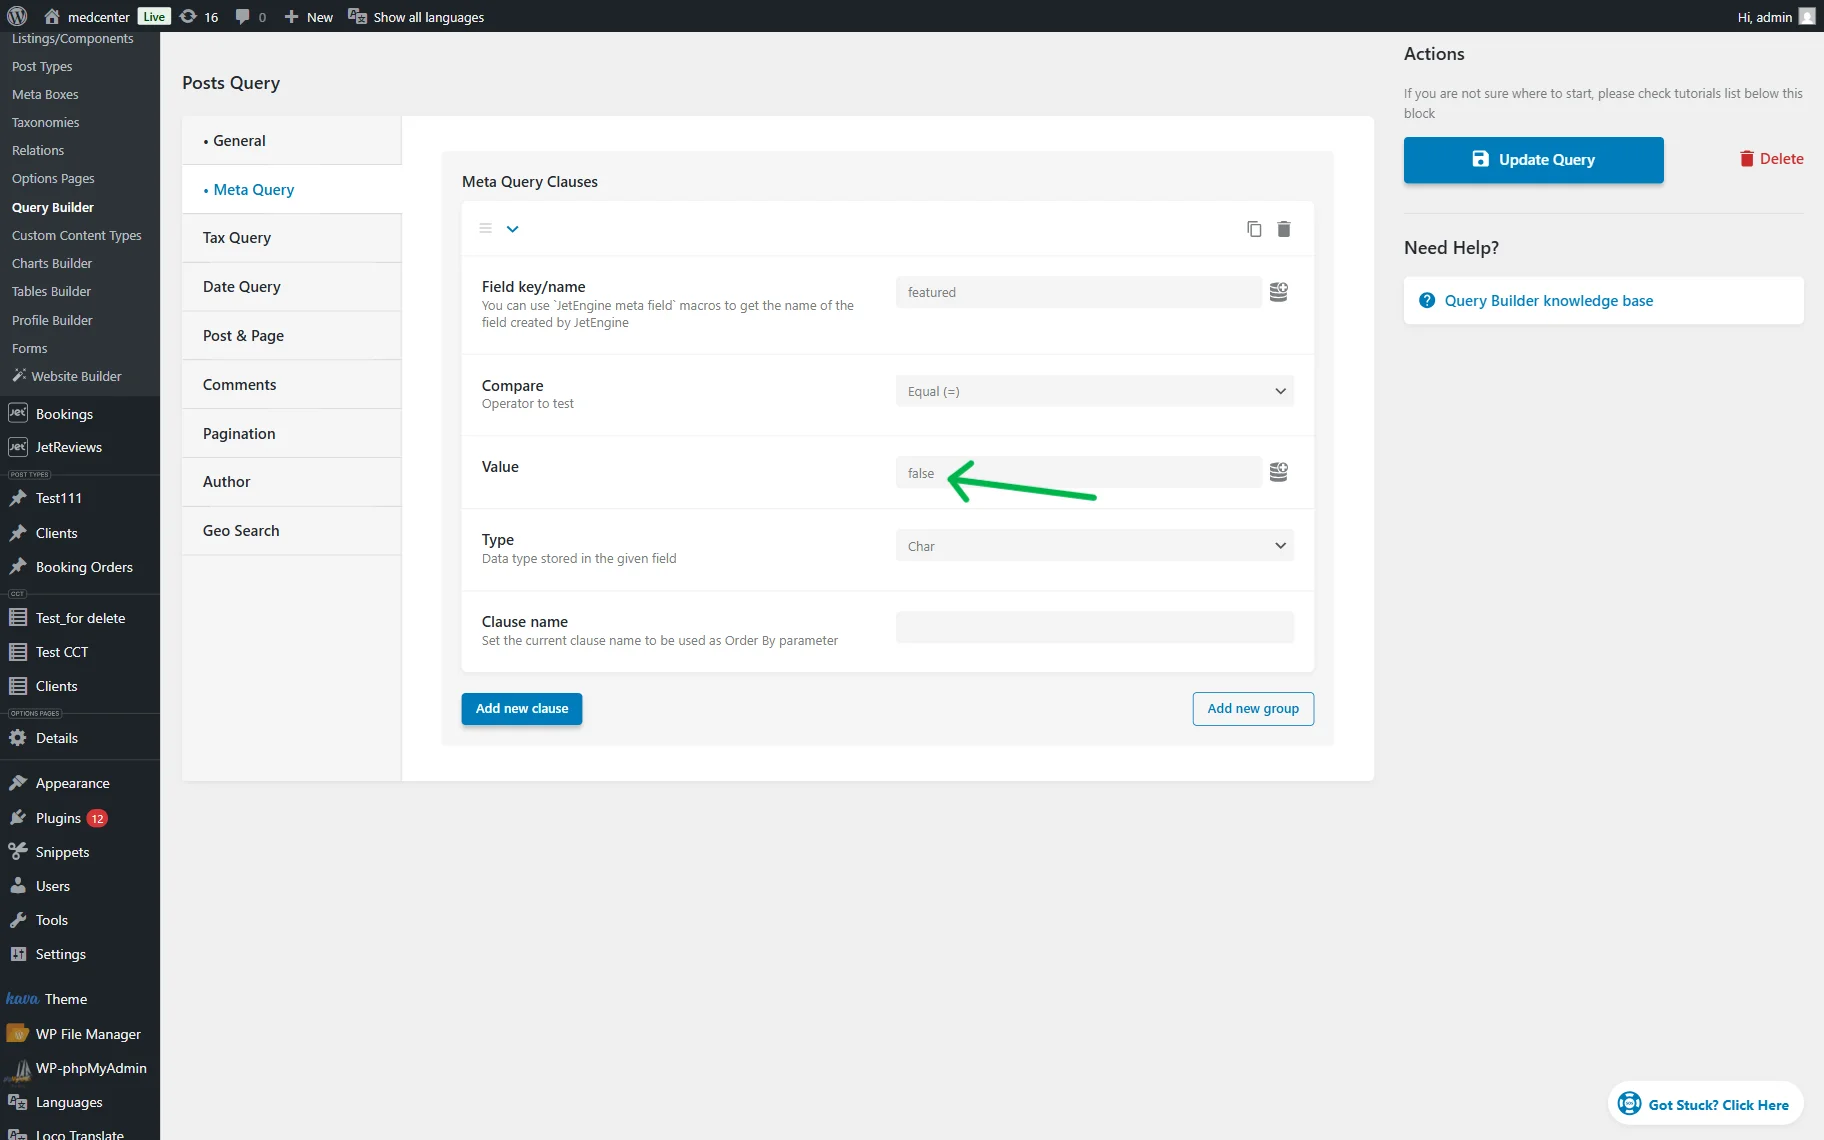
Then, open the Meta Query tab and click the “+Add new clause” button.
Put the switcher’s field name in the Field key/name input. You can also use “JetEngine meta field” macros to get the name of the field created by JetEngine. Select the “Equal (=)” operator from the Compare dropdown. In the Value input, set “true” to get the posts with the enabled switcher, and “false” for the posts with the deactivated switcher (in this case, we use the “true” value). Choose the “Char” data type for the Type field.

Click the “Add Query” button once you’re ready.
Now, we need the identical query. You can create a new query or copy the one we have just created.
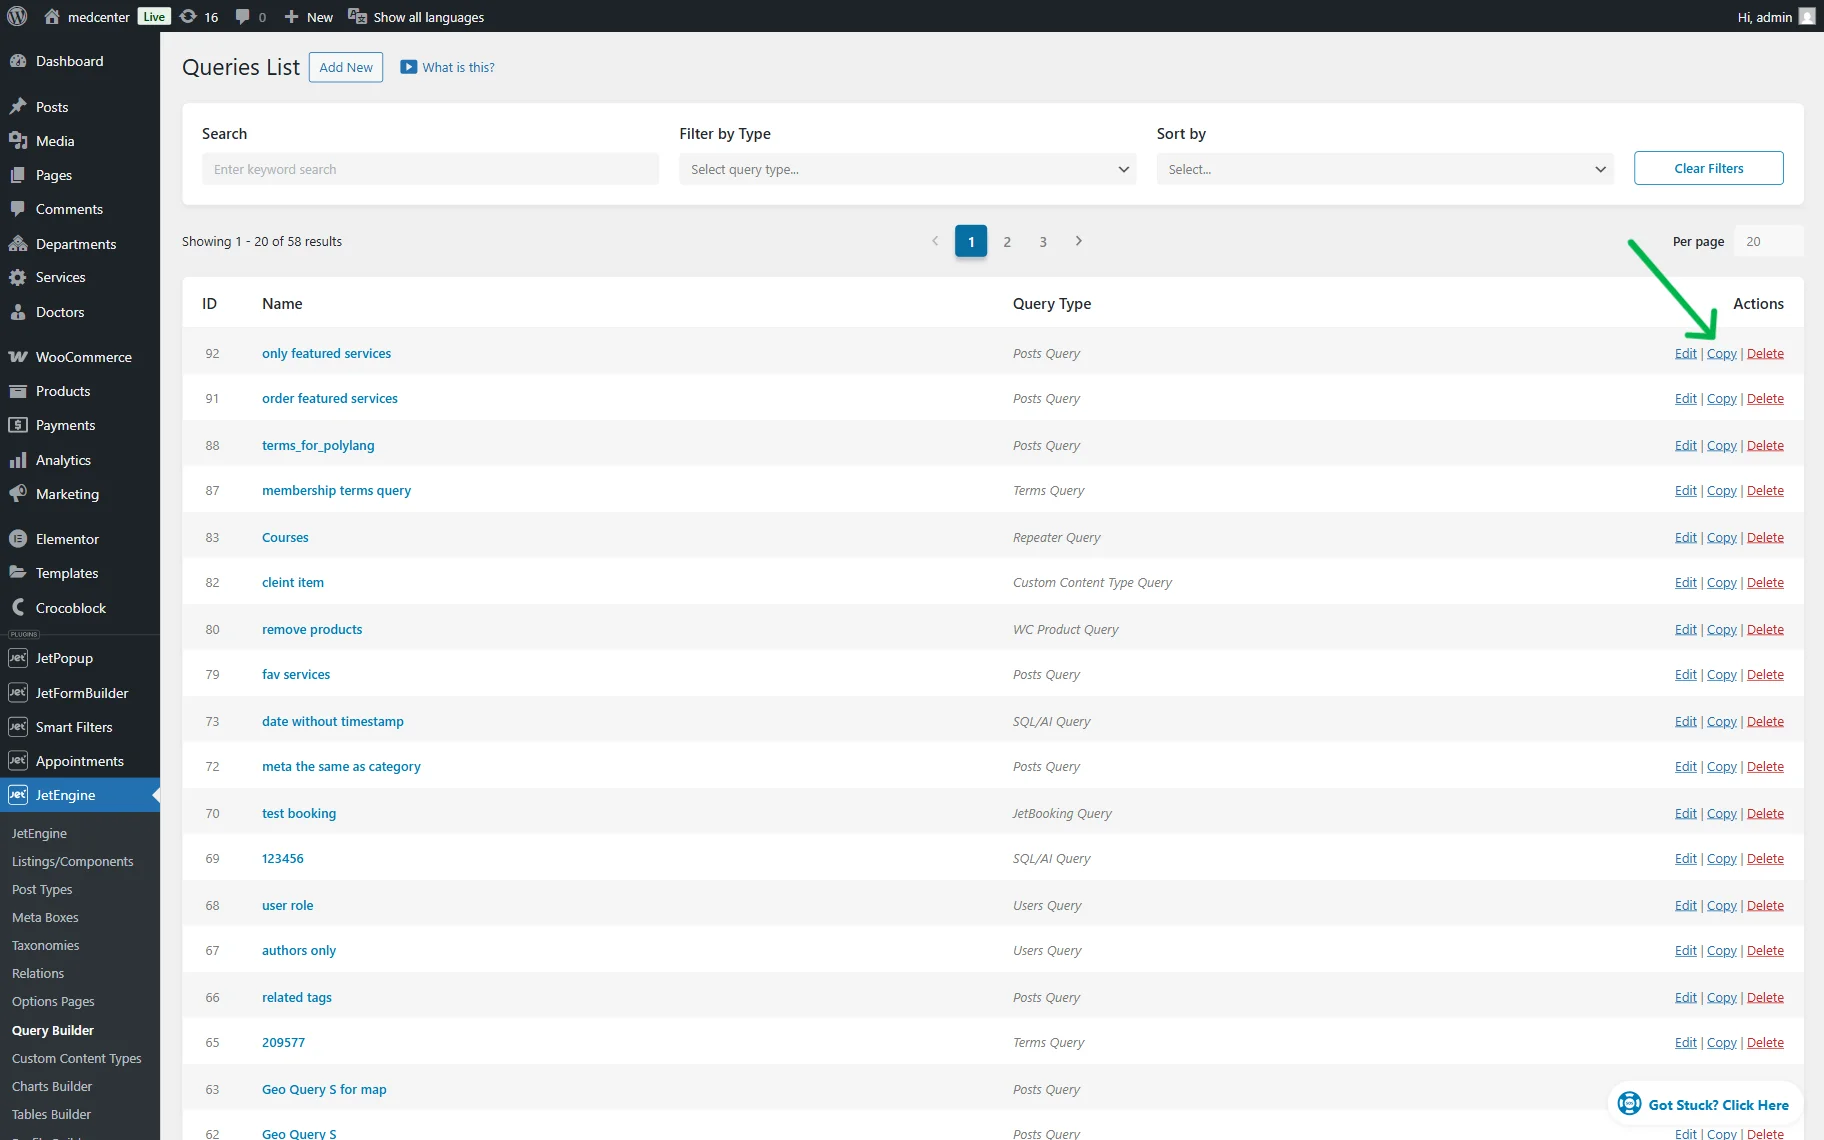
The only thing we need to change is the Value field in the Meta Query tab. In our second query, we used the “false” value.
Click the “Add Query” button once you’re ready.
Set up the page
Open the page where you need to display the listings.
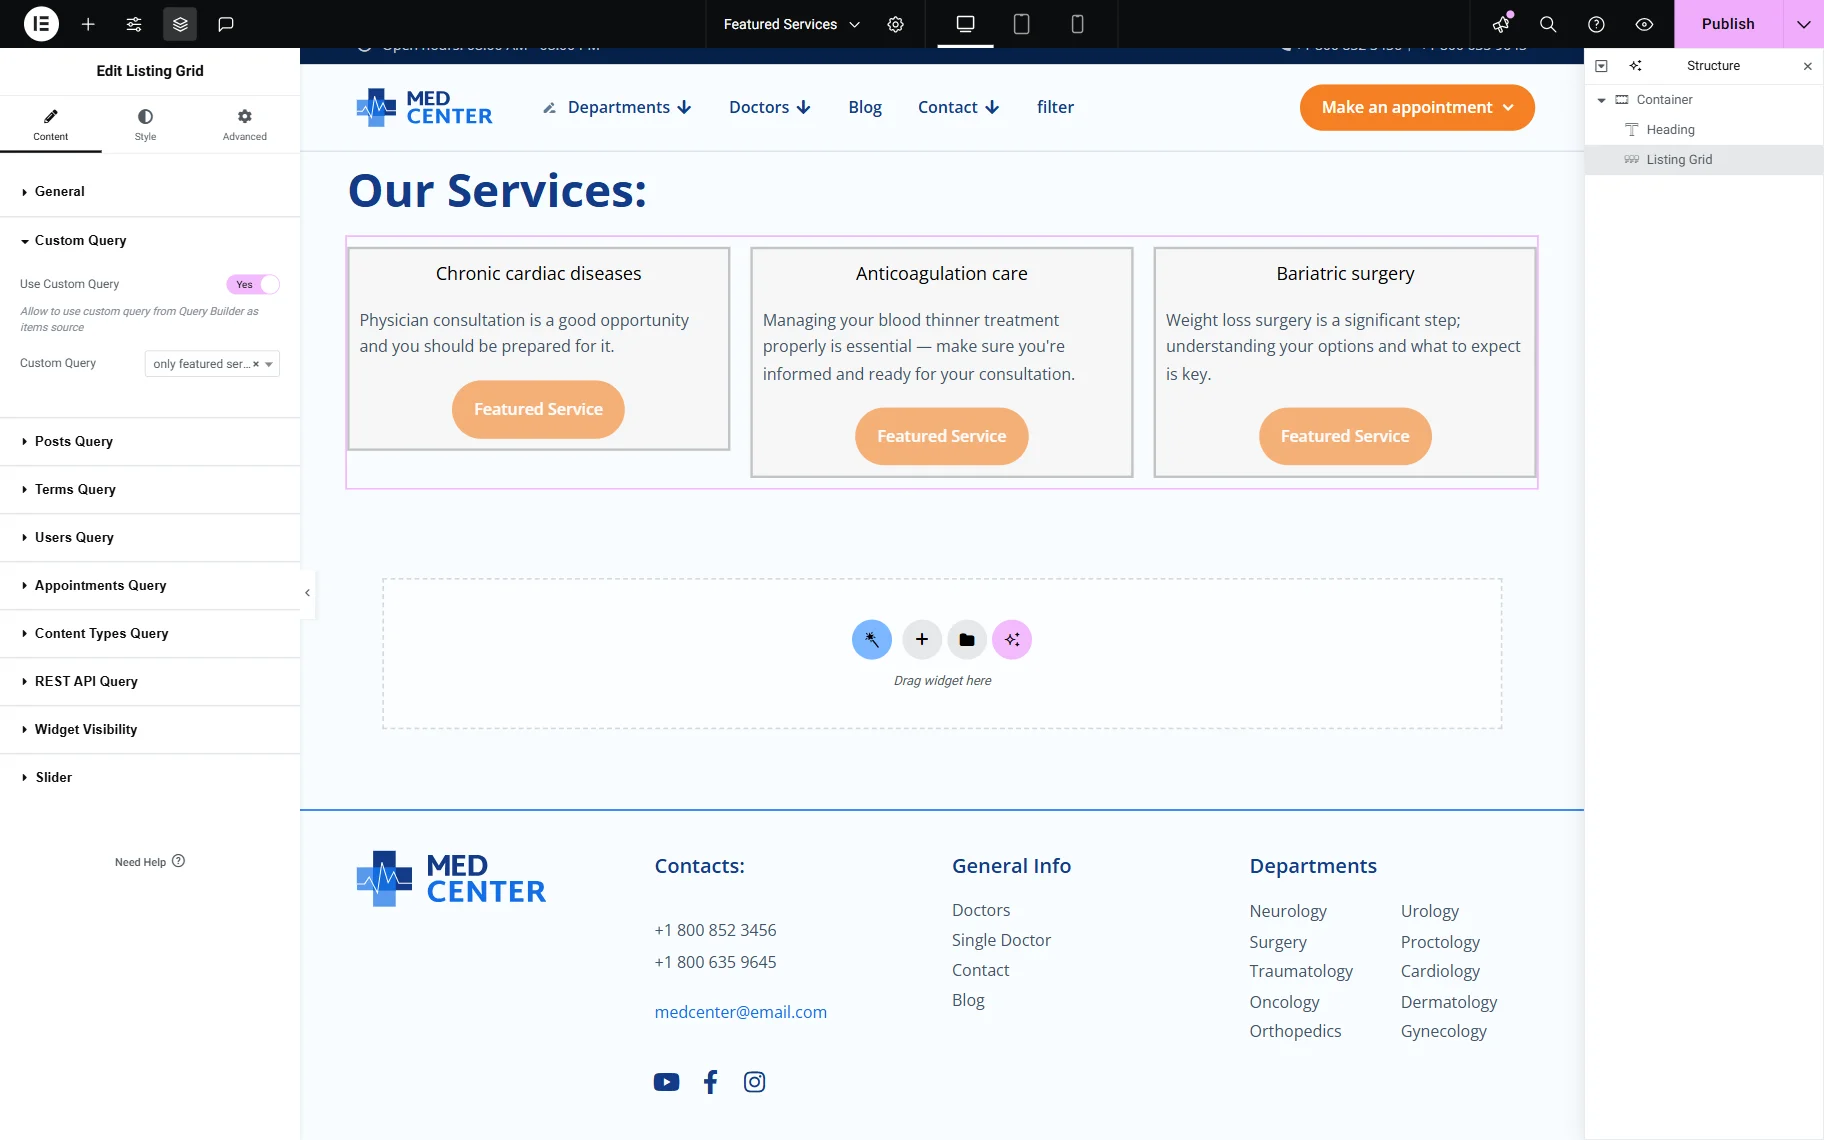
First, we added the featured posts list. For that, add the Listing Grid widget, and after setting all the basic fields in the General tab, open the Custom Query tab and enable the Use Custom Query toggle.
Select the Custom Query to display posts with the enabled switcher (set to “true”).
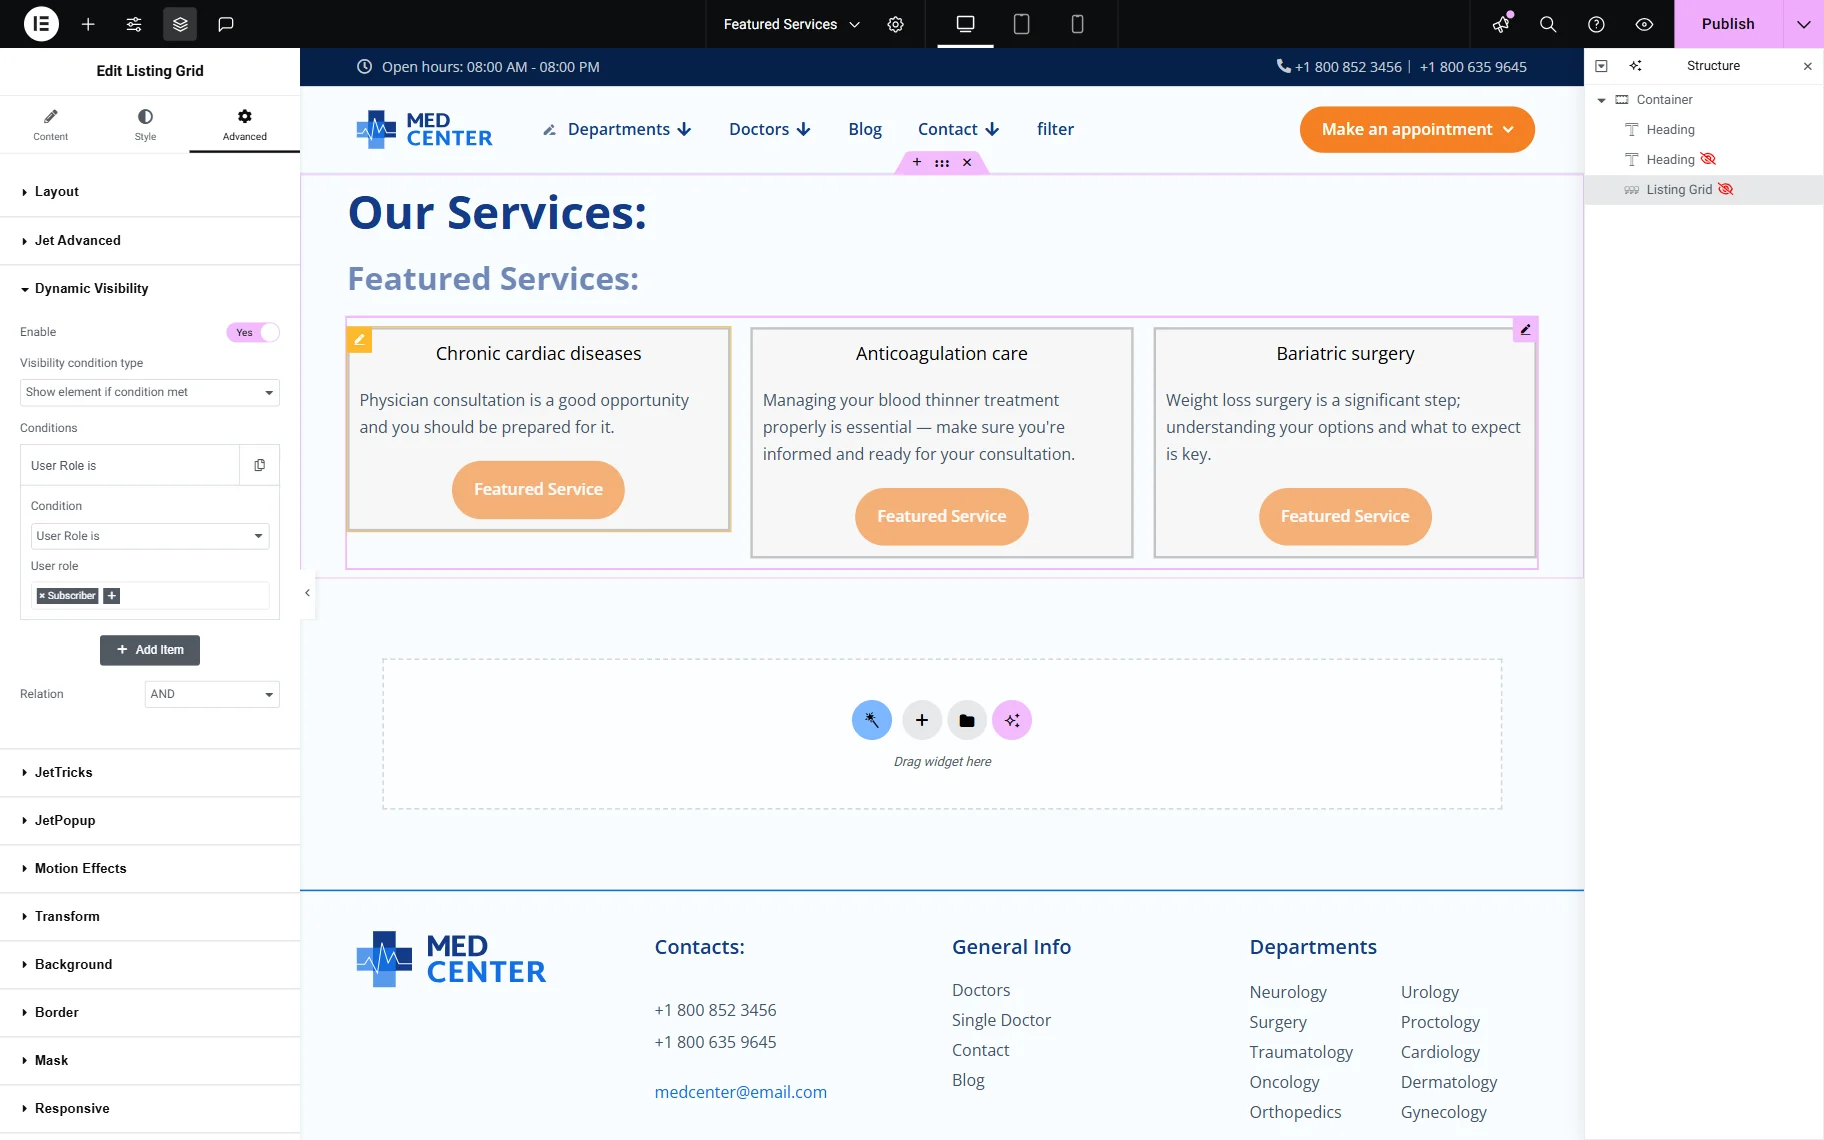
Then, navigate to the Advanced section. Go to the Dynamic Visibility tab, open it, and enable the toggle.
Select the “Show element if condition met” Visibility condition type, “User Role is not” Condition, and choose the User role (in this tutorial, we selected “Subscriber”).
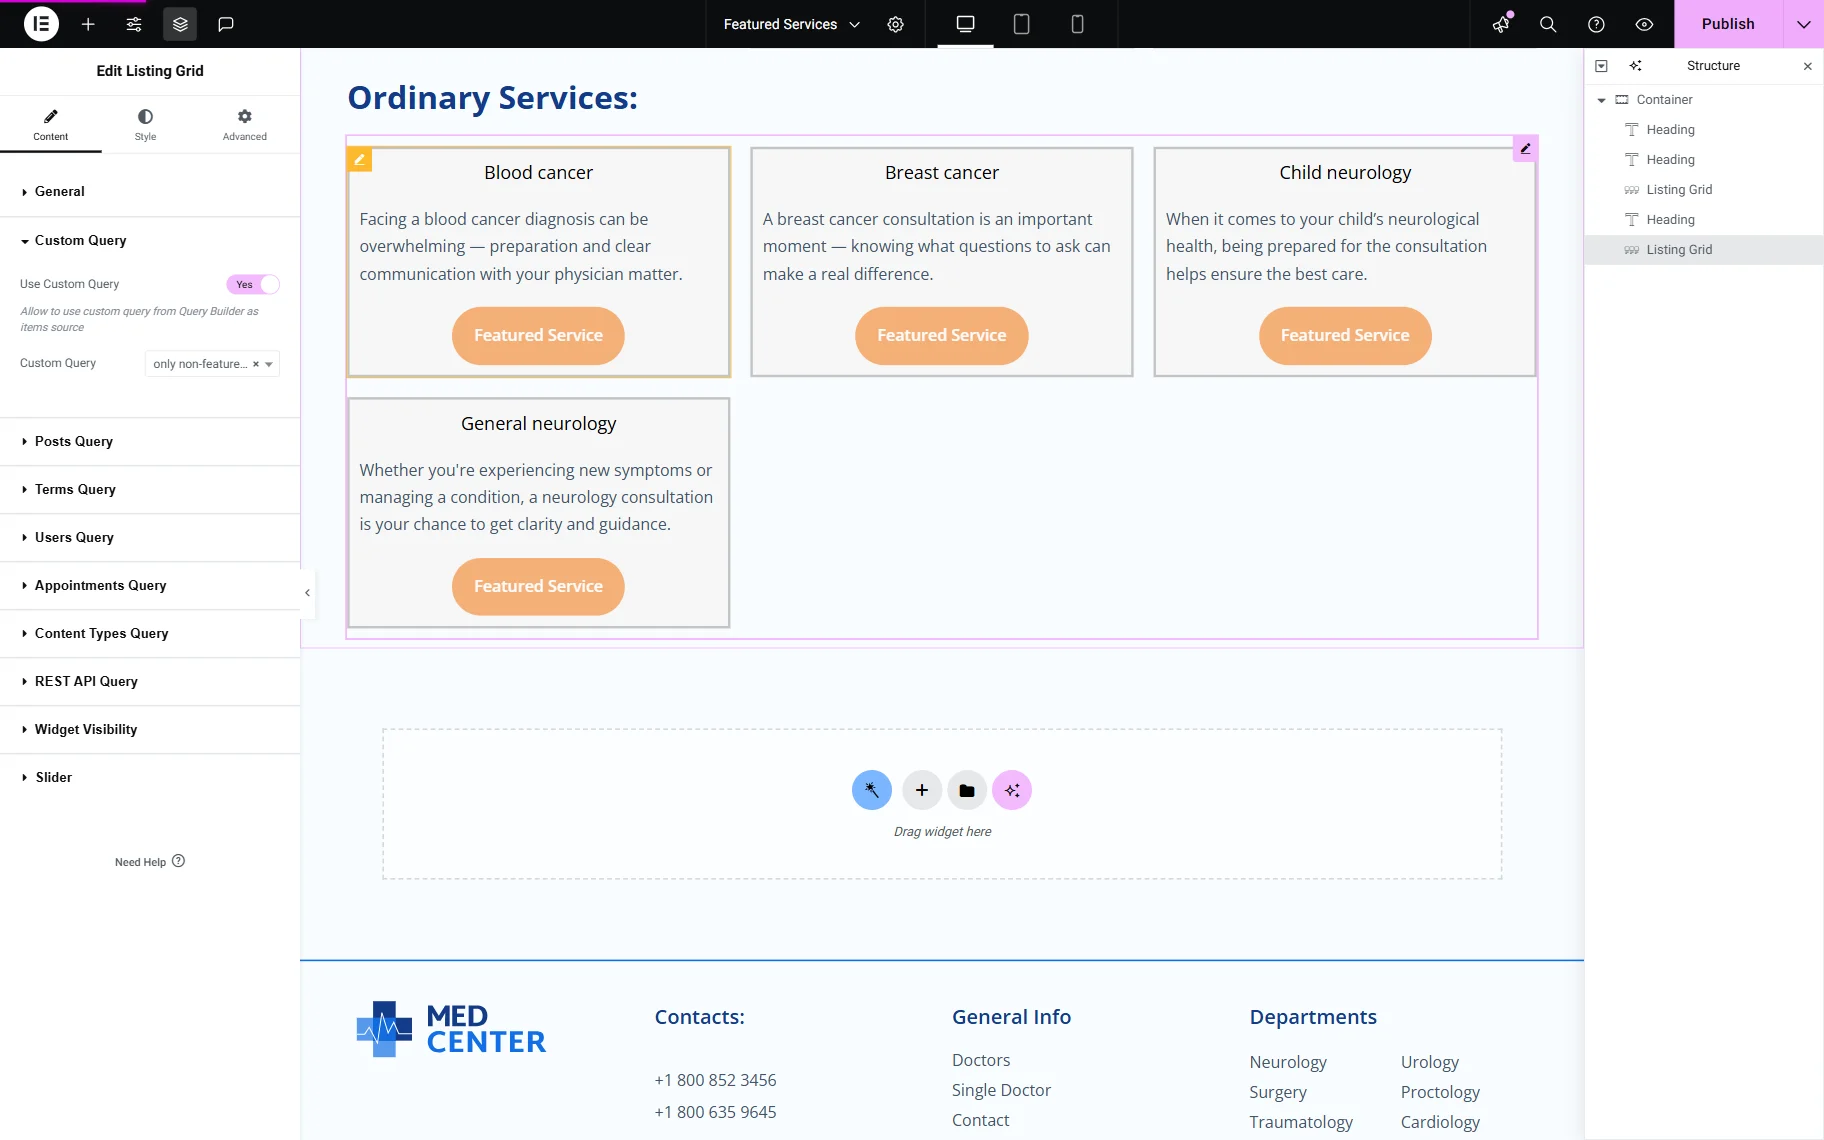
Now, we add one more Listing Grid widget and attach a different custom query to it to display only the non-featured posts.
Finally, we added the Button widget to open the pop-up. In the General tab, we changed the Text to “Open Featured Services”.
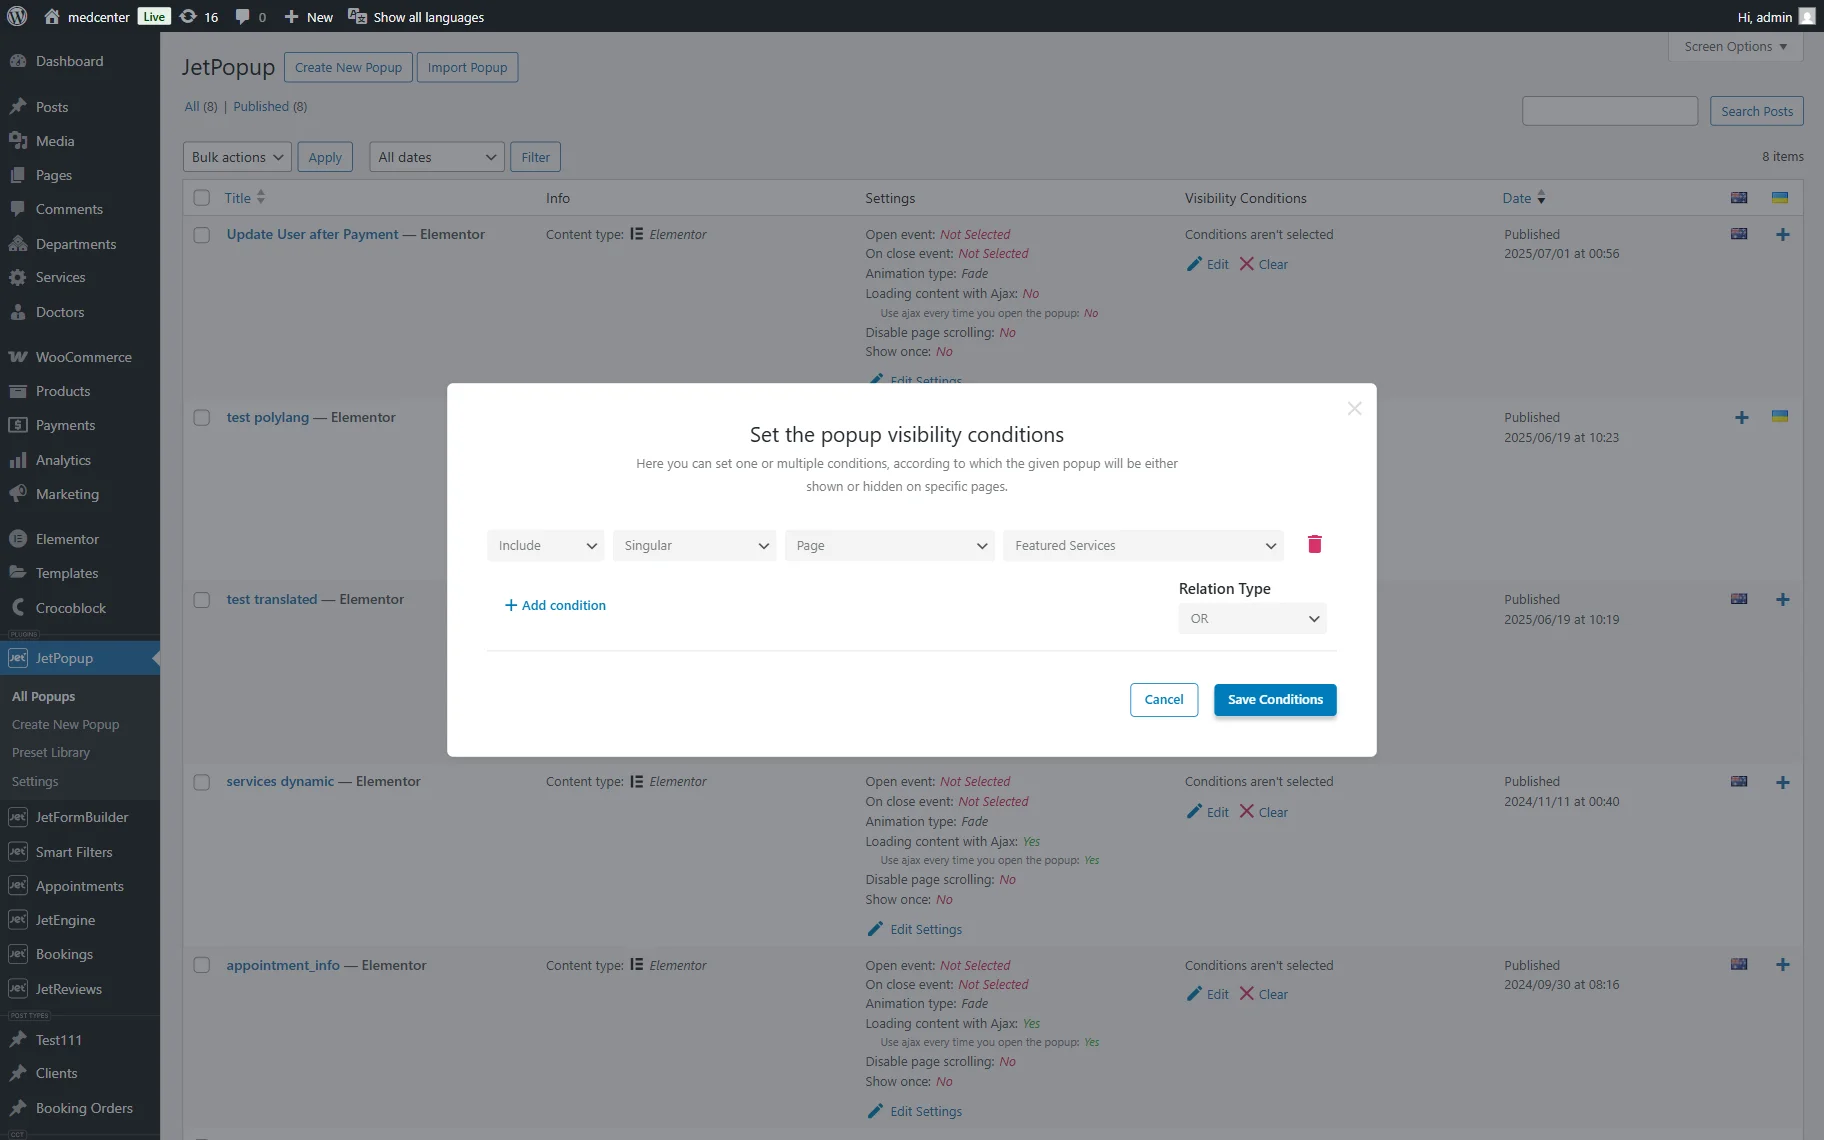
Navigate to the Advanced section, move to the JetPopup tab, and attach the recently created pop-up. Select the Trigger Type you need. To attach the pop-up to the Button widget, we select the “Click on Button” option.
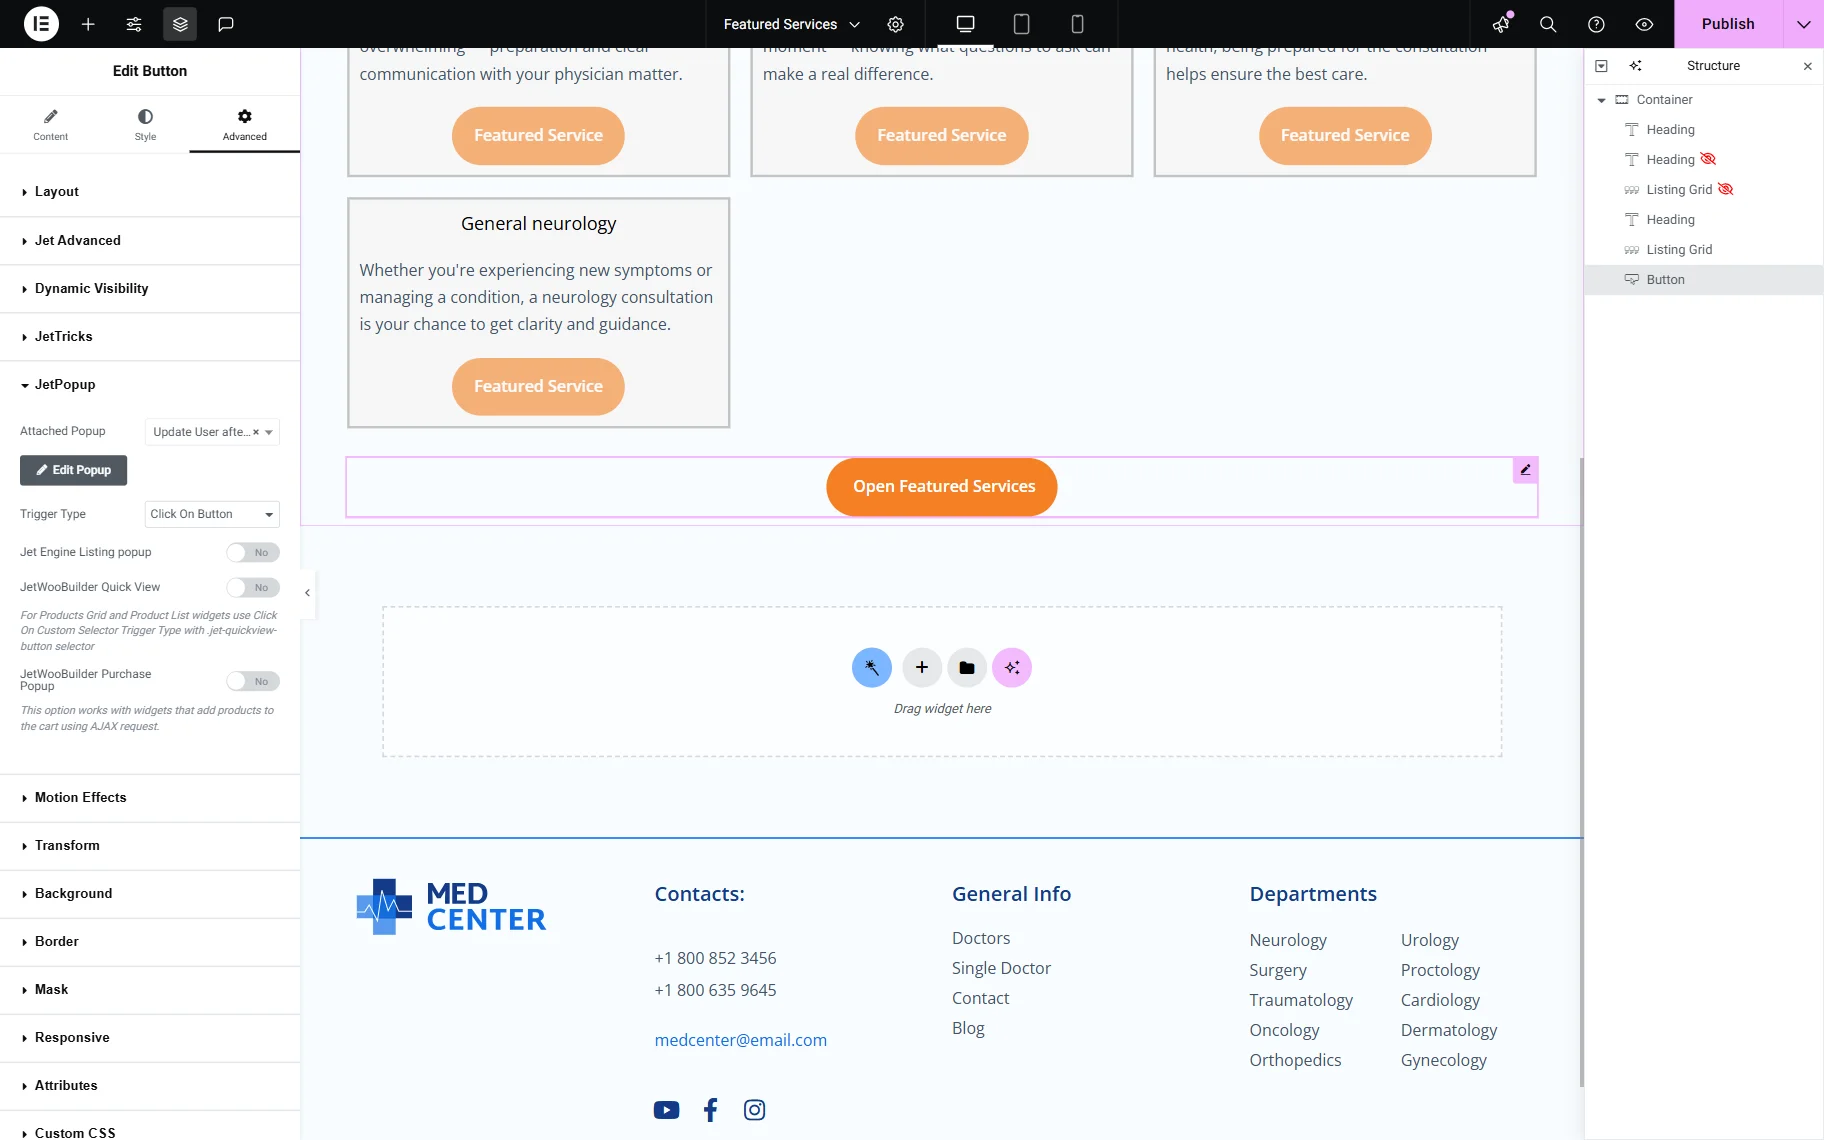
Click the “Publish” button once you’re ready.
Check the result
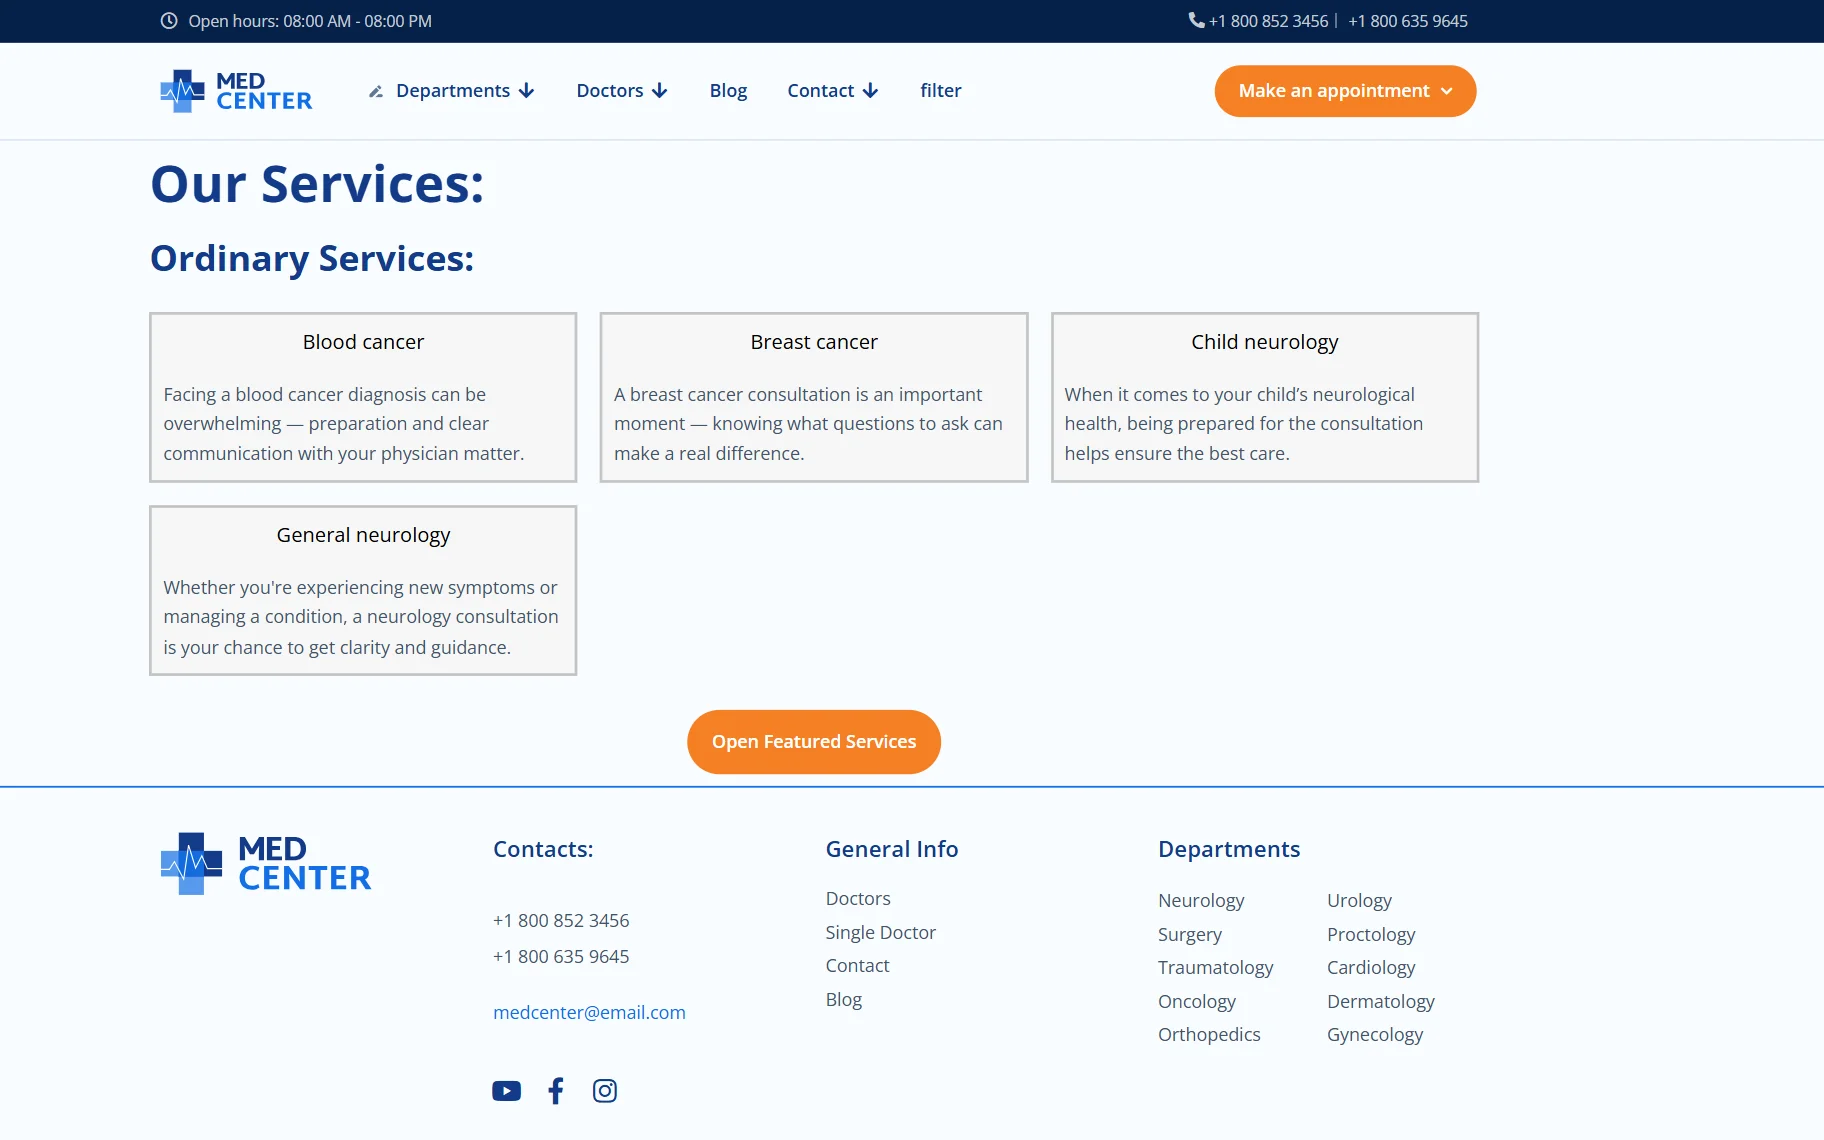
To see how the setup works, we need to be sure that we are visiting the site as a guest.
Let’s proceed to the frontend page.
We see only non-featured posts and the button to see featured services.
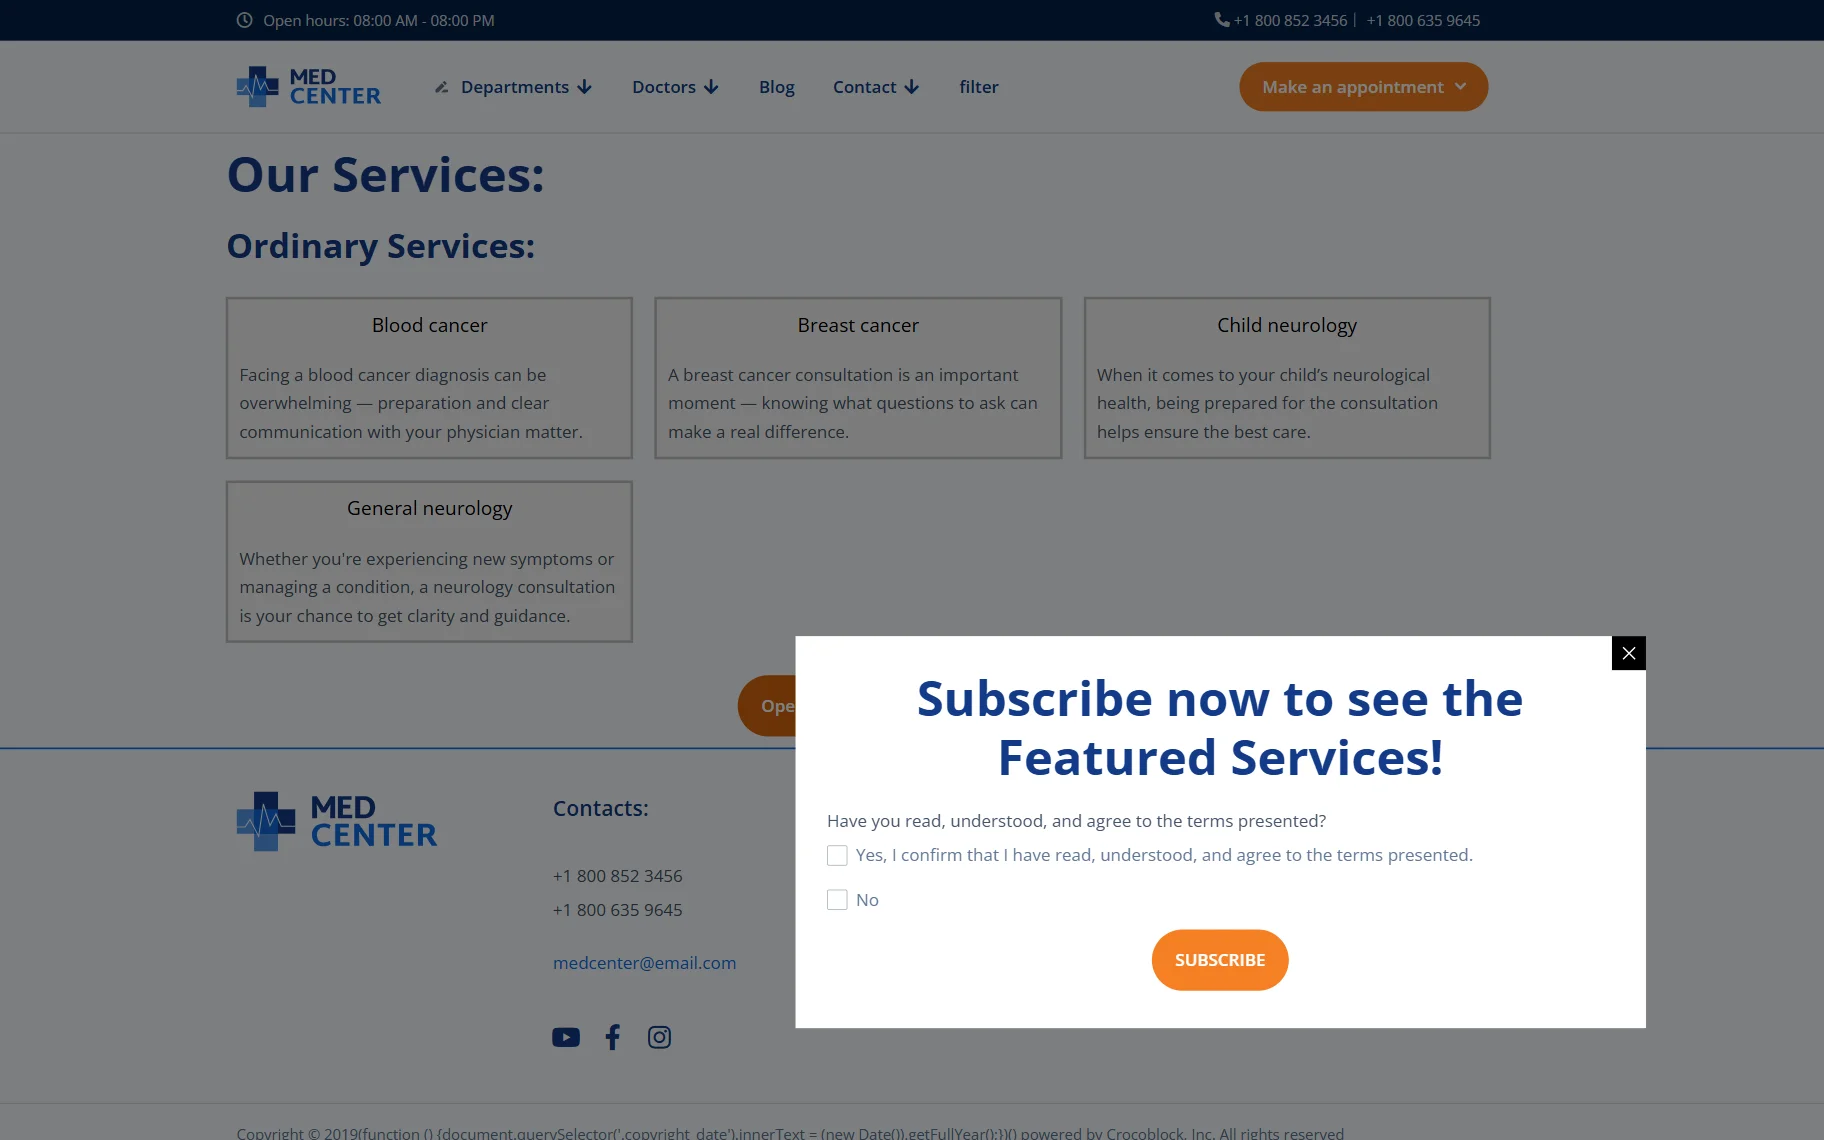
When we click the button, the pop-up with the form opens.
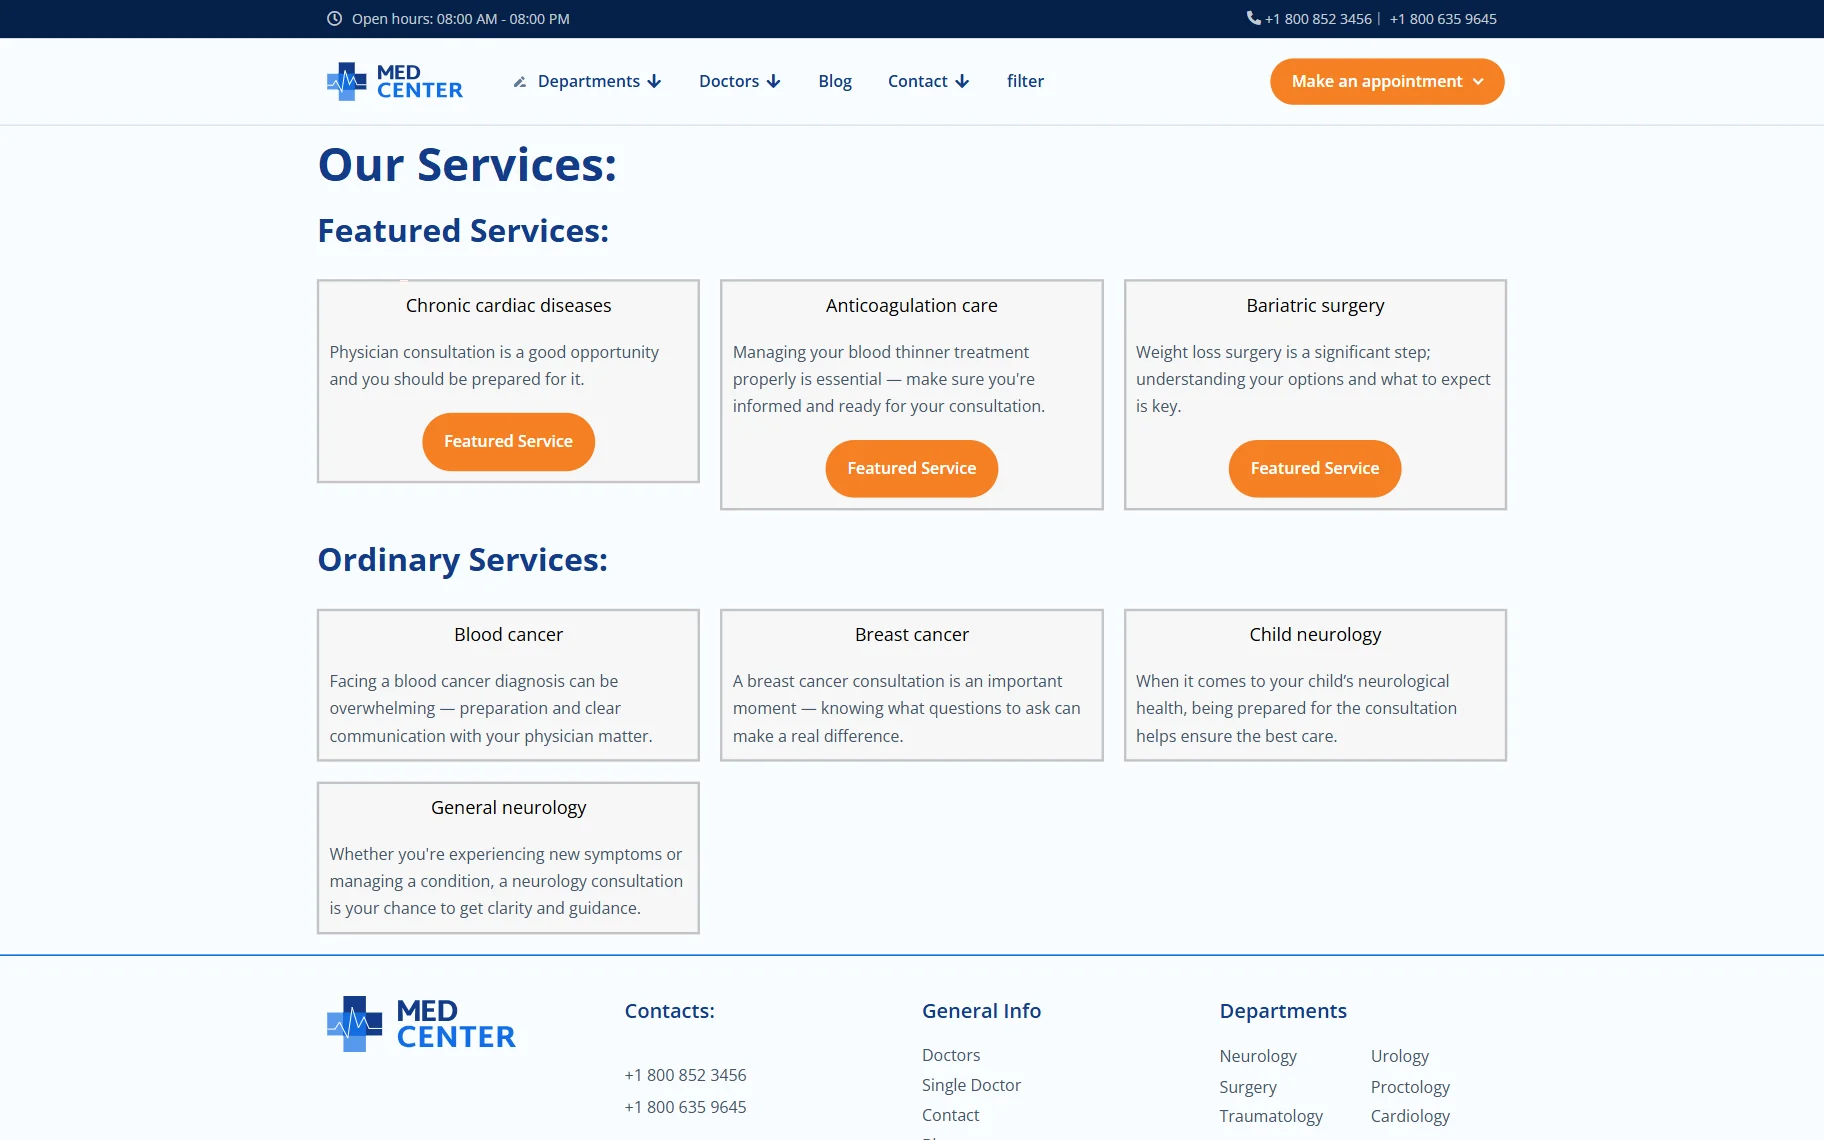
Log in to the PayPal account and buy a subscription. After that, you will return to the page where Dynamic Visibility will show the featured services. That means the user role was changed successfully.
That’s it. Now you know how to display featured posts first, and only after a successful payment, using the JetEngine Dynamic Visibility, JetFormBuilder, and JetPopup plugins for WordPress websites.