
How to Create Dynamic Calendar with Bricks
Discover how to create a Dynamic Calendar for the WordPress website with the Bricks theme builder and JetEngine plugin.
The Calendar element helps you to display scheduled events and timetables. With its help, you can display calendar listings on your WordPress website and style them in the Bricks page builder.
Preparations
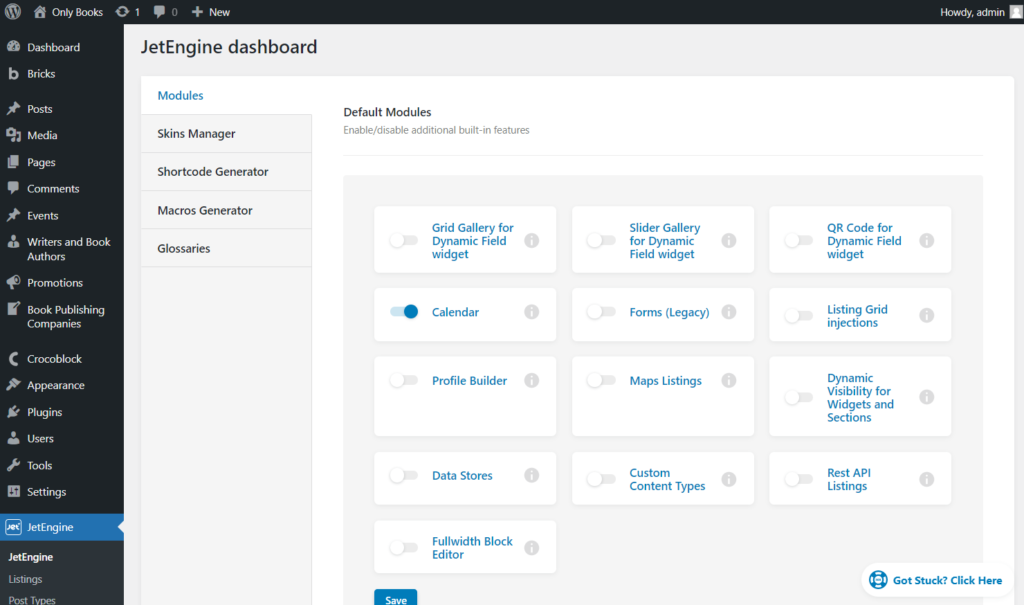
To activate the Calendar module, proceed to the JetEngine Dashboard, enable the Calendar toggle in the Default Modules section, and push the “Save” button.
As the requirements said, you needed to create a dedicated CPT for the events. Proceed to JetEngine > Post Types, hit to edit this post type, scroll down to the Meta Fields tab, and add the Date meta field.
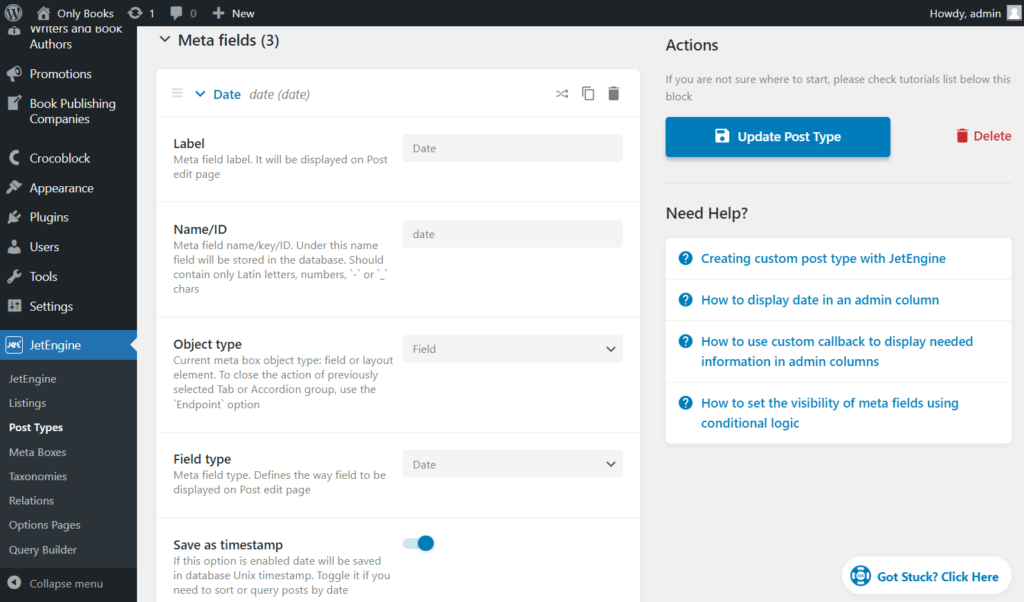
If you want to add the multi-day events to the calendar (events that will last for more than one day, e.g., weekend or holiday events), create the second “End date” Date meta field. More about this function you can learn from the How to Display One Post for Several Dates with Calendar Widget tutorial. Don’t forget to enable the “Save as timestamp” toggle.

Also, I created the Media meta field to add images to the calendar.

When you finish editing the CPT, click the “Update Post Type” button.
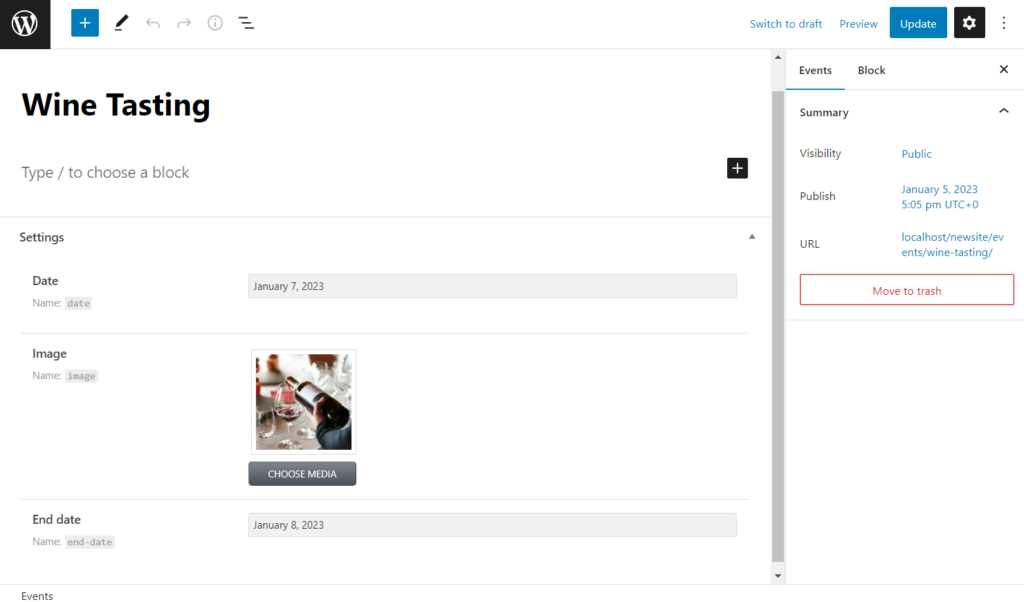
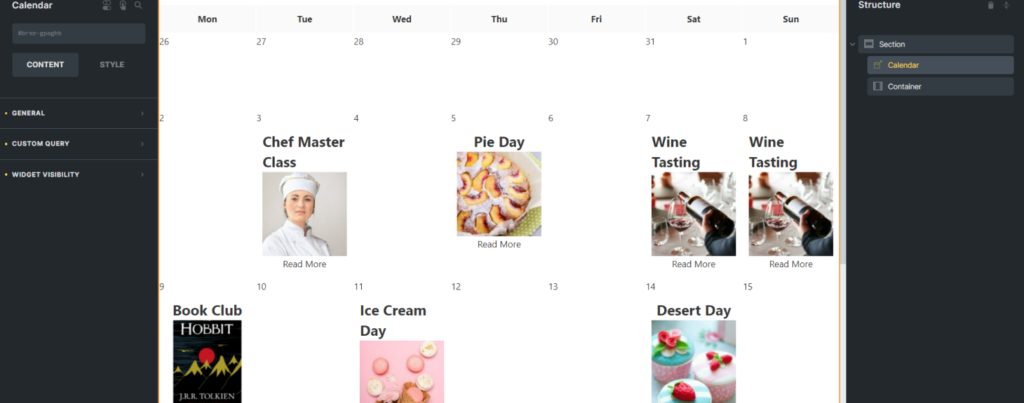
Proceed to the CPT tab on the WordPress Dashboard (“Events,” in my case) and create several event posts to display them later in the calendar listing. I created several events for the restaurant website.
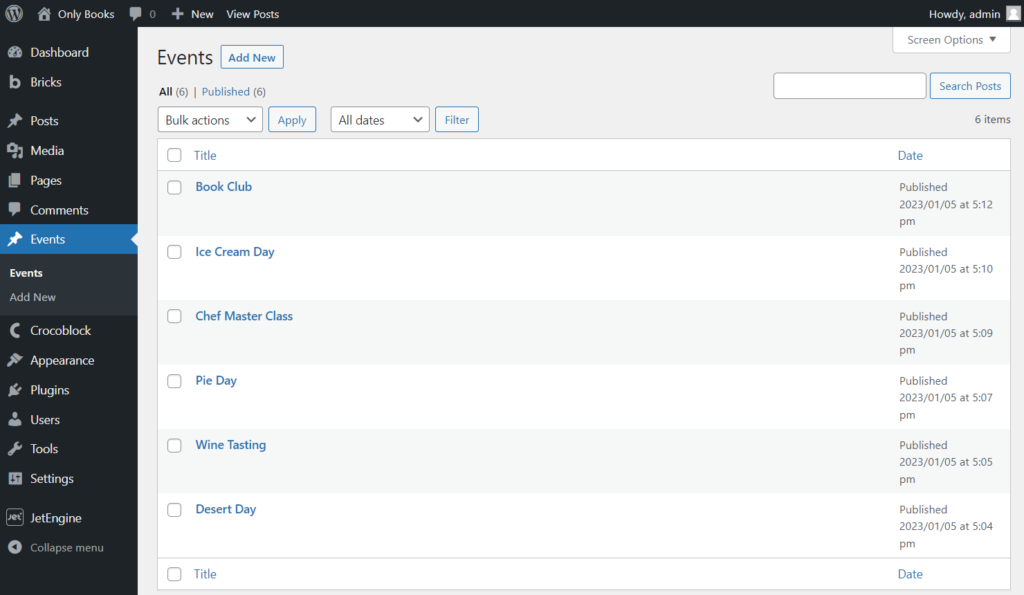
In the “Wine Tasting” event post, I added start and end dates to show later in the calendar that this event lasts two days (during the weekends).
Create a Listing Template for the Calendar
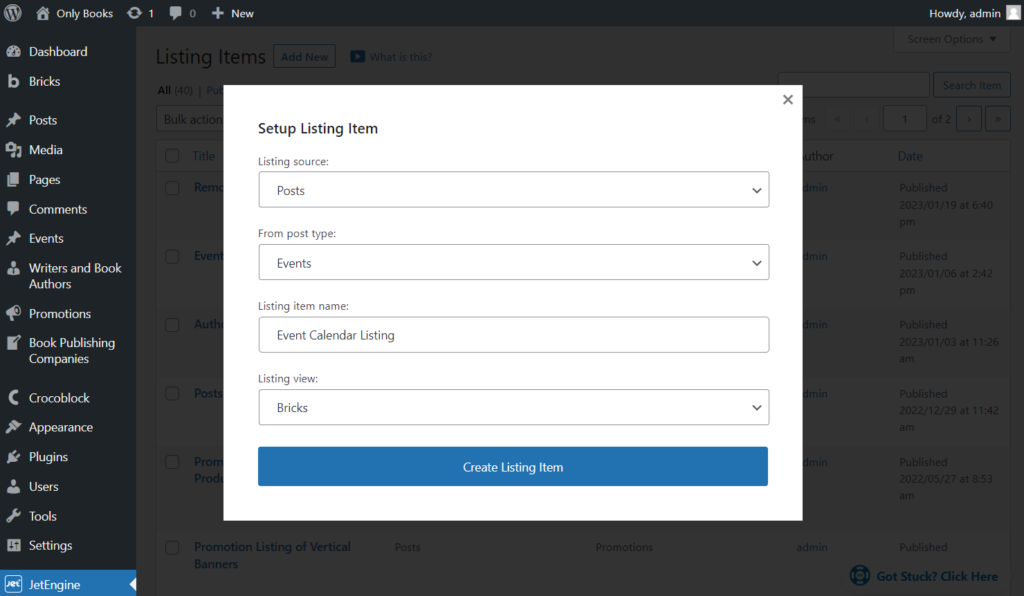
Move to the JetEngine > Listings and click the “Add New” button. Pick the “Posts” Listing source, the post type for the events in the From post type field (“Events” in my case), enter the Listing item name, and select the “Bricks” Listing view. Push the “Create Listing Item” button.
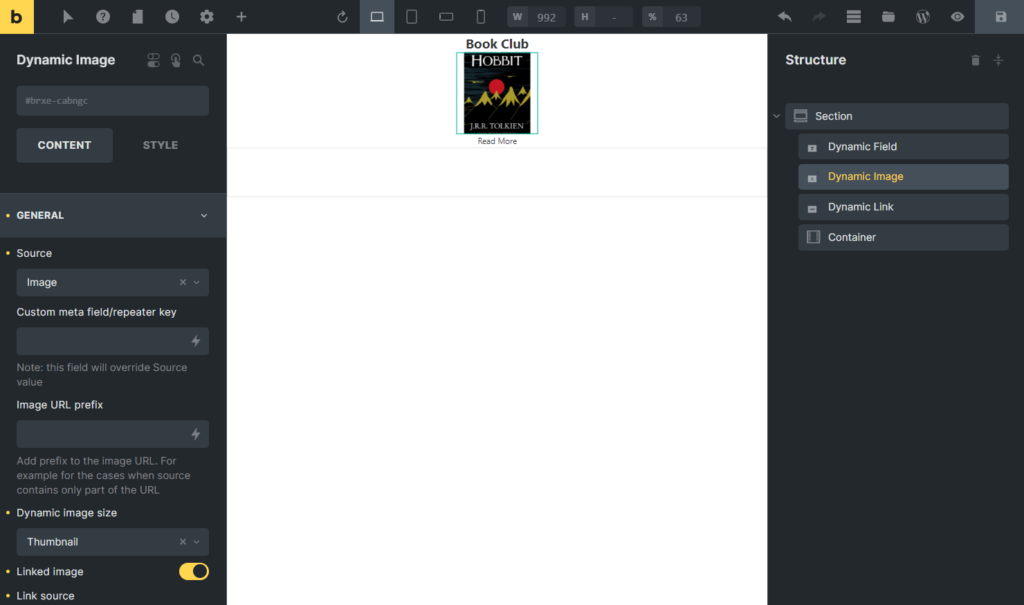
Hit the “+” button on the canvas to add a new section. Drag-n-drop the dynamic elements such as Dynamic Field, Dynamic Image, and Dynamic Link to arrange the future calendar cell. You can find more about Listing item creation with Bricks in the How to Create Listing Items with Bricks tutorial.
I used the Dynamic Field element to display the post title, Dynamic Image to show an event picture from the Image meta field, and Dynamic Link with the “Permalink” Source so that users can proceed to the event page.
After you finish customizing, hit the “Save” button.
Add the Calendar Element to the Page
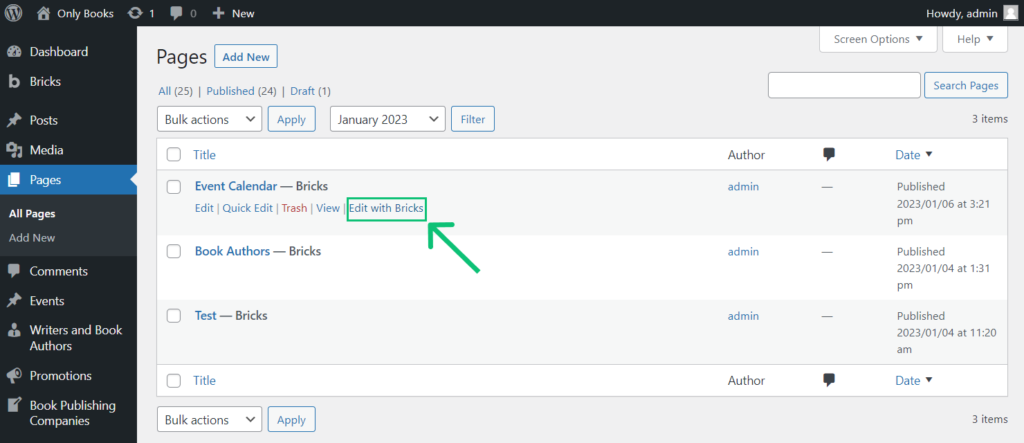
Move to the Pages tab on the WordPress Dashboard and click “Edit with Bricks” on the page you created earlier to place the dynamic calendar here.
Add a new Section and drag-n-drop the Calendar element.
Now, let’s get through the Calendar settings.
General settings
- Listing. In this drop-down menu, you need to select the recently created listing template for the calendar cell;
- Group posts by. This feature defines how the events will be placed in the calendar. If you choose “Post publication date” or “Post modification date,” every event will be placed in the calendar cell corresponding to that event’s creation or modification date. According to this step-by-step tutorial, you need to select the “Date from custom field” option and input the Date meta field name to the Meta field name text area. You can pick the “Query item creation date” option if you want to display in the calendar such objects as users, comments, and terms by the creation date. If such objects contain the Date meta field, use the “Date from custom field” option;
- Allow multi-day events. If you turn this toggle on, you will make it possible to add events that last for two and more days. In the End date field name, enter the Date meta field name where you added the end event date;
- Use custom post types. Enable this toggle if you want to show posts from two or more different post types.
- Week days format. In this drop-down list, you can select the way the weekday names will be displayed: “Full,” “Short,” or “Initial letter”;
- Start from custom month. By default, the calendar opens on the current year and month. After enabling this toggle, you can choose any other month of any other year to show first;
- Show posts from the nearby month. This toggle enables showing the events that happened or will happen in the nearby month;
- Hide past events. If you don’t want to display all the events that have already ended, turn this toggle on.

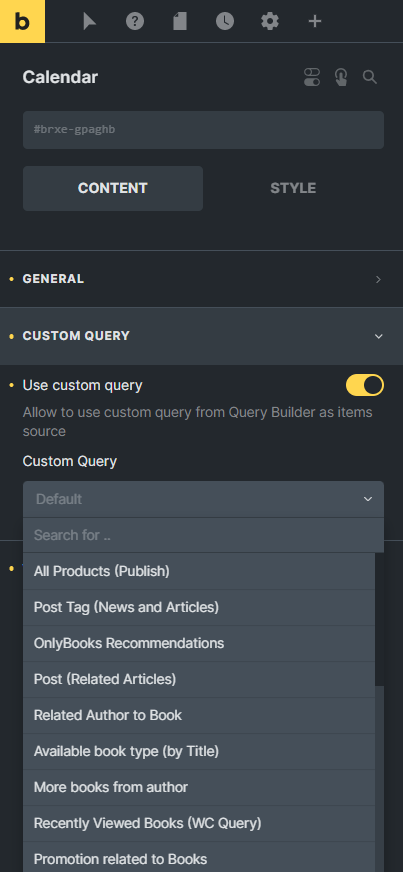
Custom Query
Query Builder is the JetEngine feature that allows you to display only those items in the list that correspond to the created conditions. You can create the custom query for posts, terms, users, etc., and apply it to the Listing Grid in the Custom Query settings tab. To learn more, proceed to the Query Builder Overview.
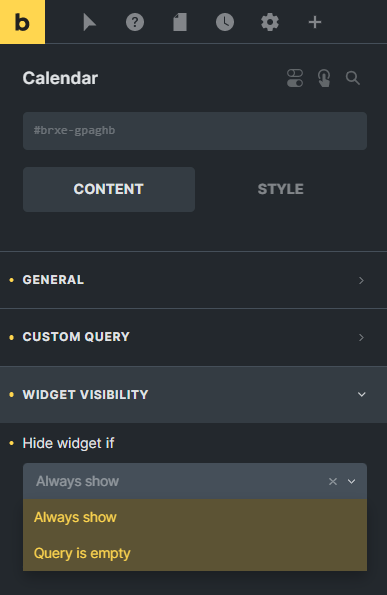
Widget Visibility
With the Widget Visibility settings section, it is possible to set the element always to be shown or hide it when the query is empty.
After you finish customizing the Calendar, hit the “Save” button.
Dynamic Calendar on the Front End
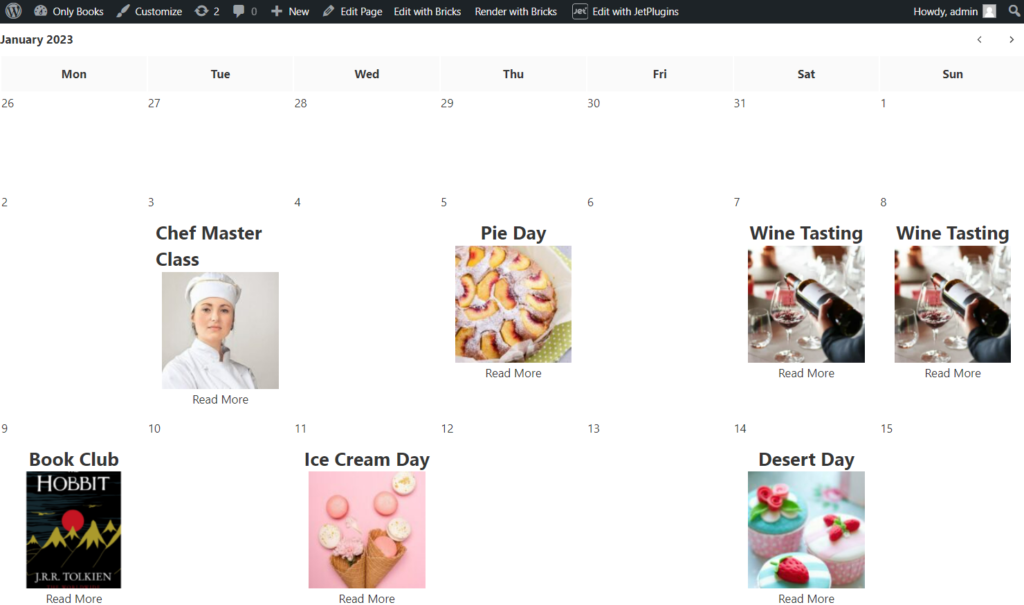
Proceed to the page with Calendar on the front end. As you can see, posts from the “Event” CPT are displayed according to the date in the Date meta field. The “Wine Tasting” post is shown twice according to the start and end date.
That’s all. Now you know how to create the Dynamic Calendar for the WordPress website with the Bricks theme and JetEngine plugin.