
How to Use Headline and Animated Text Widgets
This tutorial explains how to create a headline featuring Headline and Animated Text widgets included in the JetElements plugin.
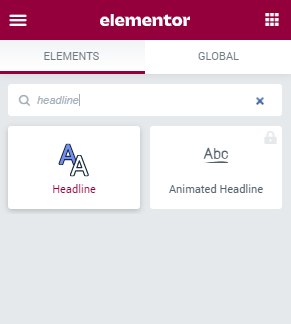
Adding Headline with JetElements Headline Widget
JetElements Headline widget is the stylish widget for Elementor, that allows using versatile typography settings and classic and gradient text colors. It also allows applying the image for the text. Follow the instruction, and you will learn how to create an attractive and noticeable caption.

1 Step — Add the Headline widget to the page
Firstly, open the page where you need an attractive headline in the Elementor page builder. Find the Headline widget and drag-and-drop it into a new section.
2 Step — Define settings
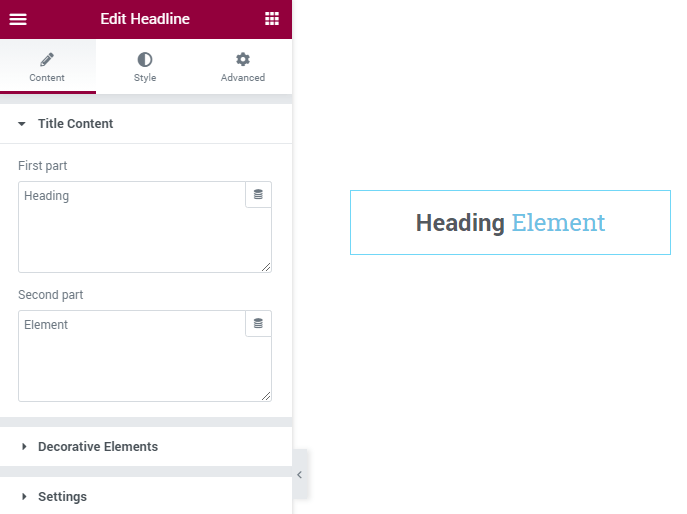
Move on to the Title Content section of the Content menu tab. Here you can input the First and the Second parts of the Title.
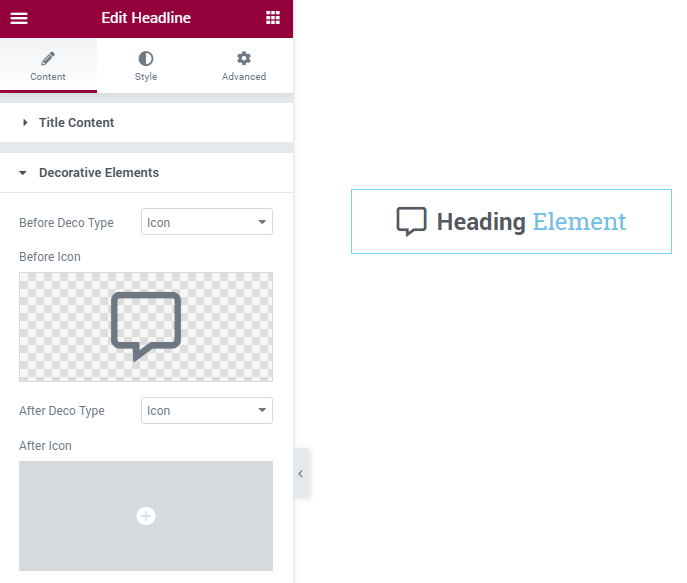
In the Decorative Elements section of the Content tab, you are able to add Before and After Deco Type. That could be an image or an icon.
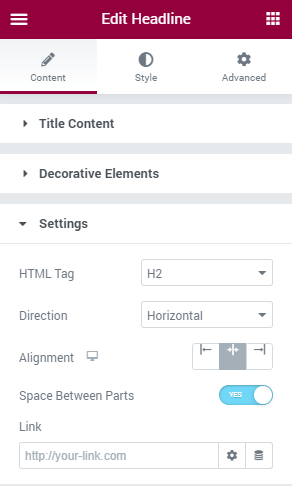
Finally, deal with the Settings section.
- HTML Tag. Notice you should choose one of the heading markups. However, it shouldn’t be H1. The proper heading markup is needed for the title to be ranked by the search engine. H1-H6 specifies the importance of the heading in comparison to other headings. This way, H1 – is the most important heading, while H6 – the least important;
- Direction. This is how the first and the second part of the heading will be placed on the page. If you choose the Horizontal option, they will go in one line one after another. And if you choose Vertical, the second part will be placed under the first;
- Alignment. It should be clear, here you can choose the alignment of the text;
- Space Between Parts. By default, this toggle is turned on. If you will turn it off, the parts of the headline will go one after another without any spacing;
- Link. If you want the headline to include a link – you can paste it here.
Proceed to the Style menu tab. All you need to do now is to create a design that will meet your taste and needs. If you need some inspiration, you can find it here.
Creating Headlines with Animated Text Widget
From this part of the tutorial, you will find out how to create a headline using the Animated Text widget, which can play the role of a heading.

1 Step — Add the Animated Text widget to the page
Open the necessary page in the Elementor page builder and search for the Animated Text widget. Drag and drop it into a new section.

2 Step — Define the settings
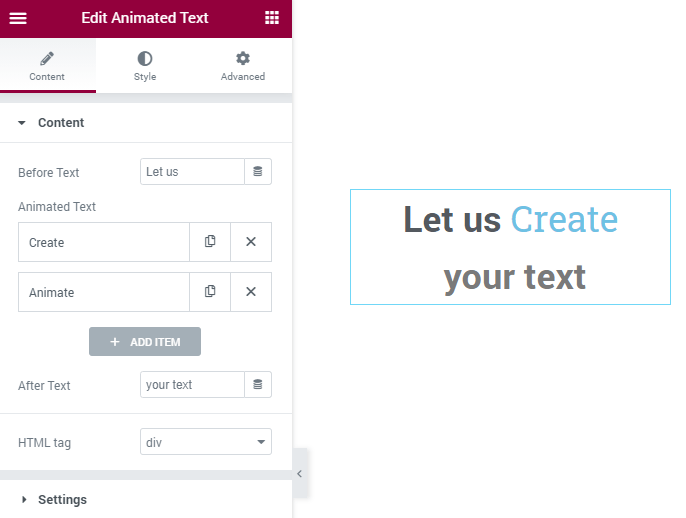
The Content section of the Content menu tab is where you create your new headline. There are three parts of a heading: Before Text, Animated Text, and After Text.
Before Text and After Text never changes; however, the Animated Text part changes on and on, where each item replaces another. You can add as many Animated Text items as you wish.
In the Content section, you can also choose the HTML tag for the headline. For details, visit this page, it contains a full list of all possible HTML tags.
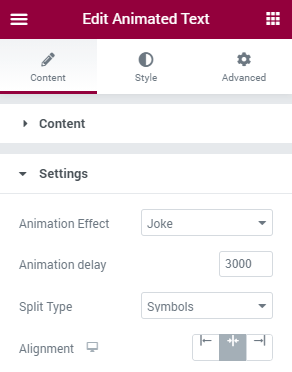
Proceed to the Settings section of the Content menu tab, and in the Animation Effect dropdown, you are allowed to choose an effect among Joke, Kinnect, Circus, Rotation Fall, Simple Fall, Rotation, Anime, Label, Croco, Scaling, Fun and Typing options. In this block, you can also fix the time value between two animated text items changing in the Animation Delay section. We recommend you not to make it fast because it will not be easy to read.
Then go to the Style block, where you can personalize all the parts of a headline.
Improvise and make your site appealing!