
How to Change the Number of Posts to Show per One Page
This tutorial will come in handy if you want to display a specific number of posts on the blog page featuring all your latest publications.
How to Define Number of Posts to Show per Page
First of all, log in to the WordPress Dashboard, and proceed to the Settings > Reading tab.
After that, move to the Blog pages show at most Numeric UpDown control. Click the up and down controls in order to select the number of posts to show on the Reading Settings screen.
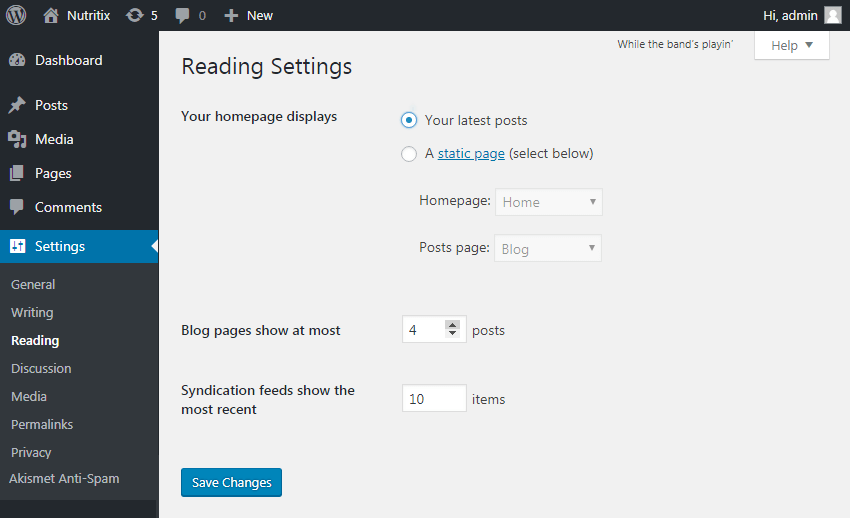
Afterwards, click the Save Changes button.
Now your page displays the needed number of posts. And all the posts that are not shown are available via pagination or navigation arrows.
The more organized your blog posts are, the easier it is for a user to access your content.
Was this article helpful?
YesNo