
How to Create a New Review Type
This tutorial will teach you how to create new Review Types and then attach them to the Custom Post Types using the JetReviews WordPress plugin.
Before you start, check the tutorial requirements:
- Elementor (free version) or Block editor (Gutenberg)
- JetReviews plugin plugin installed and activated
The JetReviews plugin allows you to create different review types for each of the custom post types you have on the WordPress website. Assessment criteria for rooms you offer for rent and products you sell are different, so review templates also have to differ. Now, let’s look at how you can create a template and assign it to the appropriate CPT.
Add a New Review Type
Open the WordPress Dashboard, and go to JetReviews > Review Types. You will see only the Default review type row if you haven’t created any Review Types before. It can’t be deleted or edited. Click the “Add New” button on the top of the screen.
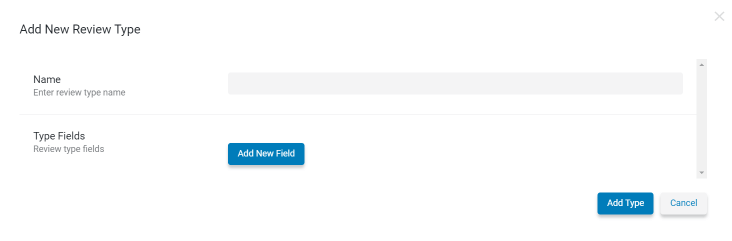
In the appeared Add New Review Type window, you have to type in the Name for that review type and then start adding Type Fields by clicking the “Add New Field” button.
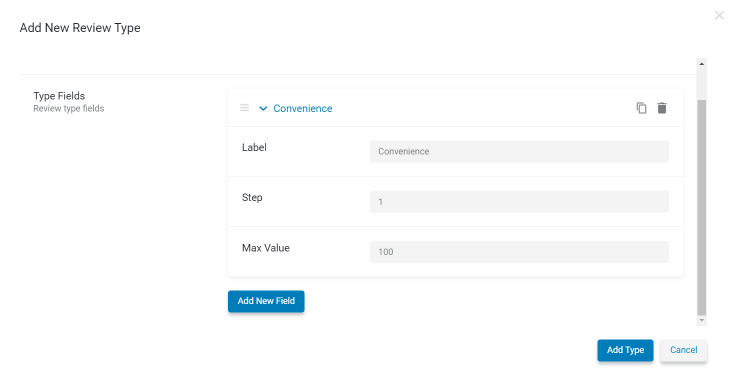
Those fields represent the assessment criteria of the item you want the users to evaluate. Each of the fields has three options:
- Label – that is the title of the criteria. The field will be automatically named according to it;
- Step – here, you define the size of the steps. For example, if you want the users to evaluate something in percent, you can set it to “10” and the Max Value to “100”. In that case, by increasing the rating for one step, the user will increase the total score to 10;
- Max Value – the highest valuation the user can choose. It could be any number from 1 to 100 and more if you want to.
You can add as many fields as you need by clicking the “Add New Field” button. You don’t need to add any kind of text area to the review type – it is included in the template automatically. When you are done, hit the “Add Type” button.
Assign the Review Type to the CPT
When the Review Type is created, go to JetReviews > Settings. Choose the necessary custom post type from the list on the left side and open the tab. Turn the Use review for post type toggle on.
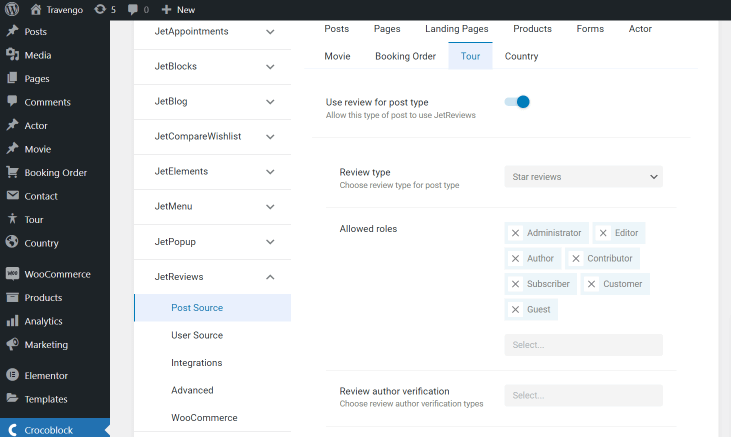
Choose the Review type you just created from the drop-down list to assign it to this custom post type. Select the Allowed roles and set the other settings if needed. More detailed information about all the settings of JetReviews you can find in this overview.
That’s it! You created a new Reviews Type and assigned it to the Custom Post Type. To make reviews visible to users, you’ll have to add a Reviews Listing widget to the Single page of that CPT. To learn more about how to do it, check out our review addition tutorial.