
How to Create a Multi-Column Mega Menu in Elementor
This tutorial uncovers the way of creating a so-named multi-columned mega menu with several columns using the JetMenu plugin for Elementor.
JetMenu plugin is an easy-to-use tool that perfectly suits for customizing a website’s menu and building a mega menu with Elementor.
This obviously means you can create a mega menu with any needed structure, including any number of columns, inner sections, and, surely, any widgets.
In this tutorial, we will learn how to create a mega menu with several columns using the JetMenu plugin for Elementor.
Primary Settings in WordPress Dashboard
From this tutorial, you have already known how to create a Mega Menu, here, we will show how to customize it with multi-columns. The first thing we want to share with – for each column we need to create a separate menu.
Well, let’s learn the process step-by-step:
WordPress dashboard settings
So, go to your WordPress Dashboard > Appearance > Menus, press “create a new menu“, select the menu to edit and name it.
Enable JetMenu for the current location
In the Menu settings, at the end of this page, choose the Display location and Enable the JetMenu, do not forget to press the “Save Menu” button.
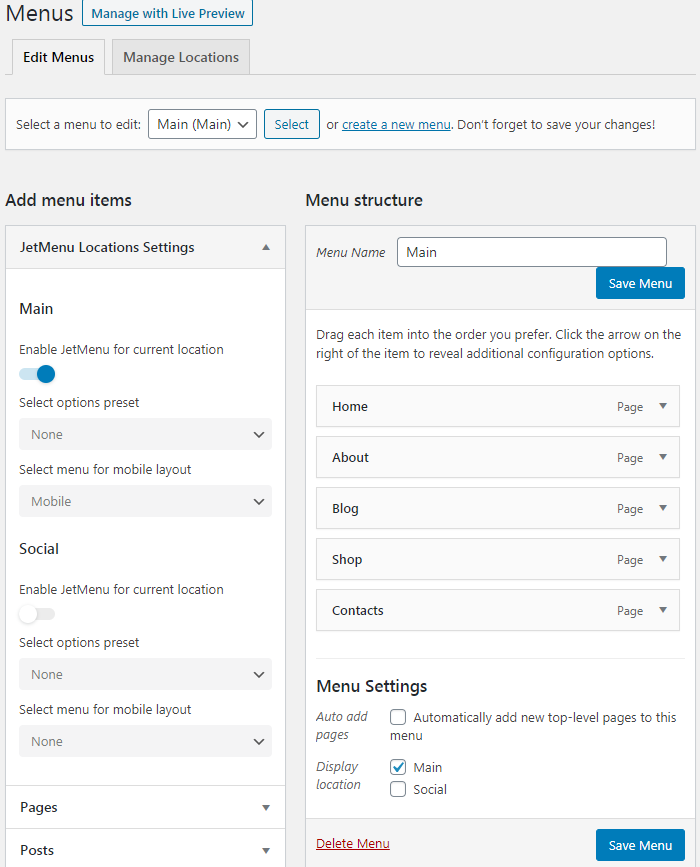
Add the menu items
Choose and add menu items you want to be displayed, like Pages, Categories, Custom links, etc. In the Menu Structure you will see the added Items, then press Save, otherwise the changes will not be saved.
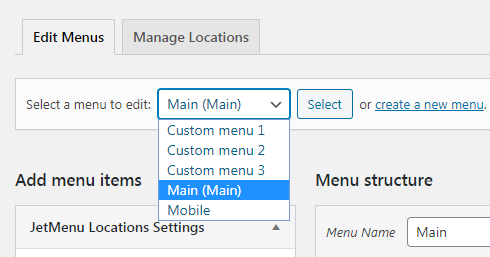
Now, in the same way, we need to create a mega menu for each column. For example, we want to add three columns in one of the Header Categories, so three more menus must be created.
Create new menu for each column
When you ensure that all changes are saved, in the Edit Menus Section press Create a New Menu for each column and add items you want to be displayed in them. Do not forget to give a name. Press the “Save” button after each action.
Add Vertical Mega Menu Widget
For columns to be displayed in the right way, we need to use the Vertical Mega Menu Widget.
Well, let’s see the final steps to set the columns for the menu.
WordPress dashboard settings
In the Edit Menus, select the Main Menu location and choose the Item you want the multi-columns to be added.
Enable mega submenu for the item
Click on the JetMenu setting that is positioned on the right from the item’s title. After that you will see a small pop-up where it is possible to make, Mega Submenu Enabled, just toggle to Yes.
In the example, we choose the Service Item.
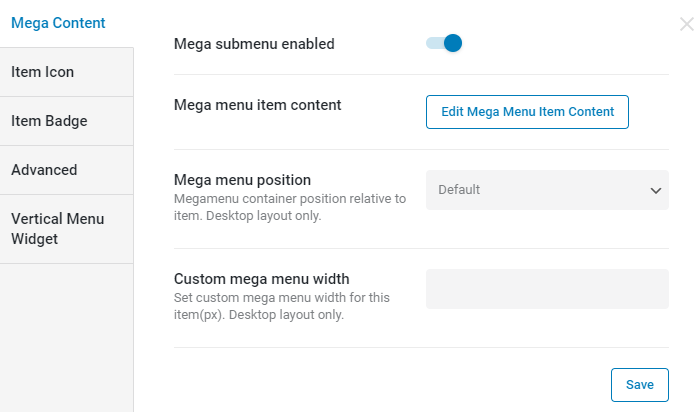
Edit mega menu item content
To open the page in Elementor and add widgets, press Edit Mega Menu Item Content and you will be redirected to Elementor Editor.
Add three sections
As we decided to create three columns, we should have the same number of sections where we need to add the Vertical Mega Menu Widget to each. Just click “+” and choose the template with three columns.
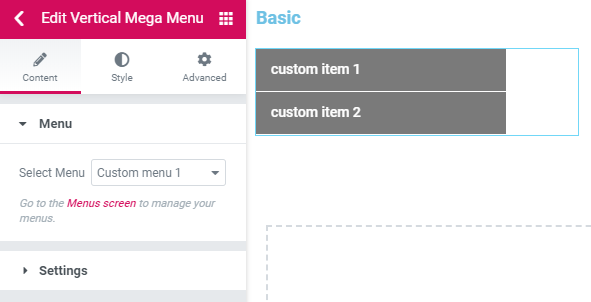
For example, in the Services Item, we want to have such columns as Basic, Extended, and Pro.
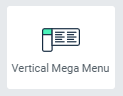
Insert a vertical mega menu widget
The next step is to add the Vertical Mega Menu Widget in each column. In the Edit Section select the menu that was created in the WordPress Menus settings.
A detailed explanation for you to understand, we have created three menus, that are to be displayed by means of a Vertical Mega Menu widget. So, in Elementor Edit Section choose those menus we prepared.
For instance, in the column called “Basic”, we selected the Custom Column 1 menu. For the rest two columns, we repeated the same actions.
You can add a Heading for each Column, we titled them as Basic, Extended, and Pro.
See what we get after setting all three columns:
Style up the columns
As always, all Crocoblock plugins and Widgets are developed for you to set them to your test and vision.
It is possible to change the color of the word, background color, set the Hover, in one word, customize it as you wish.
Update and save the work
It is important to press the “Update” and “Save” buttons when all is set. In another case, you will lose all changes.
Now you know how to create a mega menu with several columns with the help of the JetMenu plugin.