
Parallax Effects Overview
This tutorial will help you to learn how to create Horizontal Parallax, Vertical Parallax, Mouse Move effect, Scrolling Zoom, Scrolling Rotate, Scrolling Blur, Scrolling Transparency, and 3D Effect on any page of your website using Elementor and JetElements plugins.
JetElements Section Parallax Extension is a powerful tool that will help you add some dynamics to your website. Parallax is an effect that creates an illusion of depth to the page’s background. It is achieved by setting different scrolling speeds and movement direction for separate layers of the image. There are several types of parallax effects that you can apply to your website using JetElements and, in this tutorial, you will learn how to apply all of them.
Preparing Website for Parallax Effects
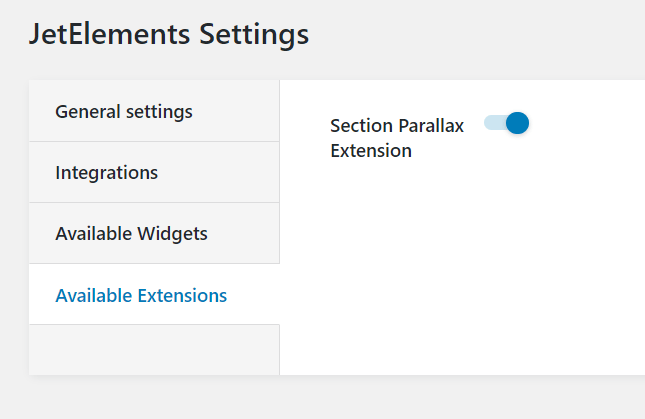
Open your website admin dashboard and go to JetPlugins > JetElements Settings. Proceed to Available Extensions tab and switch on the Section Parallax Extension toggle.
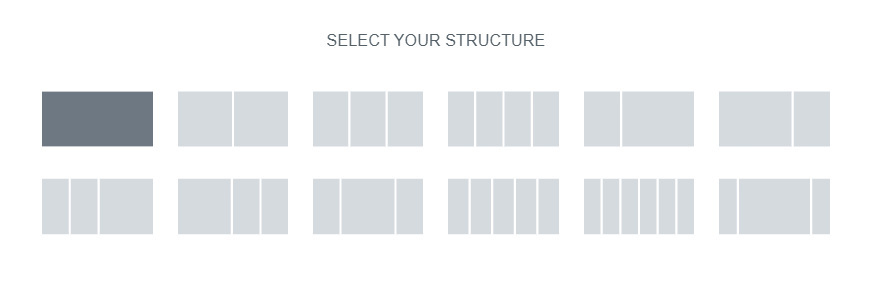
Now go to Pages, choose the page you would like to add a parallax effect to, and click the “Edit with Elementor” button. Scroll the page down, hit the “Add New Section” button, and select the first structure.
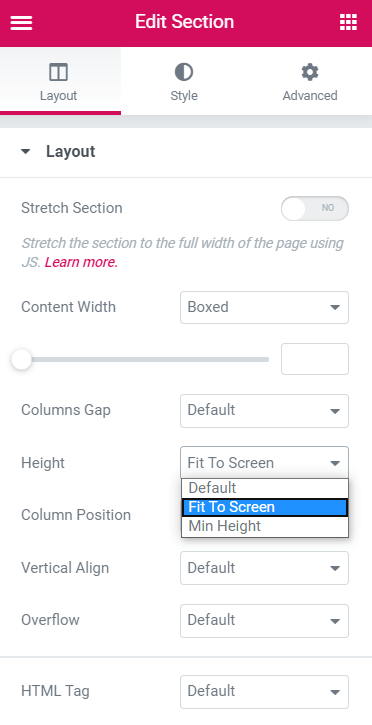
Proceed to Layout tab > Layout and choose “Fit to screen” from the drop-down list in the Height option. You can also set the height of the section to some certain value if you need (in that case, choose the “Min Height” option and define the value manually).
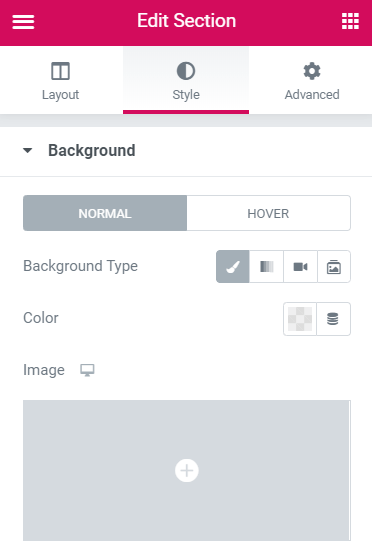
Go to Style > Background, choose the “Classic” Background Type, and click Image to select the background picture.
Set the Position to “Center Center,” Repeat to “No-repeat,” and Size to “Cover.” This assures that the background image will look nice and fits the section. If the resulting picture is blurry, you’ll have to take the image with a higher resolution.

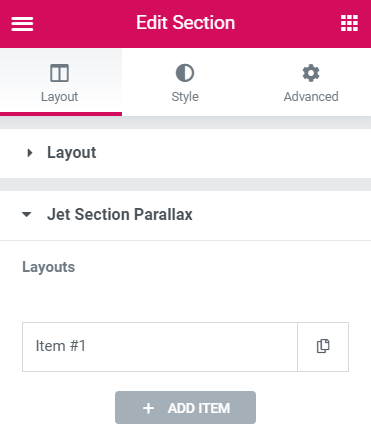
Turn back to Layout > Jet Section Parallax. Here you can add new layers that will move at different speeds and create the effect of depth and dynamics. You can add as many layers as you need by clicking the “Add Item” button.
Creating Parallax Effects
Click Item to start customization. Before choosing the Parallax type, let’s take a look at all other options.
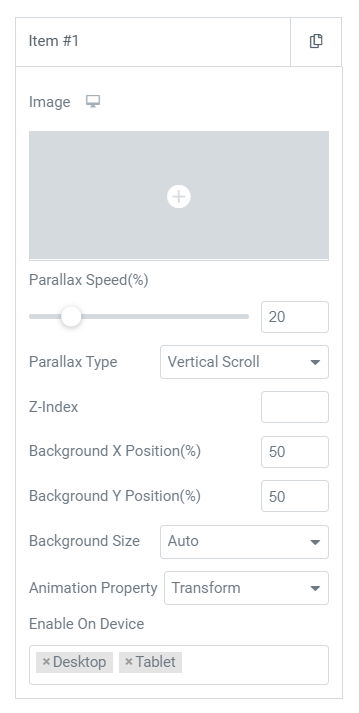
- Image. Here you can choose the next image layer that will move over the previously chosen background picture.
- Parallax Speed (%). This option allows you to set the speed of movement for this layer. It is shown in percent. The bigger this value is, the faster and more visibly this layer’s picture will move. Take into consideration that this value could be bigger than 100.
- Z-Index. The number you type into this bar will define the priority of the layer. If the pictures overlap each other, the one with a bigger Z-index will be shown on top of those with the smaller Z-index.
- Background X Position (%). Here you can set the horizontal position of this layer’s picture regarding the background image (in percentage terms). Take into consideration that this value can be bigger than 100 and lesser than 0 (it can have negative value).
- Background Y Position (%). And here you can set the vertical position of this layer’s picture regarding the background image (in percentage terms). This value can also be bigger than 100 and lesser than 0 (it can have negative value).
- Background Size. This option defines the size of this layout’s picture. Auto means that the image will be displayed in its original size. Cover will resize the image so that it fills the whole section, even if it is stretched or cut on some side. Contain changes the size of the image in the way it becomes fully visible in the section but doesn’t change its proportions.
- Animation Property. There are also three options in the drop-down menu here. You should choose Background Position if the image of this layer fills the whole background. Transform is for smaller elements and Transform 3D in combination with Parallax Type “Mouse Move” makes the element look like a 3D object.
- Enable On Device. You may need to show the parallax effect only on specific devices. Here you can choose on what devices this specific parallax effect will be shown.
And now let’s go back to Parallax type.
None
That’s quite obvious. When you choose this option, the picture of the layer won’t move.
Vertical Scroll
In this case, the element of the layer will move vertically, from top to bottom, but with a different speed regarding the background image. Here’s how it will look like on the front:
Horizontal Scroll
When you choose this variant, the layer’s picture will move horizontally as you scroll. You can choose the Direction of movement, whether the element will move To Right or To Left. Check out the way it looks:
Mouse Move
This parallax type makes the layer’s image move in the opposite direction to the movement of the mouse. It can create some really cool visual effects on the front:
3D
If you choose this Parallax Type and set the Animation Property to “Transform 3D” as well, the layer’s image will still be moving in the opposite direction to your mouse. But besides that, it will also rotate to create an illusion of a 3D object:
Scrolling Zoom
As you scroll the page down, this parallax type will zoom in the layer’s image. Be aware that the picture should be high-resolution to look really good when zoomed. For example, like this one:
Scrolling Rotate
In this case, the image will be rotating around the center of the section. You can choose the Direction of rotation – To Left (clockwise) or To Right (anticlockwise). This parallax effect is one of the most impressive ones and adds lots of dynamics to the page:
Scrolling Blur
If you want to make a user focus on some element of the section, you can add this parallax effect. As you scroll the page down, the layer’s image will change its sharpness. You can choose Direction. Fade In means that the picture is sharper at the beginning and becomes blurrier as you scroll. Fade Out is vice versa; the image becomes sharper as you scroll.
Scrolling Transparency
If you choose this variant, the layer’s picture will change its transparency as you scroll the page down. And again, you can choose the Direction. Fade In will make the image less visible from top to bottom. Fade Out makes the image transparent at the beginning and more visible as you scroll. Combination of Scrolling Blur and Scrolling Transparency can create an astonishing effect:
As you can see, parallax effects have gone far from their original look and now can be used not only in a vertical dimension. Use them on the pages of your website, combine and mix them as you see fit, and make your platform even more attractive to visitors. Good luck!