
How to Use GetResponse Form Notification Type (Legacy)
From this tutorial, you will learn how to create a connection between the JetEngine form and the GetResponse account using the Notification form functionality.
Before you start, check the tutorial requirements:
- Elementor (Free version) or Block editor (Gutenberg)
%desc%
- JetEngine plugin installed and activated
%desc%
GetResponse is a software platform that helps users with marketing tasks. It has lots of built-in tools for email marketing, like autoresponders and automation apps. So, if you have a GetResponse account, you may want to use it for your website. JetEngine Forms can be connected with the GetResponse account. This allows you to apply the GetResponse tools to the data collected with the help of the form.
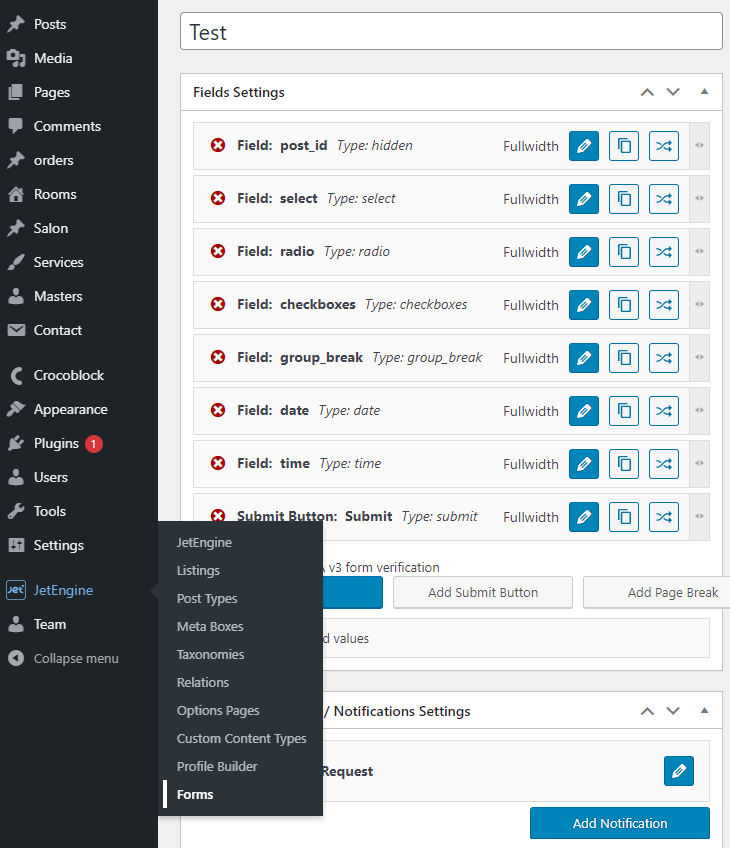
Create Form
First of all, you need to create a form. Open your website’s dashboard and go to JetEngine > Forms. Press the “Add New” button, give the form a name and add the necessary fields. If you need a more detailed guide, check our form creation tutorial.
Generate GetResponse API Key
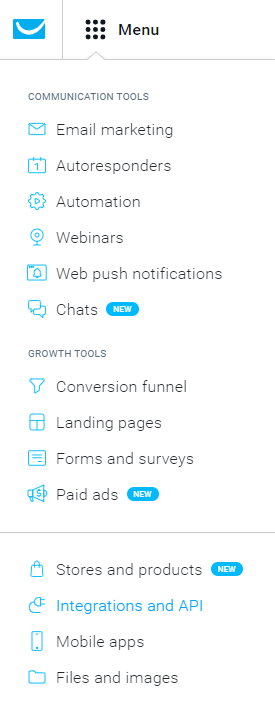
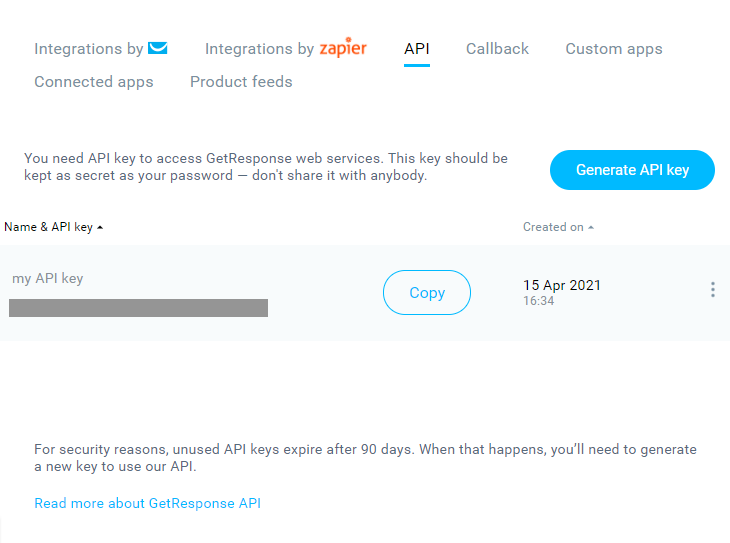
By this time, you probably already have a GetResponse account. Enter your account and go to Menu > Integrations and API, or you can just follow the link.
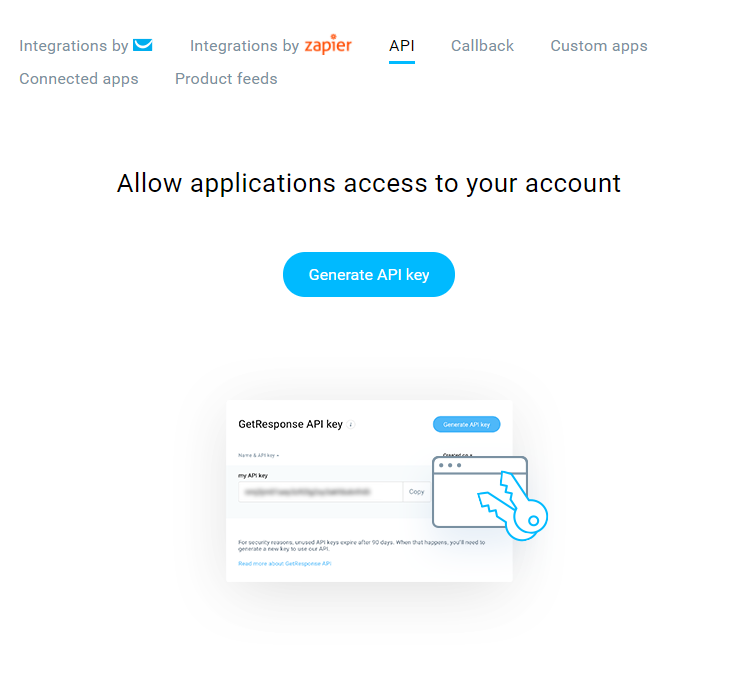
Give your new API key a name and press the “Generate” button.
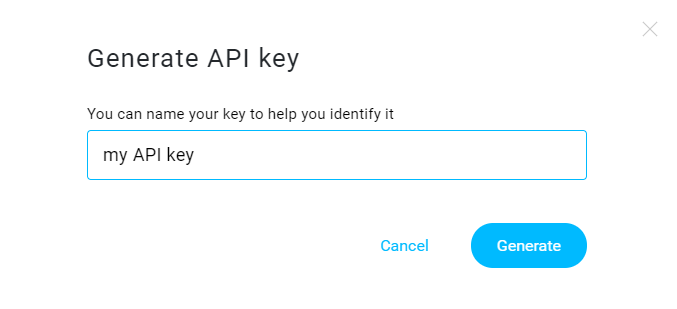
When the system generates the key, copy it and go back to the form creation window.
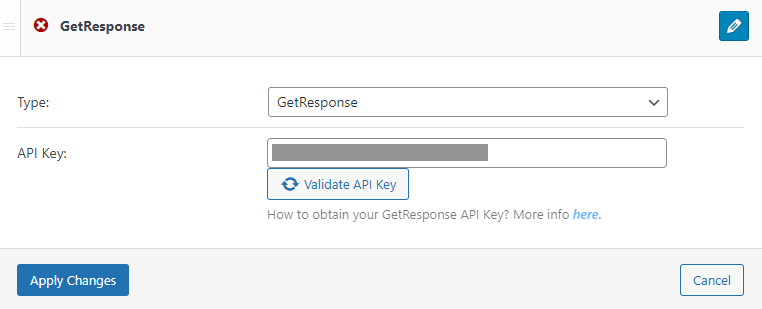
Validate Key and Fill the Fields Map
Scroll to the Post-submit Actions/Notifications Settings section. Press the “Add Notification” button and choose the “GetResponse” option in the Type drop-down menu. Paste the key to the API Key bar and click on the “Validate API Key” button.
- In the List Id drop-down menu, you should choose the list you created in GetResponse. The data from the submitted forms will land on that list;
- Day of Cycle. Insert the number of cycles day;
- The Fields Map section contains all the data fields that can be filled with the information from the form. You can choose the corresponding form fields in the drop-down lists that are placed to the right of the list fields.
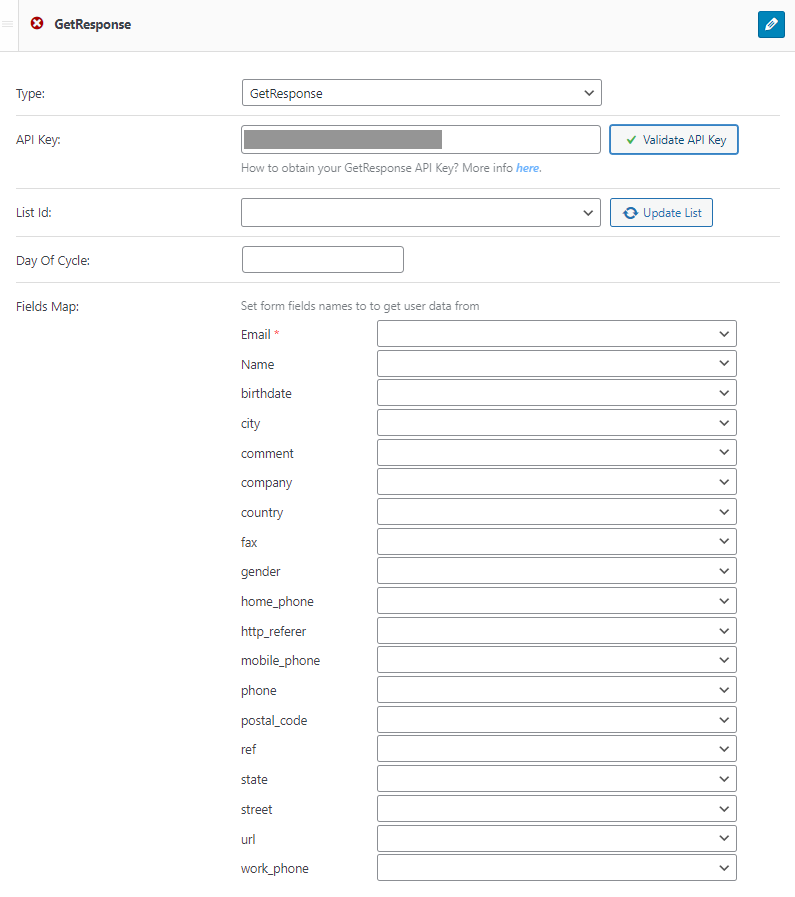
When you are done, hit the “Apply Changes” and then the “Update” buttons.
Now, when the user submits the form, the data from it will be added to the list in your GetResponse account. Apply any necessary tools to it.