
JetFormBuilder: Conditional Visibility for Form Fields
- Where to find the Conditional Block?
- How does the Conditional Block work?
- Conditional Block Settings
From this tutorial, you will learn how to control the visibility of the JetFormBuilder fields with the help of conditional rules, set in the Conditional Block.
If you are creating a complicated form, you may need to make some of its parts visible only after some conditions are met. For example, you want to add a few fields for the clients who have children but the others don’t need to see those fields. In this case, you may set some rules that define when those fields become visible to the user.
This is possible with the help of the Conditional Block, so let’s take a closer look at it.
Where to find the Conditional Block?
Conditional rules are applied to the fields of the form, so the Conditional Block is available only while you are creating the form. Open your website’s dashboard and go to JetForms > Forms. Open the form where you would like to apply the visibility rules.

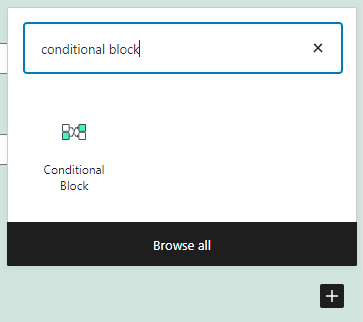
Click the “Add Block” button, either the one in the left upper corner or under the added fields on the workspace, and find the Conditional Block.
When added to the form, it will look like that:
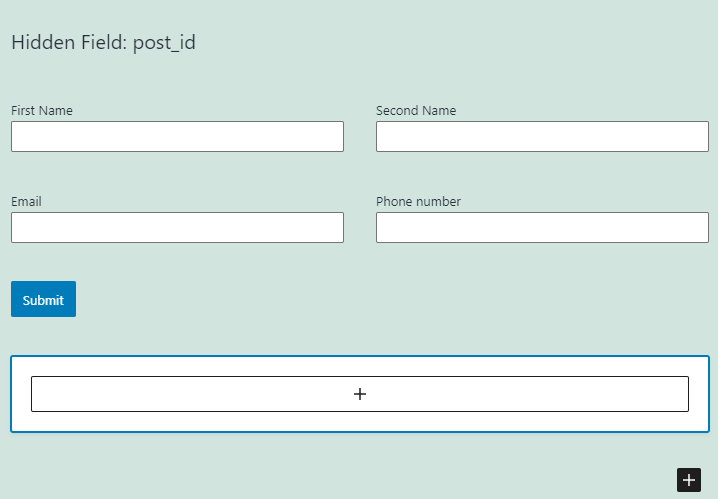
By clicking on the button with a plus-shaped icon placed directly on the block, you can add a field to it. The conditional rule will be applied to that field.
How does the Conditional Block work?
First of all, you add a field to the block by clicking the button with a plus-shaped icon. There could be several fields but be aware that they will all share the same conditional rules. Let’s name the field you add to the block a “connected” field.
Afterward, you go to the block’s settings, choose the “target” field, and set the conditions. The Conditional Block takes the value of the target field and checks if it meets defined conditions. If they do, it shows (or hides, depending on the settings) the connected field.
Conditional Block Settings
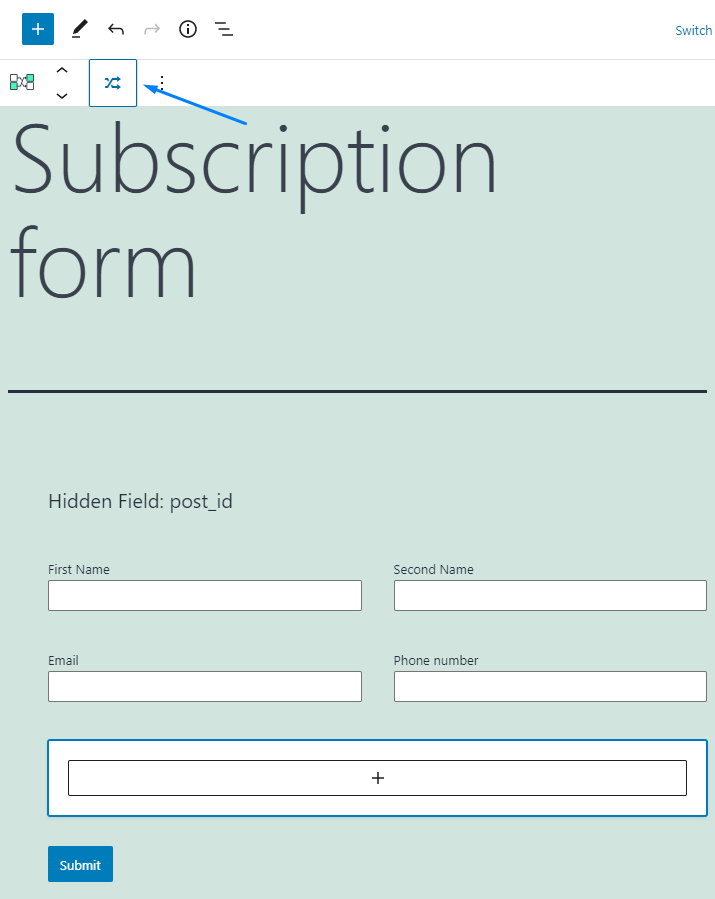
To enter the conditional rules settings, click the button with the crisscrossed arrows on the upper tools panel.
The Conditional Logic pop-up window will appear. Let’s go over the controls.
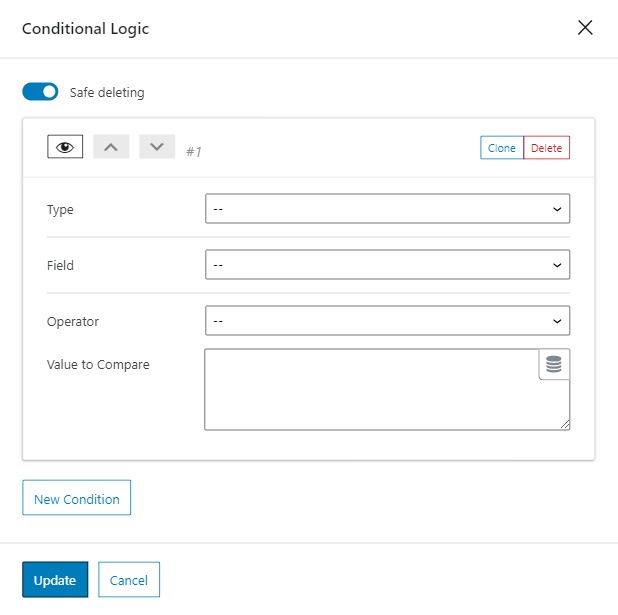
- Safe deleting. When you click on the “Delete” button, you can receive a notification message that asks you one last time if you are sure about that. This measure can help if you have hit the deletion button by accident. That notification can be disabled by turning off the Safe deleting toggle;
- Show/Hide Button. Clicking on the button with the eye-shaped icon can hide or unfold the conditional rule tile. If you have lots of rules, it may be convenient to keep them closed in terms of navigation;
- Up/Down Buttons. Those two buttons with arrows that are placed next to the “Show/Hide” button change the position of the conditional rule in the list. They move the tile one position higher or lower;
- Clone. This button creates a copy of the conditional rule tile. It will come at handy when you need to apply the same conditions to several fields;
- Delete. Obviously, it deletes the conditional rule tile.
And now let’s overview the settings.
Type
Here you can choose whether the connected field will be hidden or visible by default.
- Hide this field if. In this case, the connected field is visible by default and will be hidden only when some conditions are met;
- Show this field if. And vice versa, the field will be invisible unless the user meets the conditions you set in this tile;
- Set value for this field if. When the conditions are met, the connected field will be filled with the data you type into the Value to set bar.
For the rest of the tutorial, let’s assume you have chosen the “Show this field if” option.
Field
In this drop-down menu, you can choose the target field. All the fields you’ve added to the form this far will be listed there, named by their Labels.
Operator
This is where you choose the conditions the target field’s value has to meet. If they do, the connected field will be shown.
Equal
If the value of the target field is equal to the value you have put to the Value to compare text area, the connected field will be shown.
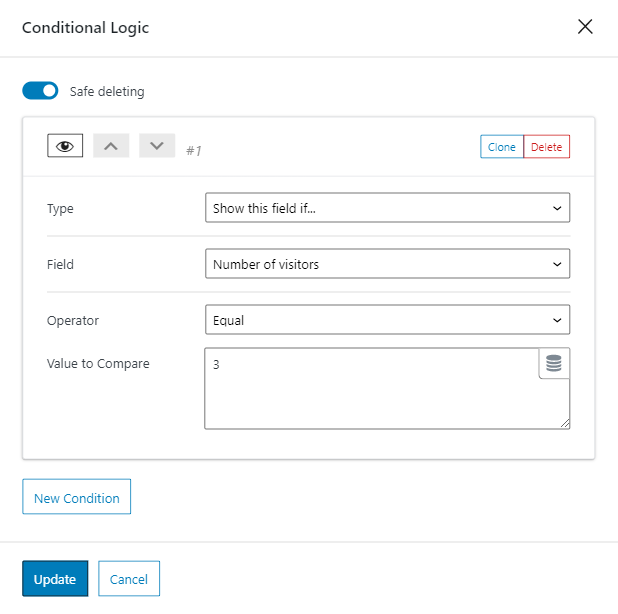
For example, let’s assume that the connected field (Number of rooms) will be shown only when the user types “3” into the target field (Number of visitors). Here’s how the Conditional Logic window will look like:
Here’s how it will look like in the front:
Greater than/Less than
The connected value will be shown if the value of the target field will be greater/lesser than the value you put to the Value to compare text area. On the frontend, it will look almost the same as the Equal operator.
Between
If you choose this operator, you have to set the range of values in the Value to compare bar. The range is defined by two numbers separated by a comma. The smaller number goes first and the bigger goes last (it has to look like that – “2,9”, not “9,2”). The first and the last numbers are included in the range, which means that if you set the “2,9” range, it will count as “2,3,4,5,6,7,8,9”.
When the value of the target field falls into the range, the connected field will be shown.
In the list
This is a special operation for the Checkboxes field. The Conditional Block will compare the value from the Value to compare bar and the value of the option, chosen by the user in the target field. If they are the same, the connected field will be shown.
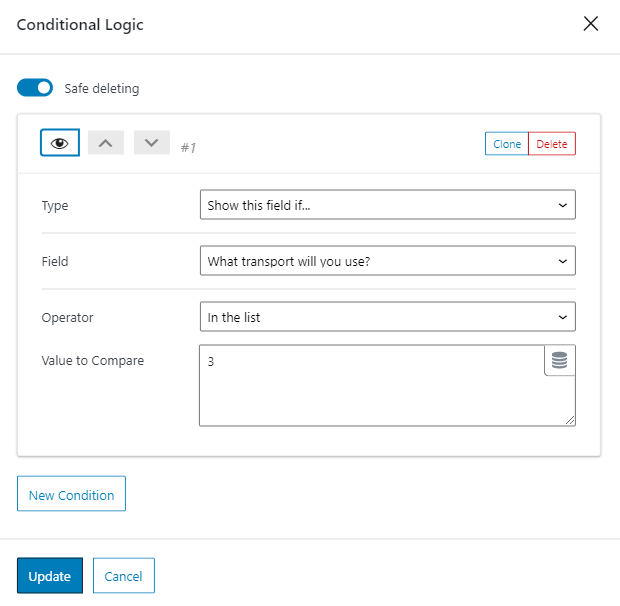
For example, let’s assume that the connected field (Parking place) should appear only when the value of the target field (What transport will you use) will be “3” (“car” option). Here’s how the Conditional Logic window will look like:
Contain text
The connected field will be shown if the text value of the target field will contain the value you put to the Value to compare bar. This operator works with the fields that contain text information – Text and Textarea field.
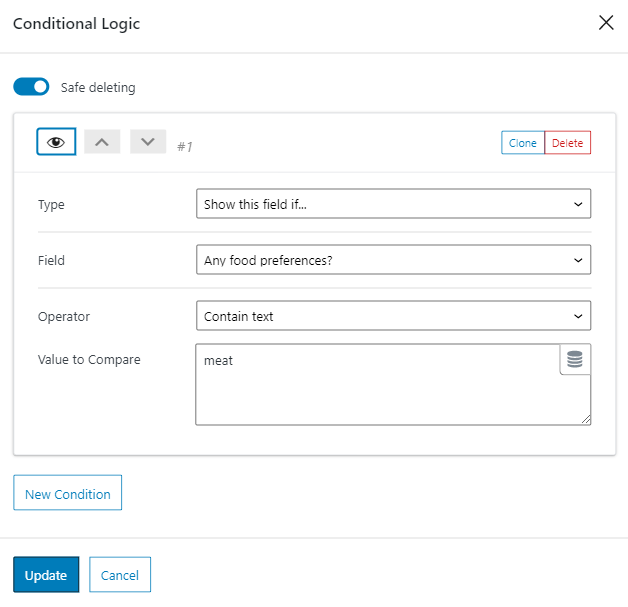
For example, you would like the connected field (Would you like to take a look at our grill menu) to appear when the user types the word “meat” into the target field (Any food preferences). Here’s how the Conditional Logic window will look like:
On the frontend it would look like this:
By the way, this operator will also work with the Media field. You can choose some format (“.jpg” for example) as the value of the Value to compare text area, and the connected field will be shown when the user adds a file of such format.
Those are all the settings of the Conditional Block. You now know how to set the visibility rules for the form fields.