
How to Apply Filters to Gutenberg Blocks
This tutorial reveals how to use JetSmartFilters filters in Gutenberg on the example of the Checkboxes filter.
The elements created and added in the Gutenberg editor are much “lighter” than those built with Elementor. They look simpler and can’t be uniquely styled but also don’t reduce the page loading speed. If you wish to sacrifice stunning designs to loading speed, the JetEngine and JetSmartFilters plugins allow you to do that. This tutorial will show you how to add filters to the Gutenberg page and configure all the necessary settings.
Add Items Grid
First of all, you need to create a grid that will be filtered by one of the JetSmartFilters widgets. Be aware that when used in Gutenberg, those filters can only work with JetEngine listing grids and WooCommerce shortcodes. Go to the page or post where you would like to add the grid and filters, and click the “Edit” button.
If you want to place a listing grid to the page and need a hint, go through our tutorial on how to use JetEngine widgets in Gutenberg.
And if you’d like to display the WooCommerce products list on this page, learn more about WooCommerce shortcodes.
Create and Add Filter Block to Page
When you are done creating the items grid, open the dashboard and go to Smart Filters > Add New. Create the filter you need. For more information, check out this filter creation tutorial.
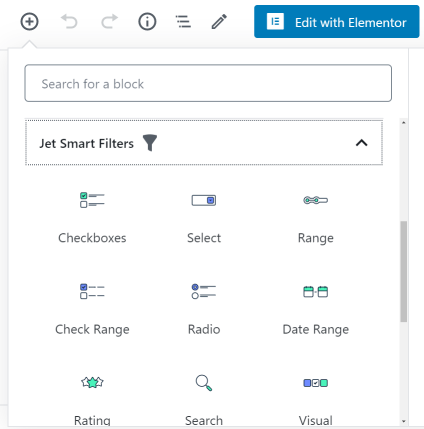
After that, turn back to the page or post with the item grid, click the “Add block” button (it has the icon of a cross in a circle), and find the Jet Smart Filters blocks tab. Choose the filter you need and click on it. In our case, it will be the Checkboxes filter.
Define General Settings
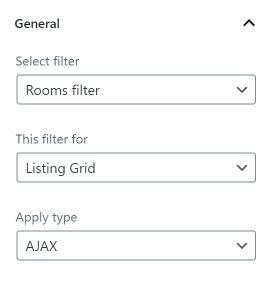
Click on the filter block and look at the General settings menu on the right side of the page. That menu is almost the same as the one you can see in Elementor. Let’s take a closer look at each feature.
- Select filter. In this drop-down menu, you have to choose the filter you created for the grid on this page;
- This filter for. There are two options here – “Listing Grid” and “WooCommerce Shortcode.” Choose the one matching your items list;
- Apply type. This feature defines how the sorting results will be presented to the user. “AJAX” means that the sorting results will appear without reloading the page. The “Page reload” option will reload the page to show the filtering results. And if you choose the “Mixed” option, the page won’t reload but the URL of the page will change;
- Apply on. Here you can choose if the results will be shown after the user changes the value or once the Apply button is clicked;
- Show apply button. If you have chosen the “Click on apply button” option in the previous feature, turn this toggle on to show the button;
- Apply button text. The text you will type in here will be placed on the button;
- Show filter label. This option will be useful if you have several filters to apply. When enabled, it shows the filter label.

Set Indexer Options
The indexer is a feature that shows how many items match every sorting option. The number of items is shown near the option in brackets. If you would like to enable that option, it is not enough to turn on the toggle in the menu.
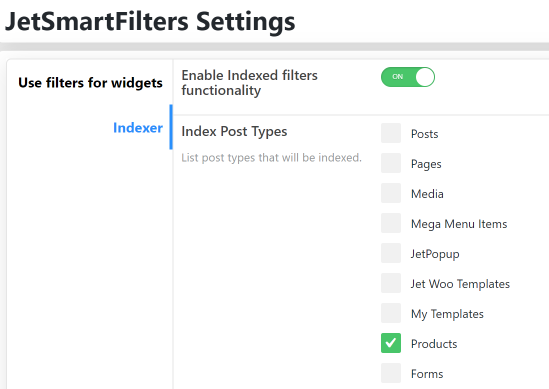
First of all, you have to open the Dashboard and go to JetPlugins > JetSmartFilters Settings > Indexer. Turn on the Enable Indexed filters functionality toggle, click on the proper post type, and click the “Save” button.
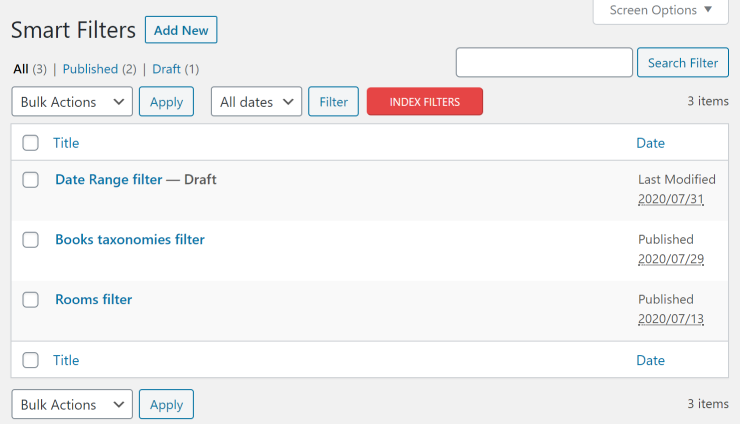
After that, proceed to SmartFilters, open the list of filters, and hit the “Index Filter” button.
Now you can turn back to the page with the grid and filters and continue with the settings. Unfold the Indexer Options menu tab and turn the Apply Indexer and Show Counter toggles on. After that, you can choose whether to show the counter with zero value when the option is empty and when to change counters.
After you’re done with all the settings, click the “Update” or “Publish” button and go to the front to see what it will look like.
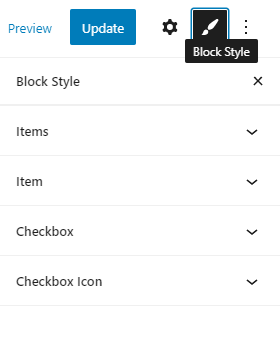
If you have JetStyleManager installed, you can also customize the appearance of the filter block. In that case, after clicking on the filter block, you will see a “Block Style” button next to the “Settings” button. Hit it, and you will see a set of sections that contain the design settings of the block elements. You will be able to choose alignments, sizes, colors, fonts, gaps, and other features of the filter design. Play with the settings to achieve the result that will fit your taste.
That’s it. You now know how to apply a filter to the grid without editing it in the Elementor page builder.