
How to Translate Woo Page Templates Using WPML
From this tutorial, you will learn how to prepare a WooCommerce shop website to be translated with WPML modules and how to use them to translate the JetWooBuilder templates.
JetWooBuilder is a WooCommerce page builder for Elementor. Using its 60+ widgets, you can create unique Elementor product page layouts and templates for My Account, Thank You, Cart, Checkout, and other pages. If you don’t want to build page templates from scratch, you could use custom Woo page templates.
JetWooBuilder is now WPML-compatible, which means you can translate its templates and widget-added content into multiple foreign languages. This tutorial will take you through basic preparation steps and show how to translate JetWooBuilder templates step-by-step.
Making the WooCommerce Shop Website Translation-Ready
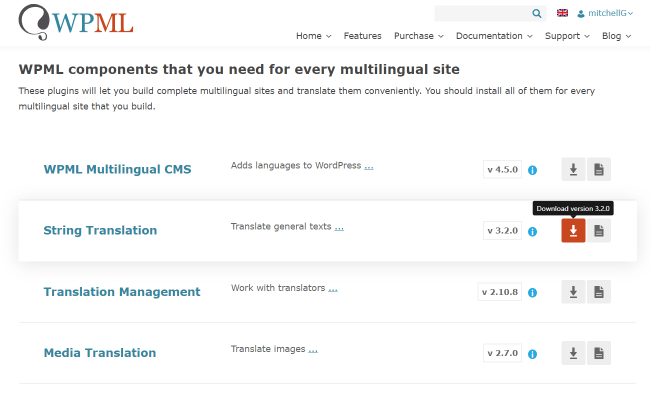
To translate a WordPress website, you’ll need the core WPML Multilingual CMS plugin.
- Go to the WPML pricing page and get the Multilingual CMS plugin.
- Proceed to Plugins > Add New, upload the .zip file, and activate the plugin after installation.
- Run the WPML Setup wizard.
- Add the necessary languages and choose the URL format.
- Register WPML.
- Choose the preferred translation method.
- Install the glue WooCommerce Multilingual WPML plugin.
- Complete the remaining installation steps.
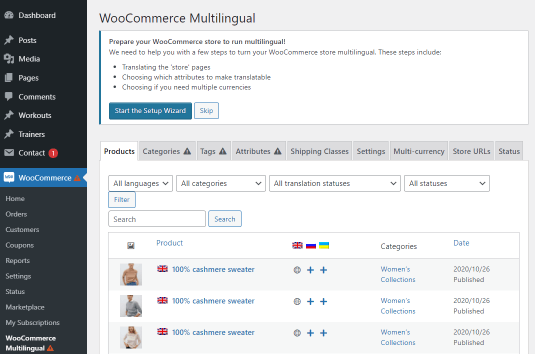
As soon as you complete the WPML Setup, proceed to adjust WooCommerce Multilingual.
- Open the WooCommerce > WooCommerce Multilingual pathway in the WordPress admin panel.
- Click the “Start the Setup Wizard” button.
3. Go through the installation steps and decide on the Translation Option. By default, the system offers three allowing you to:
- translate all products automatically;
- choose which products to translate and display only translated products;
- choose which products to translate and display those with no translation as untranslated.
4. Close the setup window after you complete all steps.
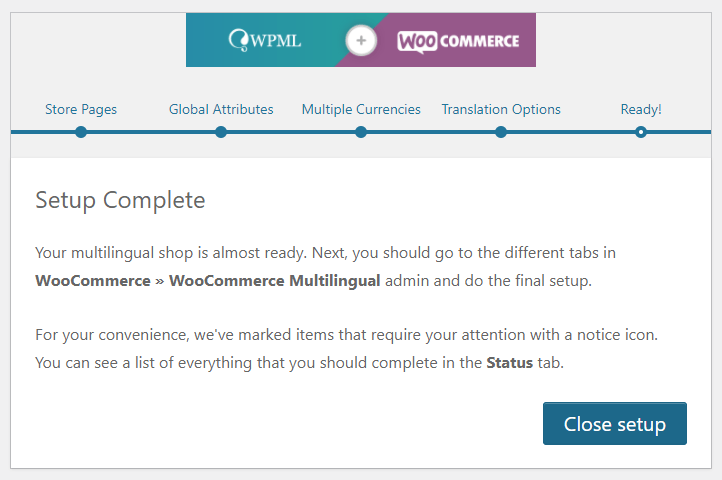
Afterward, do the final multilingual shop setup. Go to WooCommerce > WooCommerce Multilingual > Status and fix the issues marked with a notice icon.

Once done, you can proceed to translate the Elementor WooCommerce plugin templates.
How to Make the JetWooBuilder Templates Translatable
JetWooBuilder is a multi-component plugin, so it requires some time configuring. For starters, you’ll have to make its templates, meta fields, products, widget strings, and taxonomies translatable. Otherwise, the WPML plugin will be unable to detect the JetWooBuilder content and translate it into secondary languages.
Primary preparations
As mentioned previously, you are supposed to buy the Multilingual CMS plan and install/activate the WPML String Translation, WooCommerce Multilingual, and WPML Media Translation modules.
Install and activate the Multilingual Tools plugin
Multilingual Tools is a WPML plugin that can help you generate the wpml-config.xml file and place it into the root folder of the theme/plugin. You can find out more about language configuration files. In brief, such a file is meant to tell WPML which custom post types, taxonomies, meta fields, etc., need to be translated.
- Download the Multilingual Tools plugin from GitHub by clicking Code > Download ZIP.
- Upload the .zip folder to WordPress through the Plugins > Add New directory.
- Activate the plugin once installed.
Once done, you will see a new tab in the WordPress admin panel called “Multilingual Tools.”
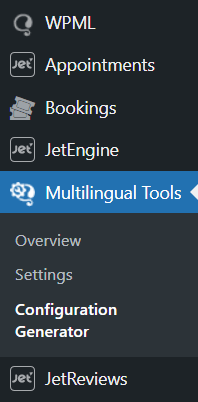
Generate a language configuration file
Proceed to the Multilingual Tools > Configuration Generator directory. Here, you will see five sections:
- Custom Post Types;
- Custom Fields;
- Custom Taxonomies;
- Admin Texts;
- Shortcodes.
Each section allows you to set which elements should be translated.
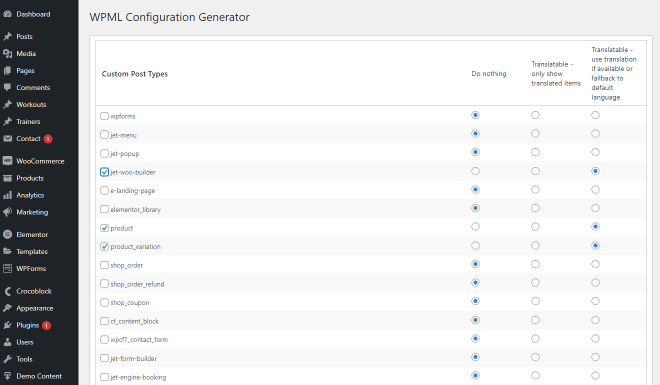
In the Custom Post Types section, there are three options you can choose from:
- Do nothing. Select this radio button to ignore the items;
- Translatable – only show translated items. Select this option if you prefer to output only translated items on the front end;
- Translatable – use translation if available or fallback to default language. If you select this option, the items will be displayed either in the second or default language, depending on the provided translations.
Tick the JetWooBuilder-related post types and set the option to “Translatable.”
In the Custom Fields section, you can choose one of the four available options:
- Don’t translate – the custom field values will be outputted in the default language on secondary-language pages;
- Copy – by selecting this option, the plugin will always copy the default-language values of custom fields to the secondary-language site version, including the cases when the initial custom field value has been modified in the primary language;
- Copy once – select this option to make the plugin copy the custom field value to the secondary language during the first-time translation. Moreover, if you prefer setting a different value here, the previous value won’t overwrite the new one;
- Translate – the custom field values will be made translatable.
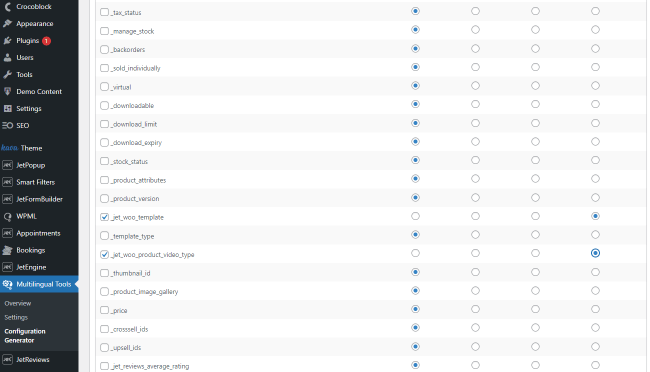
Detect the JetWooBuilder custom fields and tick them. In our case, there are three fields: _jet_woo_builder_content, _jet_woo_template, and _jet_woo_product_video_type. You can choose to translate all three custom fields or set different options for each. Please make sure to set the _jet_woo_template field to “Translate,” as it will help the WPML modules pick the JetWooBuilder template content.
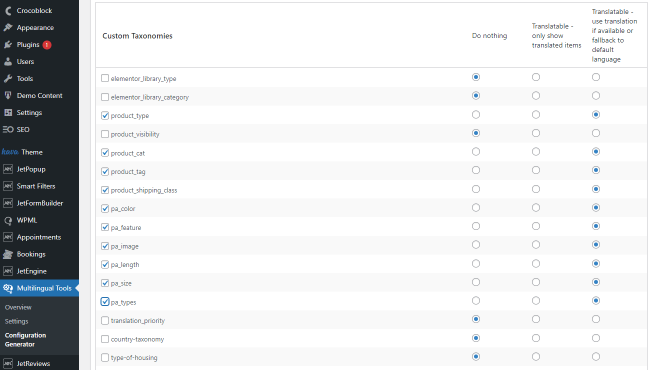
Furthermore, there is the Custom Taxonomies section.
WooCommerce websites are usually multi-page marketplaces where it’s possible to buy anything from clothing to tools and vehicles. To make it easy to navigate, website developers tend to categorize scattered items and products, creating the so-called taxonomies.
Find the JetWooBuilder and WooCommerce-related taxonomies in the dedicated section and set the option to “Translatable.” Don’t forget to tick the items.

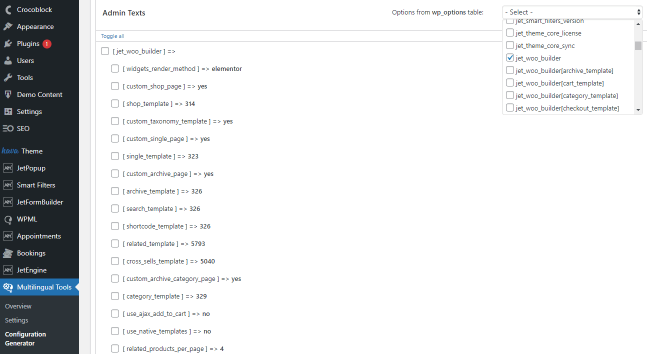
Lastly, we’ll need to set the Admin Texts section, which stores the plugin strings. There are many JetWooBuilder strings on the website, yet not all should be translated. We’ll choose the major one – “jet_woo_builder” – to let the Configuration Generator know it must be added to the wpml-config.xml file.
Afterward, scroll down the page until you see the “Generate” button. Firstly, choose the preferred option between “Save to theme directory” and “Save to file.”
- Save to theme directory. It means that the newly-generated configuration file will be immediately saved to the theme folder.
- Save to file. The language configuration file will be saved to the PC Downloads folder in the XML format.
We decided to use the first option to save time and effort. Secondly, press the “Generate” button. That’s it. Now you can proceed to translate the WooCommerce taxonomy content and JetWooBuilder templates.
Translating taxonomy terms and slugs
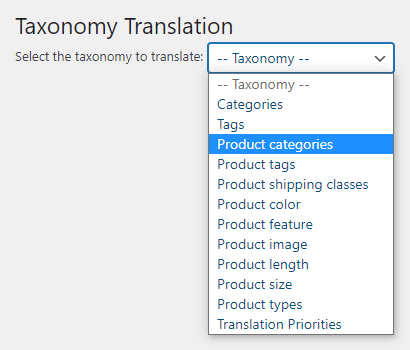
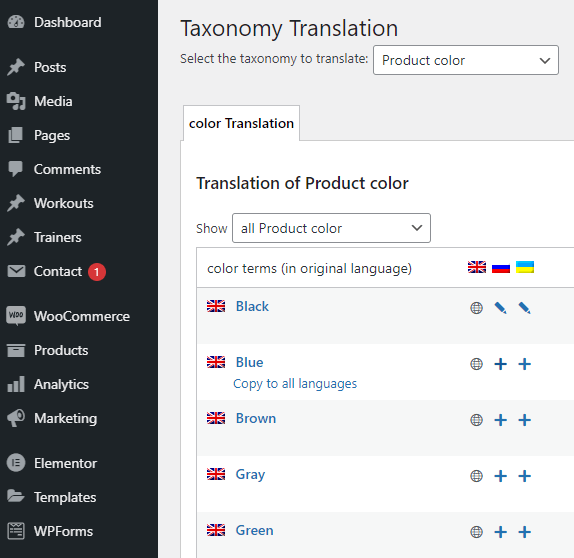
Follow the WPML > Taxonomy translation pathway and select the needed taxonomies from the drop-down list. Since we are translating the WooCommerce website items, it is vital to choose those related to products like Product types, Product color, Product categories, Product size, etc.
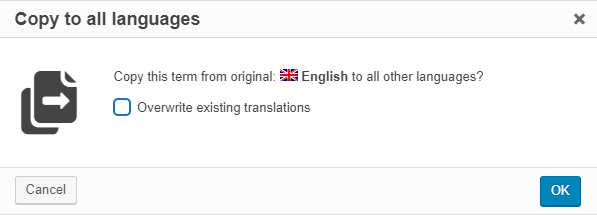
Once the taxonomy translation page opens, press the “+” icon to start adding translations. Provide the translation and click the “Save” button. Repeat these steps until all taxonomy terms, labels, and slugs are translated into the preferred languages.
Not sure how to add a taxonomy term translation correctly? This JetEngine tutorial will have you covered.
If you have any questions along the way, take a look at this taxonomy translation tutorial by the WPML team.
After you submit all taxonomy translations, they will be automatically synced to the WooCommerce Multilingual module. However, some translations are still missing, and it’s crucial to provide them. Otherwise, the site content won’t be adequately displayed on the front end.
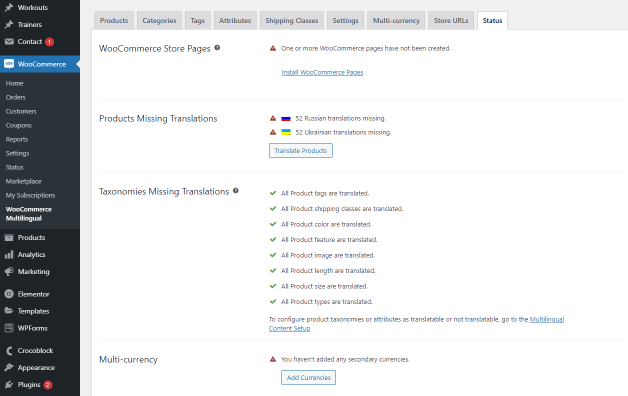
As you can see, it is necessary to translate the WooCommerce products and configure the multi-currency mode.
Translating the WooCommerce products
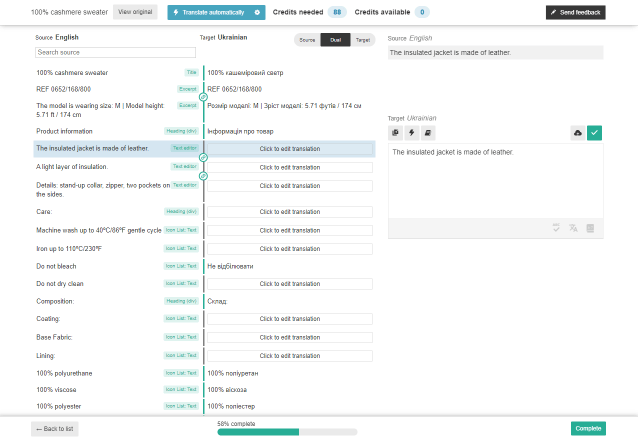
Open the WooCommerce > WooCommerce Multilingual directory. By default, you will see that the first tab, Products, is open. Start adding translations to each product by clicking the “+” icon next to its name.

Once you see the Advanced Translation Editor page, enter translations line by line. You can do it manually or use the Translate automatically option on the top toolbar. Please note that it will be possible to press “Complete” and finish the product translation only when the bottom progress scale is 100% full. Repeat the procedure for every separate WooCommerce product.
Configuring the multi-currency mode
Now that you can output translated WooCommerce products on the secondary-language pages, it is crucial to show relevant pricing.
To set up the multi-currency mode, head to WooCommerce > WooCommerce Multilingual and open the Multi-currency tab. Enable the multi-currency mode if not active and choose the option according to which the currencies will be shown.
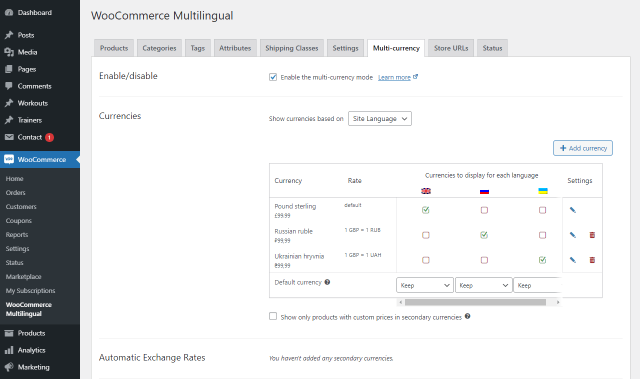
You can choose between “Site Language” and “Client Location.” To add a new currency, press the “Add currency” button. In the Currencies section, there is a table where it is possible to set the relevant currency for each site language. By ticking/unticking the corresponding checkbox, you will show a particular currency on the given website version. Configure the remaining settings and press “Save changes.”
How to Translate the JetWooBuilder Templates
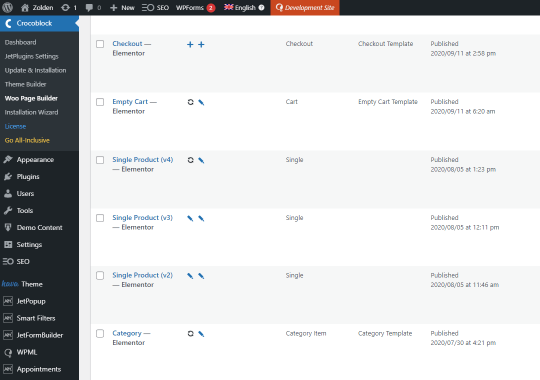
Now, let’s proceed to translate the actual JetWooBuilder pages. Open the Crocoblock > Woo Page Builder directory, which stores all the site page templates. Pick whichever template you wish to translate and press the “+” icon to add the translation in the desired language. Then submit the translated content by clicking “Complete.”
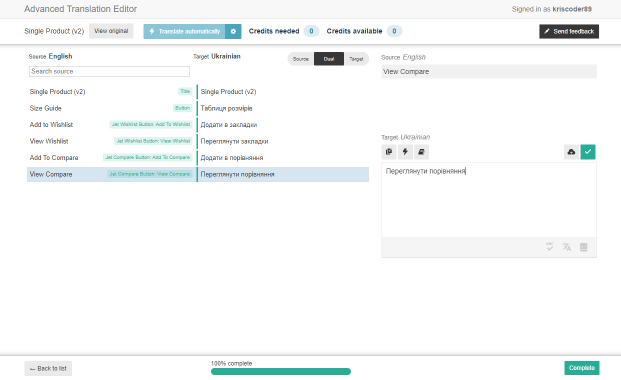
Repeat the process until all the necessary Woo Page templates are translated.
It’s time to see the final result on the front end. Navigate to the desired page in the selected secondary language and see the way it looks.
Please remember that JetWooBuilder page templates can contain sections and elements from other Crocoblock and default WordPress plugins, but that does not mean the WPML modules will be equally able to pick and translate them. Therefore, you will have to do some extra setup. Perhaps, the following Crocoblock tutorials will help:
That’s all. Now you know which WPML modules you should use to translate JetWooBuilder templates into any preferred language.