
JetMenu Dashboard Overview
This tutorial will guide you through all settings available in the JetMenu Dashboard.
JetMenu is a first-class plugin that allows creating a mega menu with Elementor and Gutenberg. Look through all settings available in the WordPress Dashboard > Crocoblock > JetPlugins Settings.
General Settings Overview
On top of the General Settings tab, you will find tools for creating a preset of current options — Preset Manager; you can also use Export and Import Options and Reset Options.
Beginning with the first button, you can create, update, apply the preset globally, or delete it. This feature is needed to save different adjustments you make and use them only for the desired menu.
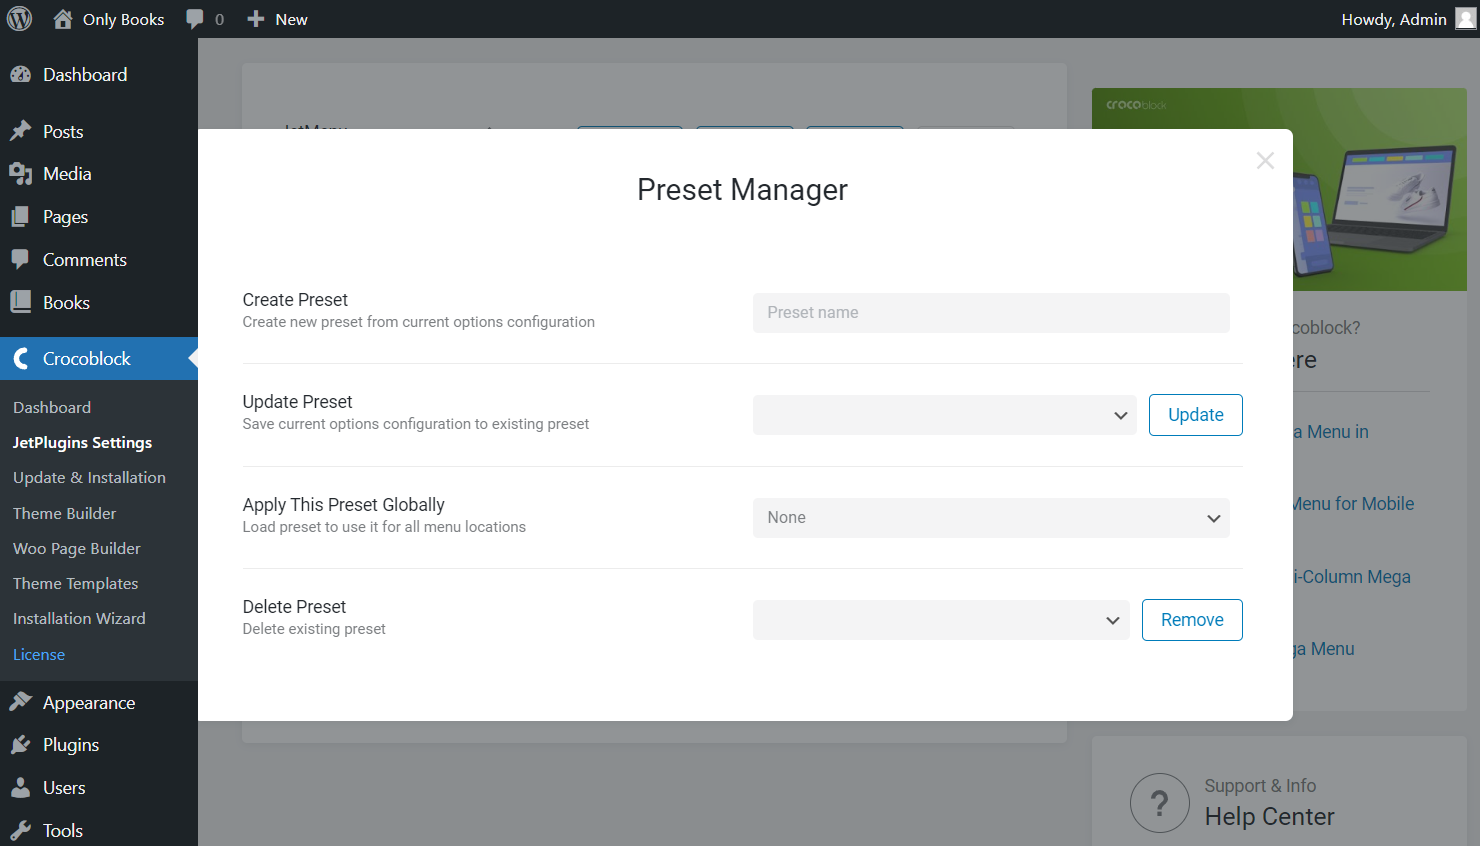
You can also find out how to export and import items, reset the customizations, and check the following settings.
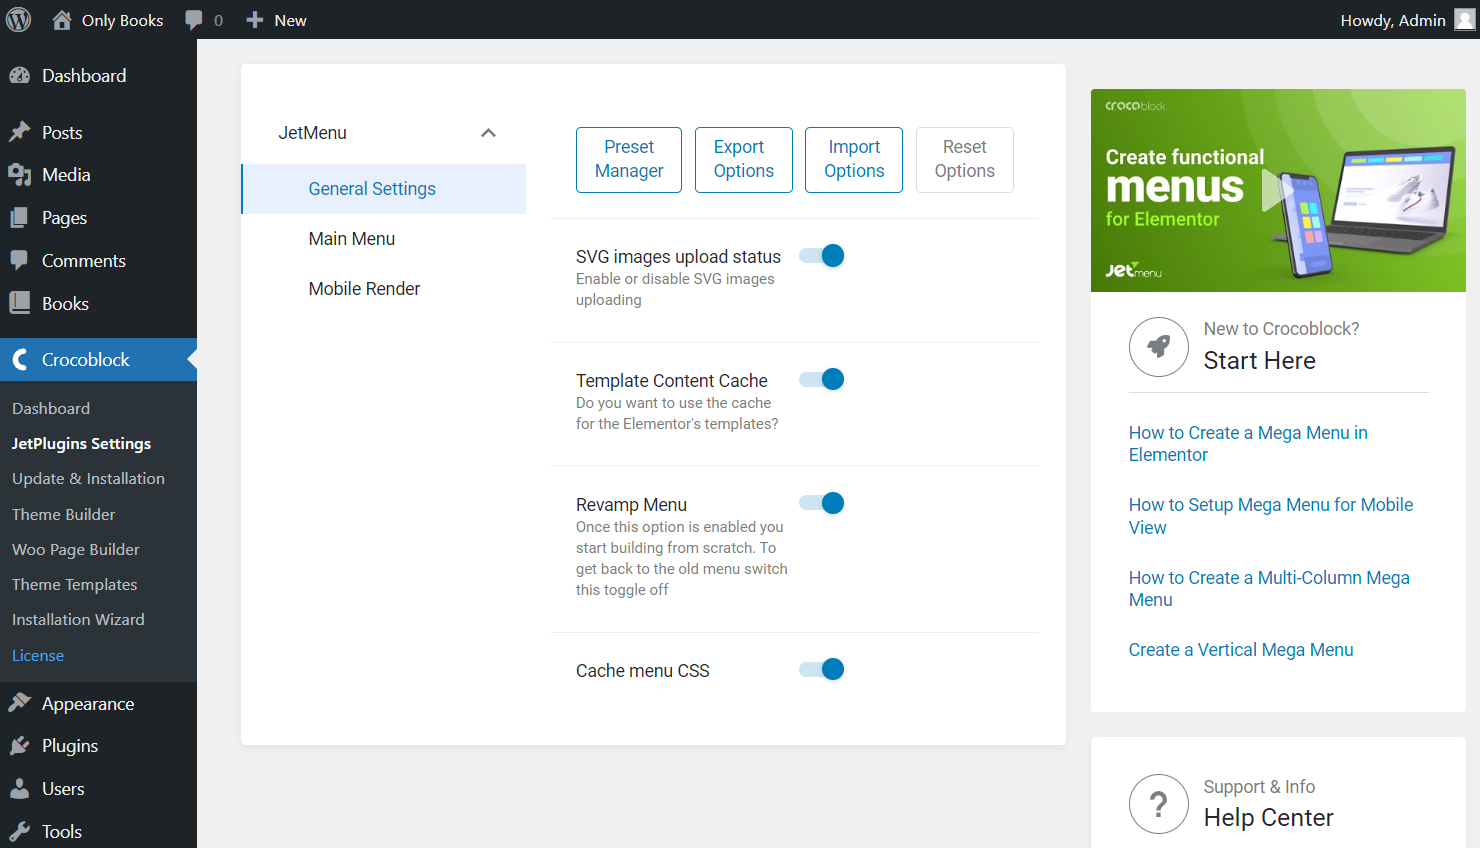
- SVG images upload status — toggle on this option if you want to upload SVG images;
- Template Content Cache — lets you use the cache for the Elementor’s templates. For instance, you can place the Elementor header or footer in the menu and apply caching with this toggle;
- Revamp Menu — switches plugin to a newer version with new options and settings. Activate it if you haven’t done it yet, as here we will look through the settings available once this toggle is switched on;
- Cache menu CSS — enable this option if you want to cache menu CSS appearance.
Let’s get a closer look at what the Revamp Menu option does. It’s a keynote feature that solves the backward compatibility problem. When this option is enabled, all settings made on JetMenu Dashboard will apply to menus from WordPress locations only.
To style up any other menu, use the settings from Mega Menu, Vertical Mega Menu, and Hamburger Menu widgets. Also, the same blocks are available in the Block Editor; read more about Mega Menu and Hamburger Menu.
Check new Mega Menu widget options with the Revamp Menu option enabled.
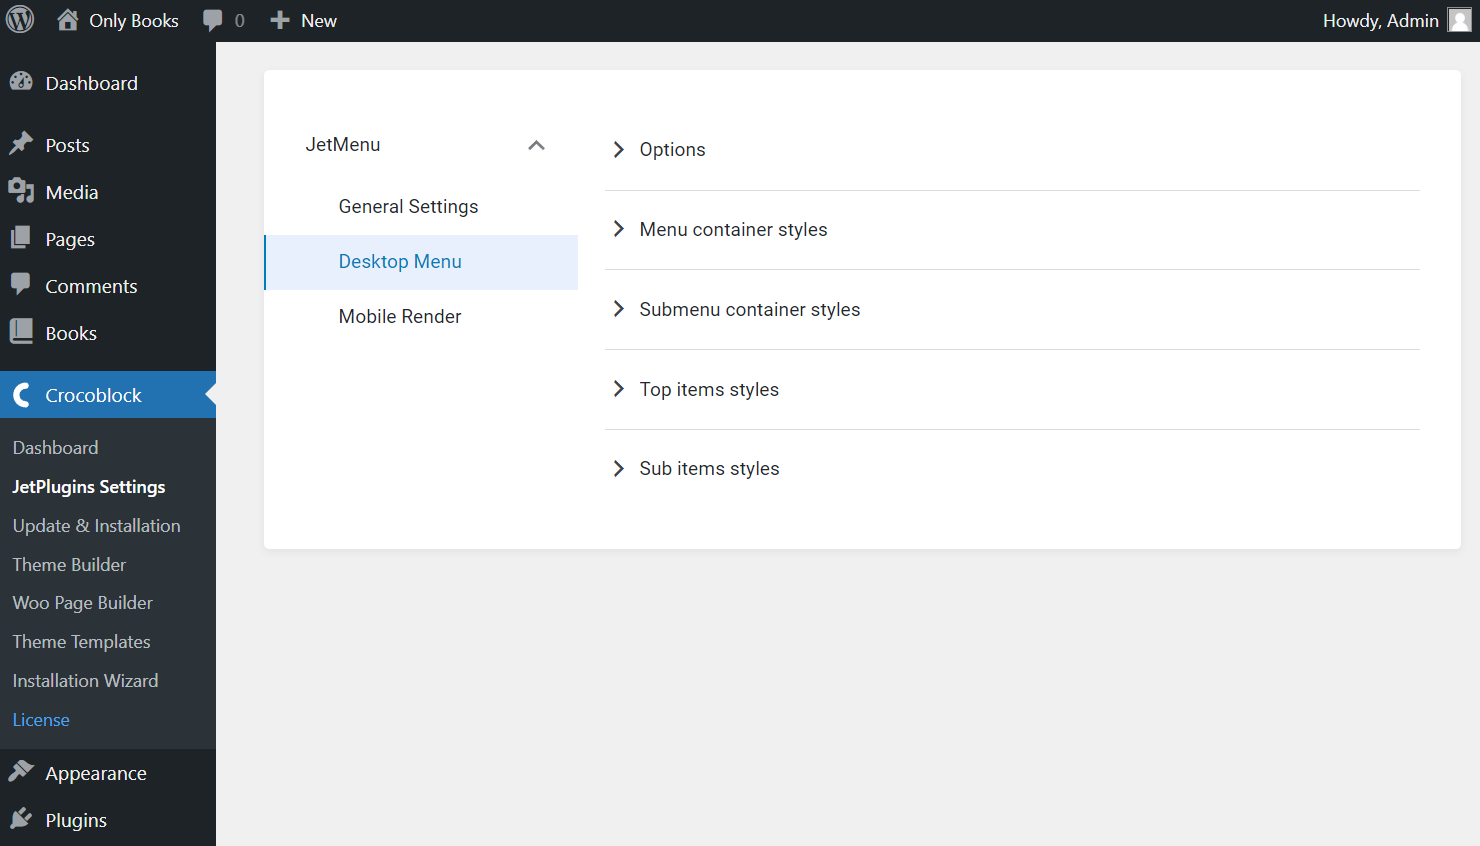
Main Menu Settings
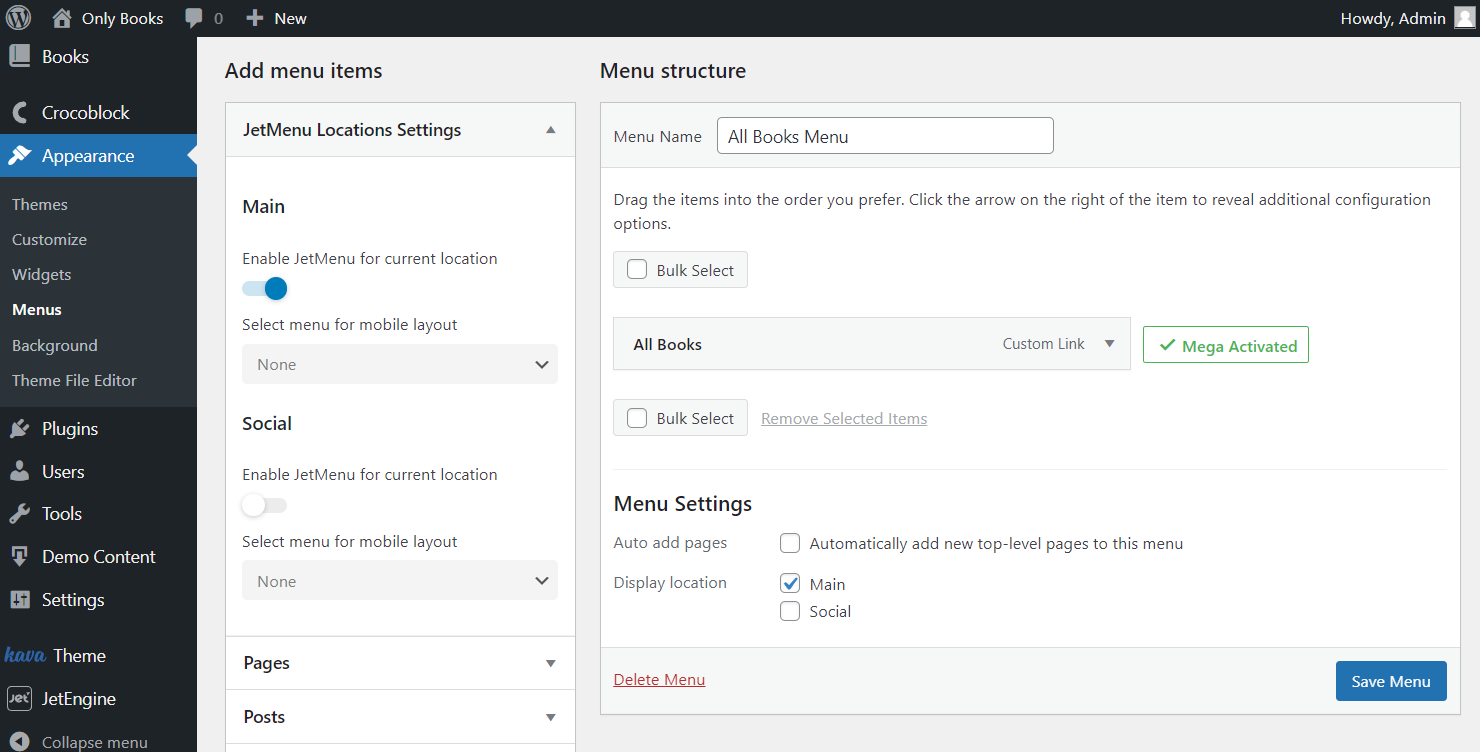
As mentioned before, the settings below work only for menus from WordPress locations.
Discover the features that are available for customization in the presented tabs. Thus, you will find three tabs on the Main Menu section: Layout, Main Menu, and Dropdown.
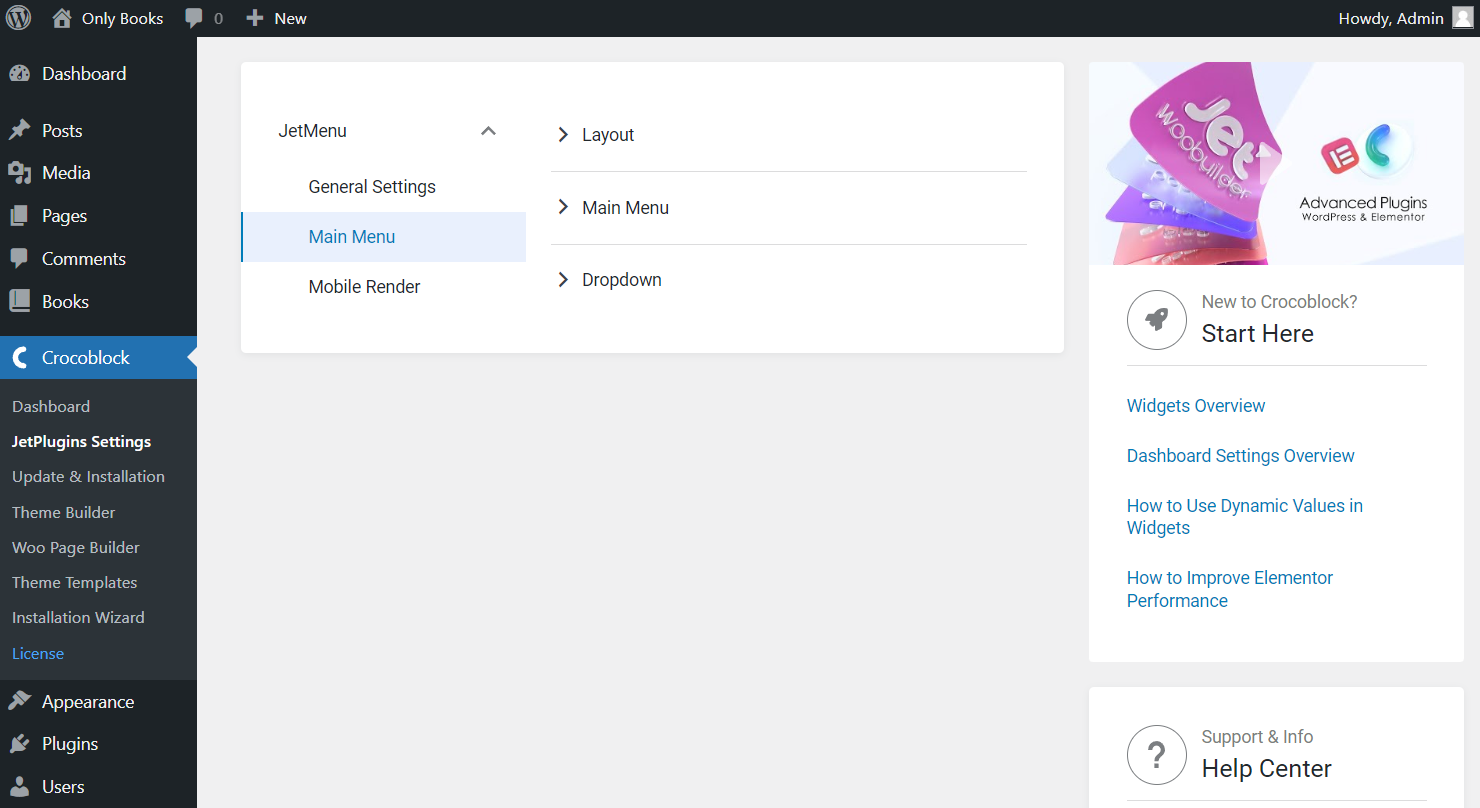
Let’s check what settings you can set on the Layout tab.
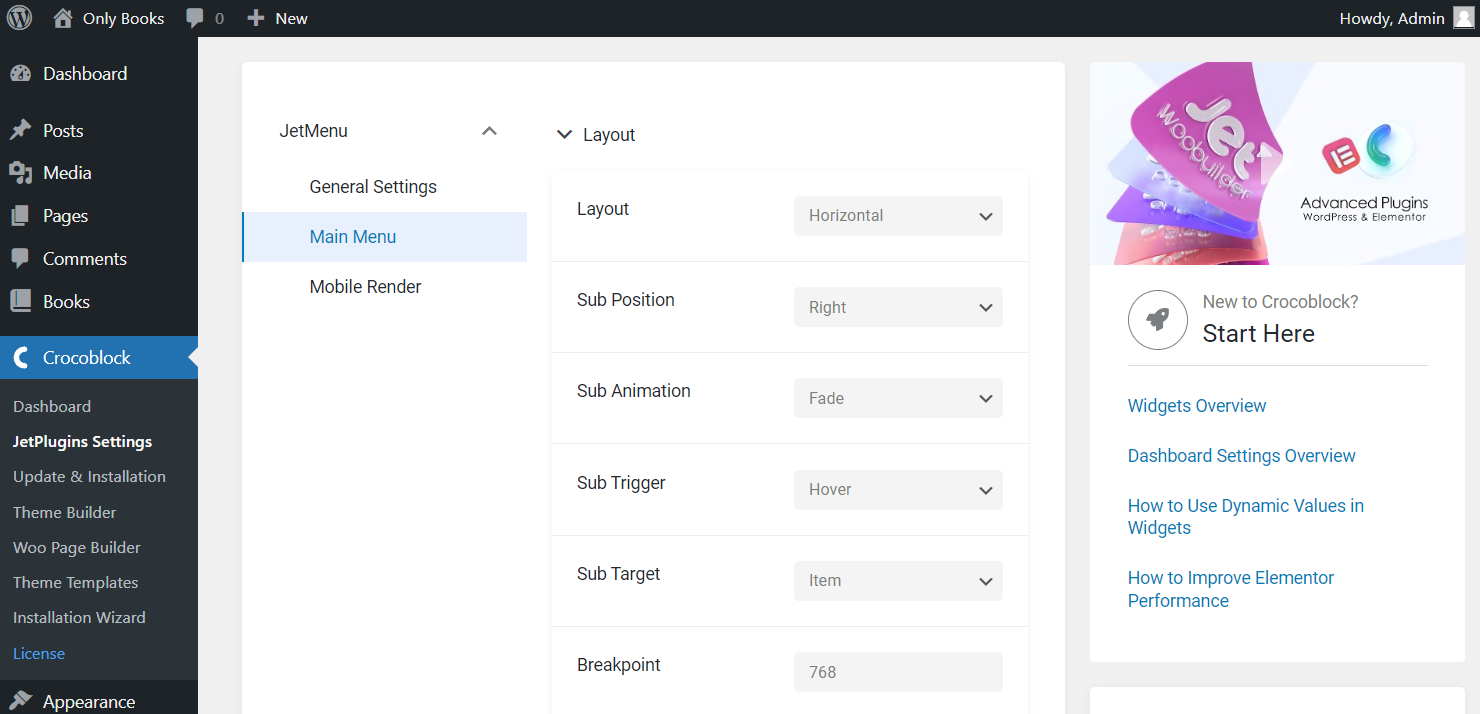
- Layout — decide between “Horizontal,” “Vertical,” and “Dropdown” menu options;
- Sub Position — position your submenu items to the right/left of the main menu item;
- Sub Animation — choose a “Fade” animation effect for your submenu items, or leave it without animation (“None”);
- Sub Trigger — select a trigger that opens the submenu (“Hover”/“Click”);
- Sub Target — submenu will be opened by clicking on the chosen element (“Item”/“Sub Icon”).
- Breakpoint — by setting this option, you will switch the menu view to a mobile layout;
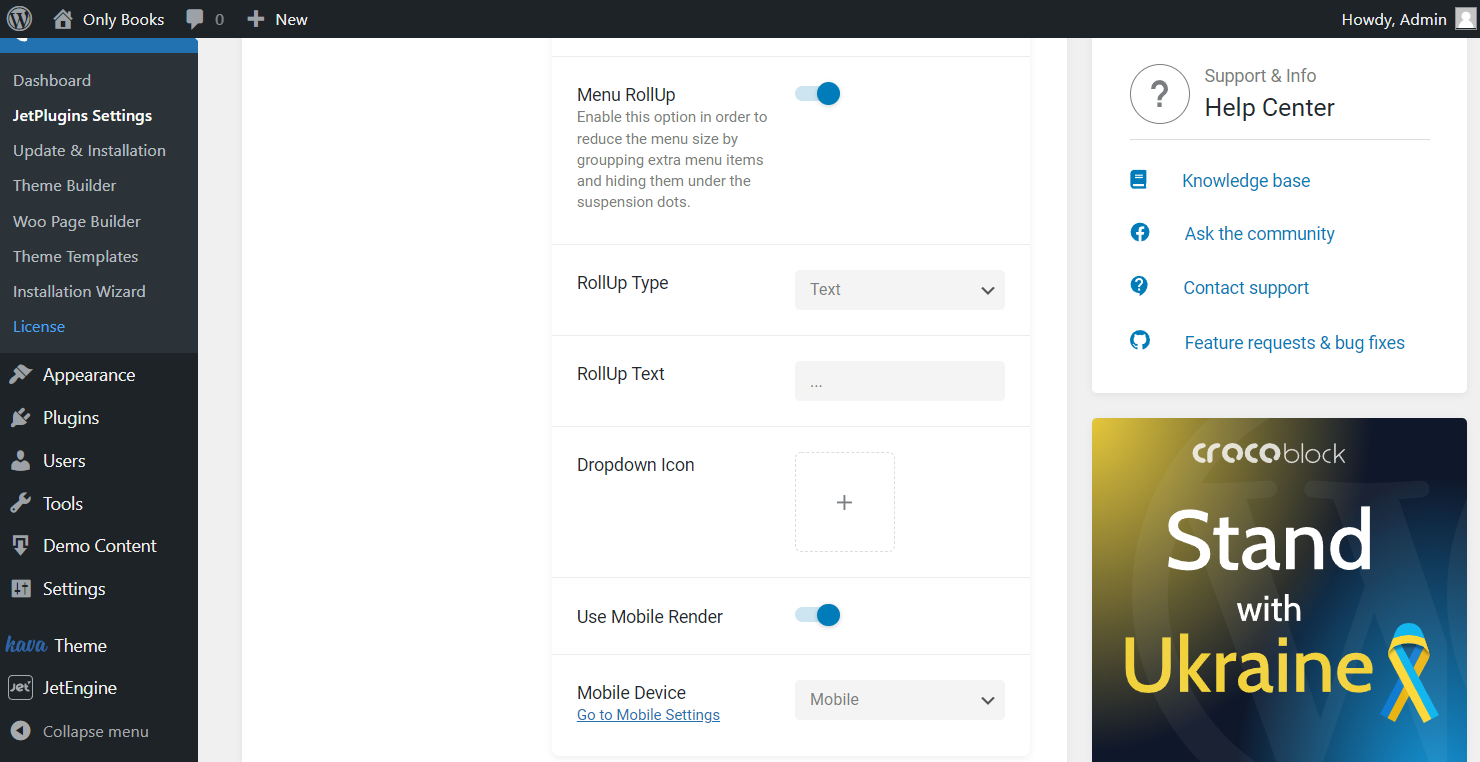
- Menu RollUp — activate this option to group extra menu items and hide them under the suspension dots;
- RollUp Type — select here an item to replace the menu items outside the menu container. It can be “Text” or “Icon”;
- Dropdown Icon — allows you to upload a custom icon for the dropdown menu. It supports all WordPress media formats, although it is highly recommended to use SVG icons for better further customization. Also, note that if you use JetMenu blocks/widgets, you can upload the icon right in the Block Editor or Elementor block/widget settings;
- Use Mobile Render — this option enables or disables the Mobile Render mode and implies choosing a Mobile Device for menu rendering — either “Mobile” or “Tablet and Mobile.”
Let’s have a closer look at the Main Menu tab settings.
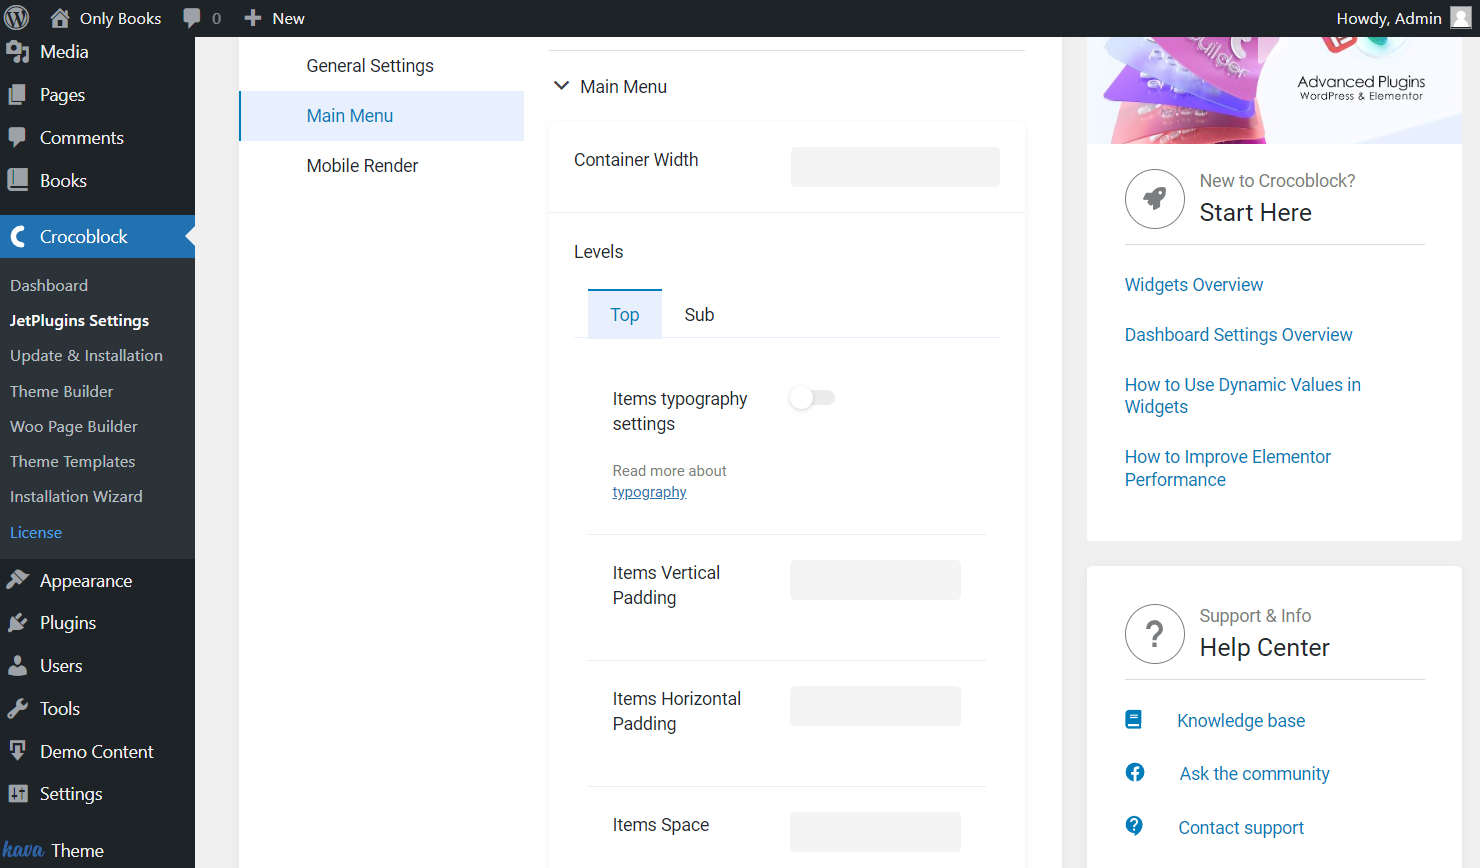
- Container Width — set an appropriate value for your menu container width;
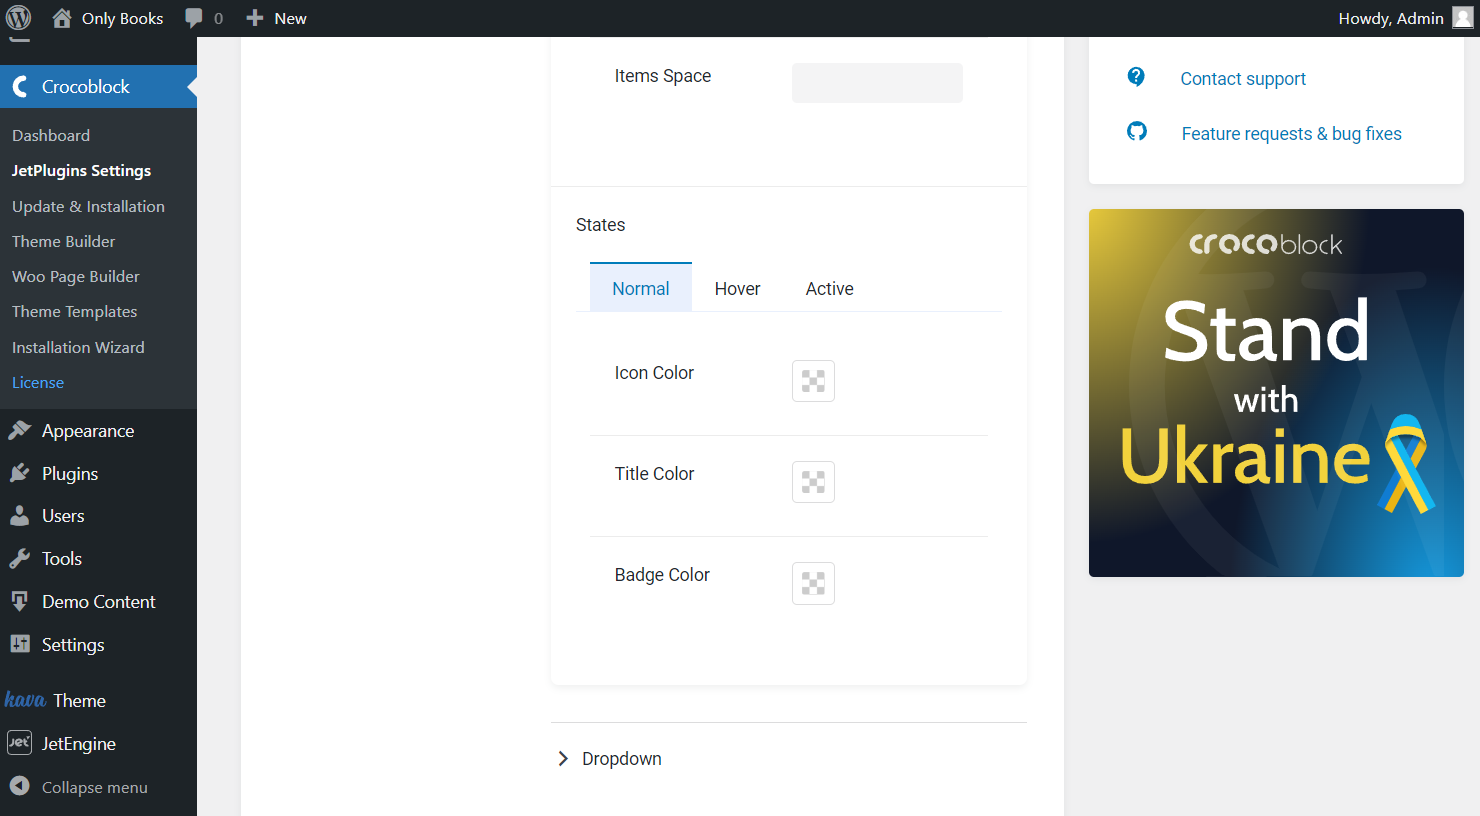
- Top Level — you will find tools for customization of typography settings, vertical/horizontal paddings, and items space of top-level menu items;
- Sub Level — the same options are available for submenu items; you will also find a tool for selecting a container color here.
To make your menu more attractive, choose different colors for icons, titles, and badges on other states: Normal, Hover, Active. Check the example on our JetMenu demo.
The Dropdown menu has the same settings as the Main Menu items. The only new option here is Dropdown Toggle. Set up the Toggle Size in pixels.

Mobile Render Settings
Customize your mobile menu with the help of options represented on this tab.
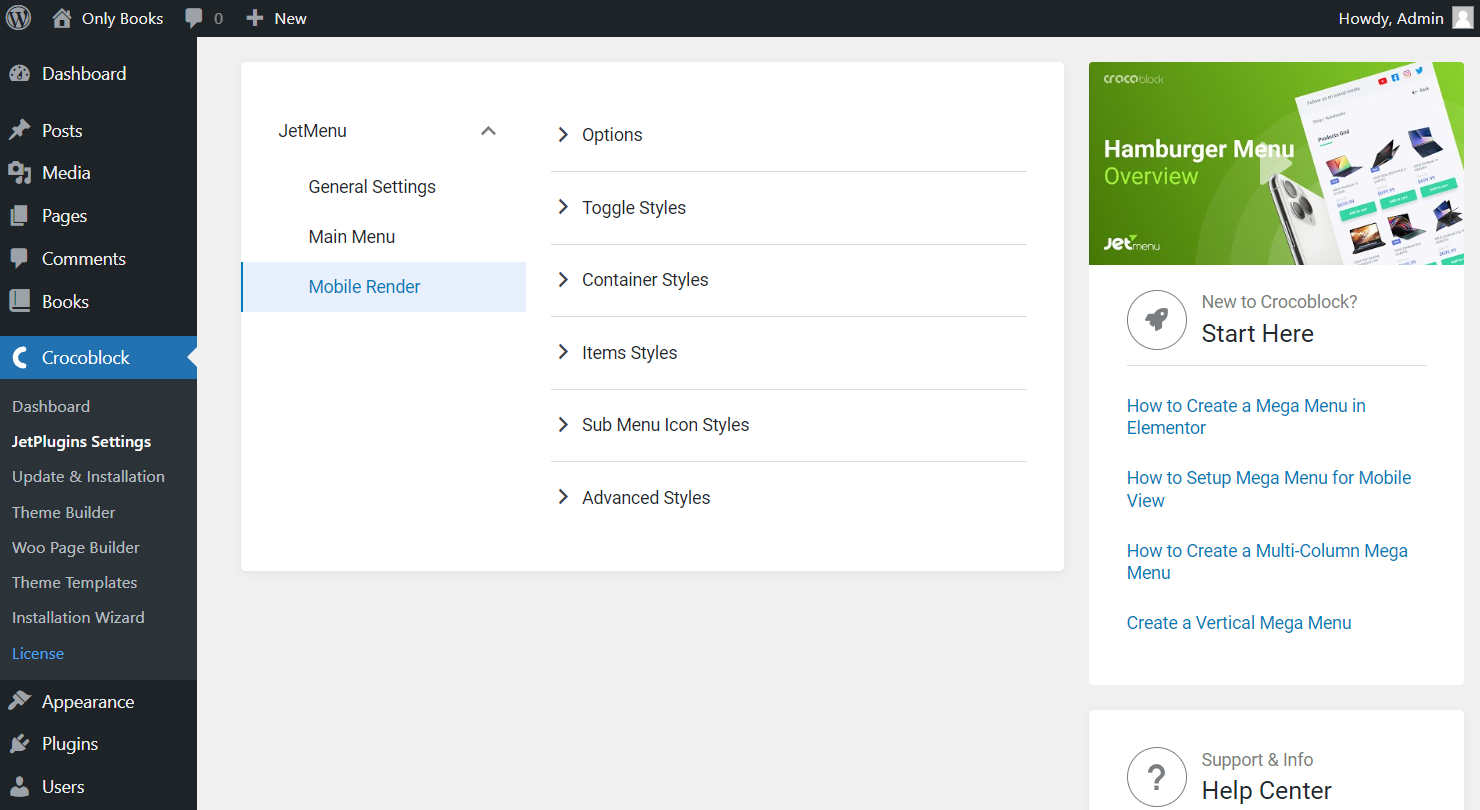
In short, you can select the layout, toggle and container position, submenu trigger and layout, templates for header content, before items content, and after items content on the first Options tab. Also, customize icons, enable Breadcrumbs, show or hide item descriptions, etc.
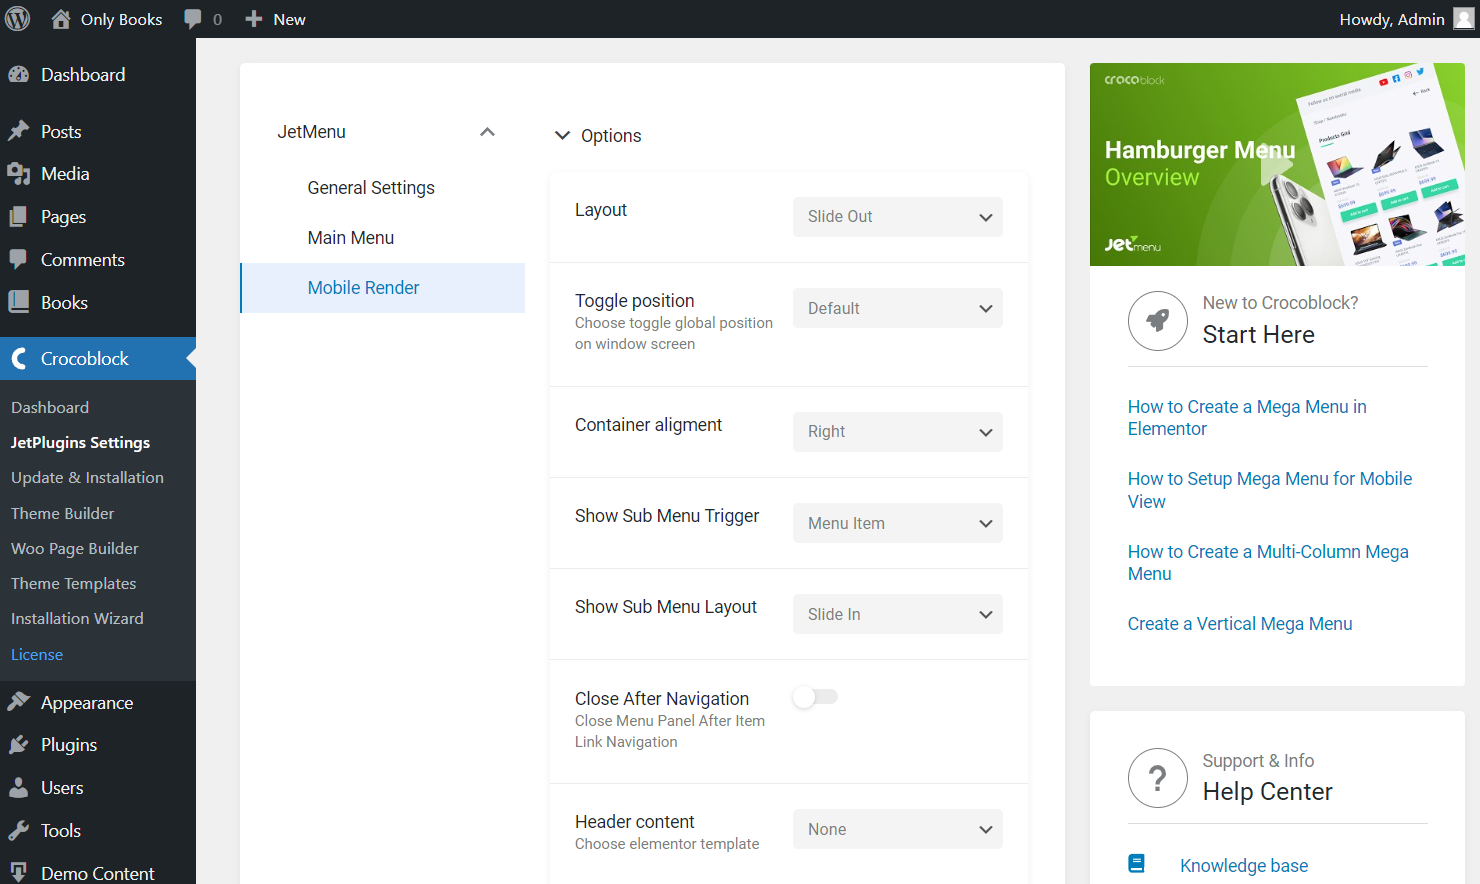
Check out all these features for Mobile Render in more detail.
That’s all you should know about JetMenu Dashboard settings. Don’t hesitate to try these options and make the site menu even more attention-getting.