
How to Install Plugins Manually
This tutorial explains the process of JetPlugins' manual installation. Feel free to learn how to do it via WordPress Dashboard.
Apart from the installation using the Crocoblock Wizard tool, there is another way to install plugins, and maybe you’ll find it more suitable. This tutorial is dedicated to the process of manual installation of JetPlugins. You can use this method in case you don’t need to install the Kava theme or demo content and just want to install one or several Jet Plugins using FTP or your server’s cPanel.
So let’s find out how to install any of JetPlugins smoothly in a step-by-step way without the Kava theme’s installation.
Installing the plugins
Log into your Personal account, and click the Downloads block.
The Plugins block shows the information about all the plugins which you can download, the versions of the plugins, and the short description for each of them.
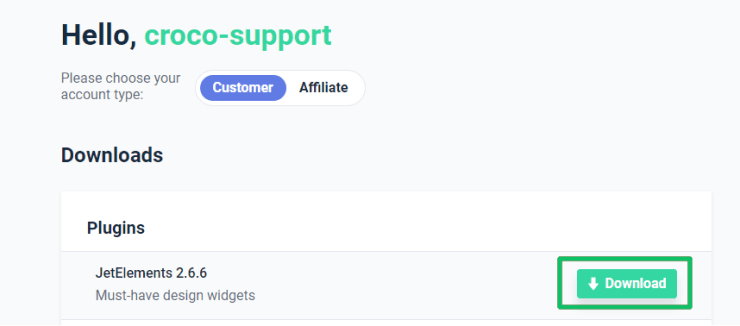
If you want to download any plugin, click the Download link. After the downloading process is finished, you can find the .zip package with the plugin in your downloads folder on the hard drive.
Now that you have the plugin’s package in .zip format, you can install the plugin manually via WordPress Dashboard or using FTP-client.
Manual Plugins Installation (via FTP)
Installation of the plugins via FTP suggests that you need to use some additional tools, but nevertheless, someone might find this way more convenient in certain circumstances. So let’s find out how to do it in detail.
To provide the installation via FTP, you should have an FTP client that is simple and comfortable to use (WinSCP, Cyberduck, Transmit, Total Commander, etc.). In case you already have one, go ahead and establish an FTP connection.
Note that you should unpack the archive before uploading it to the server using FTP. You can use any program convenient for you while doing it (e.g., WinZip, 7Zip, etc.).
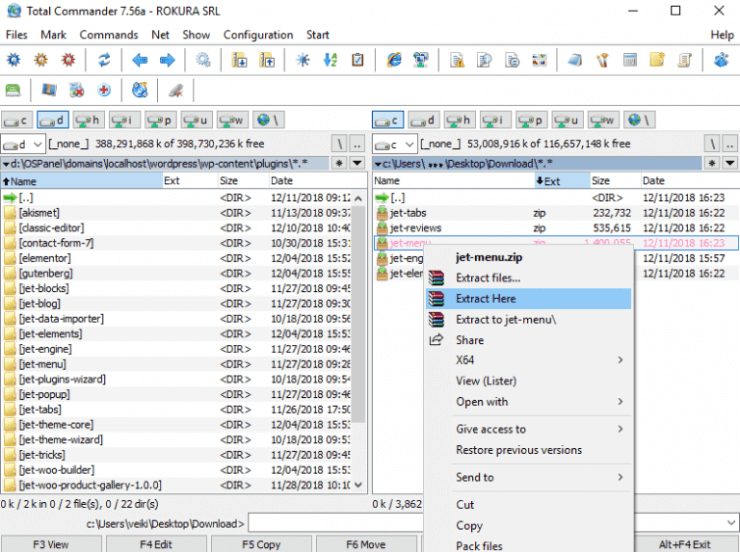
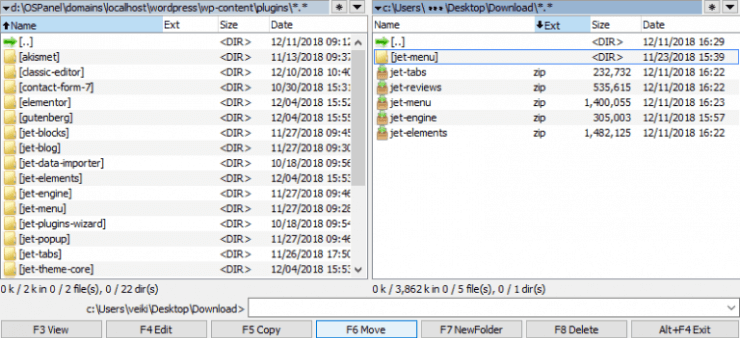
Establish the new FTP connection to access your server. Open wp-content > plugins directory in the WordPress root folder. After that, you have to upload the folder containing all the plugin files to the plugin directory on the server.
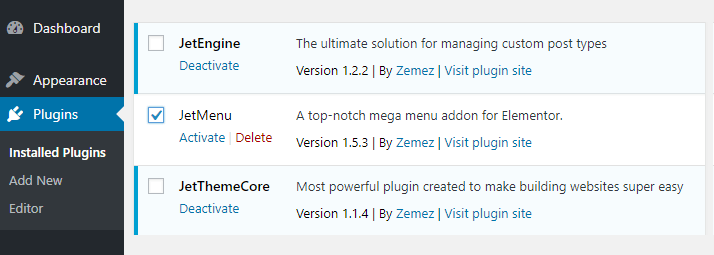
After that, log into the WordPress Dashboard. Open the Plugins tab and select the Installed Plugins option.
You’ll see the list of the available plugins. To make them work, you should activate them. So click the Activate button right under the plugin you want to make active. Now you can use it.
Now you know how to install the plugins without the Kava theme and skins, using just the standard FTP connection. It is pleasant to note that you have one more tool to make your site unique and user-friendly.