
How to Add WordPress Custom Controls and Custom Columns to Related Items
Add the desired custom fields for quick customization besides the given Title field in the “Add New …” pop-up in the related items via the JetEngine hooks.
Before you start, check the tutorial requirements:
- JetSmartFilters plugin installed and activated
- JetEngine plugin installed and activated with the Queried field key for the Query Variable field
Element with One Object
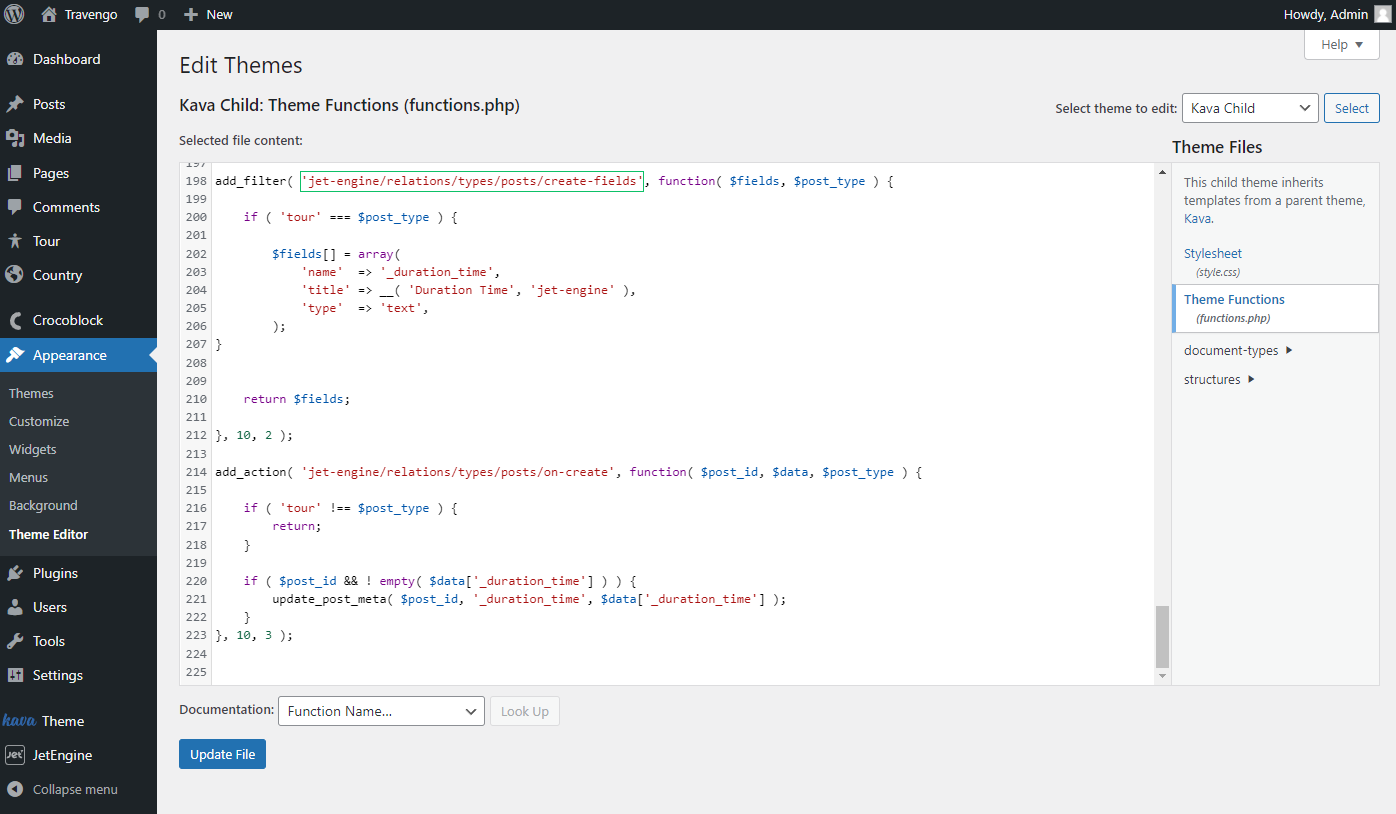
Paste the following code
Head to the WordPress Dashboard > Appearance > Theme Editor. Open the Theme Functions tab of your currently active WordPress theme.
Let’s take a closer look at the code components.
This code adds a new text field to the “Add New …” pop-up for the specified relation and saves the data typed in the field.
The ‘jet-engine/relations/types/posts/create-fields’ hook should be changed depending on the data type. This particular hook works with posts.
The hook for terms:
jet-engine/relations/types/terms/create-fieldsThe hook for users:
jet-engine/relations/types/mix/create-fields/users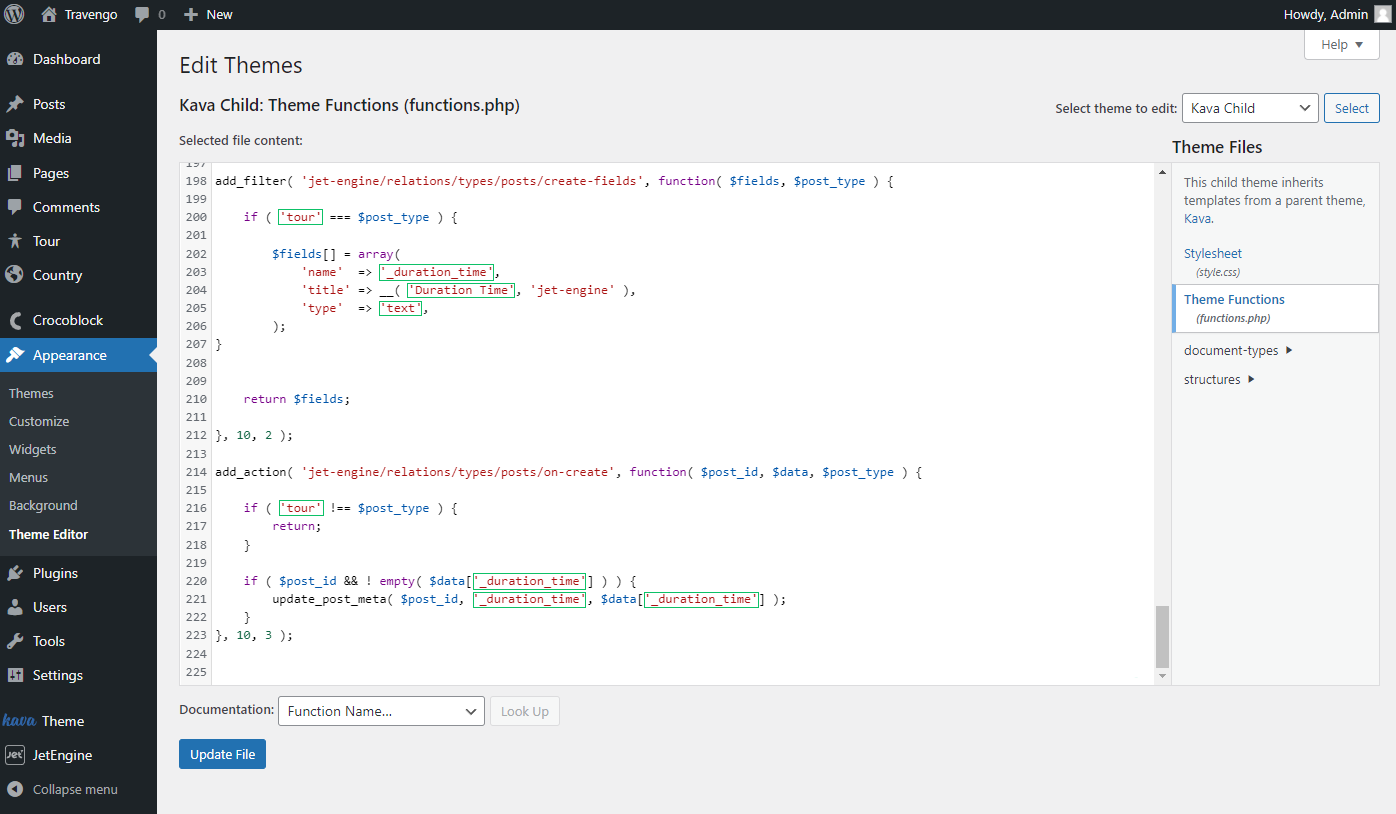
- ‘tour’ — a value that stands for the post type to which you want to add additional fields;
- ‘_duration-time’ — a name that was used during the meta field creation;
- ‘Duration Time’ — a title label that will be displayed in a pop-up;
- ‘text’ — a type of field shown in a pop-up while adding a new item.
Hit the “Update File” button and proceed to the post where the new field can be seen.
Proceed to the post
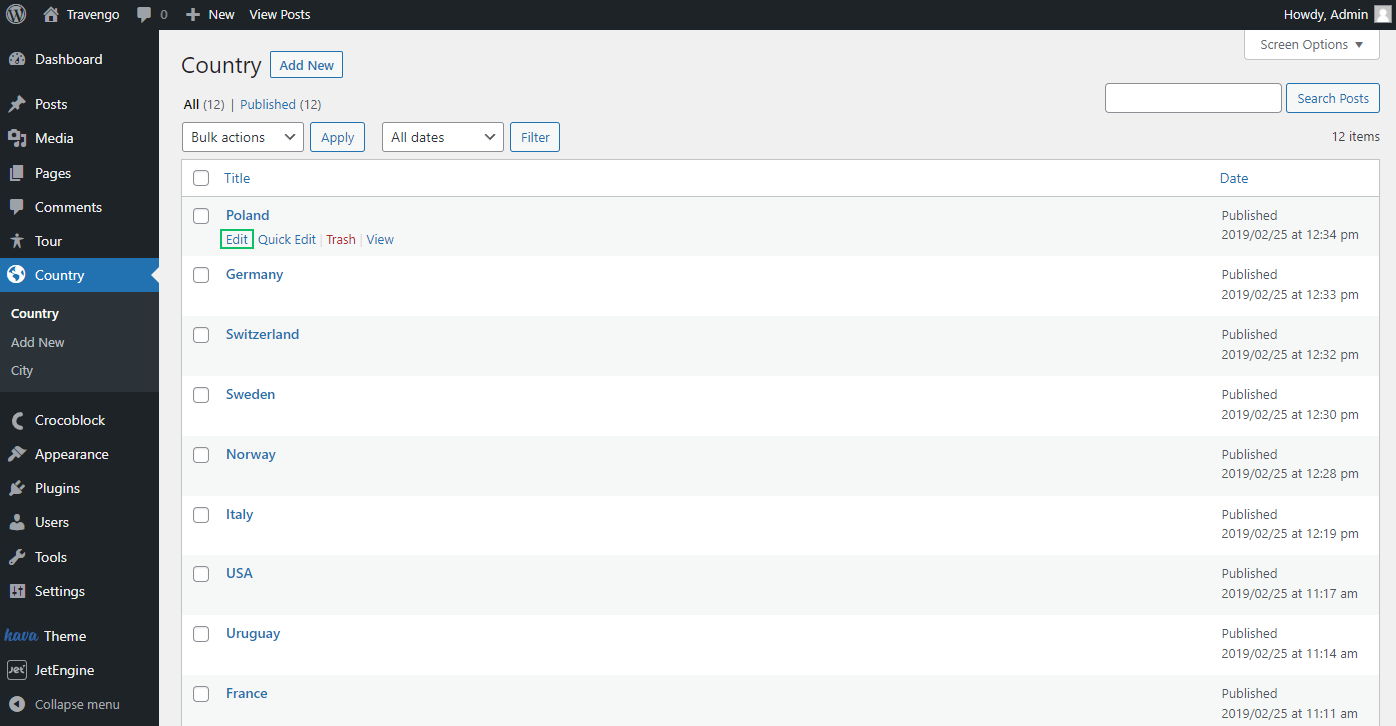
For instance, we go to the “Country” CPT as we have set it as the parent post type. And, as the child “Tour” post type is related to it, we can see the pop-up for creating new related items in the parent post type posts.
Hover on any post and click the “Edit” button to see the changes.
Click the “Add New …” button in the related items editor. Now you can see the field we have added; let’s complete it with some data and push the “Add New …” button to save the result.
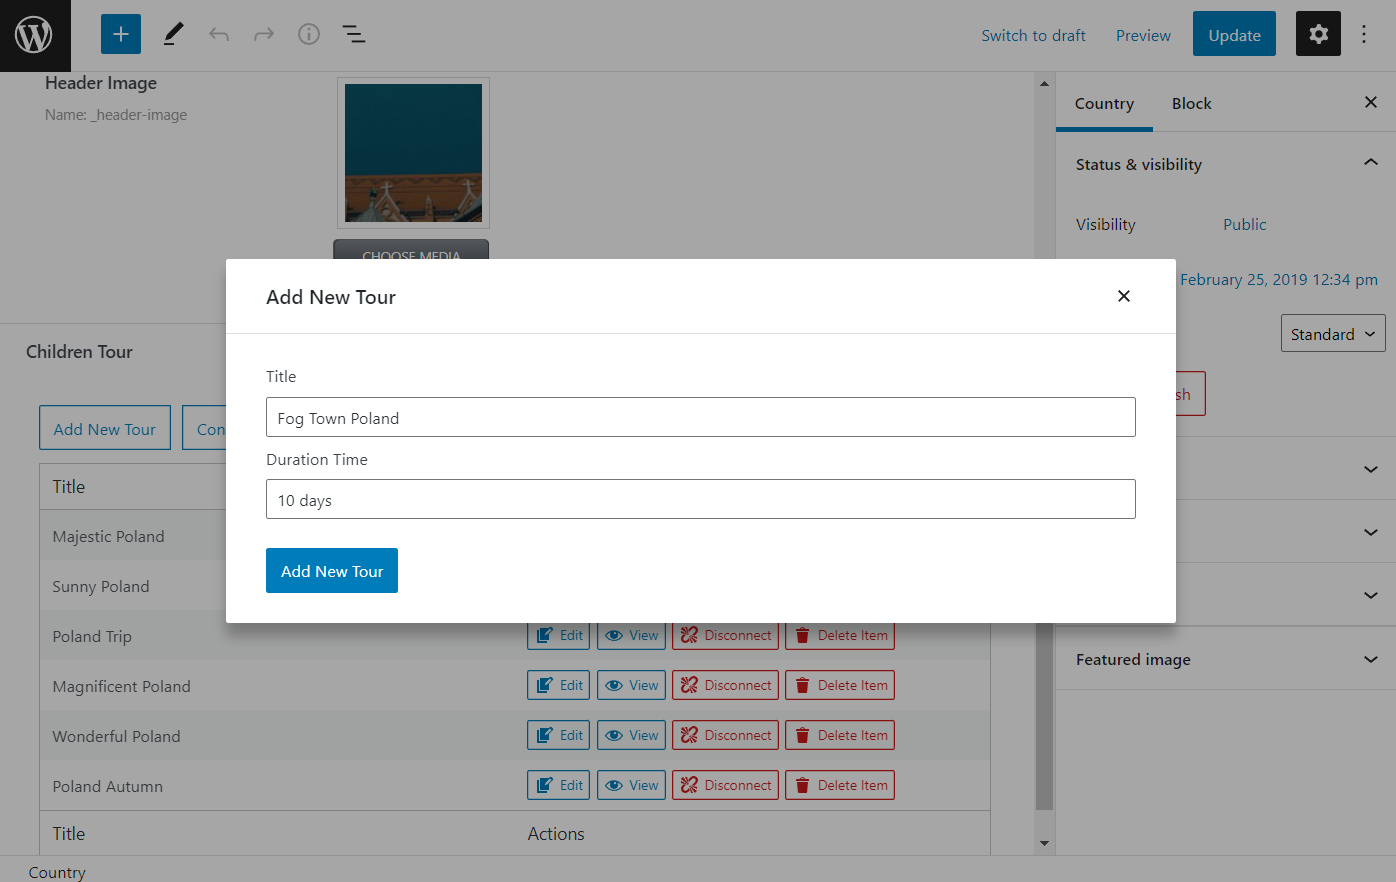
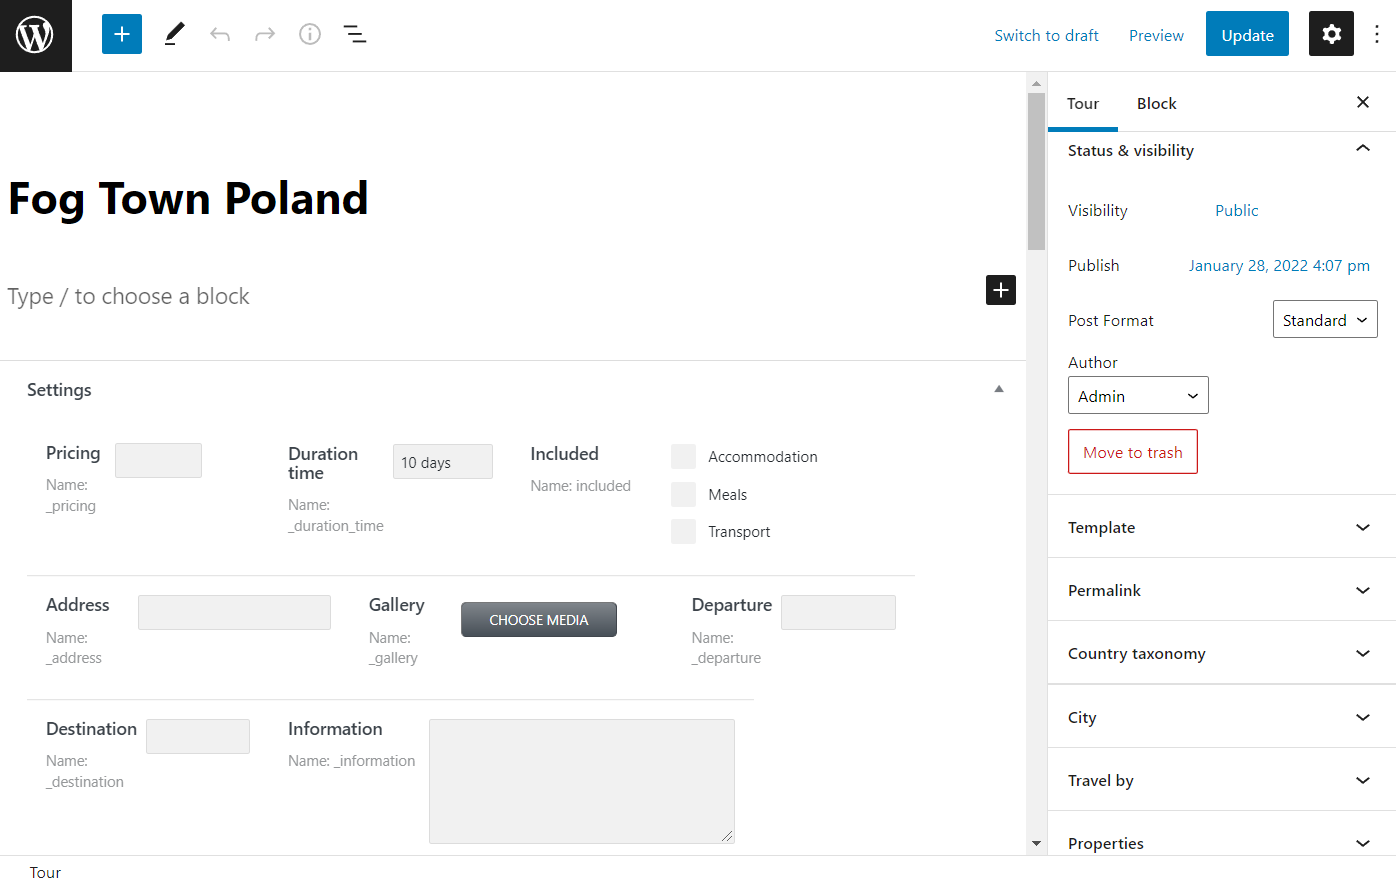
The new item appears on the list. Let’s push the “Edit” button to see if the completed data has been saved.
Once the post is opened, check that the meta field is filled with data.
Remember that you can add other meta fields with similar code besides the text meta field.
NOTE. ‘text’, ‘media’, ‘date’, ‘time’, ‘textarea’, ‘datetime-local’ values to output these fields in the pop-up.
For instance, let’s check the media field.
We add the following example. Don’t forget that you should change the type to ‘media’ in this case.

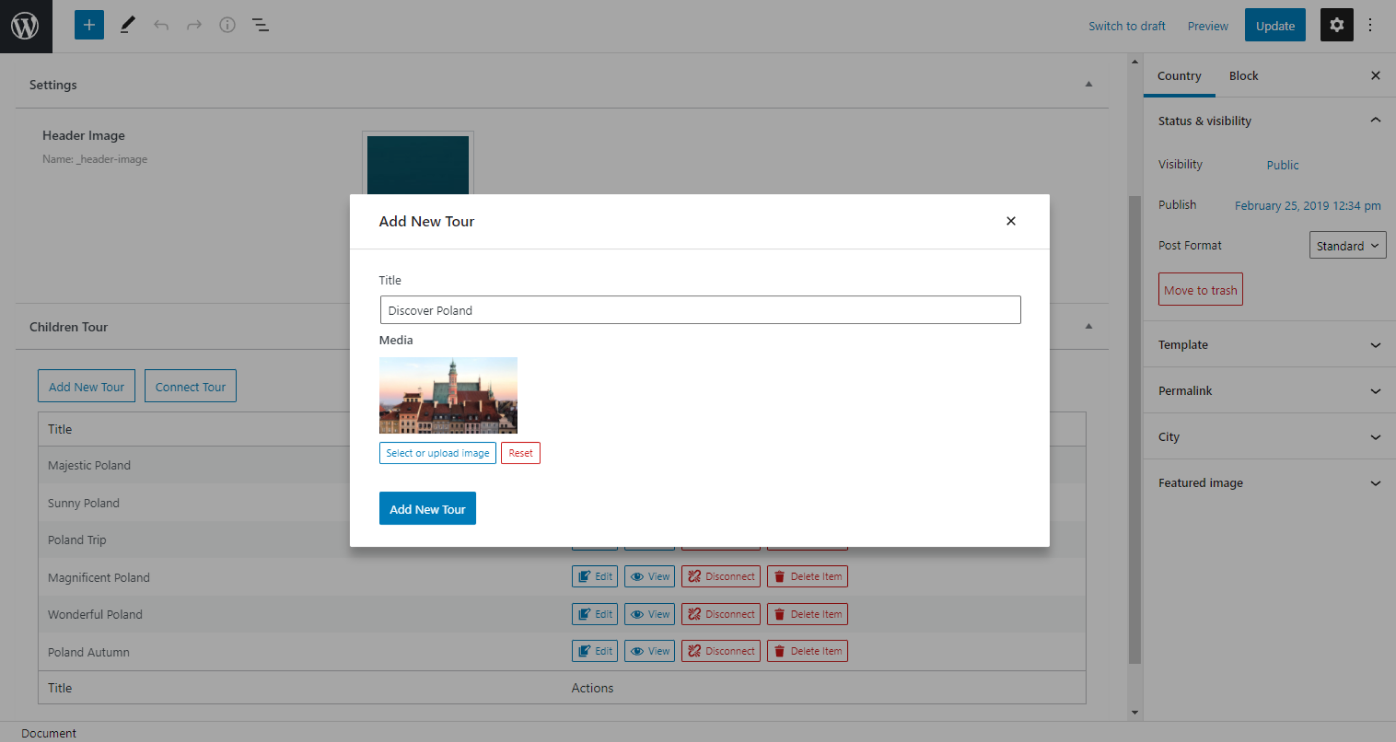
Click the “Update File” button and head to the post. Once the “Add New …” button is clicked, you can see the newly added media field.
Now you can easily upload files right in the related items editor. Push the “Select or upload image” button to choose the picture and save the changes by pressing the “Add New …” button.
The data will also be saved in the new post.
Element with Several Objects
There is also a possibility to add some fields that contain several components. You can add ‘checkbox’, ‘select’, and ‘radio’ fields with similar codes. For instance, let’s add the code of the Checkbox field.
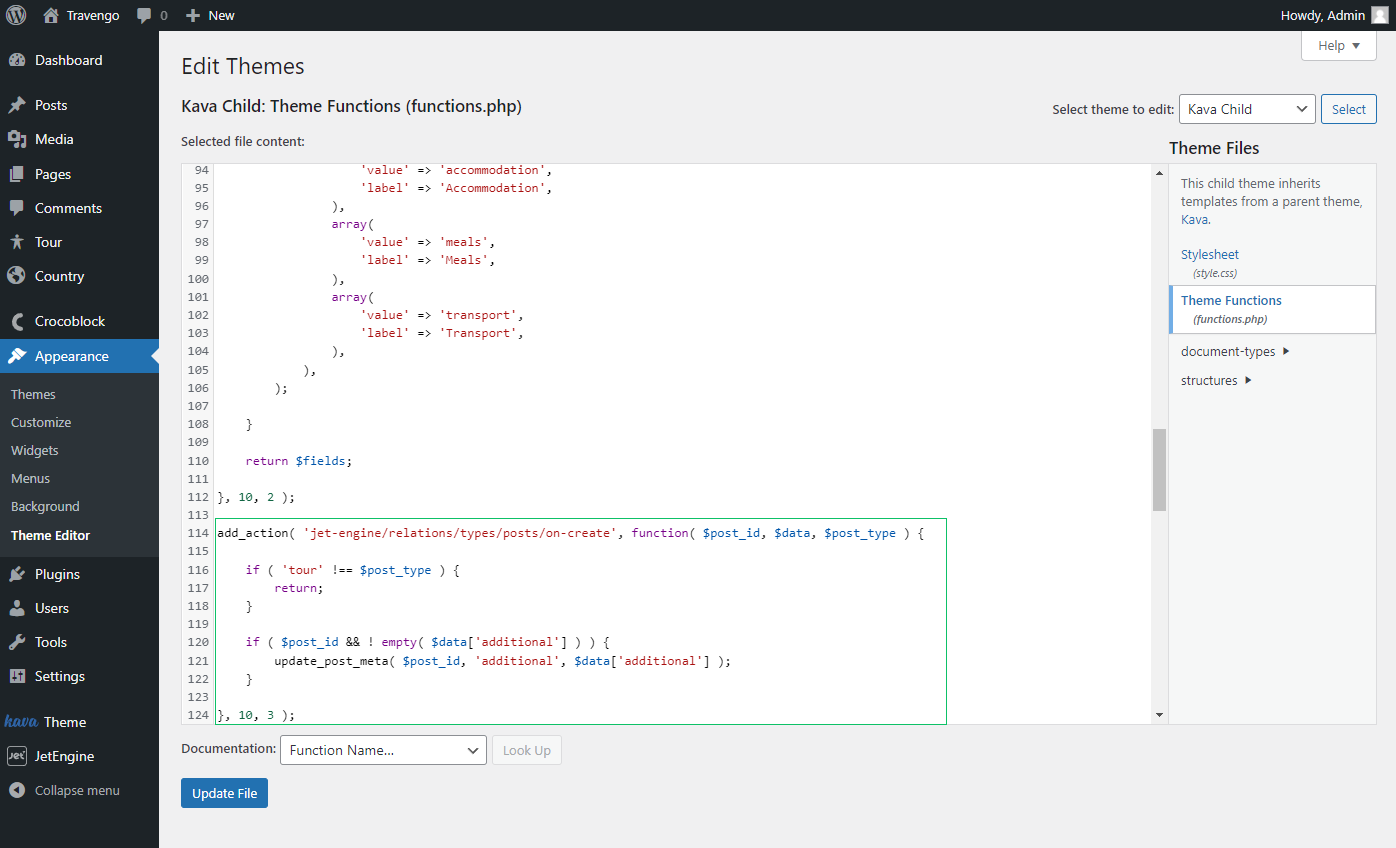
Paste the code
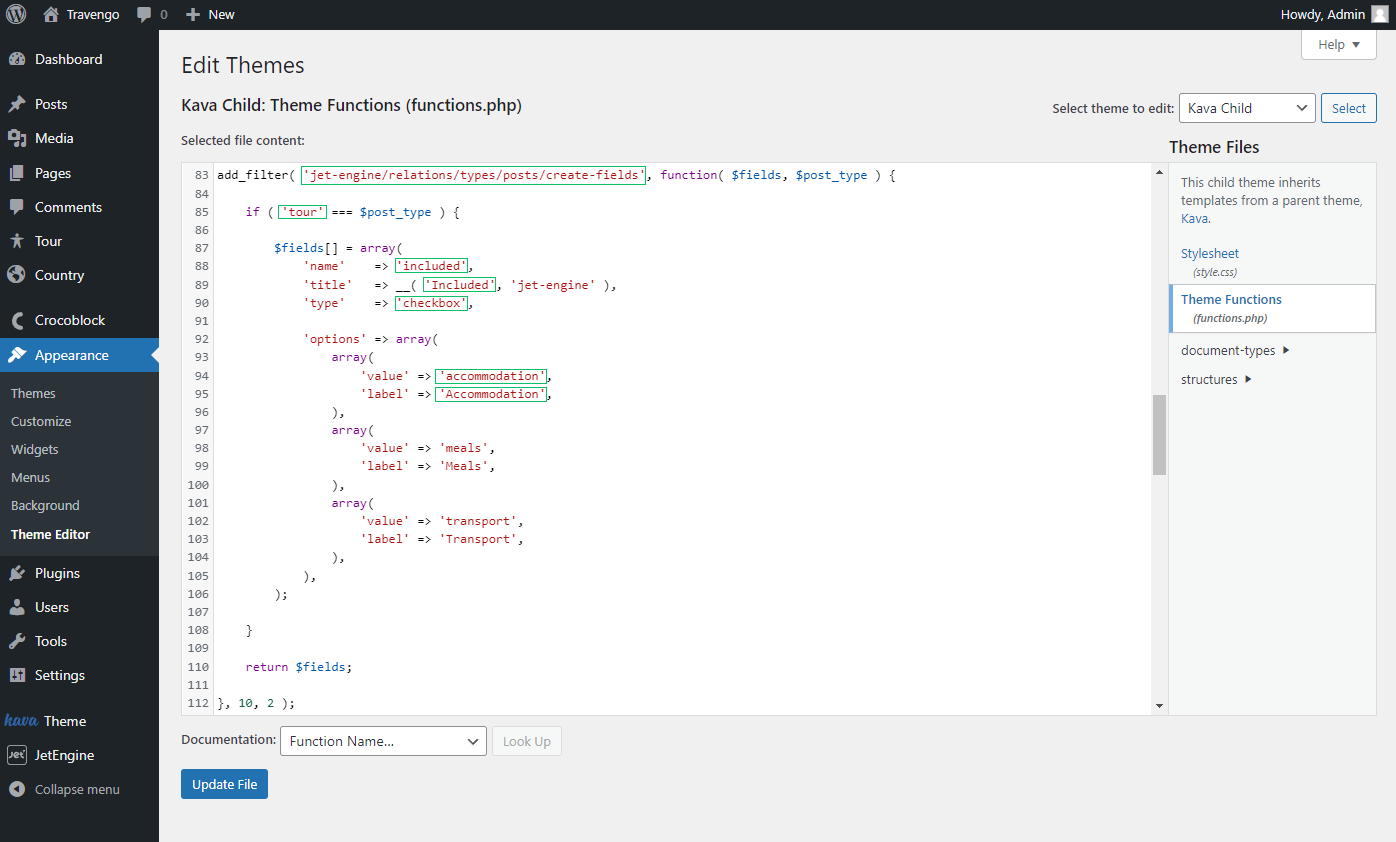
Go to WordPress Dashboard > Appearance > Theme Editor, and open the Theme Functions tab of the currently active WordPress theme. Add the following code:
Now let’s check the code components. The first part of the code includes such changeable elements:

- ‘jet-engine/relations/types/posts/create-fields’ — a hook that can be changed depending on the source. You can change it into the hook for terms (jet-engine/relations/types/mix/create-fields/users) or users (jet-engine/relations/types/terms/create-fields) depending on your needs;
- ‘tour’ — a post type;
- ‘included’ — the checkboxes meta field value;
- ‘Included’ — label you want to be displayed as the checkboxes title in the pop-up;
- ‘checkbox’ — a field type that you are currently adding;
- ‘accommodation’ — a checkboxes option value;
- ‘Accommodation’ — the title of the value displayed in the pop-up.
Add the needed ‘array’ options to create the options of the checkboxes.
The second part of the code saves the data ticked in the checkboxes.
As you have implemented all the changes to the code, don’t forget to push the “Update File” button.
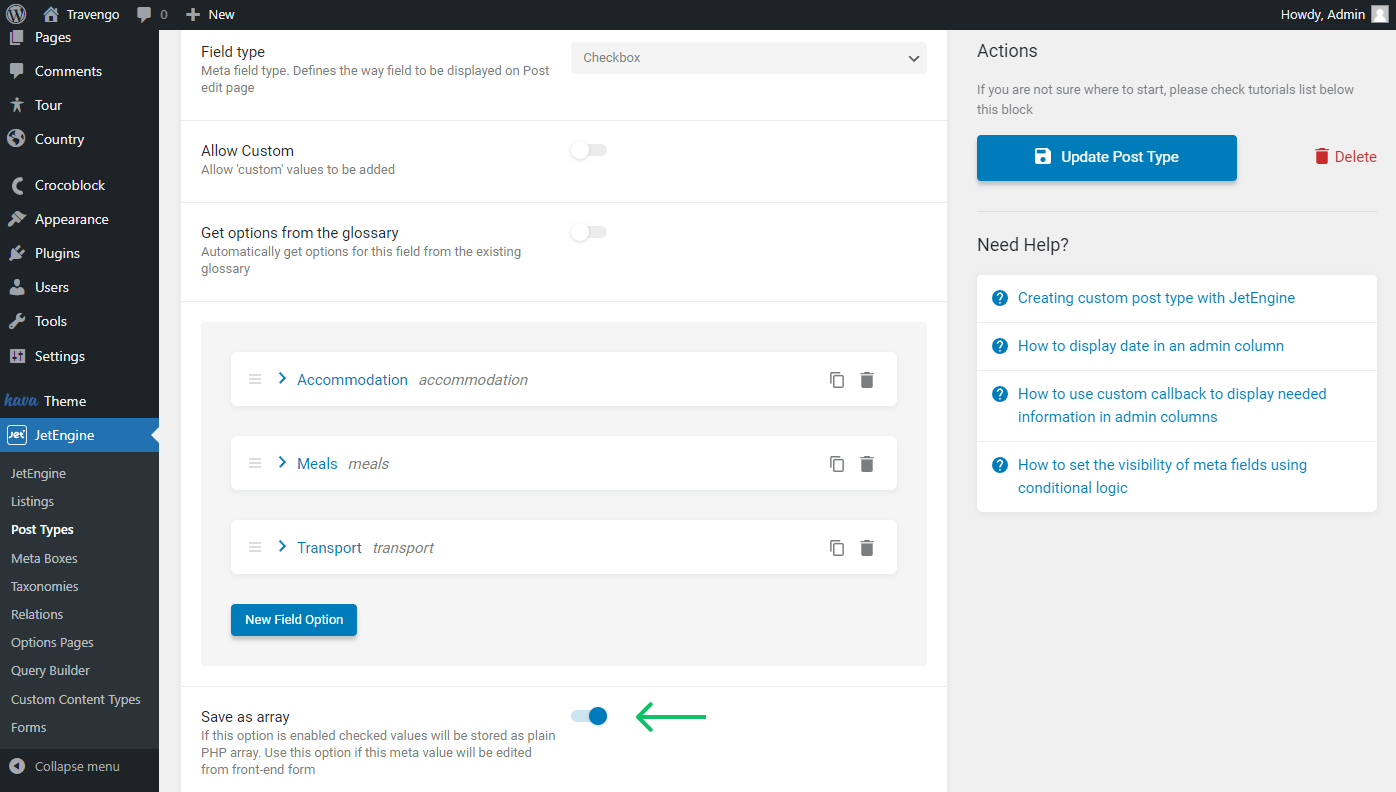
NOTE. If you want to add the Checkbox field, you need to enable the Save as array toggle. Otherwise, the options you tick in a pop-up will not be saved in the post.
To do so, head to JetEngine > Post Types and open the CPT with which you are working by pressing the “Edit” button.
Scroll down to the Meta fields tab and open the needed Checkbox field settings.
Switch on the Save as array feature and push the “Update Post Type” button.
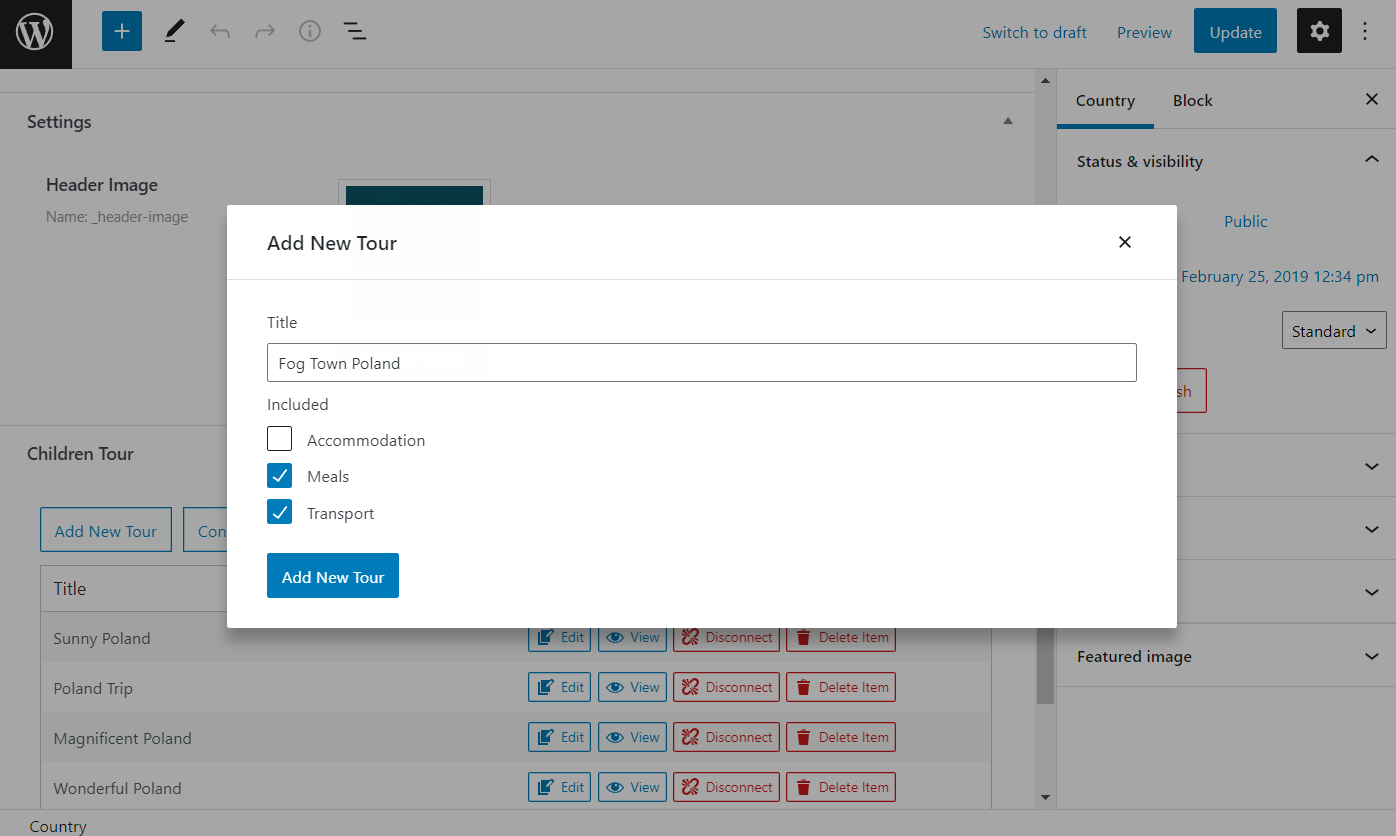
Head to the post
Open the desired post and click the “Add New …” button below the Child … title. In the newly appeared pop-up, you can tick all the needed options.
Hit the “Add New …” button and look if the new item has appeared in the field.
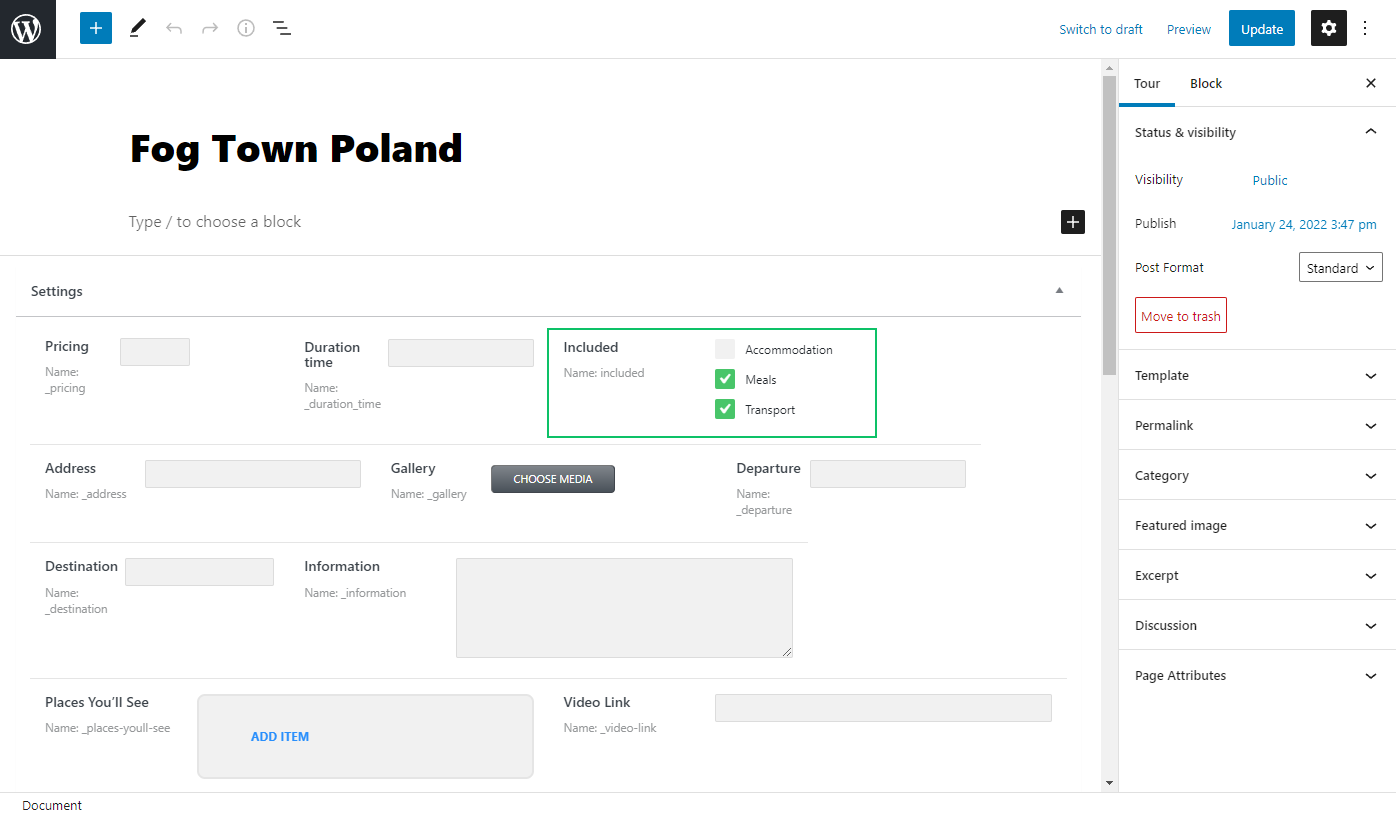
Proceed to the post editor by clicking the “Edit” button next to the new item.
Now the result is saved in the post meta field.
Don’t forget that you can also create some other fields with several objects and save the picked result in the post right during the post creation.
Now let’s check how to add custom columns to the related items.
Custom Columns in the Related Items Editing UI
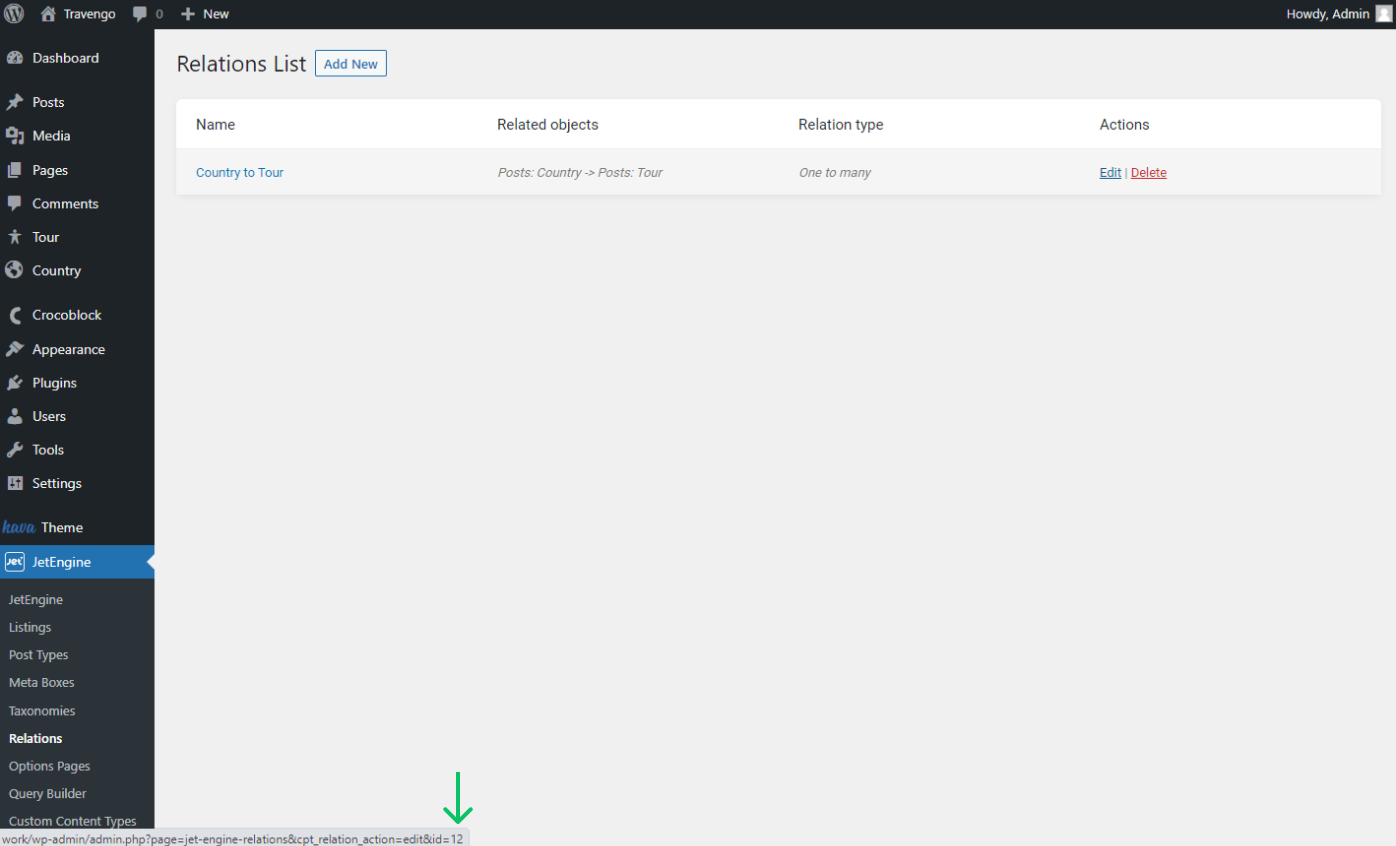
Find out the relationship ID
Firstly, find out the ID of the relation you are working with. To do so, proceed to the JetEngine > Relations directory and press the “Edit” button next to the desired relation.
Look at the page URL and copy the number in the slug. We will use it in the code.
Paste the code
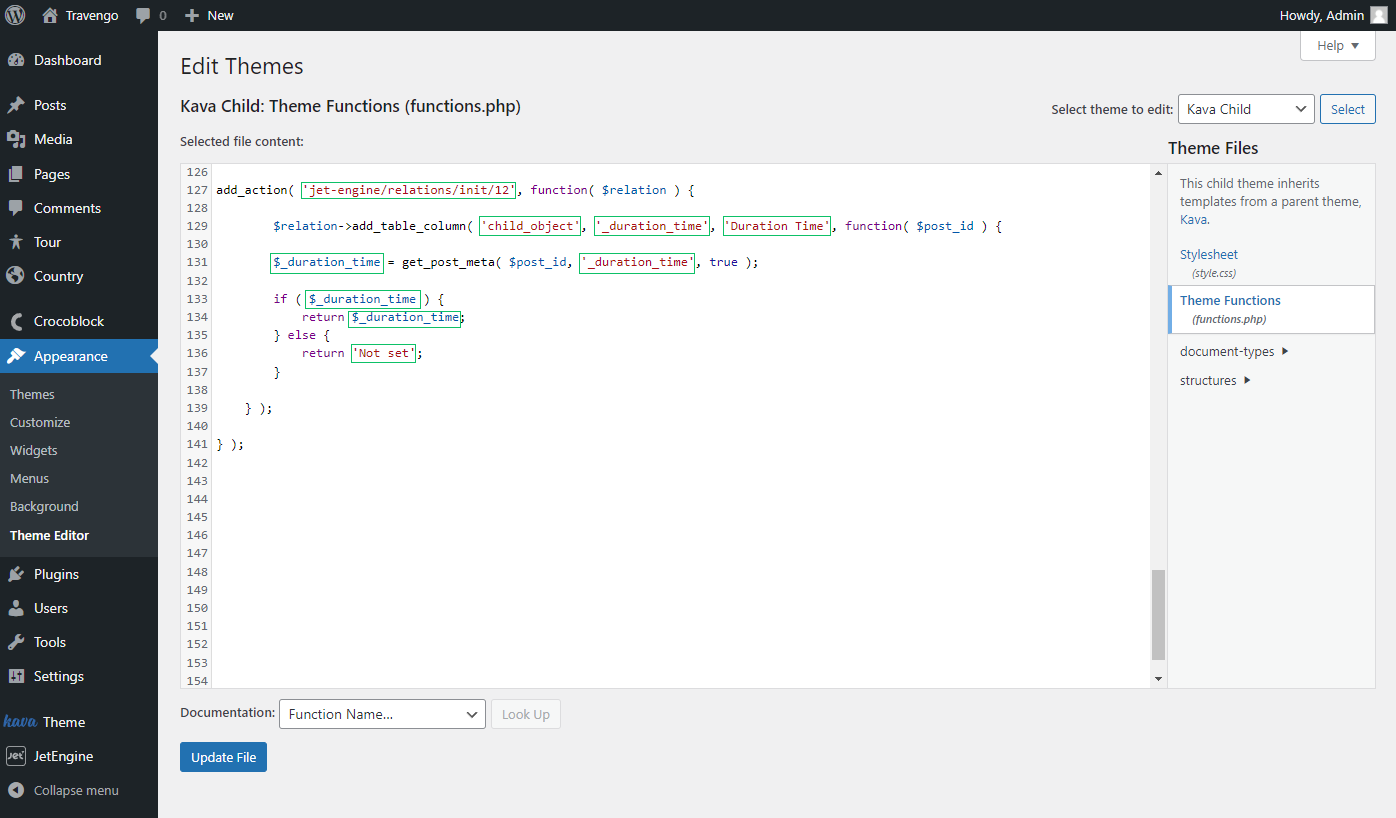
Go to WordPress Dashboard > Appearance > Theme Editor and open the Theme Functions tab.
Copy and paste the code:
NOTE. The meta field values should be separated with the “_” sign, not the “-”. In the second case, the code will not be saved.
Let’s look at the code components that can be changed according to your requirements.
Open the post.
- ‘jet-engine/relations/types/posts/create-fields’ — a hook for the posts. Mind that you can also use hooks for terms (jet-engine/relations/types/mix/create-fields/users) and users (jet-engine/relations/types/terms/create-fields);
- ‘child_object’ — a relation object we want to add a custom column. Change into the ‘parent_object’ if you’re going to add columns to the table that displays parent items;
- ‘_duration_time’ — a column identifier;
- ‘Duration Time’ — a visual column title;
- ‘Not set’ — a value returned once the meta field is left empty.
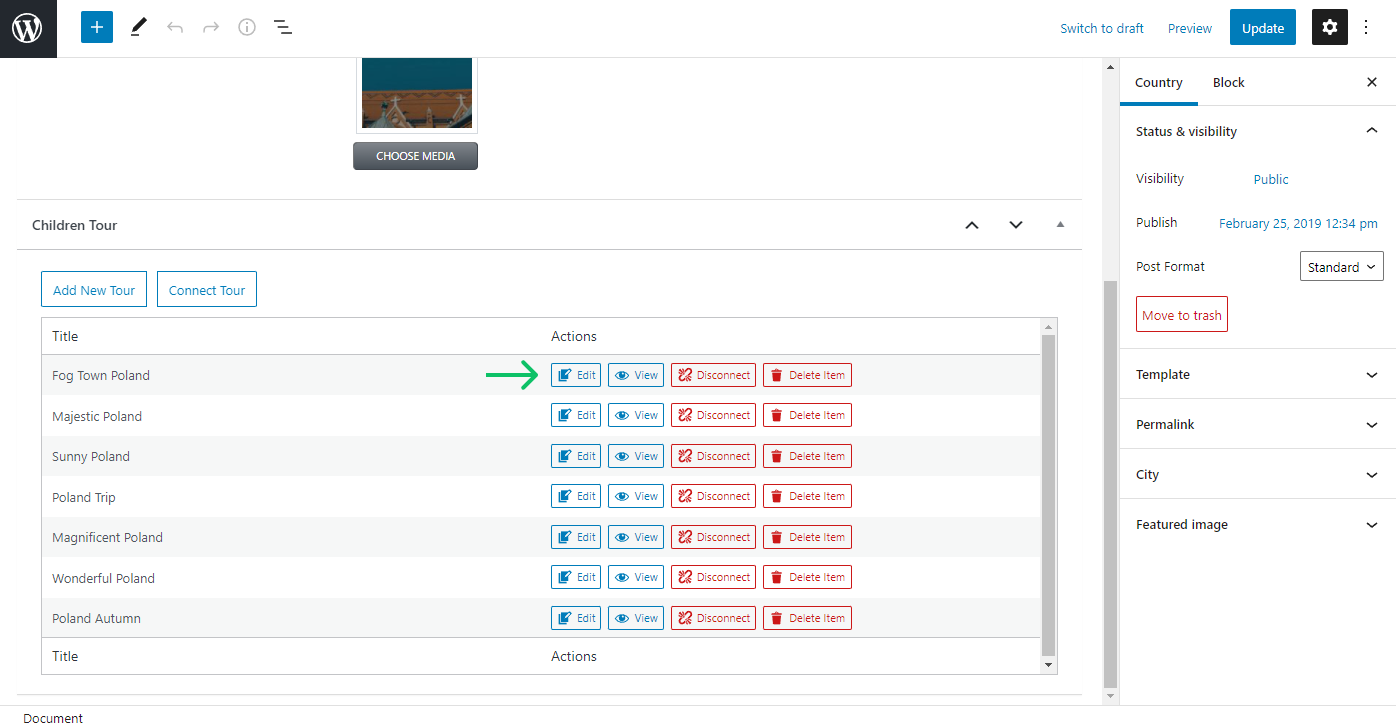
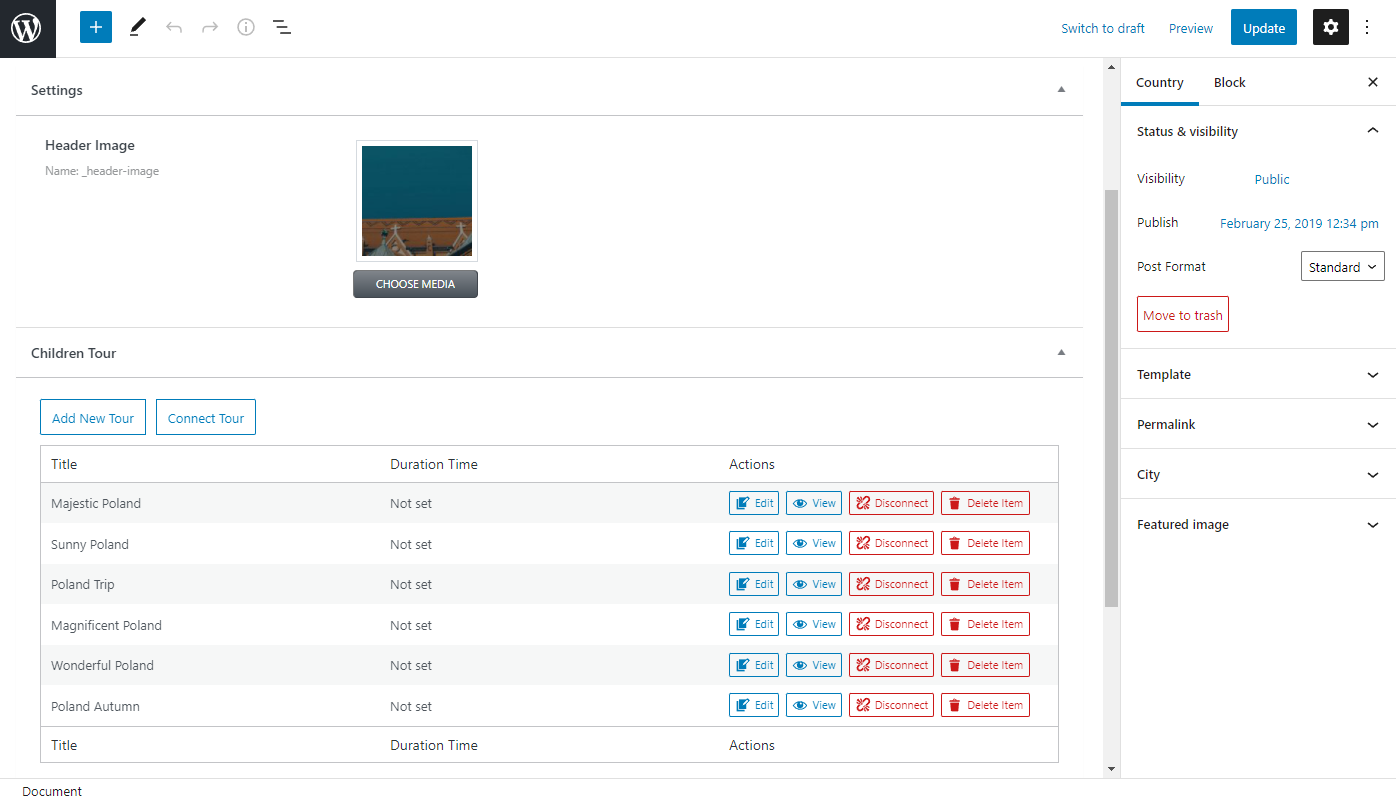
Move to the parent object post. Now, next to the “Title” column, the “Duration Time” and “Departure” columns will be displayed.
As you can see, the empty columns show the “Not set” and “–” values as we specified in the code.
Push the “Edit” button next to the item to open the post editor.
Complete the field
Fill in the Duration Time field. Press the “Update” button to save the changes and return to the parent post.
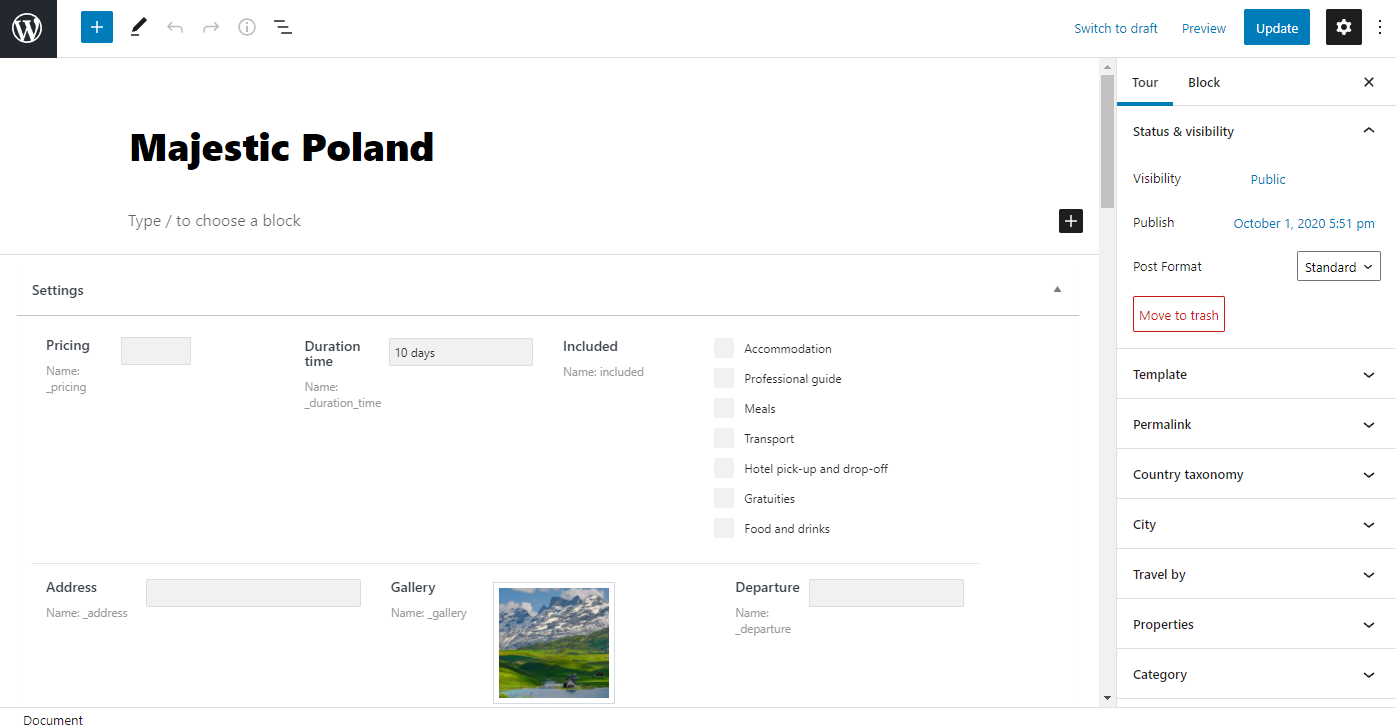
Now the column is completed with just entered data.

This way, you can add the output of any fields in a separate column.
Mind that the codes mentioned in the article can cooperate or work separately. You can find the code example by following the link.
For instance, we can add the fields in the pop-up but not display them in columns. Or show columns in the table for which there are no fields in the creating items pop-up.
That’s it; now you know how to add WordPress custom controls for new related items and in which way you can add custom columns to the relation.