
Displaying Taxonomy Terms in Different Colors with Color Picker Field
Display the taxonomy terms in different colors with the help of the Colorpicker field type added either via Meta Boxes or in Taxonomy itself and outputted by the Dynamic field widget to a front end.
Before you start, check the tutorial requirements:
- Elementor (Free version) or Block editor (Gutenberg)
- JetEngine plugin installed and activated
with the Custom Taxonomy created. If you have not done this yet, please follow this tutorial.
Add a Meta Box to the Given Taxonomy
Add this meta box at the Custom Post Type creation stage or anytime later. Just go to JetEngine > Meta Boxes, click “Add New,” and configure the General Settings as follows:
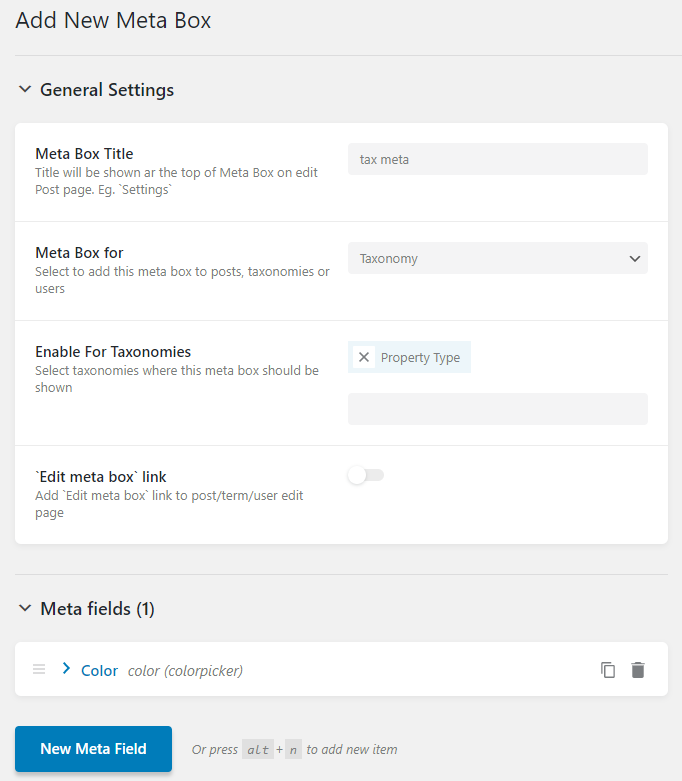
Learn more on How to Create a Custom Meta Box.
You should also add a new meta field and set “Colorpicker” as its Field type. Please note that you should have a ready-made taxonomy to be able to attach this meta box to it.
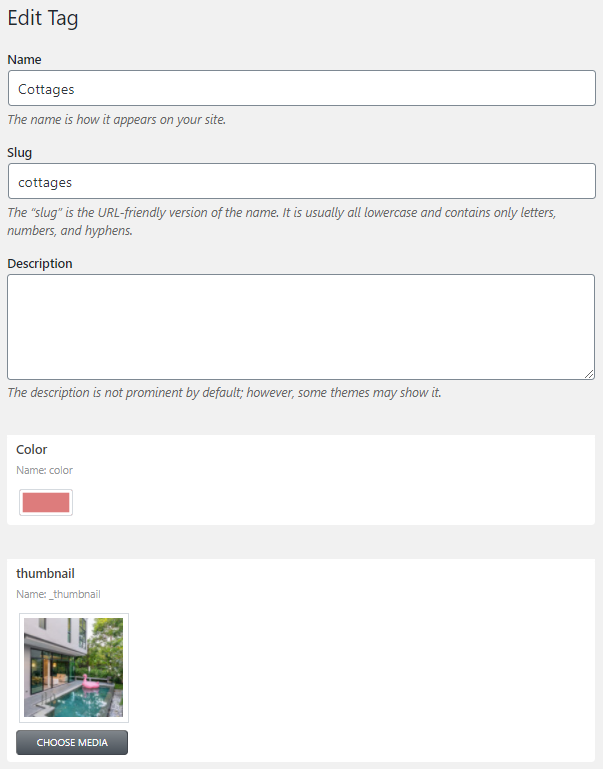
Set Colors for Each Taxonomy Term
Please proceed to the taxonomy terms section (or Tags) and click to edit one of them. In the newly-opened window, select and assign the color you fancy. Update the changes. Repeat the routine for every taxonomy term on your list.
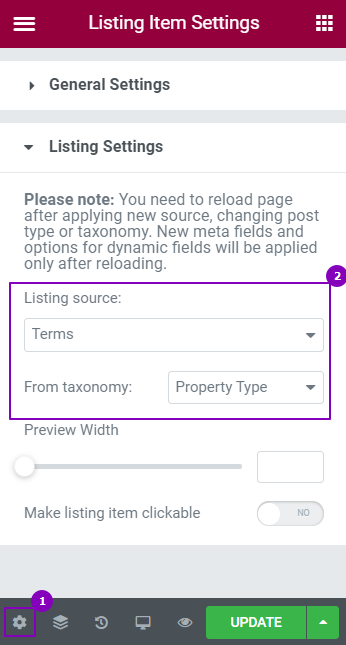
Create a New Listing
Go to JetEngine > Listings, click “Add New,” and set “Terms” as a Listing Source. In the From taxonomy select, pick the name of the taxonomy you’ve been working on. Click to create a new listing and check its settings in Elementor.
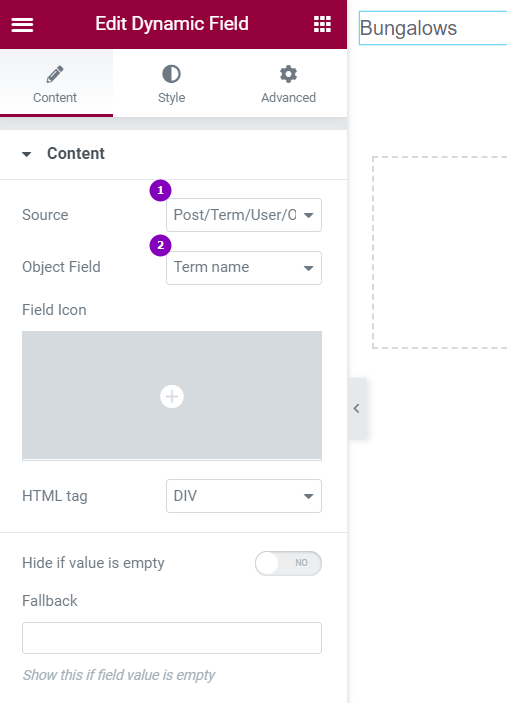
Dynamic Field Editing
Add the Dynamic Field widget to the blank canvas and select “Term name” as the Object Field.
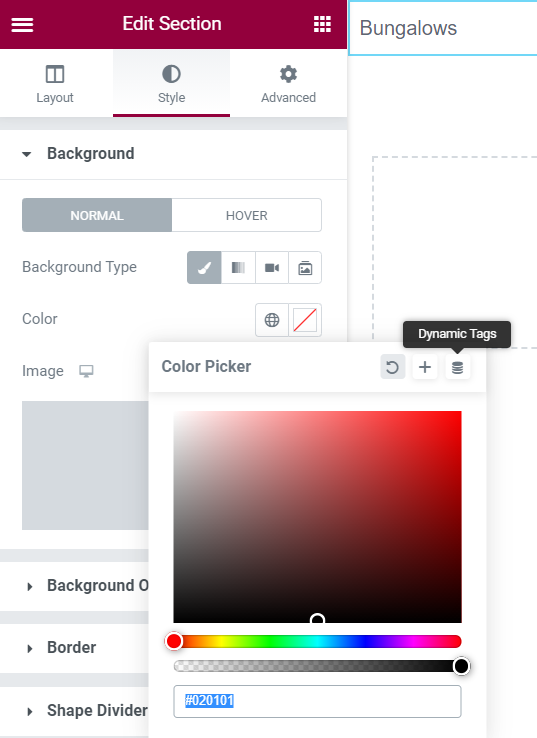
Now it’s possible to apply the color you’ve previously set in the color picker field. Click to edit the Section, press the Style tab, then choose “Custom” for Background Type. Press the Dynamic Tag icon. Hit the last icon to the right of the Color item, and you’ll see a small window.
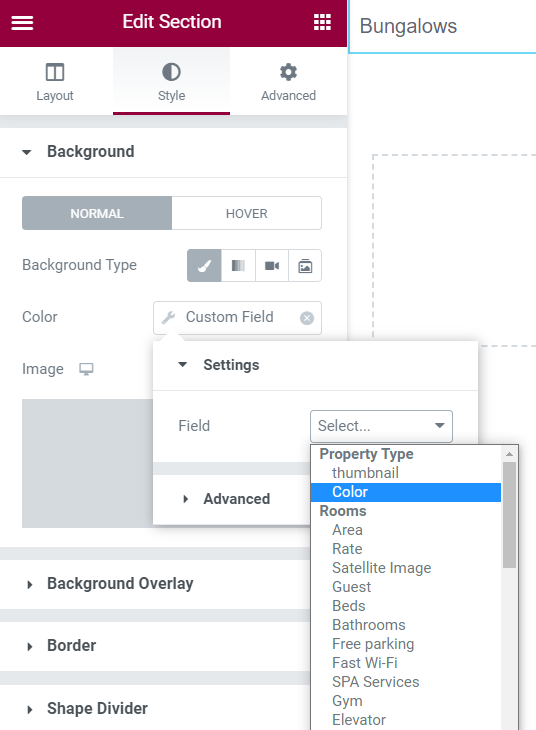
Then select the “Custom field” option within JetEngine attributes:

Once the custom field window pops up, choose the custom field “Color” you’ve created in Step 1.
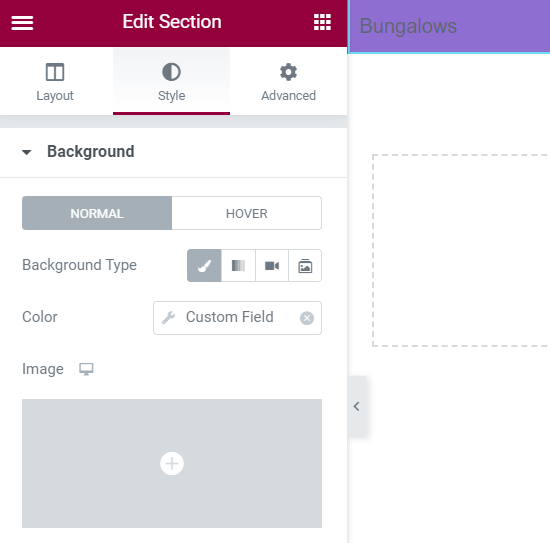
As a result, the entire Section will achieve the background color selected for this Term in the Color meta field. Don’t forget to save the Listing.
That’s how the Colorpicker meta field works. You can now add this Listing to any page you wish using the Listing Grid widget. Enjoy!