
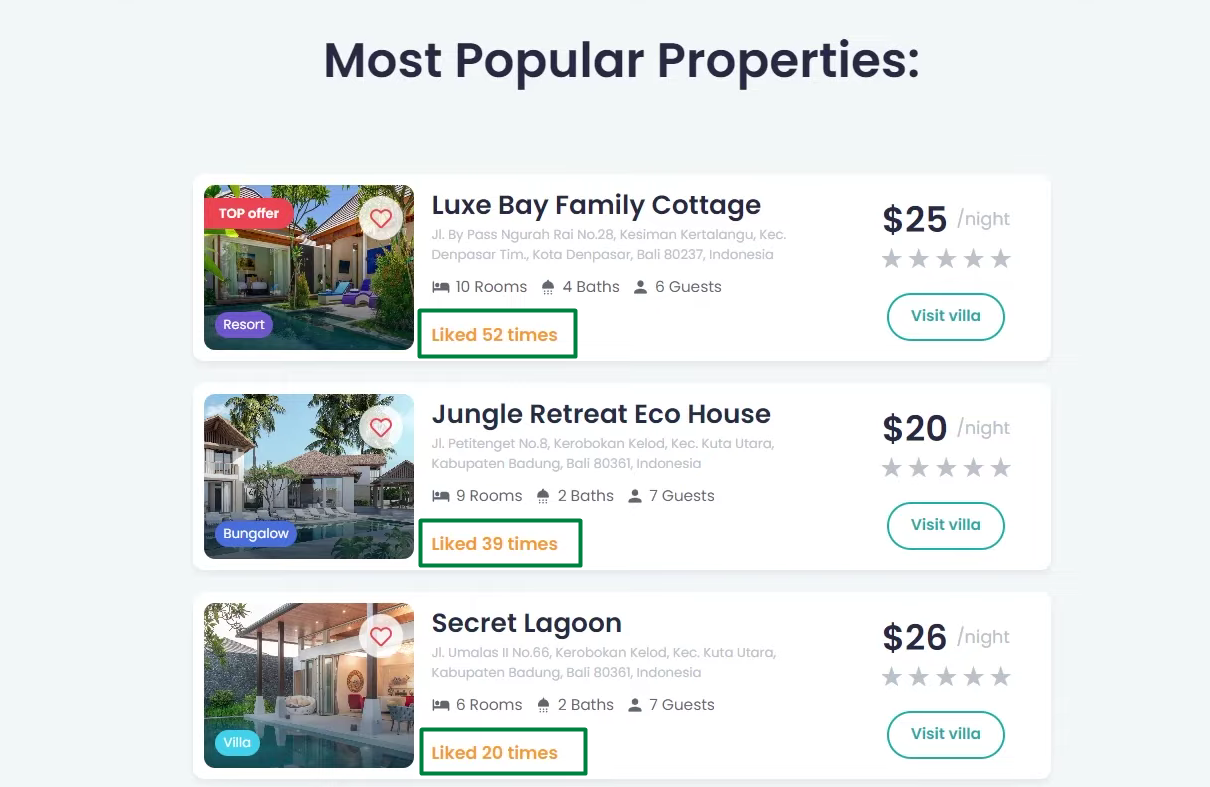
Outputting the Most Popular Posts via Listing Grid and Order Them
Display only those posts that were liked more and added to the Data Store. Display them in the needed order via the Query Builder feature.
Before you start, check the tutorial requirements:
- Elementor (Free version) or Block editor (Gutenberg)
- JetEngine plugin installed and activated
with the Listing item for posts created and the Add to Favorites link/button added. If you have not done this yet, please follow this tutorial.
- Data Store module enabled
with “Cookies” or “Session” store type created.
Data Store Configuration
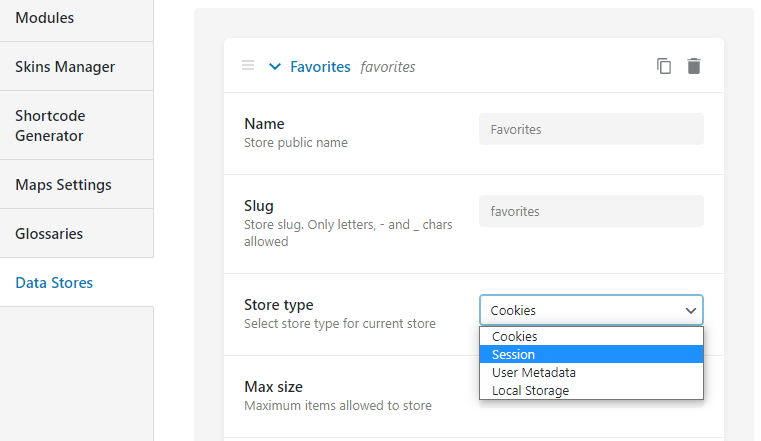
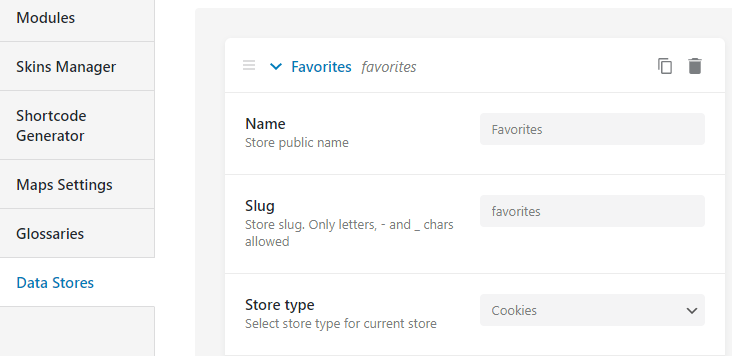
Make sure there is a created Data Store, for example, Favorites, using the JetEngine functionalities. There is a need to show which posts the users liked the most and added them more often to their Favorites data store and then output the most popular posts in a Listing Grid in descending order.
To make it all work smoothly, make sure to choose between these two Store types – “Cookies” and “Session”. “User Metadata” can backfire when the signup is not allowed, while “Local Storage” is totally served by the browser, without the back-end, so it cannot be countable.
Order Posts in the Listing Grid Widget
Go to the website page, where you want to place the Listing Grid. Open this page in the Elementor page builder and find the Listing Grid widget in the left sidebar. Drag and drop it to the desired page area and select the Listing you’ve just created in the Listing drop-down select.
Configure order via the Posts Query section in the Listing Grid
So far, the path to displaying the most liked posts from Data Stores in the Listing Grid is thorny. To make it happen, you are supposed to set up the Posts Query correctly.
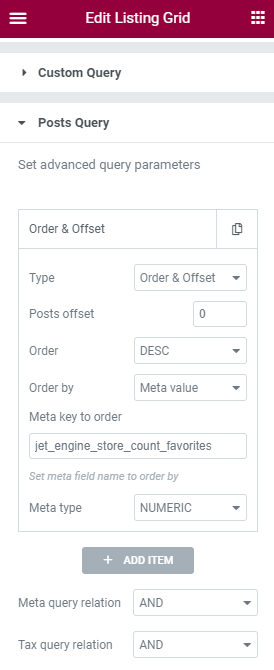
Add a new “order & offset” query item and select the Order & Offset query type. Go with DESC Order – this option will output the posts from the most liked ones to those least liked. In the Order by option, select “Meta Value”. Then paste the following into the Meta key to order field:
jet_engine_store_count_your-store-slugWhere you need to replace your-store-slug with your actual Data Store slug. Just copy it from the JetEngine Dashboard.
Lastly, you need to select the “NUMERIC” option in the Meta type drop-down. The final result should be looking like that:
Save the changes by updating the page.
Creating Custom Query for popular posts via Query Builder
You can configure this very query item using JetEngine’s separate module – Query Builder.
Go to JetEngine > Query Builder > Add New.
Name it and select the “Posts Query” option in the Query Type drop-down. Then set up the Posts Query settings. In the General tab, specify the Post Type and Post Status.
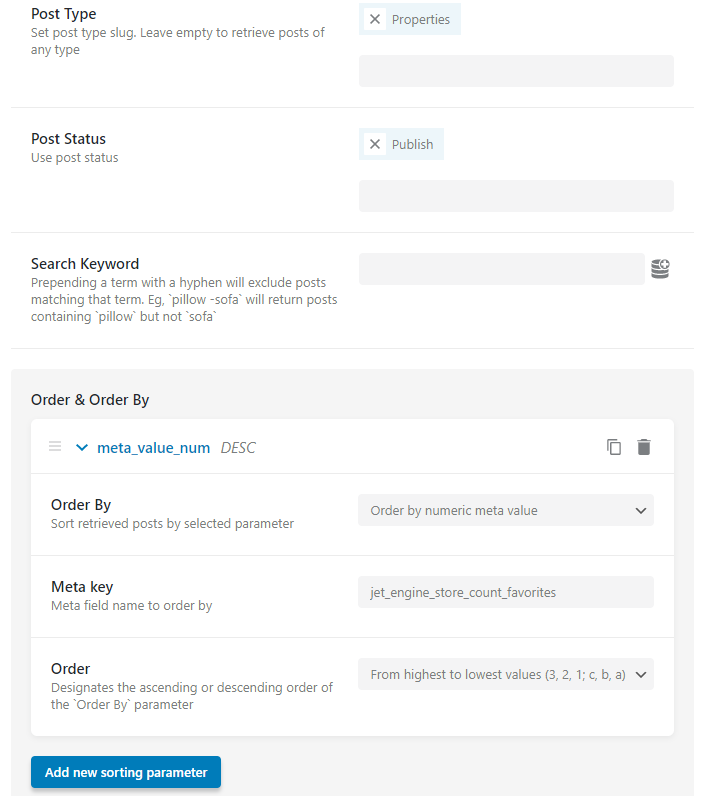
Click on the “Add new sorting parameter” button and configure it as follows:
- Order By. In this drop-down select, pick the “Order by numeric meta value” option;
- Meta key. Paste here jet_engine_store_count_your-store-slug just replace your-store-slug with an actual store slug;
- Order. Select here the option called “From highest to lowest values (3, 2, 1; c, b, a)”.
Press the “Add Query” button and proceed to display the query on the page.