In this quick tutorial, I’ll show you how to make your Elementor website unique and get the attention of a client using an animated box widget.
What is Animated Box?
The animated box is the attractive popup or section on your Elementor website. For instance:
- allow the client to scratch the overlay for getting a special offer
- reveal the content by peeling down the cover
- let the user slide out the section on the banner for a special discount
Now let’s see create the box with a scratch effect for getting a discount. You can follow this video guide or proceed with a written tutorial.
How to Activate the Animated Box Widget?
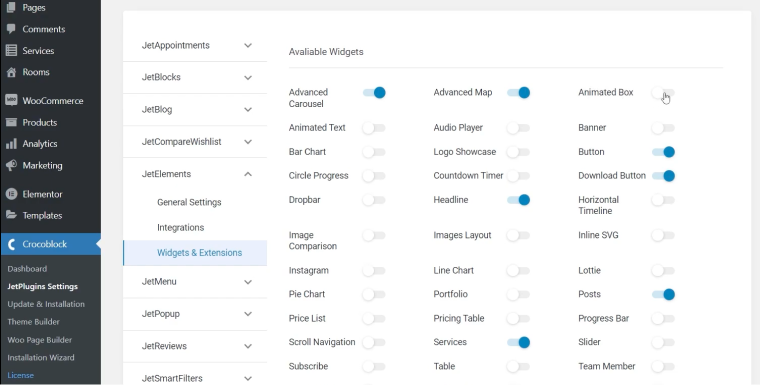
Firstly, you need to make sure that the widget is available for your site. To check this, you need to go to the Crocoblock > JetPlugins Settings; here, we need to choose JetElements > Widget & Extensions. As we can see, the Animated Box widget is not active now; all we need to do is turn it on by switching the slider.
Editing the Animated Box Widget
I’d like to add a section with the option for the customer to scratch the image to get a discount.
To start with, we choose a website page where we want to add the animated box, in my case, the home page. Select to edit this page via Elementor.
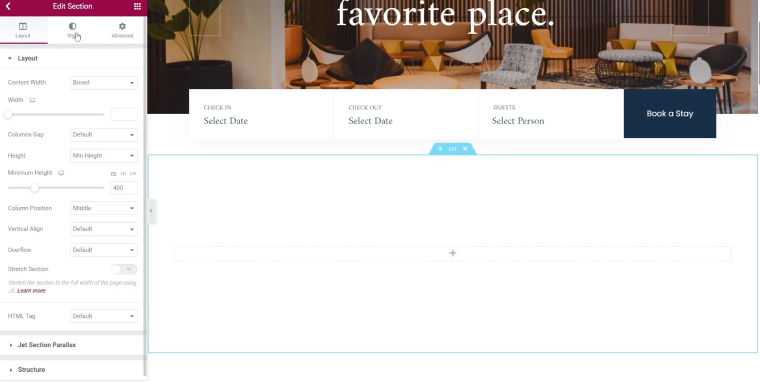
Add a new section to the Elementor page
Choose to add a new section; I will move the section higher so that the client can immediately see it on the homepage.
Click on the Edit section and choose the Layout tab. With this tab, I will be able to change the size of the section. I will select boxed for a content width and change the Height to the Minimum one.
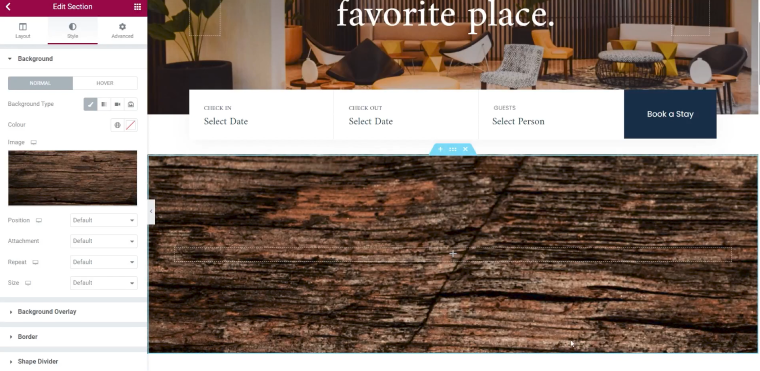
Choose the background color
Go to Style > Background to add the background image for our section. Choose the classic Background style and add the image. I chose this wooden background for myself.
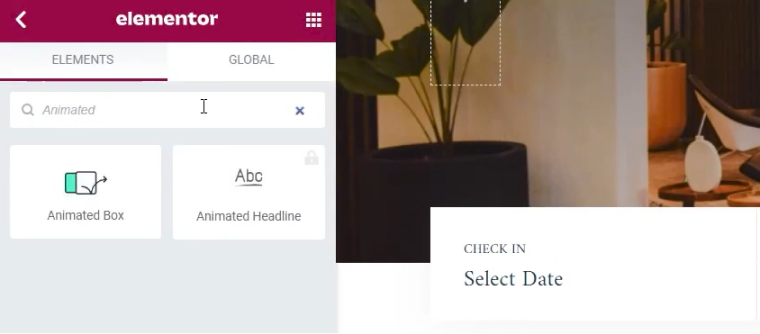
Drag and drop animated box widget
Click on the plus inside the section to insert the animated box. Start to type Animated Box in the search field. Drag and drop the widget to the section.
As we can see, we can edit the animated box with Elementor easily.
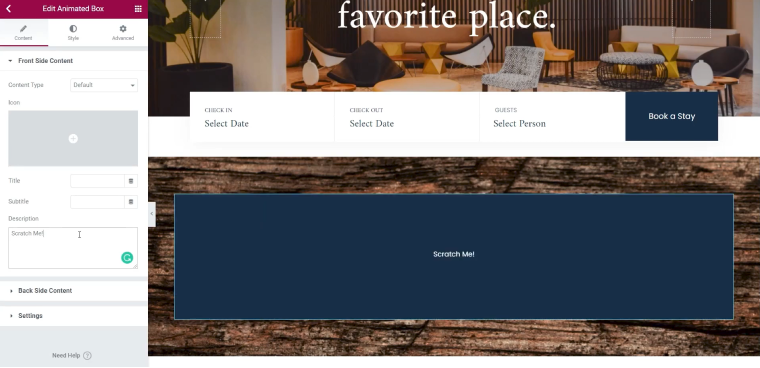
Edit the front side of a box
Go to Content > Front Side Content to add or edit the text for the front side of our Box.
I will delete the title and the subtitle and change the Description to “Scratch me!”.
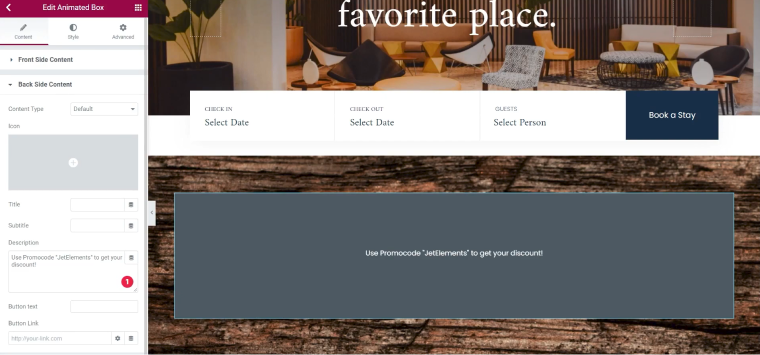
Customize the back side of the animated box
Now let’s do the same for backside Content. I will delete the title, Change the Description to Use Promocode “JetElements” to get your discount!. I will also delete the button from my box.
Open the Settings tab, where I will change the height to 100. And here is the best part, you can select the switch type:
- Hover
- Click
- Toggle Button
- Scratch
- Paper fold
- Peel
- Slide out
I will use Scratch type. With this slider, we can determine how many percent of the coverage the client will need to erase for the top content to be removed entirely. In my opinion, 70 percent is excellent.
Animated box widget styling
Finally, let’s style our animated box. Go to Style to the General Tab.
Here we can change the content Alignment from Center to Top, Bottom, and Space Between. I will choose the classic background type, but you can try the gradient one.
I will use the Color Sampler to choose a dark brown color for the front content background. You can also insert an image in the background.
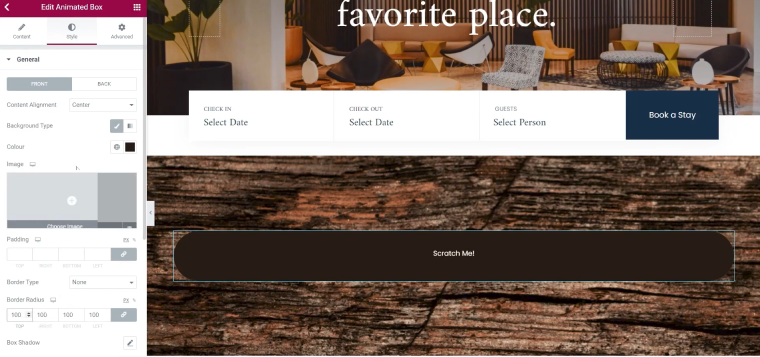
I can choose the Border Type and change the border radius with this function. I will change it to 100. To edit the background for the back layer, click on Back.
Furthermore, I will add our section’s image for the back one. You can upload a file or choose the image from the library. Change the border-radius as well.
As I do not have any icon, title, or subtitle, I will edit the Description. Then change the description color for the Front and Back to white. Under typography, you can change the font or the size of your text.
If you go to Advanced, you can always change the box size manually.
Do not forget to click on Update when finished.
Let’s check the result:
Conclusion
I hope this animated box creation tutorial was helpful for you, don’t hesitate to share your works in the comments below.

