
How to Synchronize Form with 3rd Party Services (Legacy)
This tutorial reveals the details of creating the connection between forms built with JetEngine and such services as Zapier and Make.
Before you start, check the tutorial requirements:
- Elementor (Free version) or Block editor (Gutenberg)
- JetEngine plugin installed and activated
Services like Zapier and Make allow you to create connections between different software and automate actions that you would otherwise do manually. For example, you want to send an email to a user submitting the form on your website. With the help of third-party services, you’ll manage to build a link between your JetEngine forms and other apps. Let’s take a look at how it is possible.
Synchronization with Zapier
Go to Zapier account
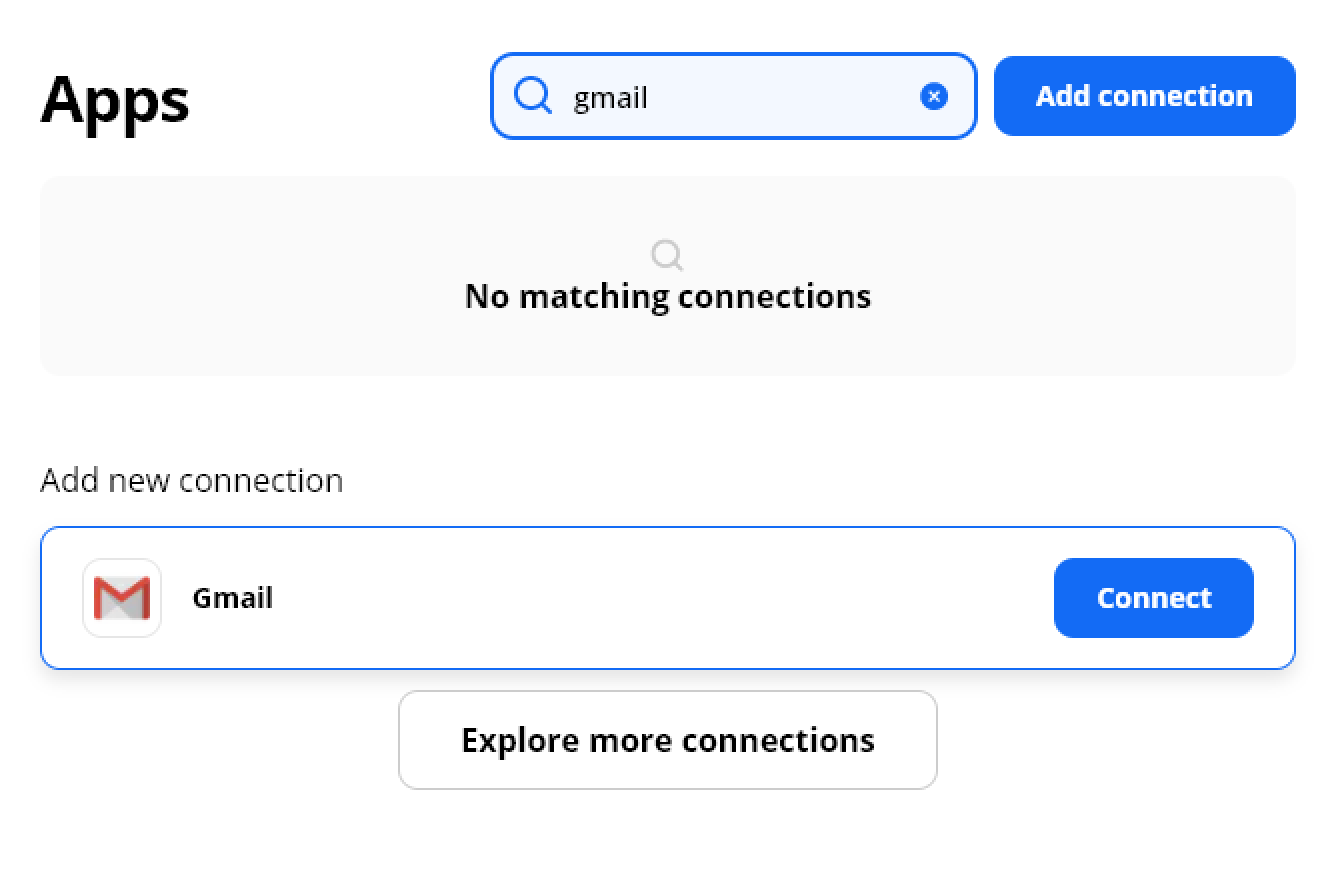
Proceed to the Zapier website and log in using your Google or Facebook account to get access to the app features. When the dashboard opens, go to My Apps, click the drop-down menu, and choose Gmail.
If you would like to connect your form with some other service, find and choose it in the drop-down menu.
In a separate window that will open shortly, choose the account you want to use and allow Zapier to manage drafts, send, view, and modify your emails.
Set trigger event
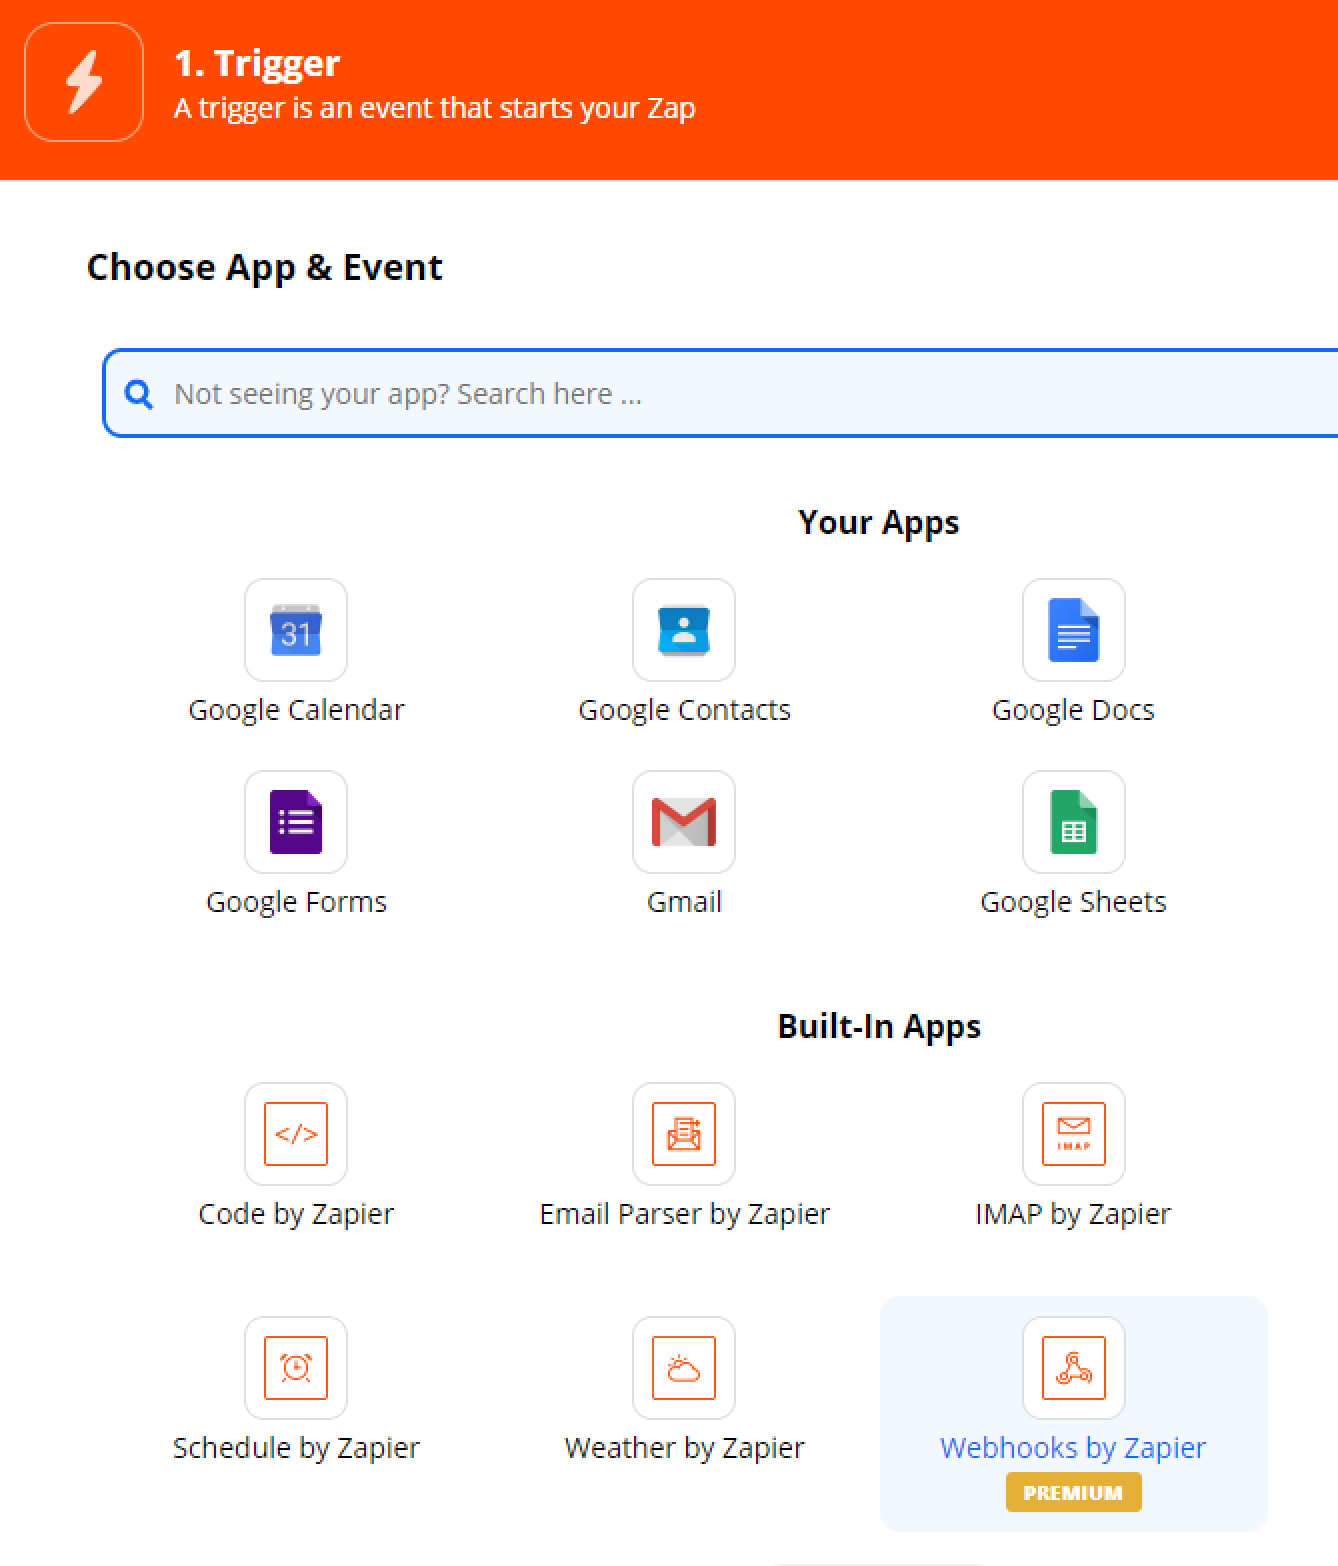
Now, click on the big black “Make a Zap” button to create a new connection. Zaps have a simple structure; firstly, you choose the event that triggers a chain and then define, actually, the chain of actions that will be performed. So, firstly, pick the “Webhooks by Zapier” app (it is among the Built-In Apps).
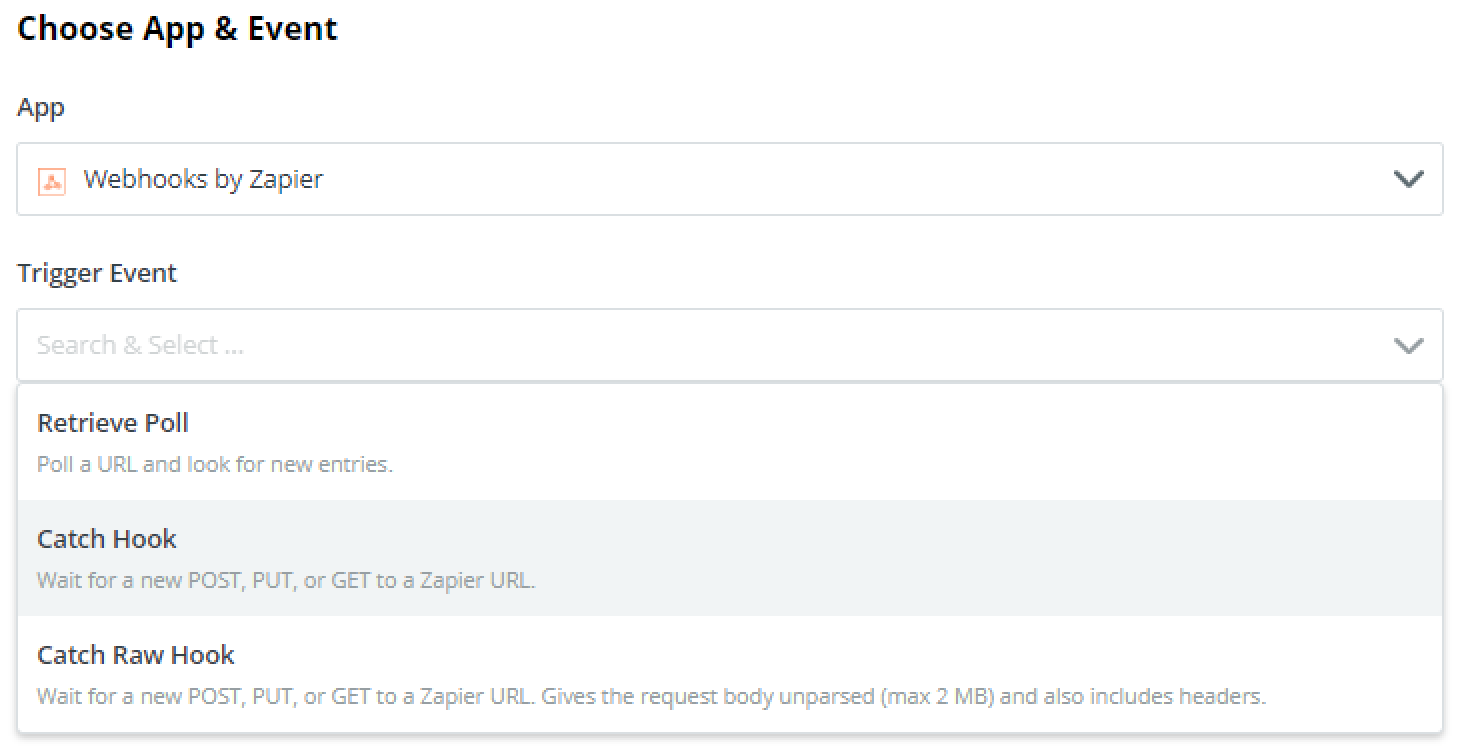
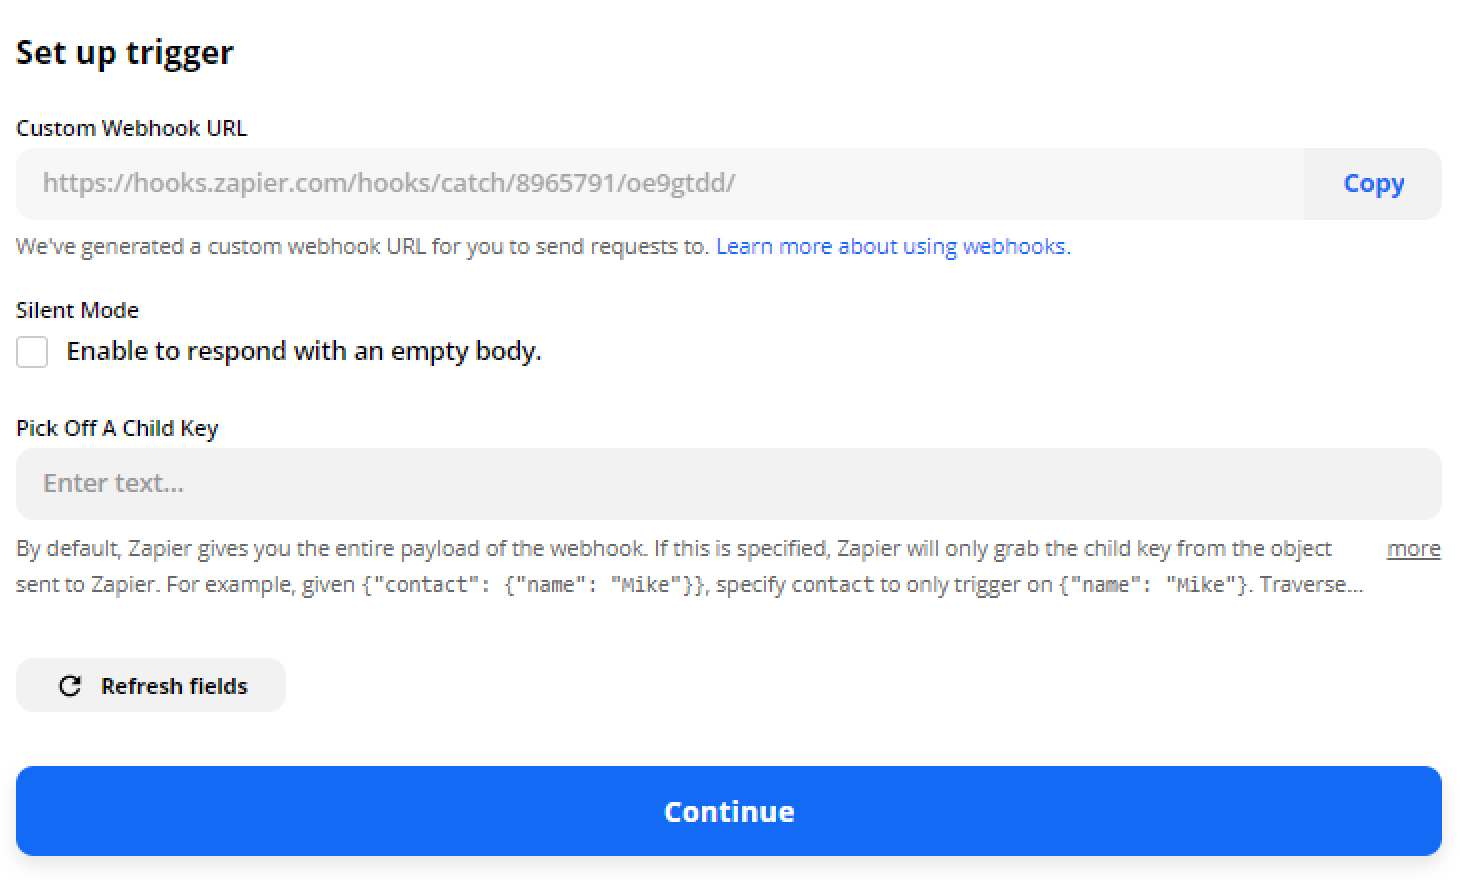
In the Choose Trigger Event drop-down menu, choose the “Catch Hook” option and press the “Continue” button.
Copy the Custom Webhook URL – it will be necessary to create a connection.
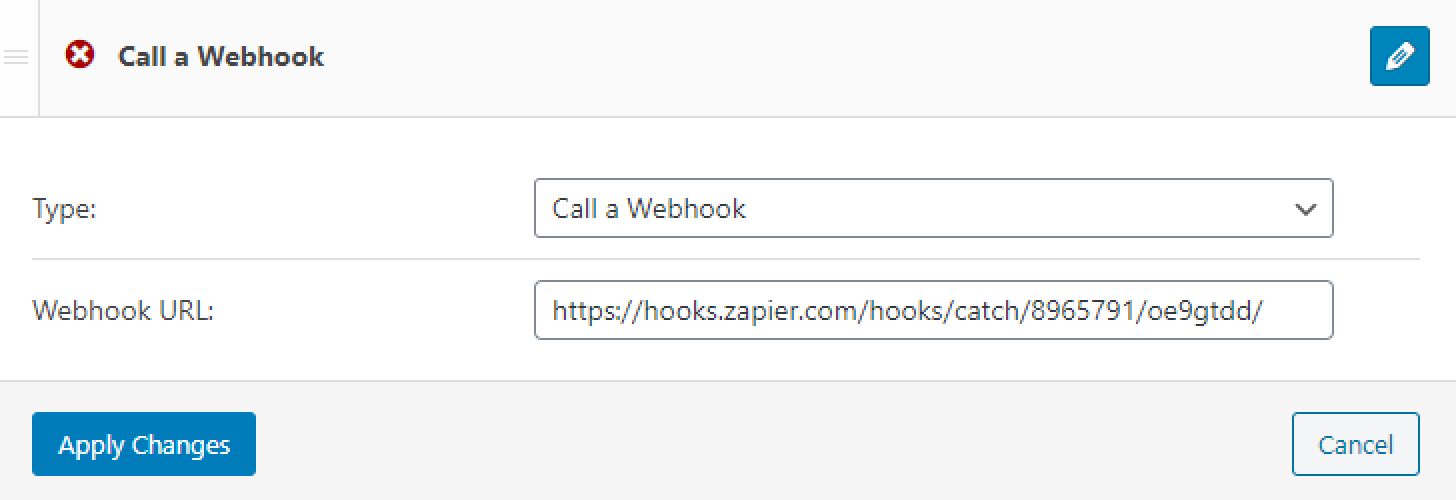
Proceed to WP Dashboard > JetEngine > Forms, find the one you wish to connect and click the “Edit” button. In the Post-submit Actions / Notifications Settings block, click the “Add Notification” button and start editing it. In the Type drop-down menu, select the “Call a Webhook” option, and in the Webhook URL field, paste the URL address you have copied (Custom Webhook URL). Hit the “Apply changes” and “Update” buttons.
After that, go to the front end, fill out and submit the booking form as a user does it.
Test connection
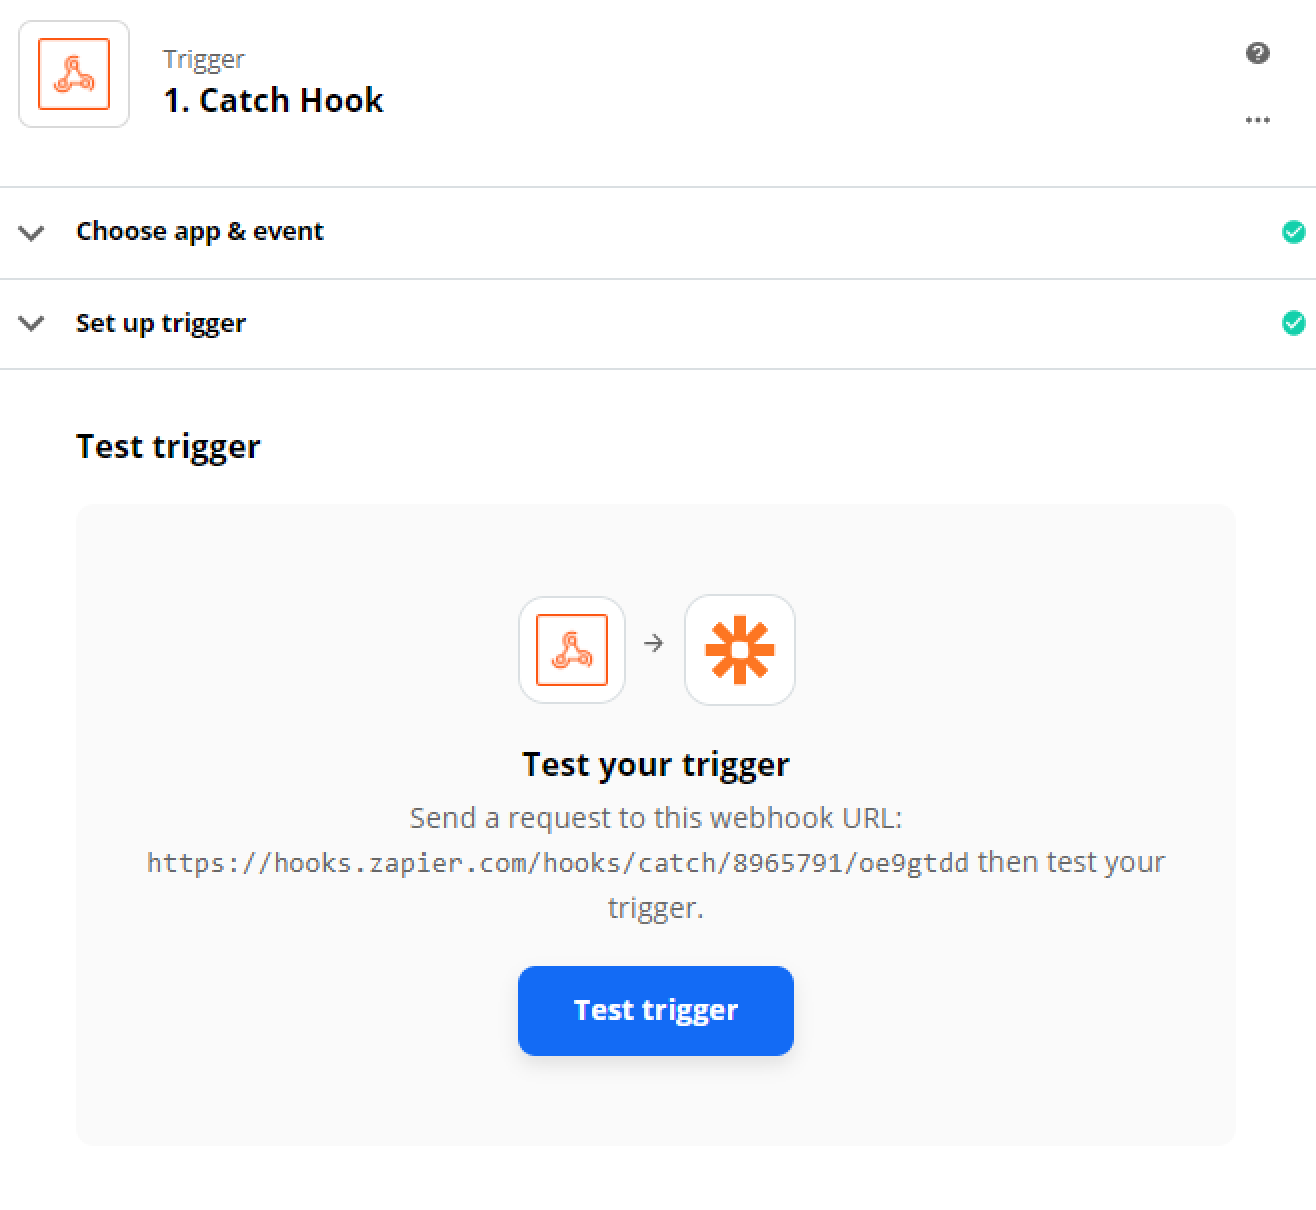
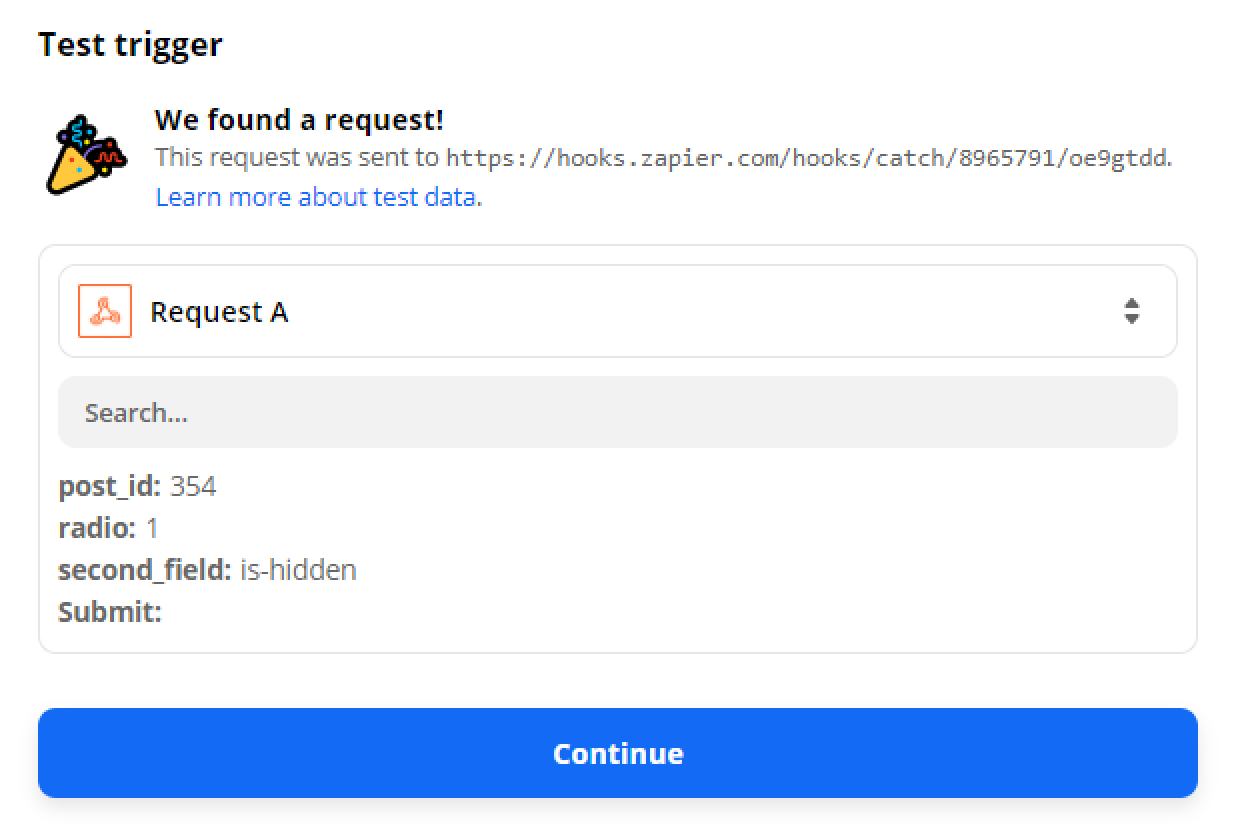
Go back to the Zap settings and click the “Continue” button on the Customize Request screen. You will see the testing screen of a zap that you’ve just set up. Click the “Test trigger” button, and it will pull the data from the form you’ve just submitted on your website.
Congrats, the connection is successfully established! Hit the “Continue” button.
Create action
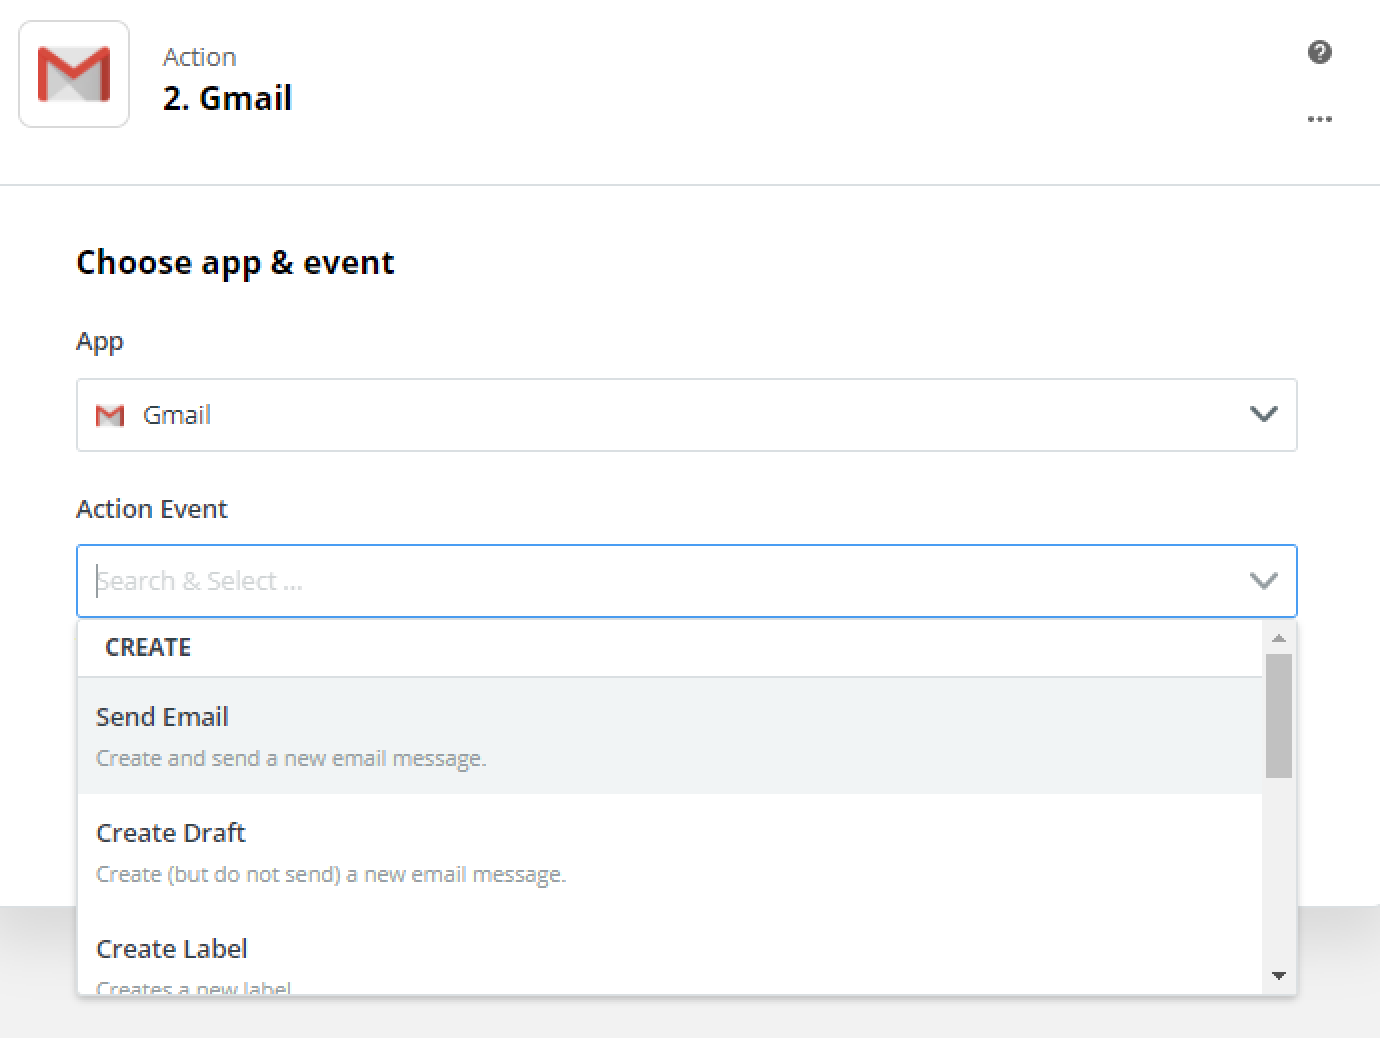
In this block, you choose what will happen once a user submits the form. Pick the Gmail app from the Your Apps section.
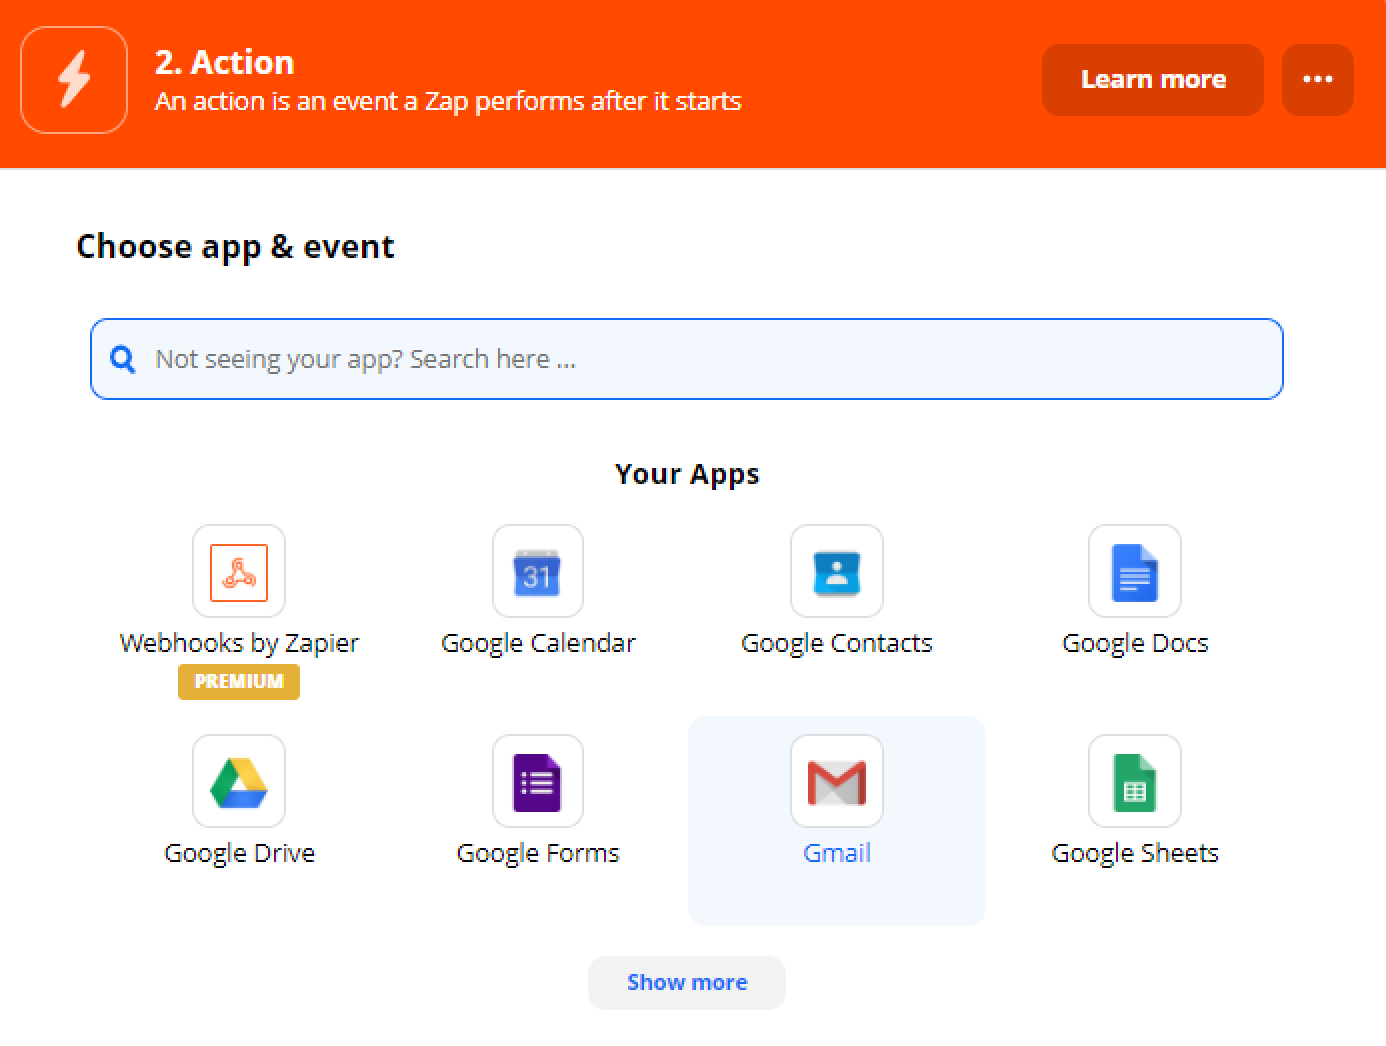
Click the Choose Action Event drop-down menu, select the “Send Email” option, and hit the “Continue” button.
In the Choose Account block, select the Gmail account you’ve previously connected with Zapier and press the “Continue” button again.
Now, you have to do more detailed customization of the message the user will receive. Choose who it will be sent To (you can choose the email typed into the form, for example), From which email address, the Subject of the letter, and other required fields. Then hit the “Continue” button.
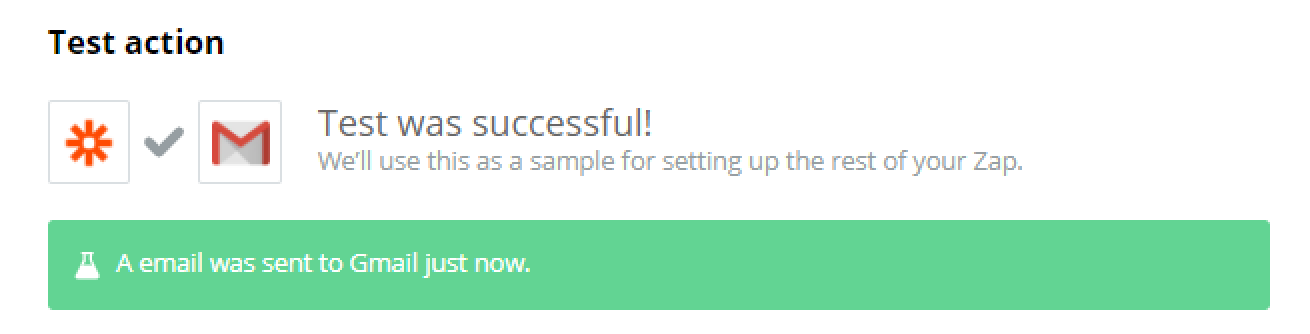
Test your connection once more
You will see the created connection between webhook and Gmail. Click the “Test & Continue” button. If everything is correct, the Zap will be successfully created. Turn it on, and that’s it – your Zap is now active and ready. Name it to be able to find it in the list of Zaps on the dashboard.
Synchronization with Make
To integrate with Make, you need to log in first and then click on the “Create a new scenario” button.
Webhook customization
Click on the “+” button, search for the Webhooks service, and select it from the list.
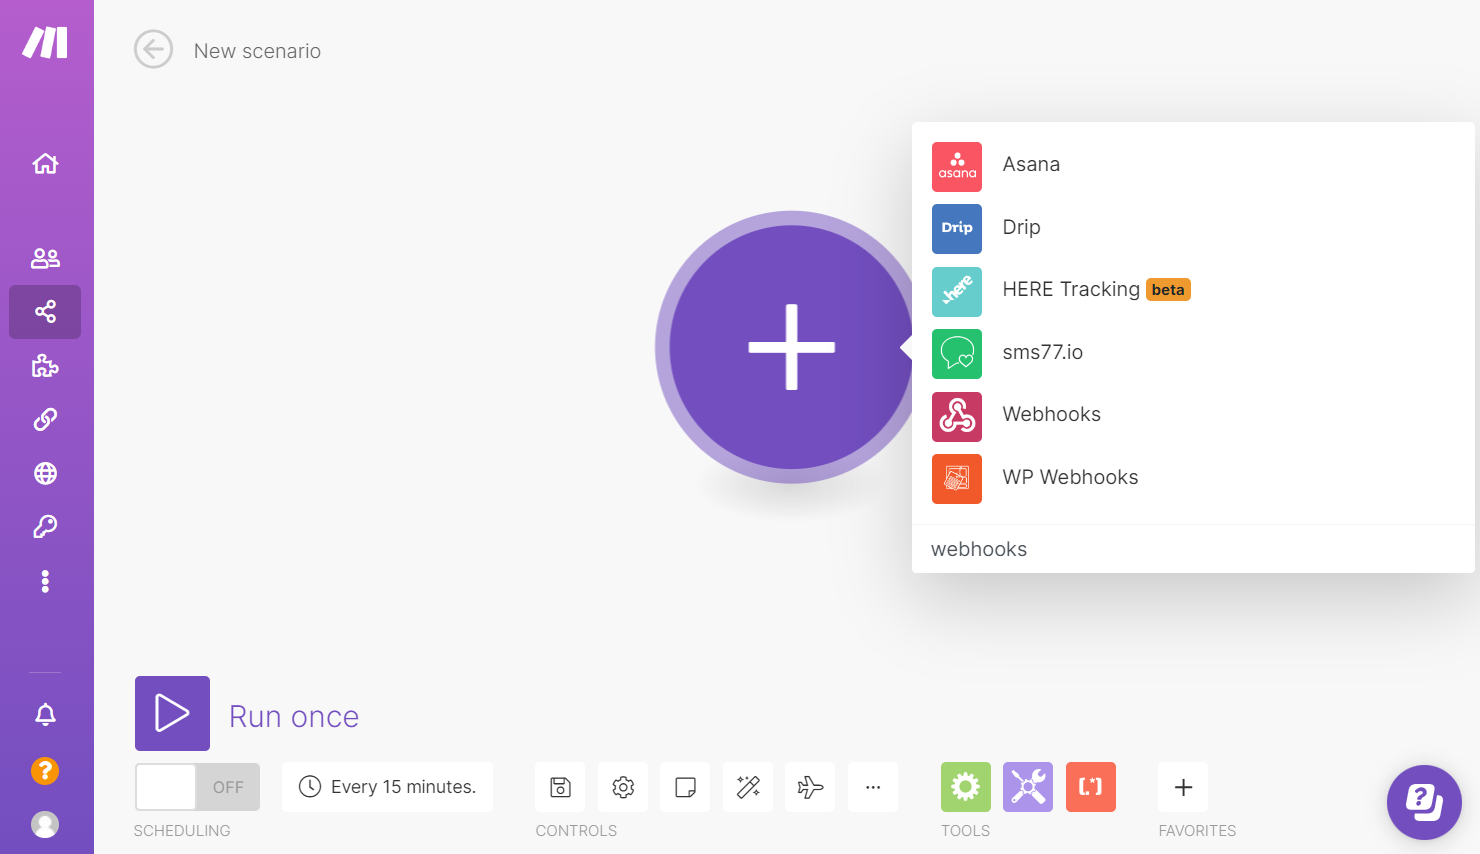
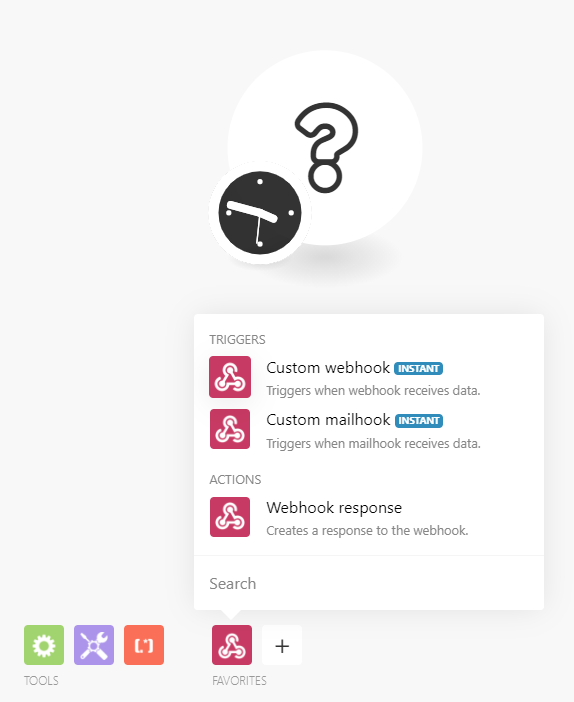
Pick the Custom webhook trigger.
On the next screen, you need to press the “Add” button, enter the name for the Webhook and click the “Save” button. After that, you will see the generated link, which you should copy to the clipboard.

Settings in the forms
Now you need to go back to WP Dashboard > JetEngine > Forms and edit the one you want to connect with Make. In the Post-submit Actions / Notifications Settings block, you need to click “Add Notification” and choose the “Call a Webhook” Type for it. Paste the link to the Webhook URL field. Hit the “Apply Changes” and “Update” buttons.
After that, go back to the Make settings and click the “Re-determine data structure” button. Navigate to the front-end page with that form and submit it.
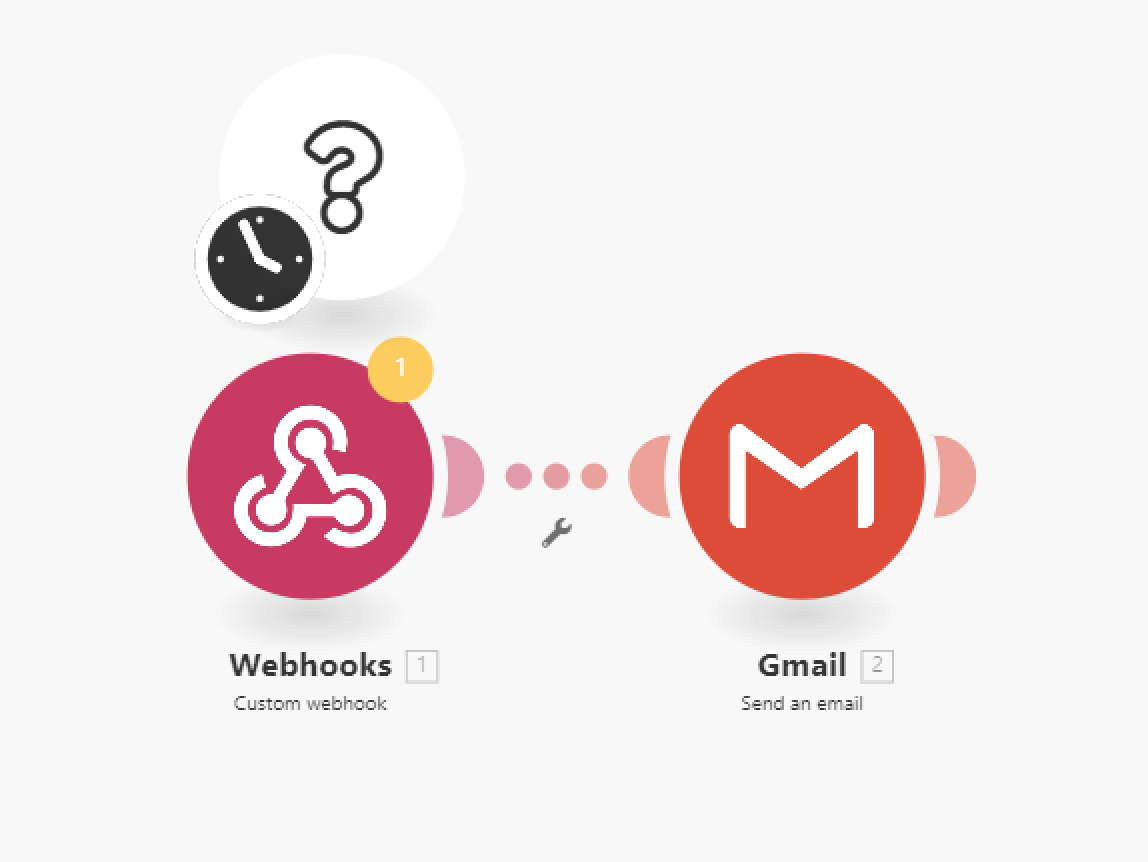
Adding another module
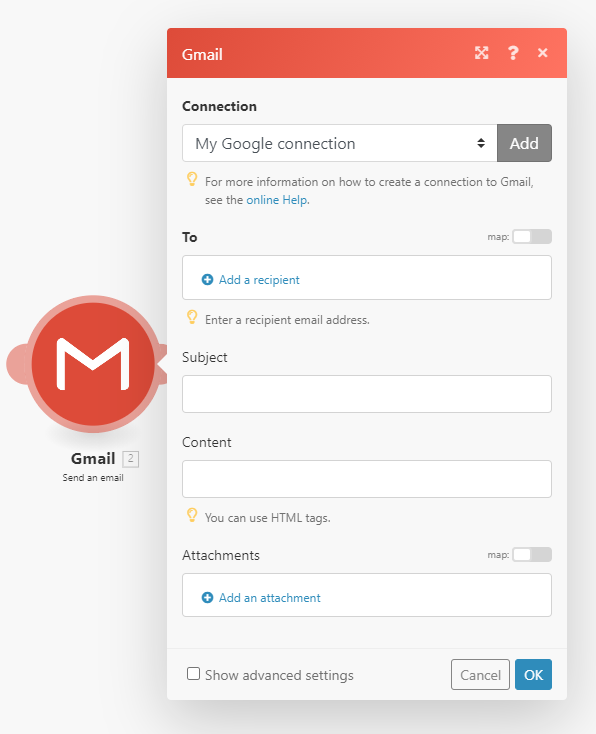
Click the “Add another module” button, choose Gmail, and then pick the Send an email action.

Click the “Add” button near the Connection bar and connect Make to your Gmail account. You also need to define the email address of the letters to be sent To, the Subject of the letter, the Content, and the Attachments. To fill the bars, you can use the data users will put into the form fields; just choose the id of a certain field.
After that, turn on the Scheduling toggle, save the changes, and hit the “Run” button.
That’s it. Now you know how to create an integration between JetEngine forms and third-party services using Webhooks. Choose the service you like more and automate the routine.