How to Manage Units via the WordPress Dashboard
This tutorial will be useful for creating and managing units via the WordPress Dashboard using the JetBooking plugin’s functionality.
The JetBooking plugin allows to add the necessary number of units, which are available in the specific type of the room, in the Units manager block by editing the post. We are going to provide you with the example based on the available units in the Deluxe Queen Room with Two Queen Beds-Tower post of the Rooms custom post type.
Editing a Post
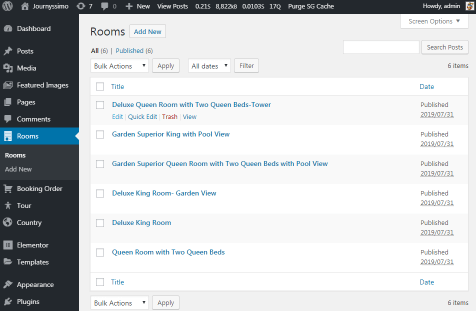
We go to the Rooms custom post type in the WordPress Dashboard and click the “Edit” option under the Deluxe Queen Room with Two Queen Beds-Tower post.

Opening the Units Manager Section
Scroll down to the Units manager section and click the “Manage Units” button to open the settings window.

Exploring the Available Units Block
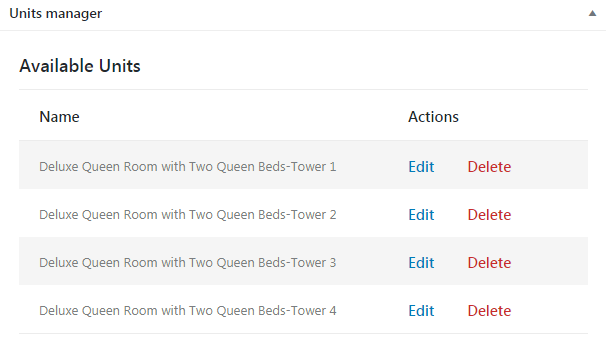
Here we can see the list of already created units in the Available Units block. We can change the name of the unit or delete it at all by clicking the corresponding option next to it (“Edit” or “Delete” action).

Creating a New Unit
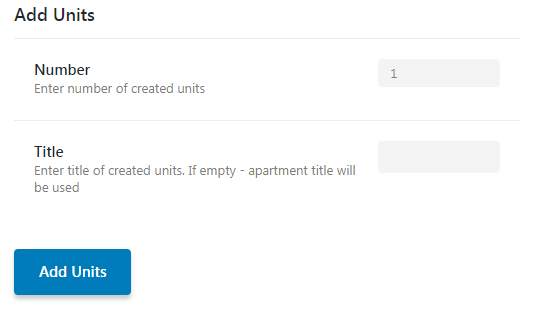
If we need to create a new unit we can do that in the Add Units block below. We need to enter the number of new units and their title. If the Title field is empty the room’s title will be used.
After we filled in the fields we click the “Add Units” button and the units will appear in the Available Units list.

Changing a Unit
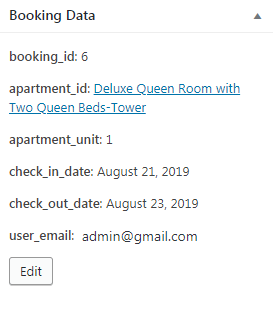
In case we want to change the unit in the order, we open to the Booking Order custom post type in the WordPress Dashboard and proceed to edit the booking data of the certain post (order).

Now you know how to manage the units using the JetBooking plugin.