How to Export Bookings from the Dashboard
Learn how to export the booking items from the WordPress Dashboard to your computer with JetBooking.
Before you start, check the tutorial requirements:
- JetBooking plugin installed and activated
Let’s assume you want to export bookings added by users of your website. It can be easily done from the JetBooking dashboard.
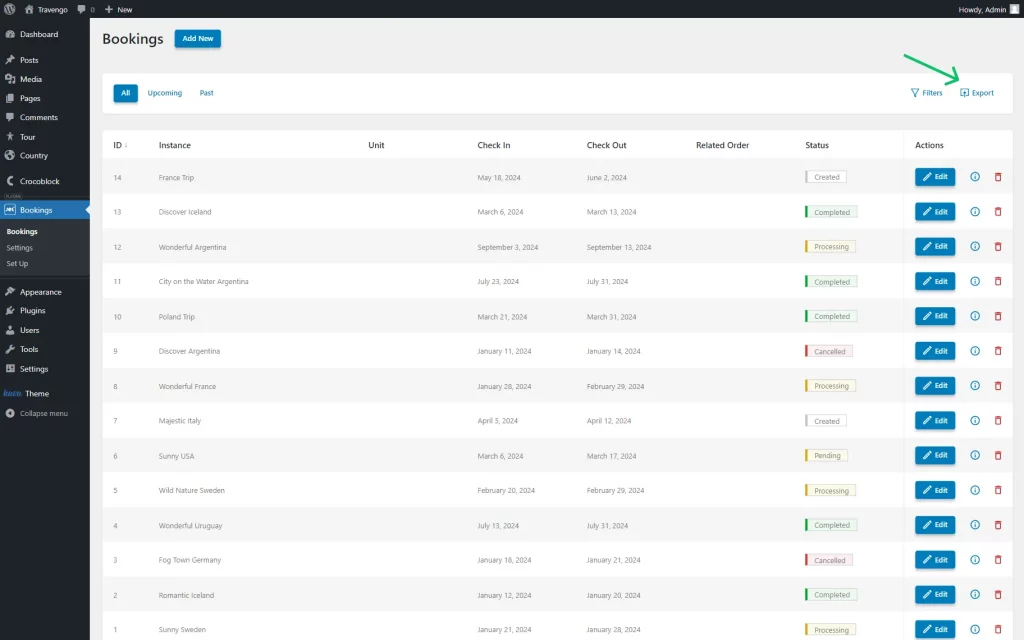
Navigate to WordPress Dashboard > Bookings to see the list of all the bookings.
Then, press the “Export” button to see the exporting settings pop-up.
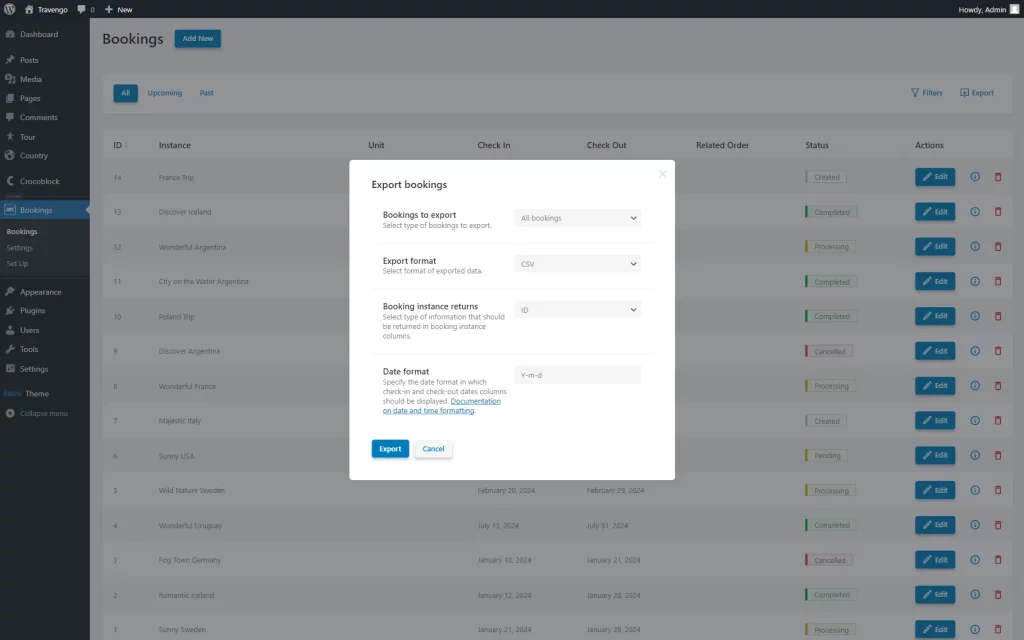
Once opened, you will see the following fields for customization:
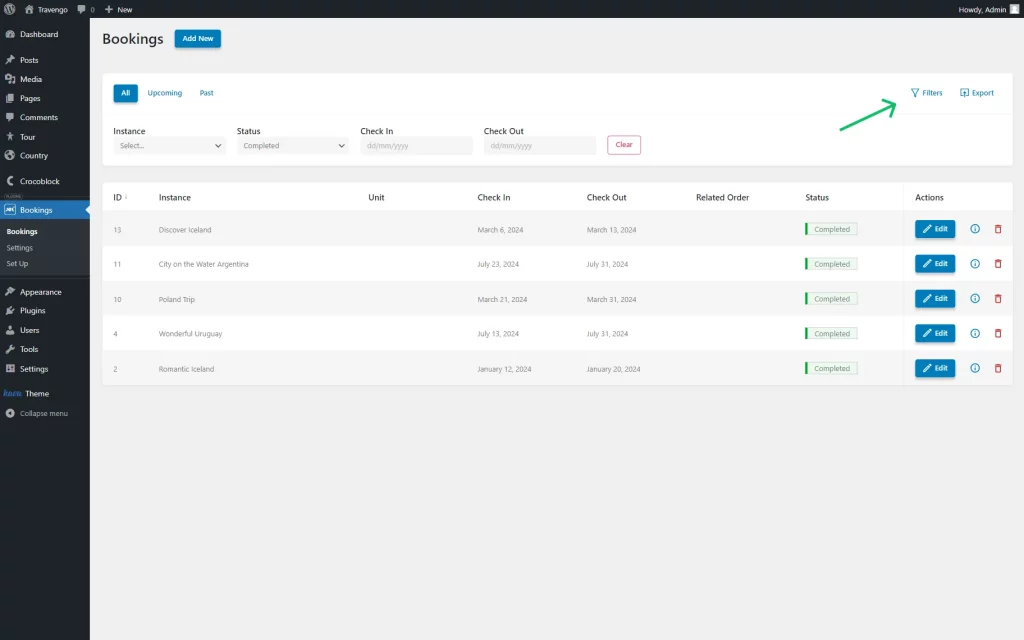
- Bookings to export — a drop-down list that includes two options: “All bookings” and “Filter bookings.” The first option is default and combines all the website bookings in one file, and the second one includes only the bookings filtered in the dashboard with the “Filter” button and its selectors.
- Export format — the format in which files will be exported: either “CSV” or “iCal”;
- Booking instance returns — a field that is available only when the “CSV” option is selected for the exported files. Select whether you want to display “ID” or “Title” in the booking instance columns;
- Date format — a field that is available only when the “CSV” option is selected as the Export format. Here, define the date format for displaying the check-in and check-out dates. Learn more about the formats in the documentation on date and time formatting.
Click on the “Export” button to save the file, which will be stored in the “Downloads” folder on your computer.
That’s it; now you know how to export the booking files from your WordPress website on your computer with the help of the JetBooking plugin.
Was this article helpful?
YesNo


