How to Create a Preset for Product Table
Learn how to create, customize, and manage the Presets available with the JetProductTables plugin for WordPress.
Before you start, check the tutorial requirements:
- Block Editor (Gutenberg)
- WooCommerce plugin installed and activated with created products
- JetProductTables plugin installed and activated
Open the Settings
Navigate to the WordPress Dashboard > WooCommerce > Settings tab (or press the “Product Tables Settings” link under the JetProductTables plugin’s name in WordPressDashboard > Plugins to be redirected to this tab). Here, move to the Product Table tab.

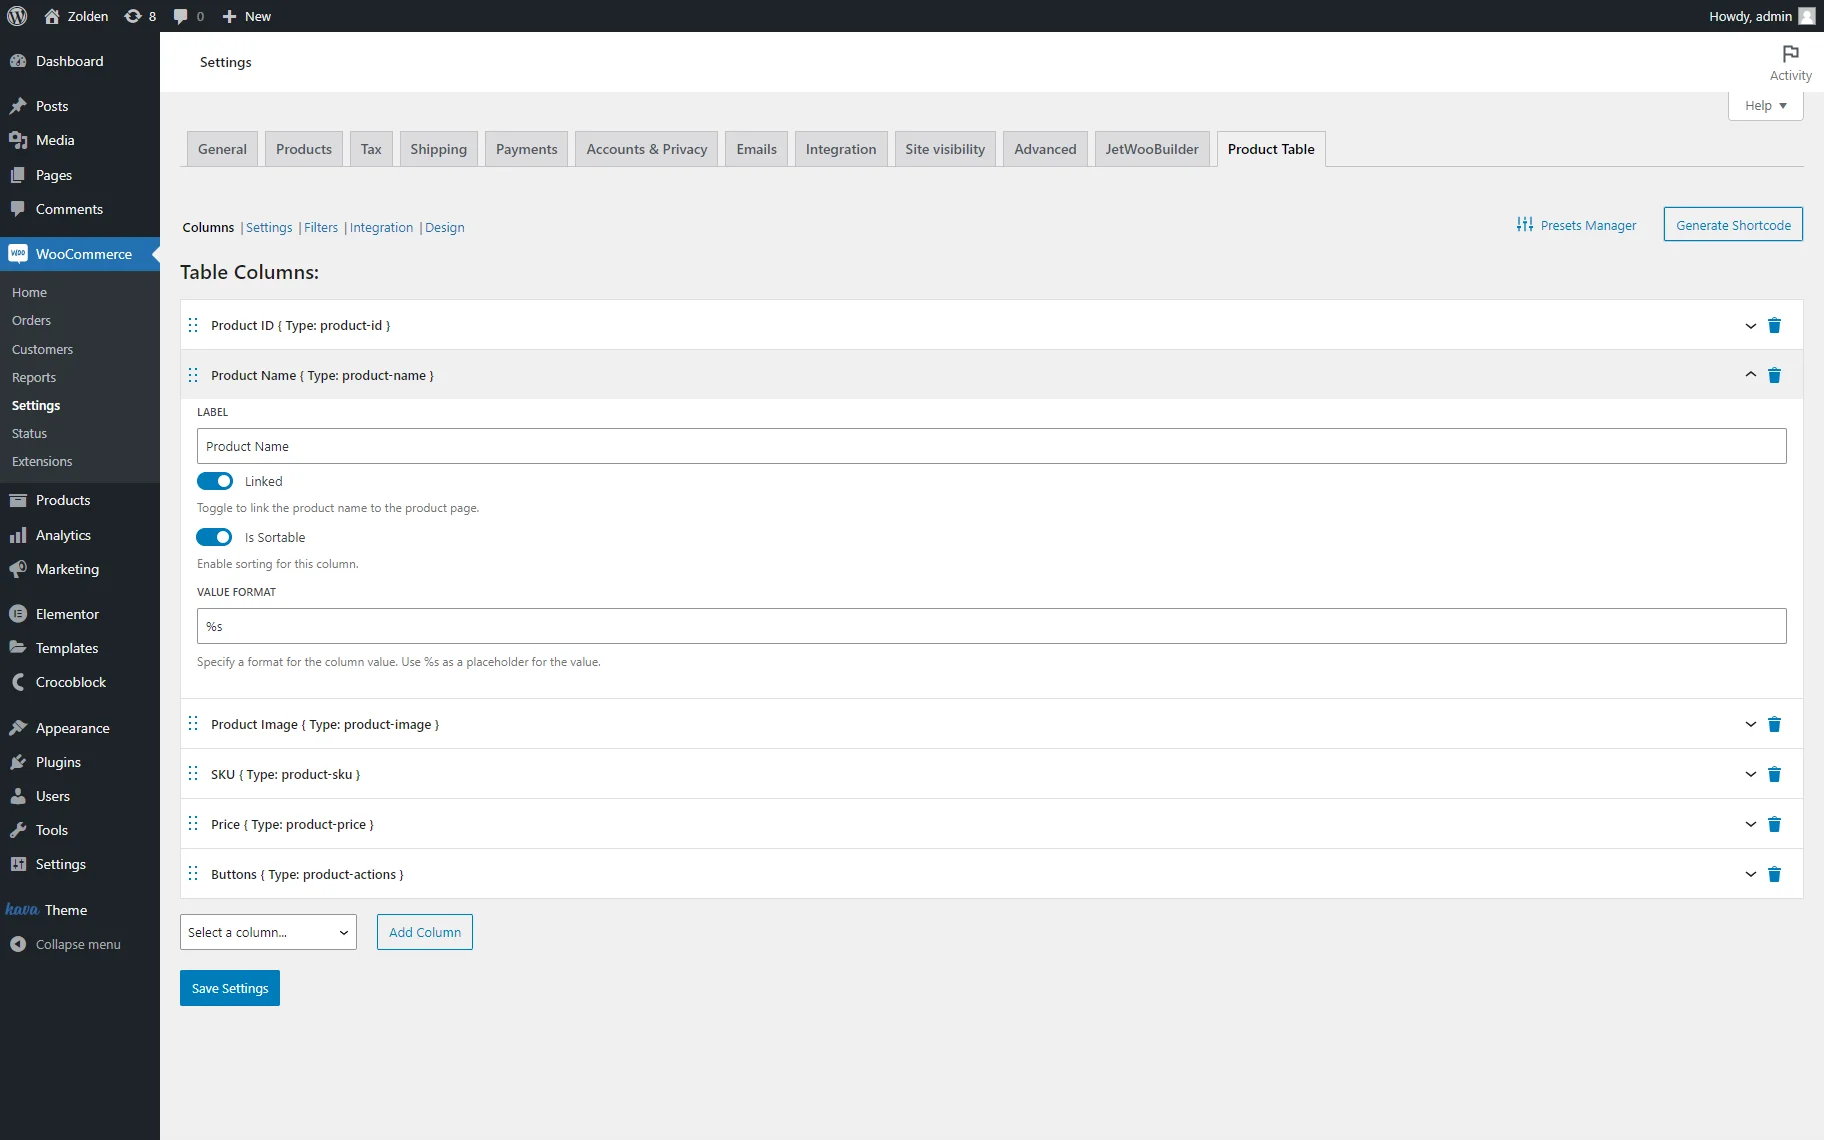
Add or Delete the Table Columns
Move to the enlisted Table Columns. Some сolumns (i.e., Product ID, Price, etc.) are added by default.
Here, you can add the needed column(s) by selecting from the “Select a сolumn” drop-down list and pressing the “Add Column” button below the Table Columns section. To delete the unnecessary сolumn, press the “recycle bin” icon on the right side of the appropriate сolumn.
Manage the Column Data
Unroll the needed column. All columns have the LABEL text field for inserting the text that will be displayed on the front end as the title of this column.
In this case, we unrolled the “Product Title” column. Then, we kept the Linked toggle activated by default to link the product name to the product page, allowed sorting the data on the front end by enabling the Is Sortable toggle, and kept the default value of the VALUE FORMAT text field.
Specify the General Features of the Table
Unfold to the Settings tab. Here, the General section includes the settings that specify the general view of the table, i.e., its header, footer, etc.
For more details about managing the general settings (i.e., for setting the direction of the table, layouts, pagination, and more), read the JetProductTables Dashboard Settings Overview.
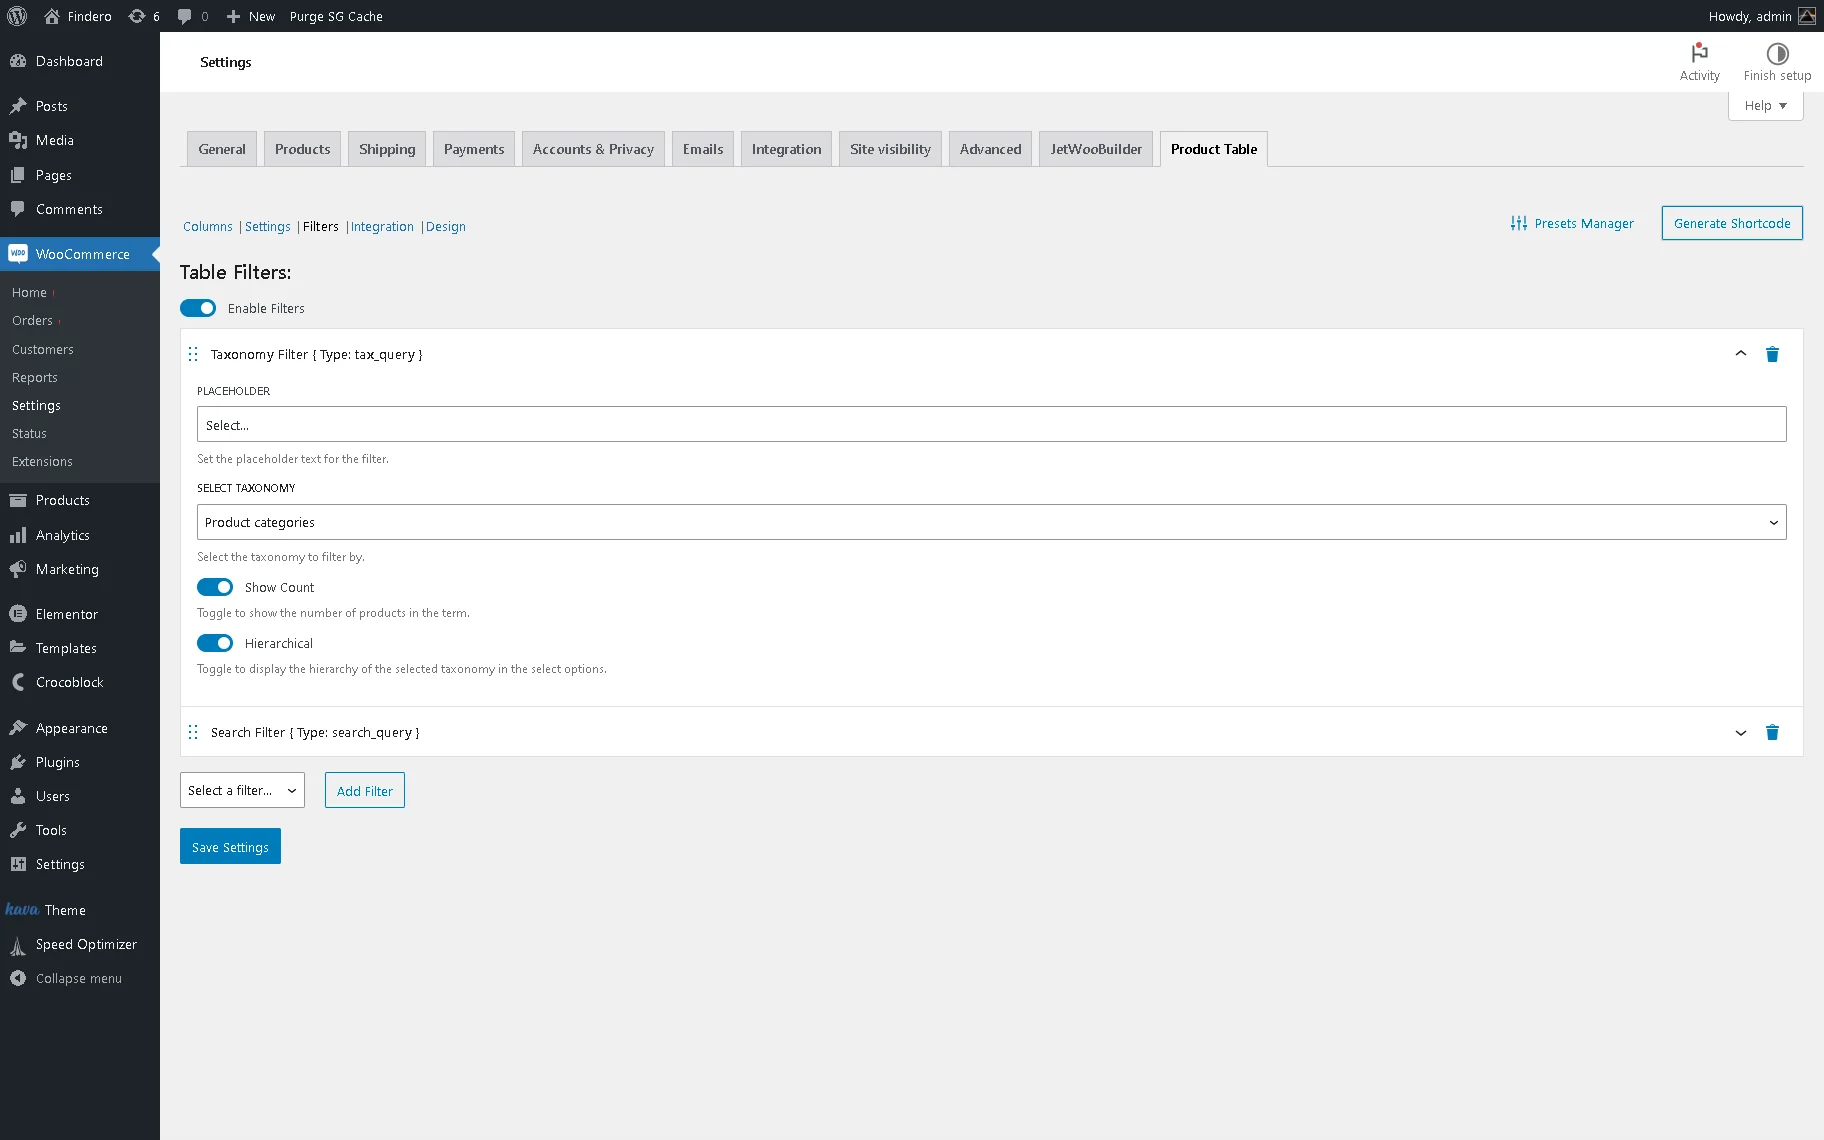
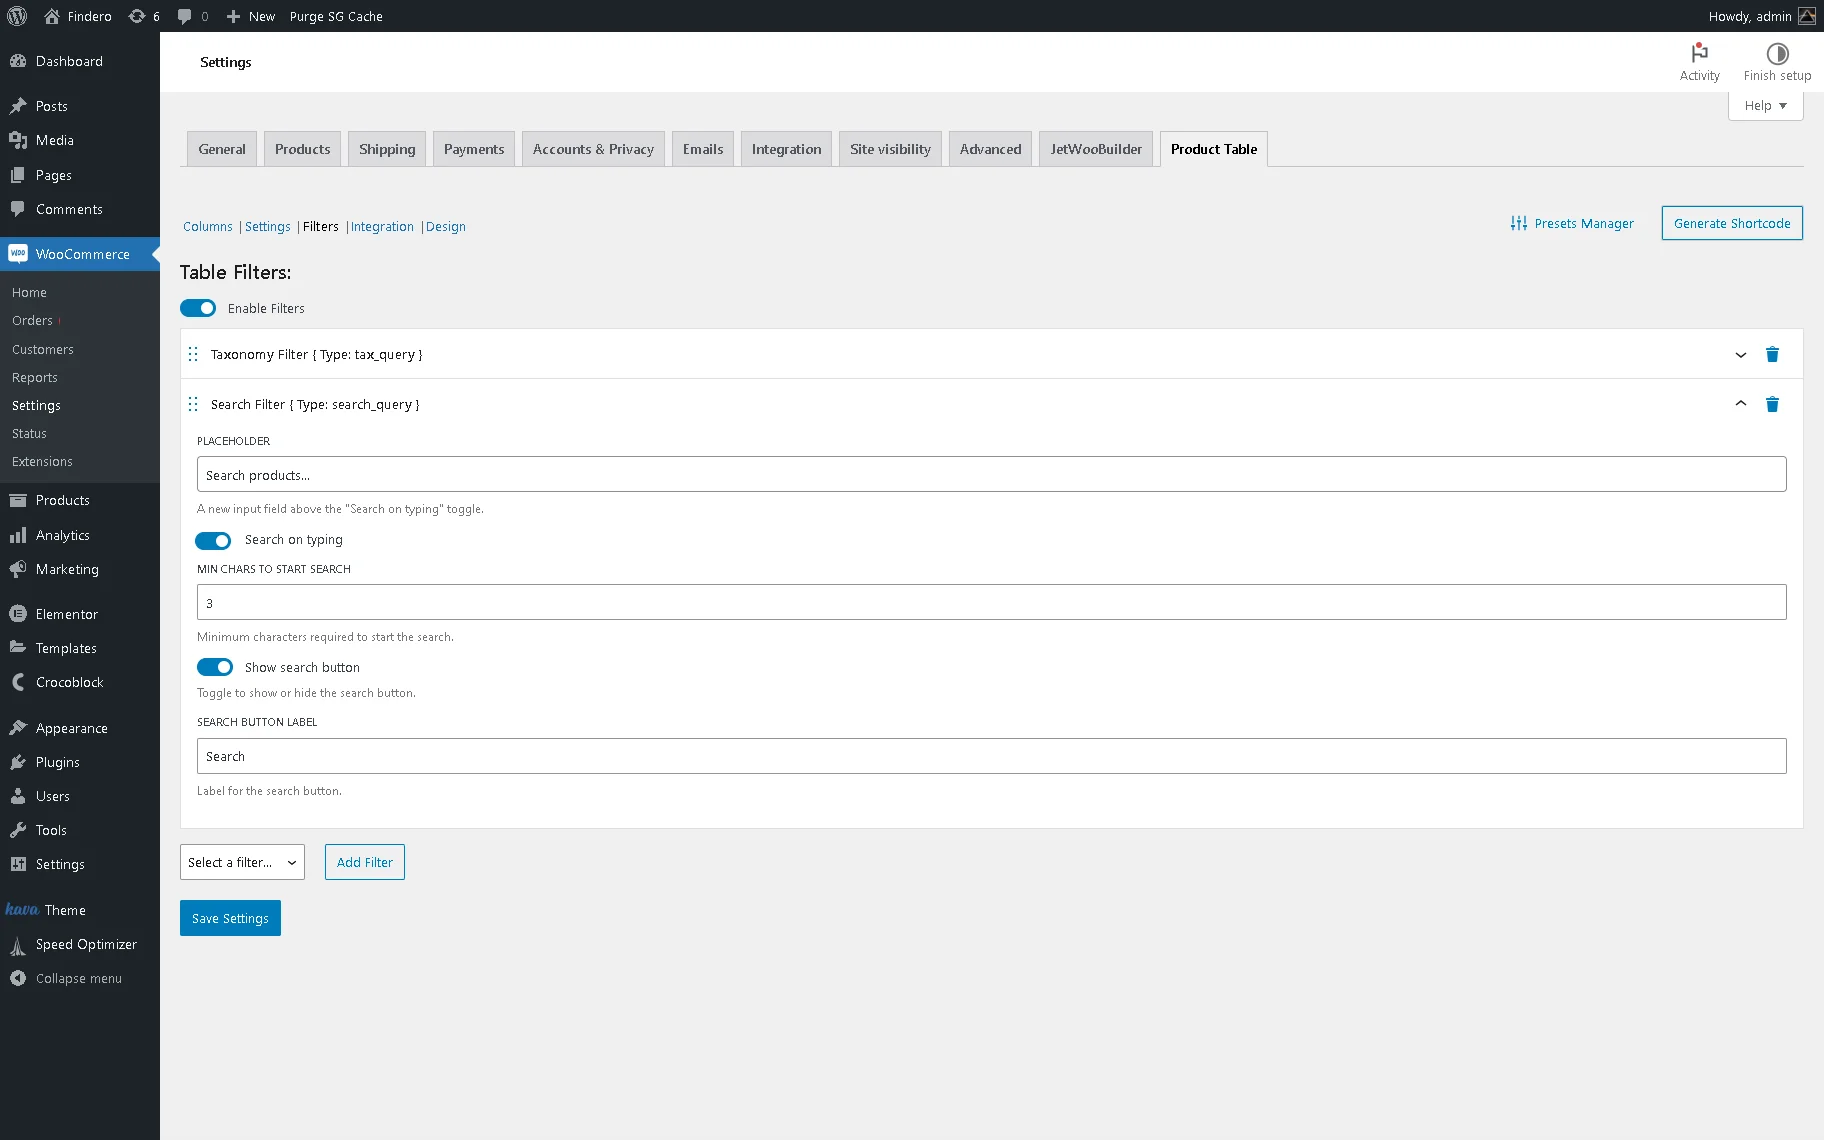
Set the Filters
This group of settings adds filters for the Product Table. If activated, the Enable Filters toggle turns on the default Taxonomy Filter and Search Filter tabs. To add another filter, select a needed option from the drop-down list with the “Select a filter…” text and press the “Add Filter” button.
In this tab, we unrolled the Taxonomy Filter tab and kept the default PLACEHOLDER text. Then, we picked the category in the SELECT TAXONOMY drop-down list.
Also, we toggled the Show Count and Hierarchical toggles to show the number of search results and display the taxonomy hierarchy on the front end, respectively.
Then, we unrolled the Search filter tab and kept the default text in the PLACEHOLDER field. Also, we activated the Search on typing toggle and then kept the default minimum number of characters that users have to enter for the automatic search to start in the newly-appeared MIN CHARS TO START SEARCH text field. Finally, we enabled the Show search button toggle and kept the default text for the search button in the SEARCH BUTTON LABEL text field.
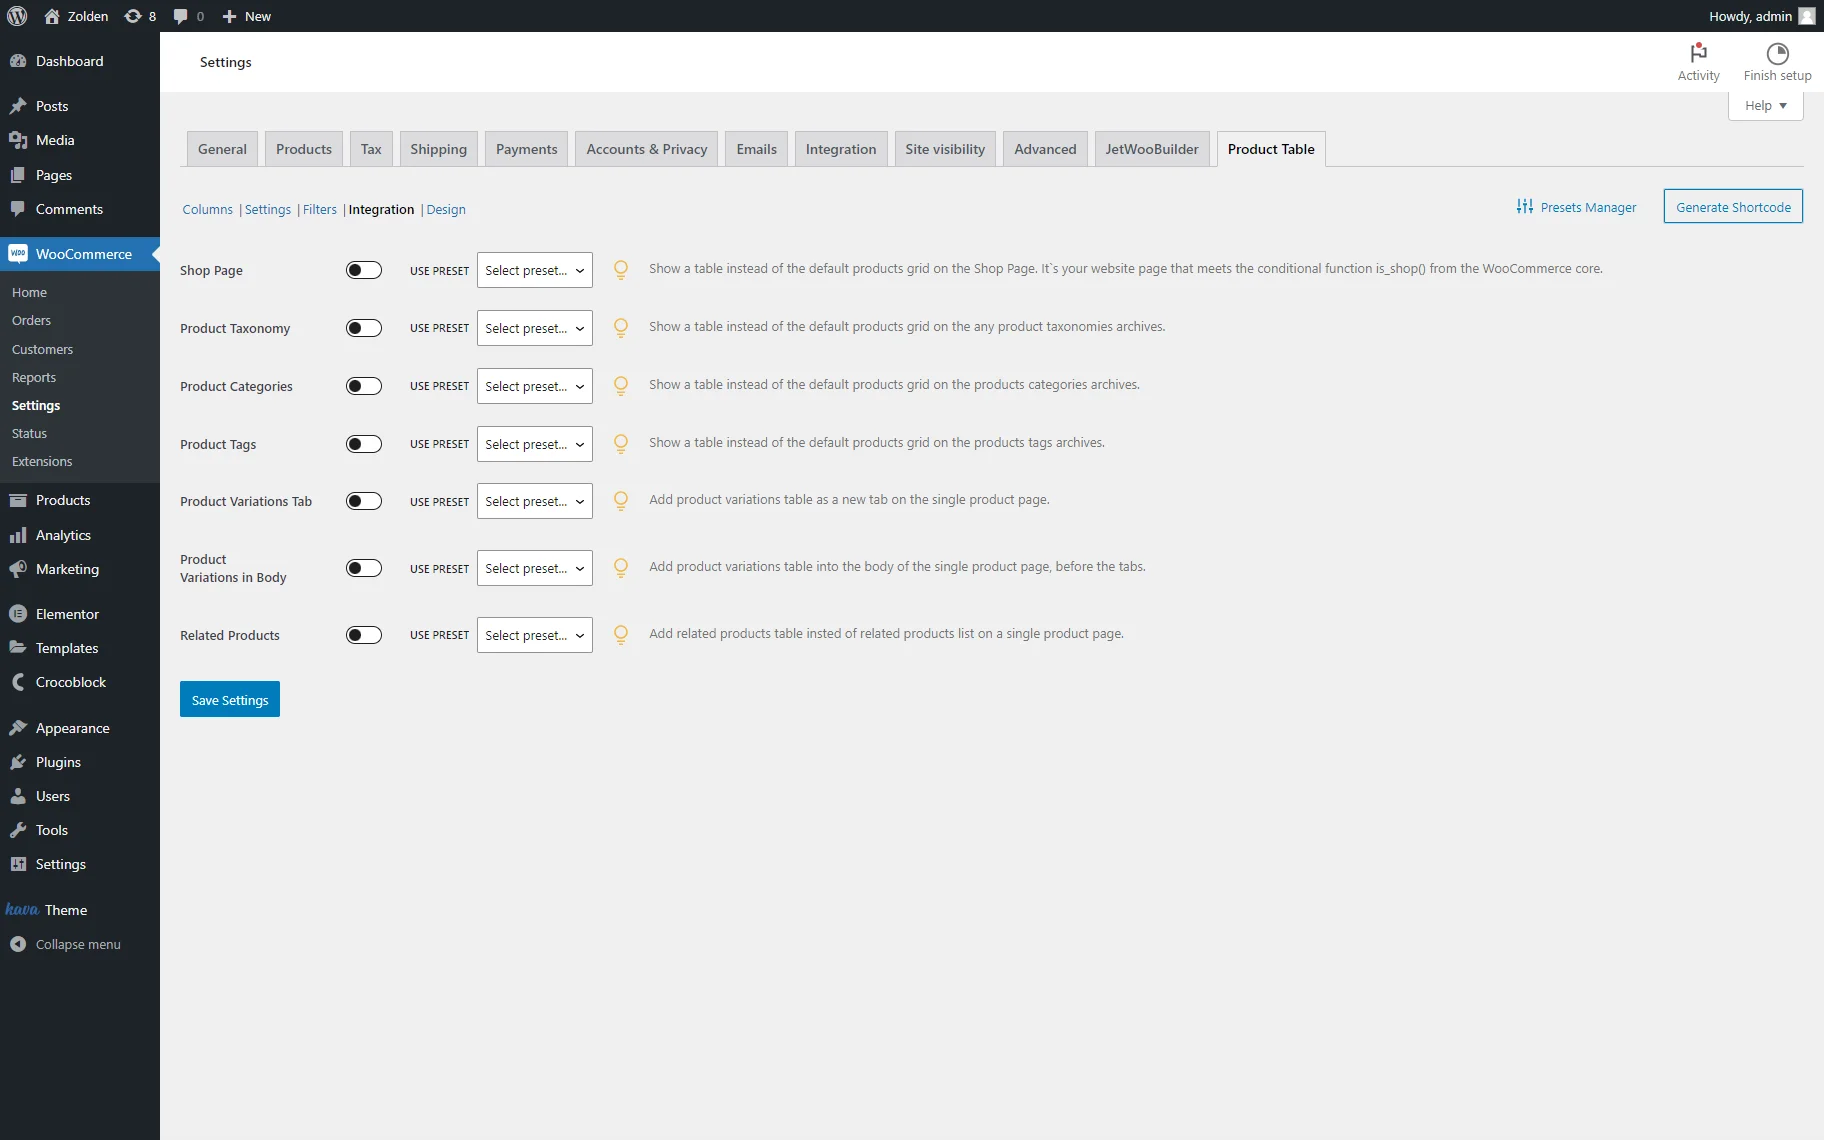
Select the Pages to Display the Table
To set the standard WooCommerce pages to display the table, navigate to the Integration tab and unroll it.
To set the Preset for the needed page, activate the appropriate toggle near the specific page. You can also choose a separate preset for each page. If no preset is selected, the table for this page will be displayed according to the settings you specified previously on the General settings tab..
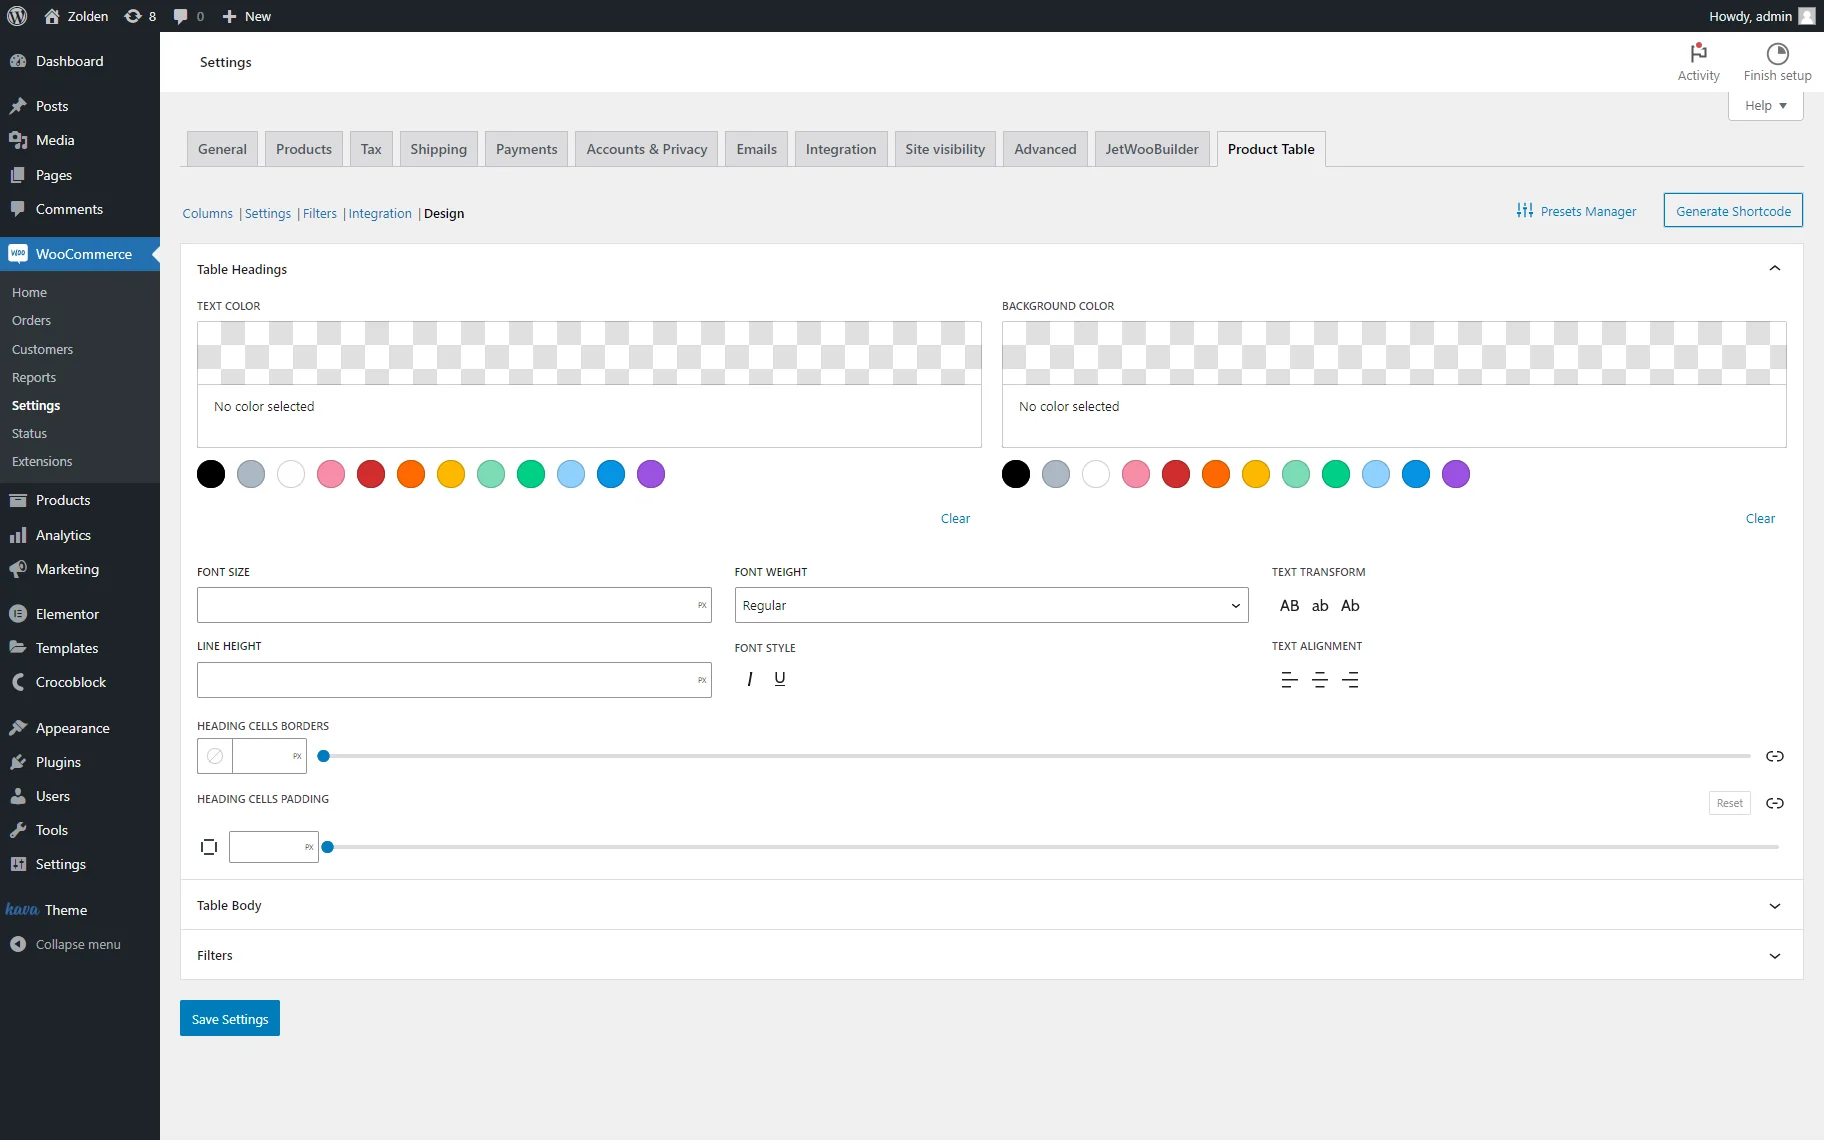
Design the Table
Move to the Design tab and customize the table’s appearance (i.e., the Table Headings, Table Body, and/or Filters). In particular, assign text colors, fonts, borders, and more.
Save the Preset
Once completed, press the “Presets Manager” button to save the preset. Here, type the preset’s name in the SAVE CURRENT SETTINGS STATE AS PRESET and press the “Save Preset” button near this text field.
Then, the created preset will be shown in the list below. Also, you can edit and/or delete this preset by pressing the “pencil” or “recycle bin” icon, respectively.
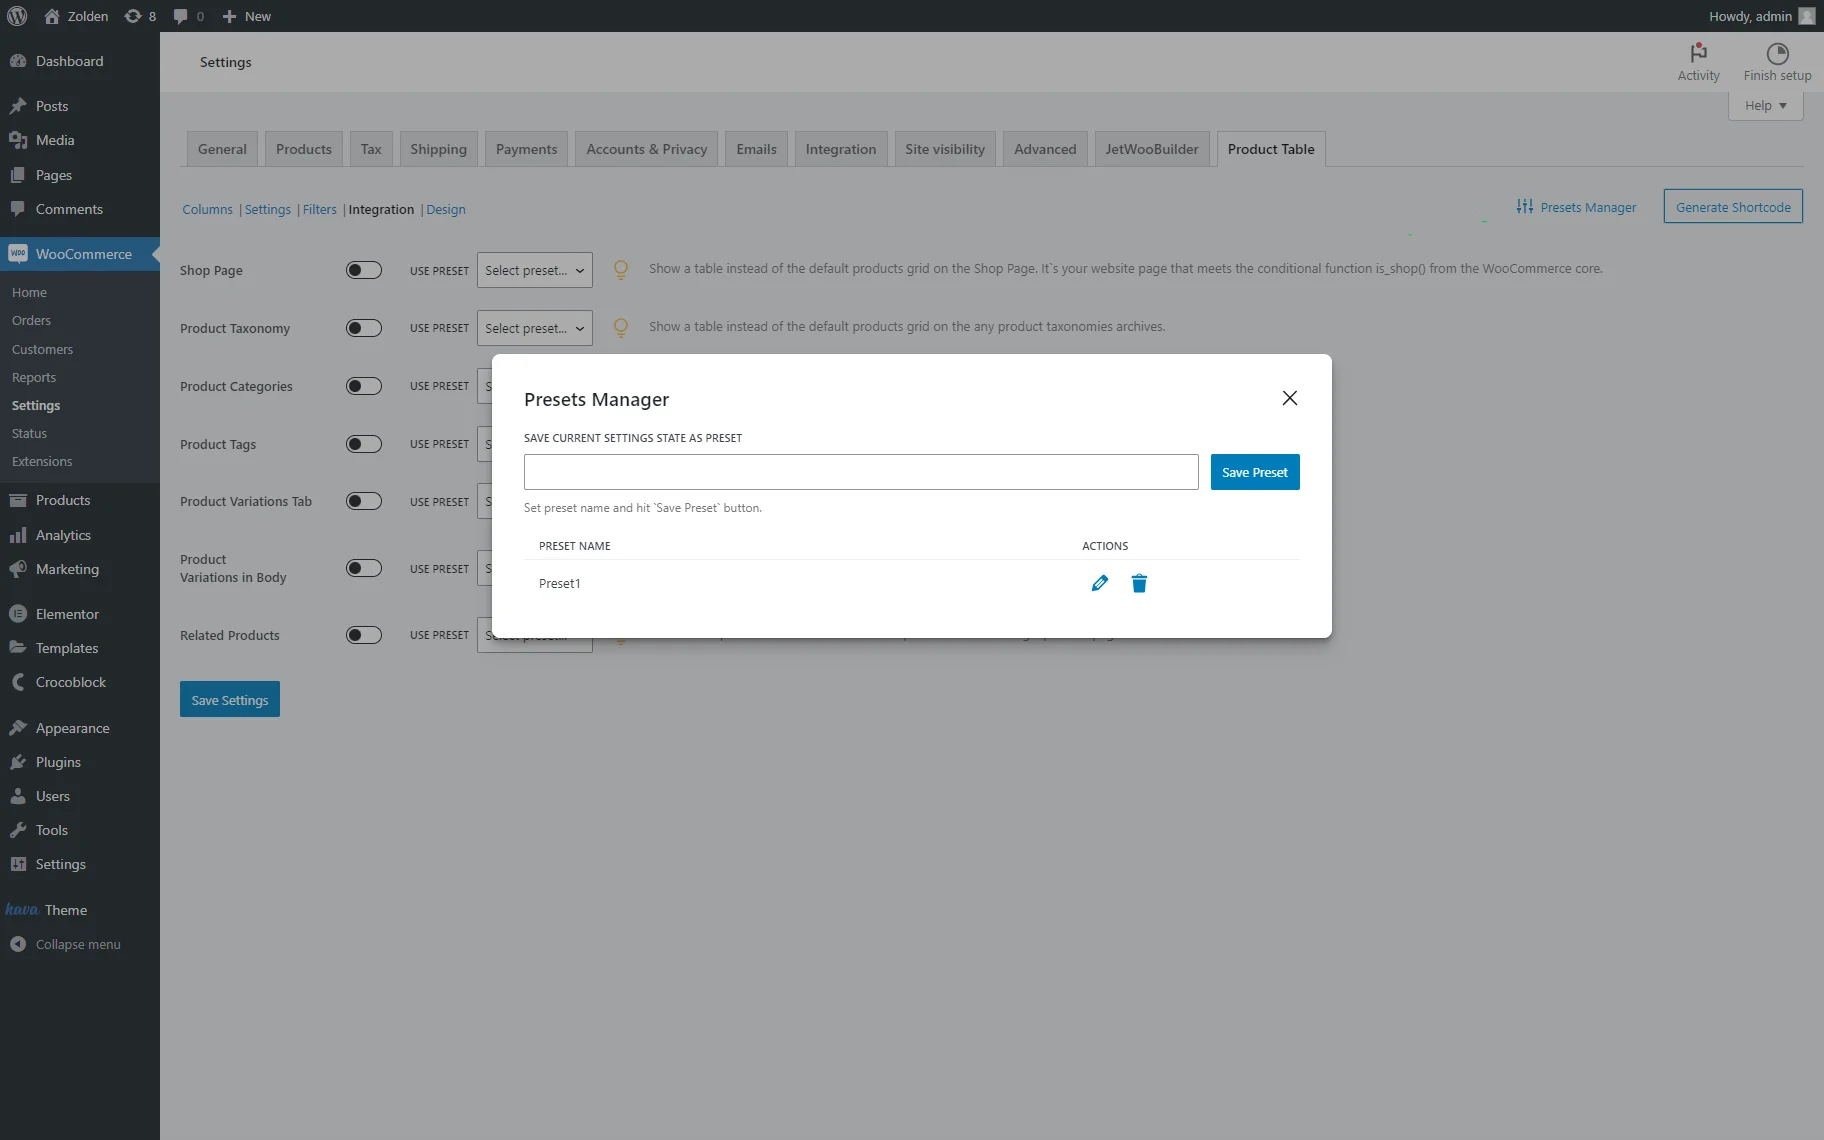
Finally, click the “Save Settings” button.
Also, check out our video overview about the Presets Manager.
That’s it. Now you know how to create, customize, and manage the presets available with the JetProductTables plugin for WordPress.