Product Table Block Overview
Learn how to display the WooCommerce objects via the Product Table block and customize the table’s appearance (i.e., use presets, show/hide the needed columns, apply different types of filters, add navigation elements and a header/footer, and manage the layouts for the different devices).
The Product Table block is available if the JetProductTables for WooCommerce plugin is installed and activated. To add it to the page in the WordPress block editor, the Block Inserter (the “plus” icon) should be pressed, and the Product Table block should be found in the search bar.
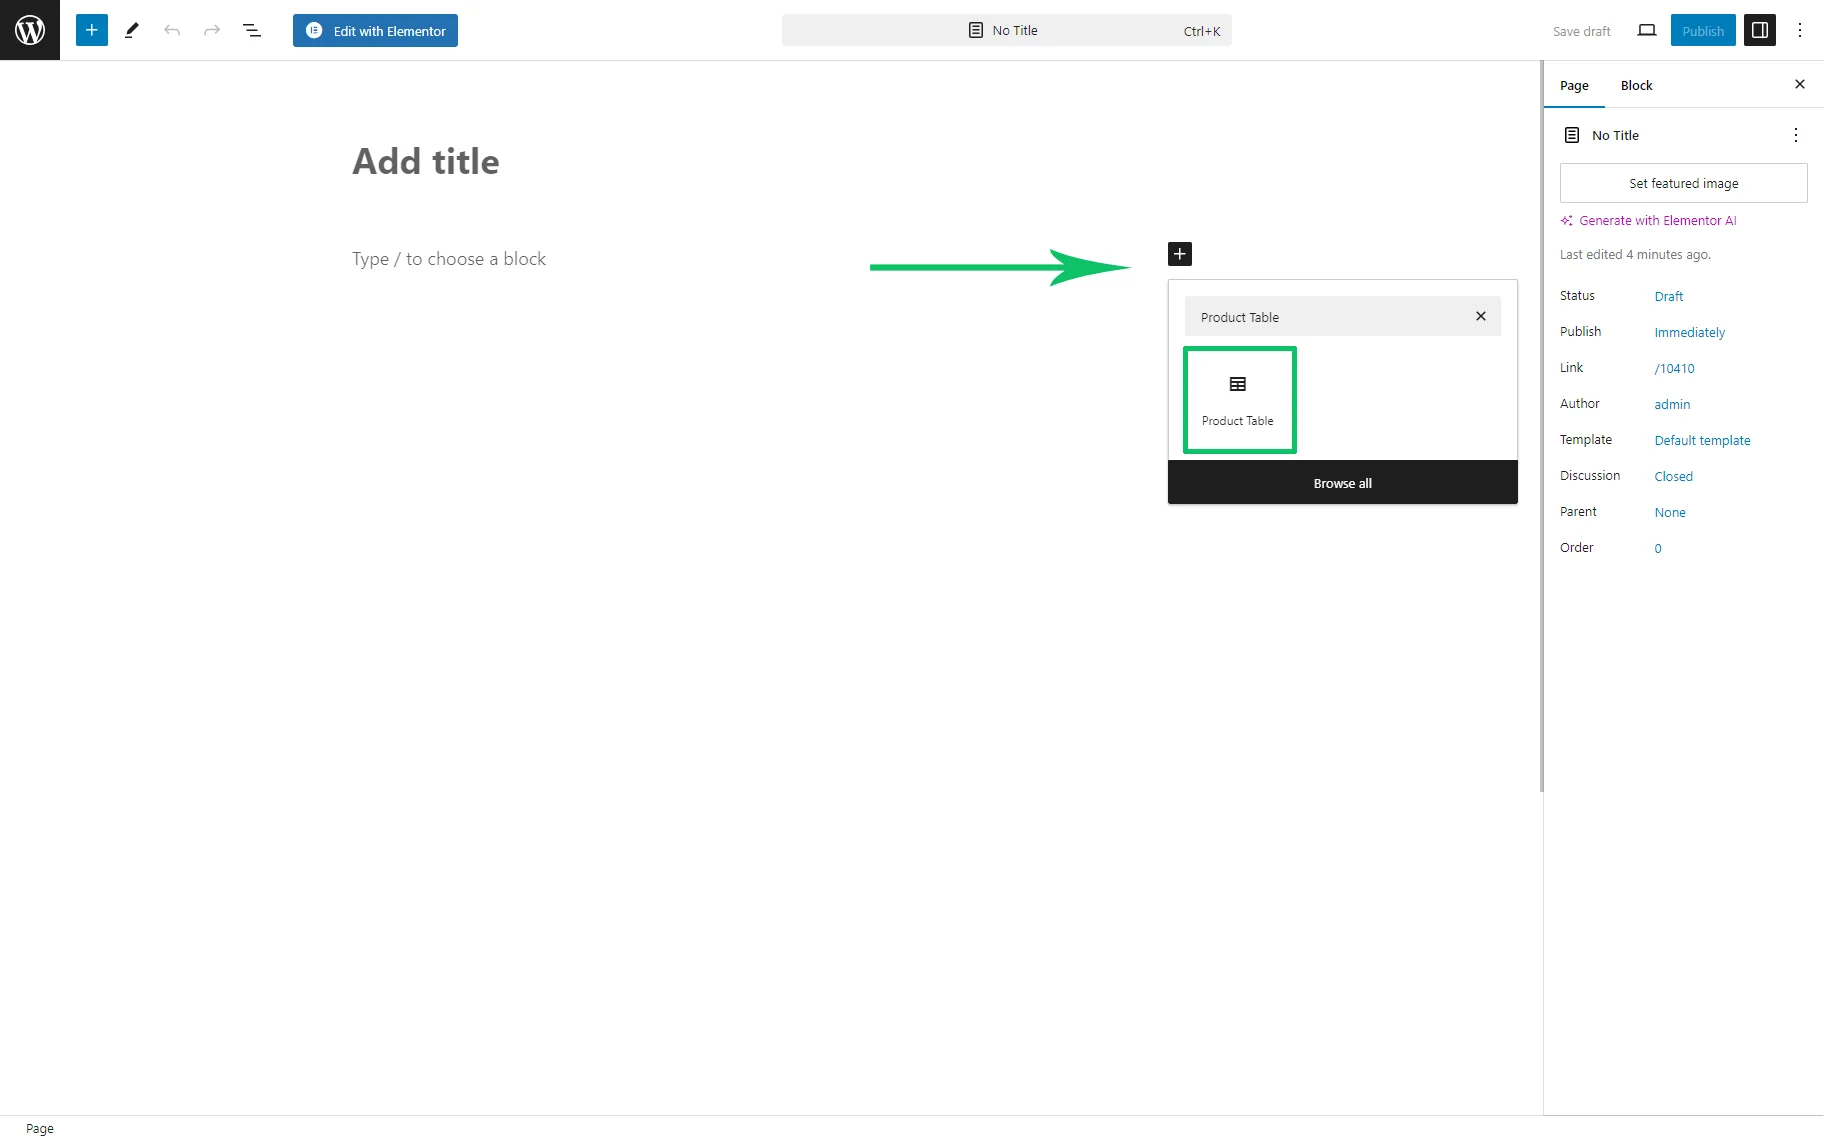
After inserting the block, a table with default settings will be added to the page.
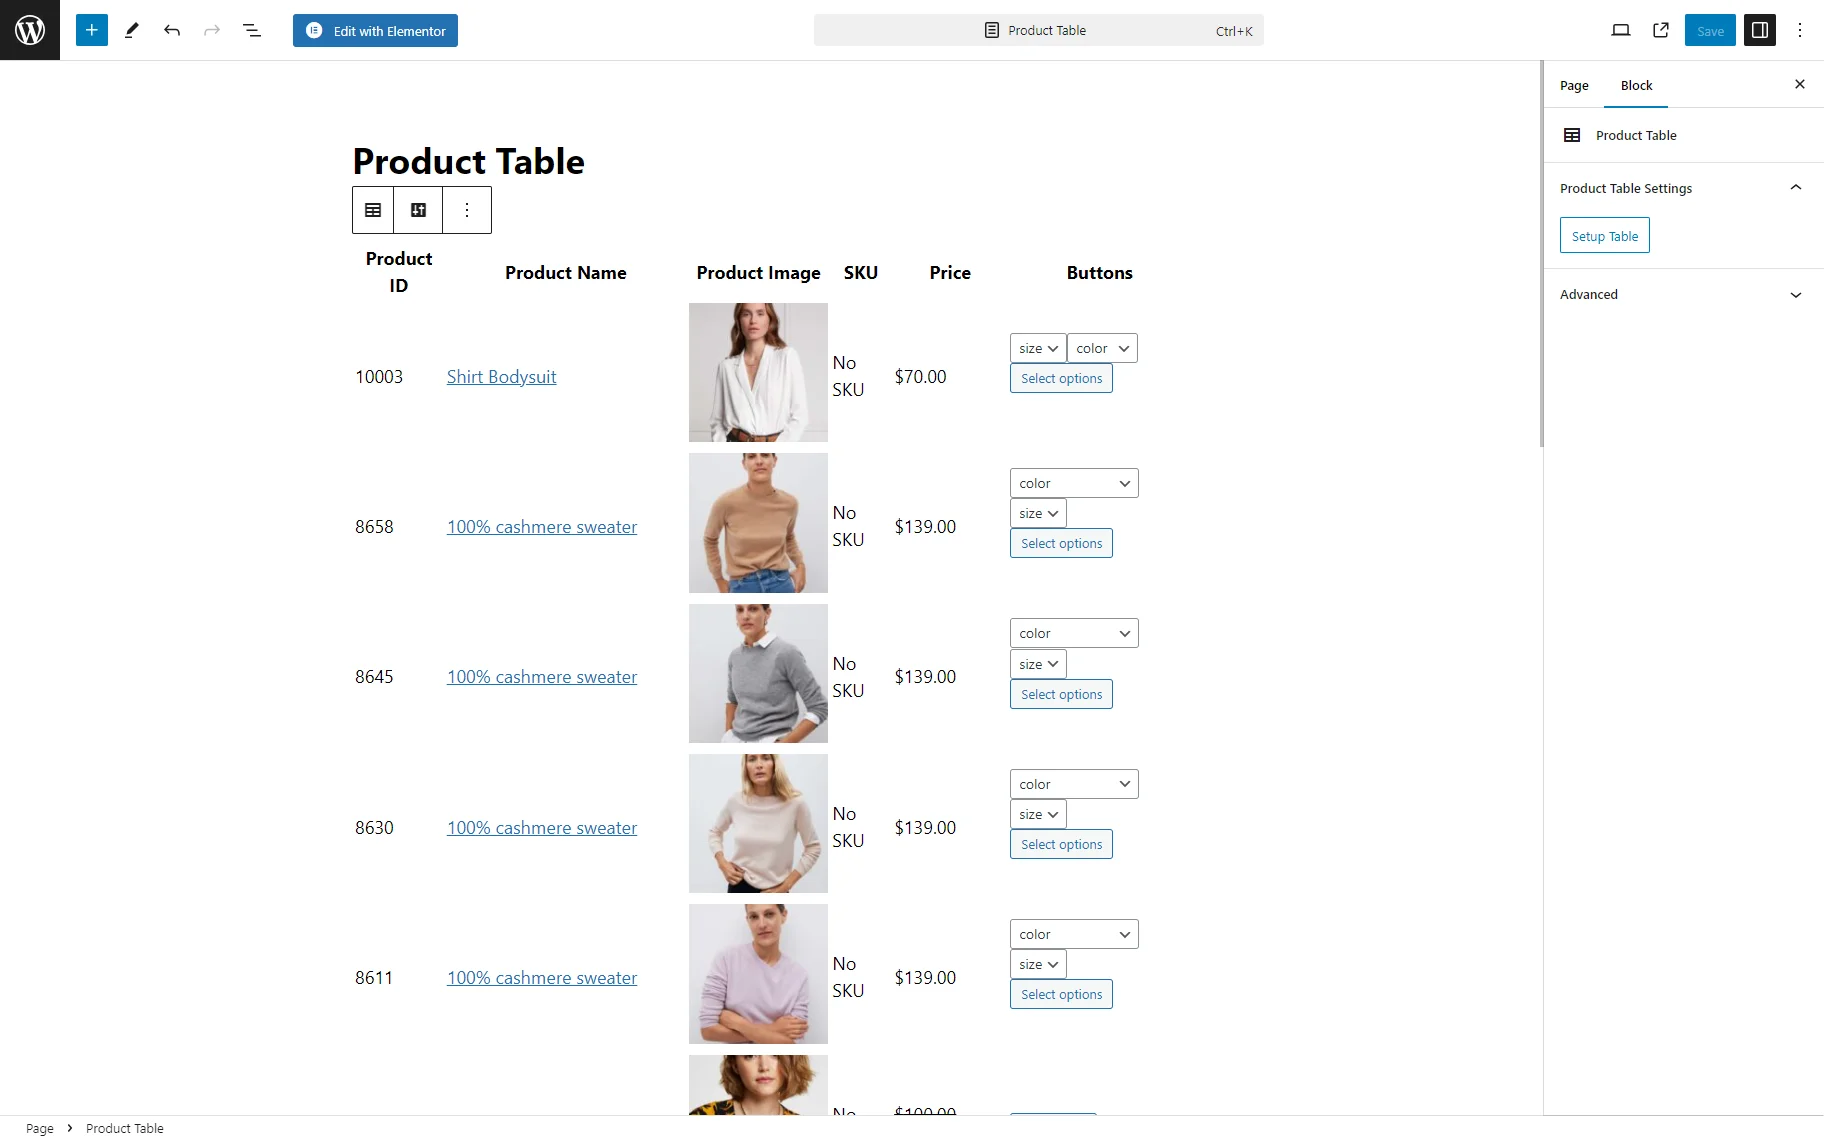
Settings of the Product Table Block
Pressing the “Setup Table” button of the Product Table settings opens the pop-up with the Query, Columns, Settings, Filters, and Design tabs. Here, the Query settings of the Setup Table pop-up customize the Product Table content, and the Columns, Settings, Filters, and Design settings allow for managing the Product Table block appearance.
The Product Table block reproduces the Columns, Settings, Filters, and Design settings that can be found in the WordPress Dashboard > WooCommerce > Settings > Product Table directory. One can read the JetProductTables Dashboard Settings Overview for more details about managing these settings.
Also, the Columns, Settings, Filters, and Design settings include the USE PRESET drop-down list, which allows selecting a previously created Preset.
The How to Create a Preset for Product Table tutorial explains how to create, customize, and manage Presets using the JetProductTables plugin for WordPress.
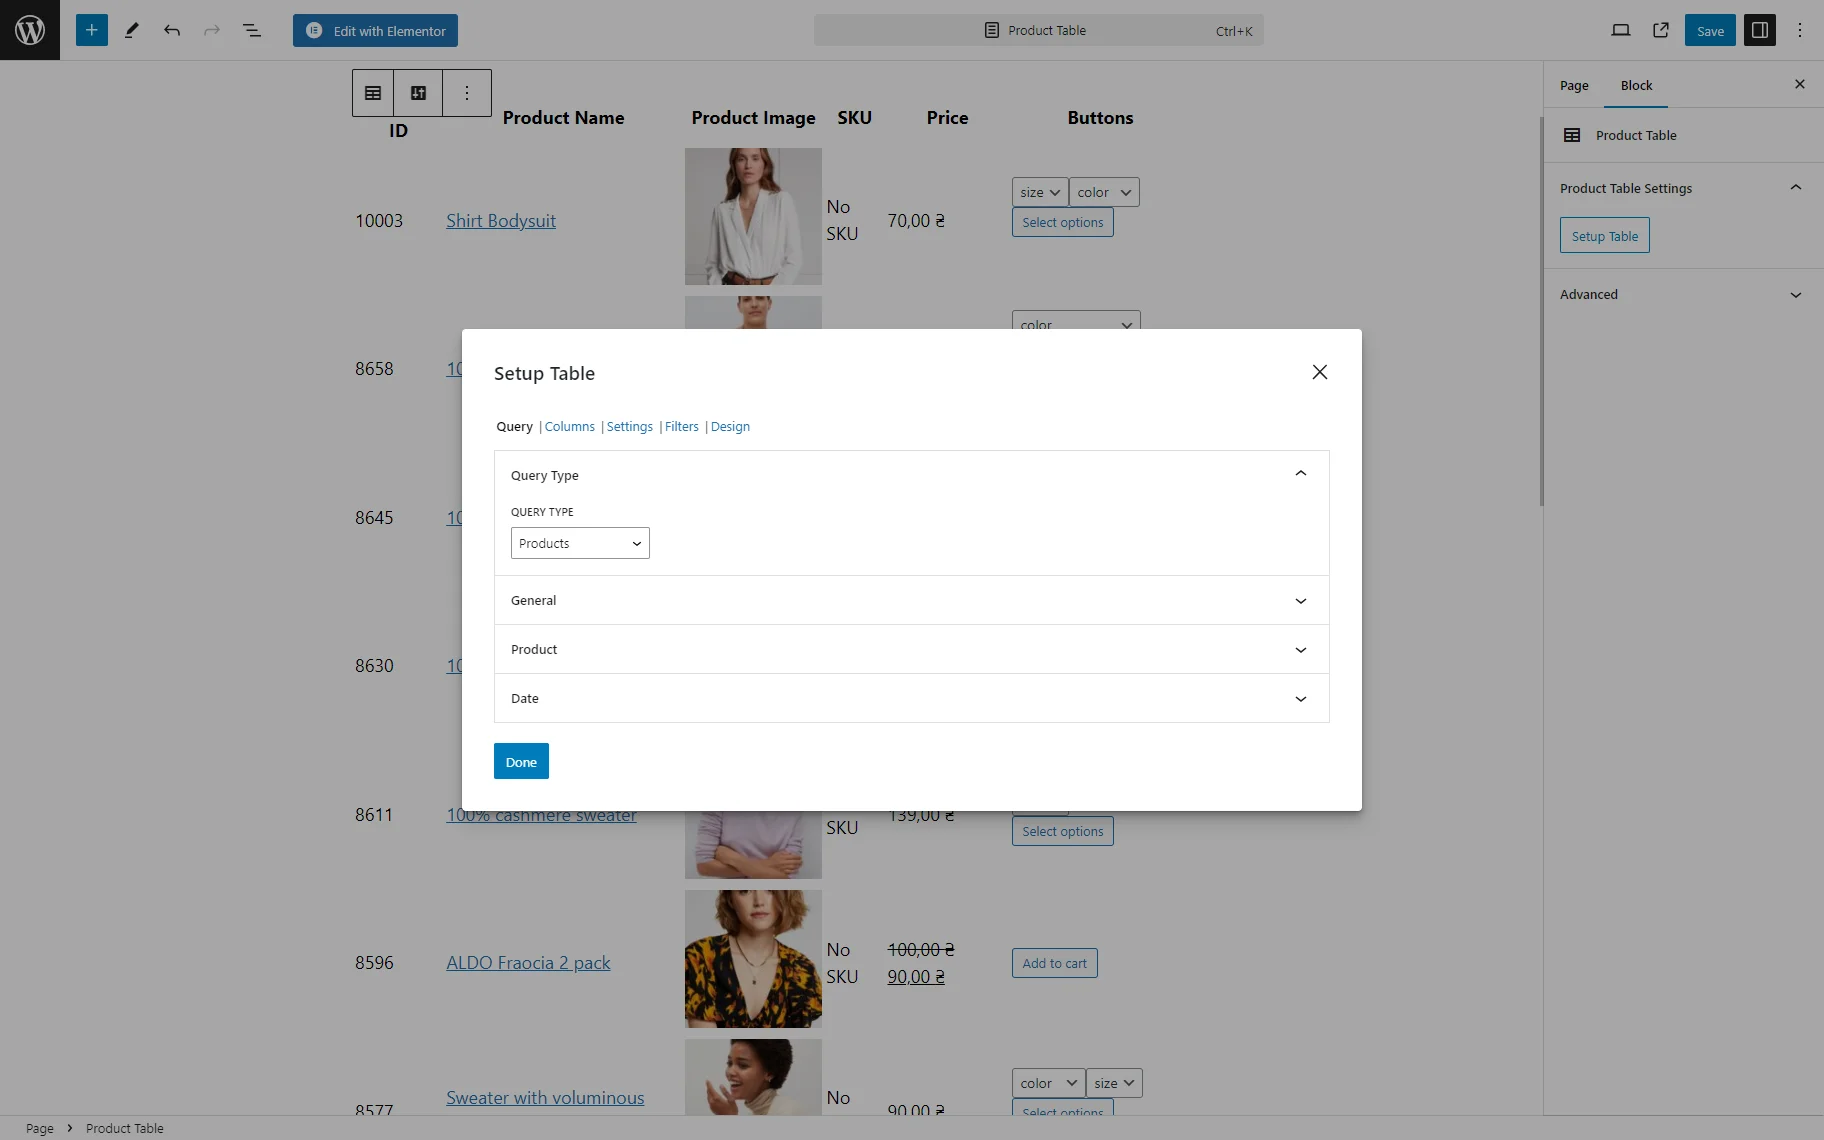
Query tab of the Setup Table pop-up
The Query tab allows selecting the type of WooCommerce objects that will be displayed in the table. In particular, the QUERY TYPE drop-down list includes the following options:
- Products 一 an option that, if selected, allows displaying a certain set of Products;
- Product Variations 一 an option that, if selected, allows displaying a set of Product Variations.
Other settings of the Query tab of the Setup Table pop-up appear depending on the options picked in the QUERY TYPE drop-down list.
Displaying the WooCommerce Products
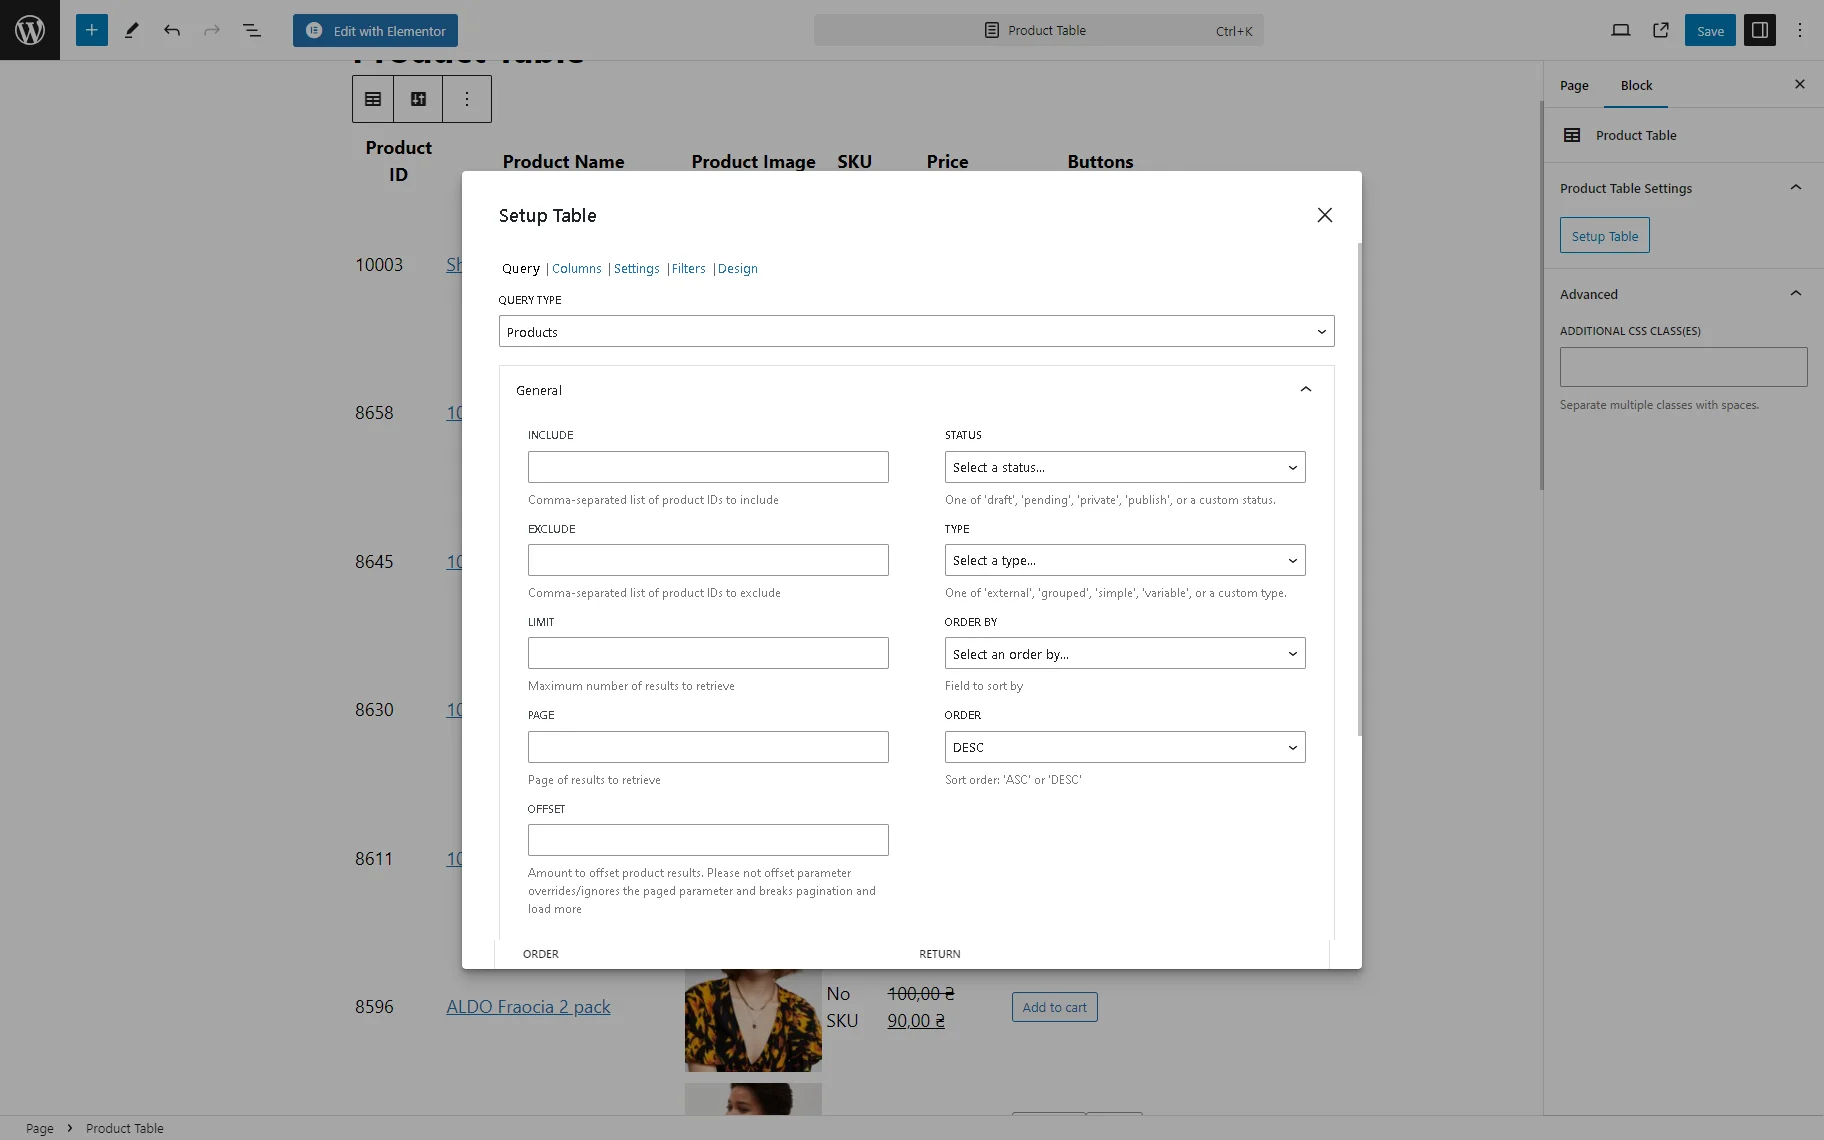
The “Products” option in the QUERY TYPE drop-down list is set by default. Also, the following settings are available: General, Product, and Date.
In turn, the General settings include the following fields, toggles, and drop-down lists:
- STATUS 一 a drop-down list that allows displaying only products with specified status, i.e., “Published,” “Draft,” “Pending,” or “Private”;
- TYPE 一 a drop-down list that allows selecting a product type, i.e., the “Simple product,” “Grouped product,” “External/Affiliate product,” or “Variable product”;
- INCLUDE 一 a text field that allows include specific products from the list;
- EXCLUDE 一 a text field that allows exclude specific products from the list;
- LIMIT 一 a text field for typing the maximum number of products to be shown or the number of products per one table page if navigation is enabled;
- OFFSET 一 a text field for typing the number of products that should be offset in the product results;
- PAGE 一 a text field for the number of the page to retrieve;
- ORDER 一 a drop-down list that allows setting the “ASC” or “DESC” order of the sorted results;
- ORDER BY 一 a drop-down list that allows sorting the items by a specific field and includes the following options: “Date,” “ID,” “Name,” “Type,” “Random,” and “Modified.”
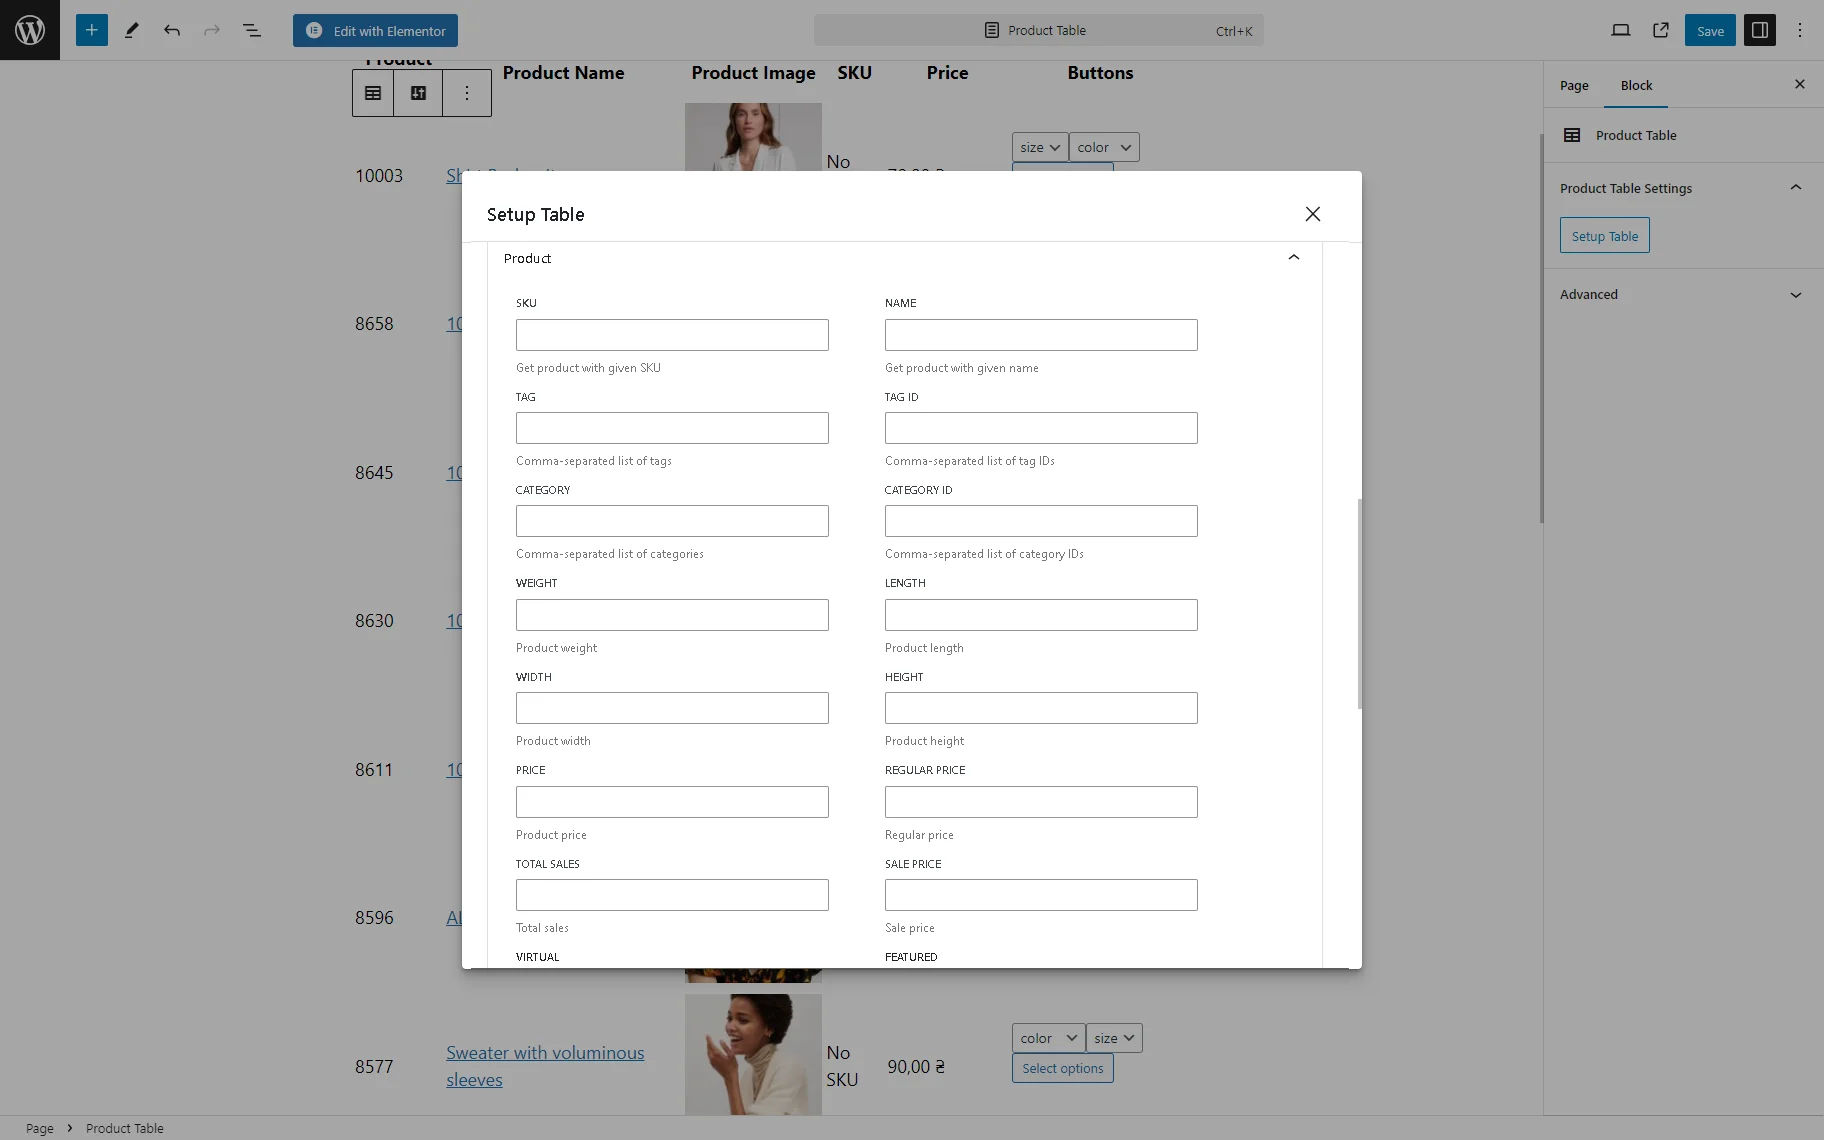
The Product tab includes the following text fields, toggles, and drop-down lists:
- SKU 一 a text field for typing the SKU of the product that should be returned;
- NAME 一 a text field for typing the name of the product that should be displayed;
- TAG 一 a text field for typing tag slugs of products that should be shown;
- TAG ID 一 a text field for typing tag IDs of products that should be demonstrated;
- CATEGORY 一 a text field for typing a list of slugs of the products that should be displayed;
- CATEGORY ID 一 a text field for typing a list of category IDs of the products that should be shown;
- WEIGHT 一 a text field for typing the needed weight of the products that should be returned;
- LENGTH 一 a text field for typing the required length of the products that should be shown;
- HEIGHT 一 a text field for typing the needed height of the products that should be displayed;
- PRICE 一 a text field for typing the price of the products that should be returned;
- REGULAR PRICE 一 a text field for typing the regular price of the products that should be demonstrated;
- TOTAL SALES 一 a text field for typing the total sale value;
- SALE PRICE 一 a text field for typing the sale price value;
- VIRTUAL 一 a drop-down list that allows displaying all products, virtual products, or not-virtual products (the “All Products,” “Yes,” and “No” options);
- DOWNLOADABLE 一 a drop-down list that allows showing all products, downloadable products, or non-downloadable products (the “All Products,” “Yes,” and “No” options);
- SOLD INDIVIDUALLY 一 a drop-down list that returns the products that can be sold individually or not, as well as returns all products (the “All Products,” “Yes,” and “No” options);
- FEATURED 一 a drop-down list that allows demonstration of all products, featured products, or non-featured products (the “All Products,” “Yes,” and “No” options);
- MANAGE STOCK 一 a drop-down list that allows displaying all products, stock-managed products, or non-stock-managed products (the “All Products,” “Yes,” and “No” options);
- REVIEWS ALLOWED 一 a drop-down list that shows all products or products that can or can not be reviewed (the “All Products,” “Yes,” and “No” options);
- BACKHOLDERS 一 a drop-down list for selecting a needed backorder status of the products, i.e., “Yes,” “No,” or “Notify”;
- VISIBILITY 一 a drop-down list for selecting the products with needed visibility, i.e., “Visible,” “Catalog,” “Search,” or “Hidden”;
- STOCK QUANTITY 一 a text field for typing the needed stock quantity of the products that should be returned;
- STOCK STATUS 一 a drop-down list for selecting a needed stock status of the products, i.e., “In Stock” or “Out of Stock”;
- SHIPPING CLASS 一 a text field for typing the needed shipping class of the products that should be returned;
- TAX STATUS 一 a drop-down list for selecting a needed tax status of the products, i.e., “Taxable,” “Shipping,” or “None”;
- AVERAGE RATING 一 a text field intended for typing the average rating of the products to be displayed;
- TAX CLASS 一 a text field for typing the tax class slug of products that should be shown;
- DOWNLOAD EXPIRY 一 a text field for typing the download expiry date;
- DOWNLOAD LIMIT 一 a text field for typing the number of downloads;
- REVIEW COUNT 一 a text field for typing the number of reviews.
The Date tab allows the products to be displayed according to the specific date(s). In particular, it contains the DATE CREATED, DATE ON SALE FROM, DATE MODIFIED, and DATE ON SALE TO text fields for typing the needed date in the “YYYY-MM-DD” format.
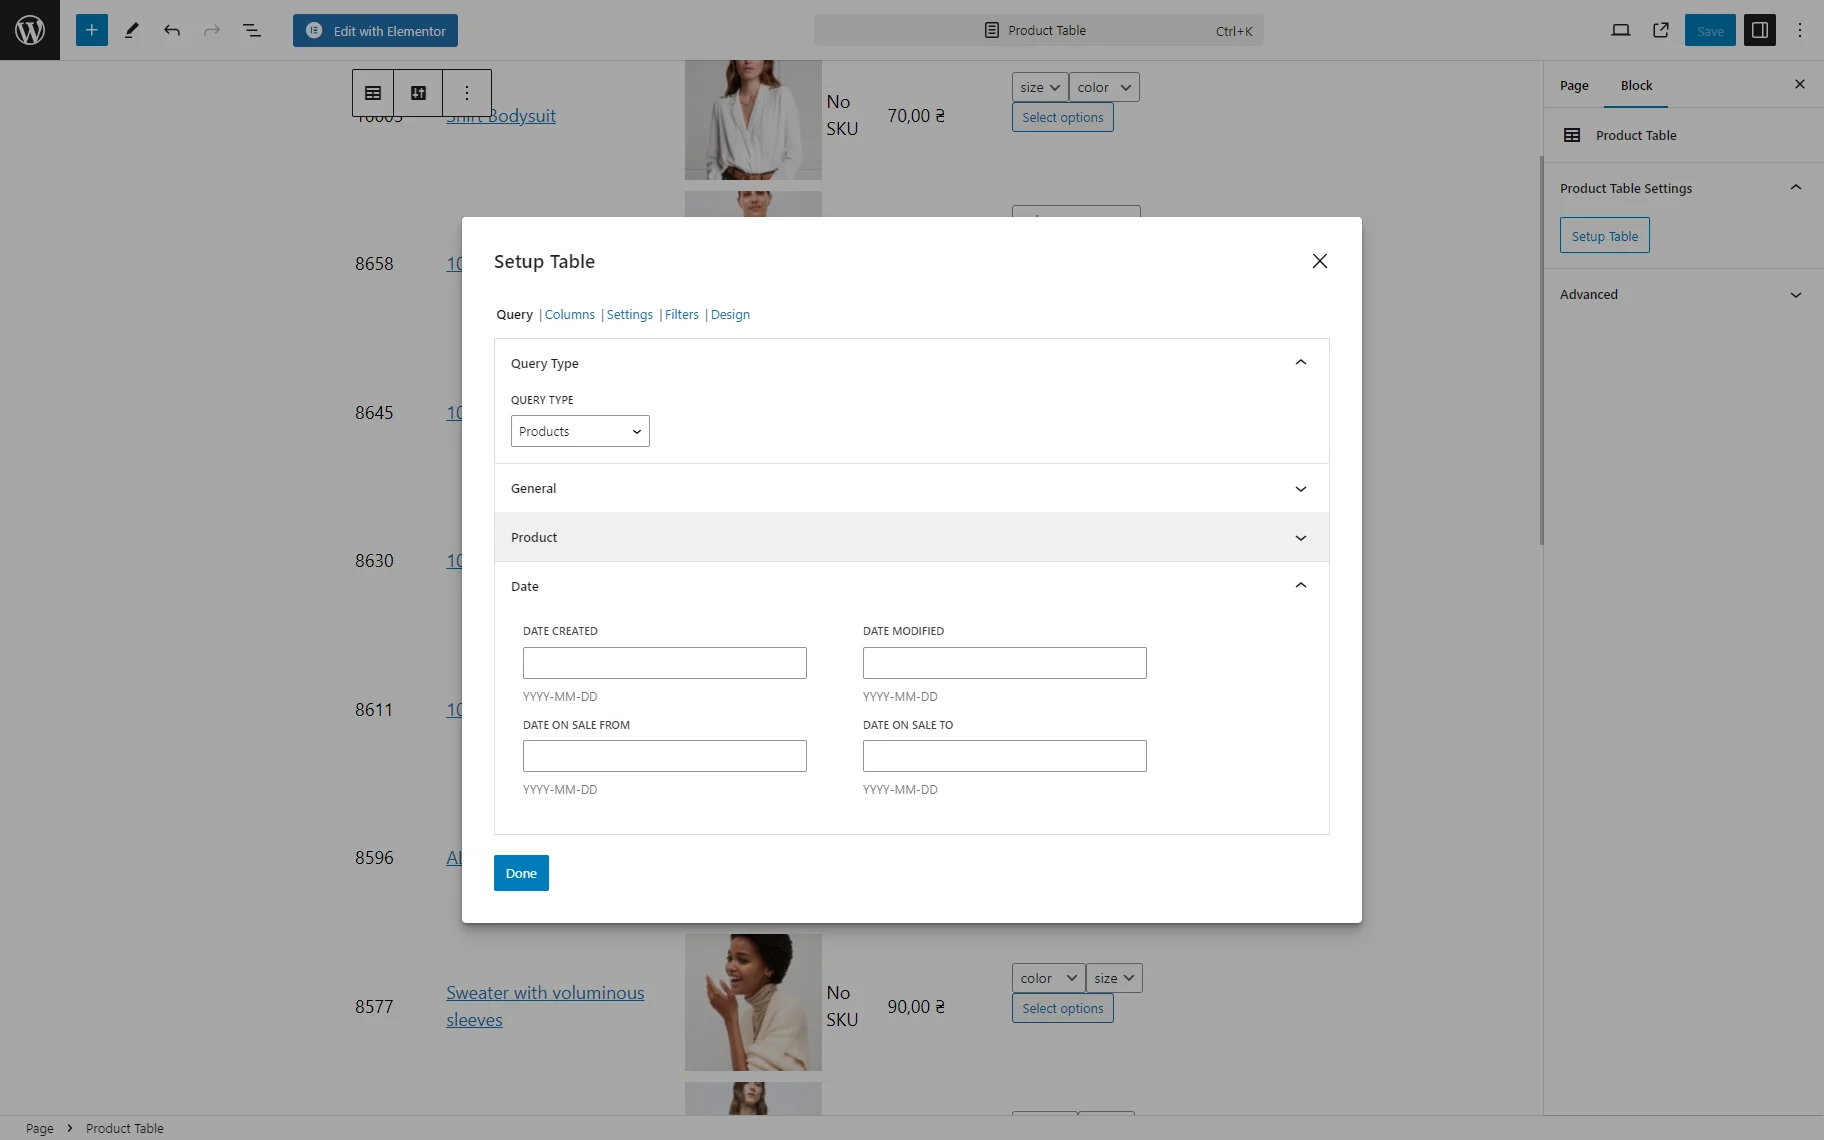
Once completed, press the “Done” button.
Displaying the Variations
After selecting the “Variations” option in the QUERY TYPE drop-down list, the Setup Table pop-up will show only the General settings tab, which includes the GET VARIATIONS FROM drop-down list. This list consists of the “Current product,” “Specific product ID(s),” or “Specific product SKU(s)” options. If selected, the “Specific product ID(s)” and “Specific product SKU(s)” activate the Enter product ID(s) for variations and Enter product SKU(s) for variations text fields for typing the needed values of the products that should be displayed.
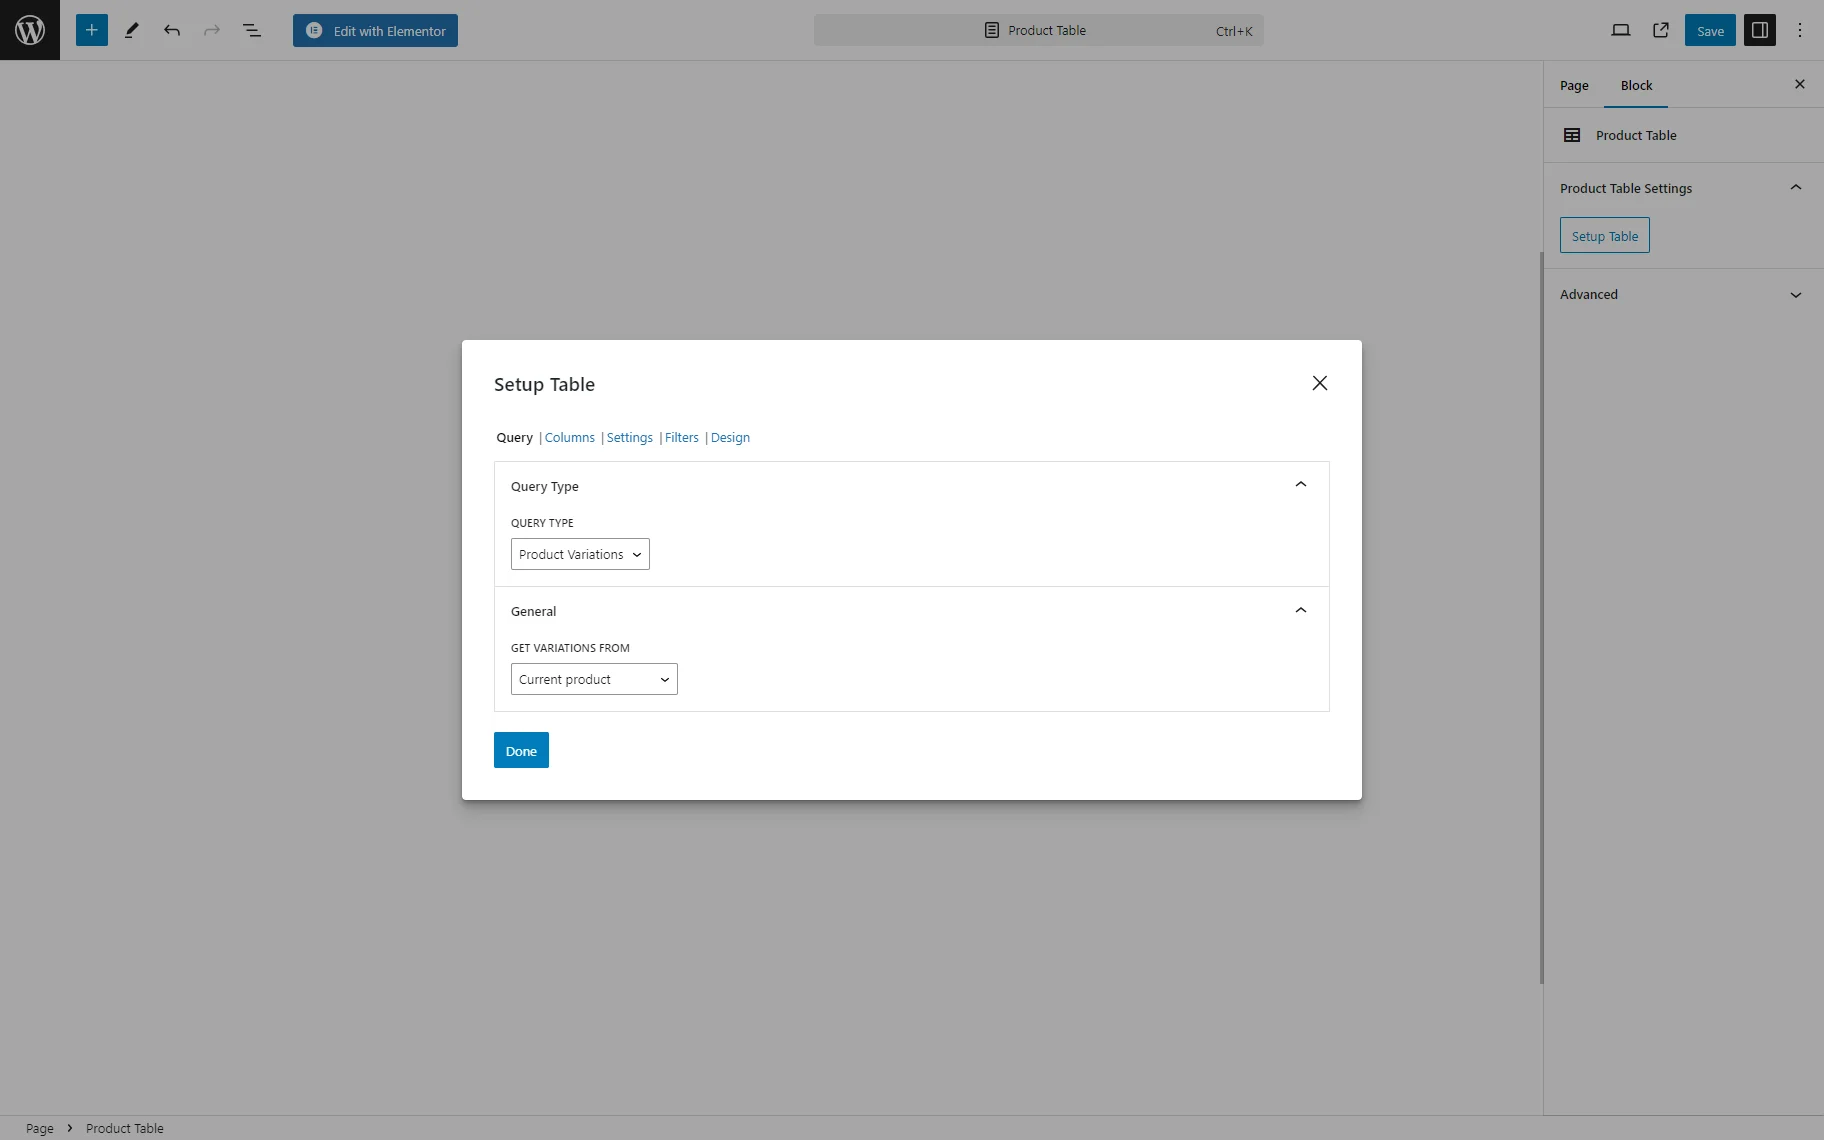
Once completed, press the “Done” button.
Column tab of the Setup Table pop-up
This tab enlists all the Columns entitled according to the WooCommerce data they display, i.e., Product ID, Product Name, Product Image, SKU, etc. Each Column has its settings.
This tab allows customizing the Product Table appearance using a Preset, adding/deleting the needed Column, and managing the Column’s settings.

The JetProductTables Dashboard Settings Overview details the settings of the default and additional Columns, explains how to add/delete the needed Column, and set the needed order.
Settings tab of the Setup Table pop-up
These settings customize the Product Table appearance on the front end, including the display on different devices. It includes the General and Navigation sub-tabs.

In particular, the General sub-tab sets the DIRECTION of the Product Table, displays the header/footer/sticky header, proposes different types of the MOBILE LAYOUT, and allows the Lazy Load. The Navigation sub-tab allows pagination and sets the related settings.
The JetProductTables Dashboard Settings Overview explains how to customize the features of the table display on the front end.
Filters tab of the Setup Table pop-up
The Filters tab contains settings that allow the different types of filters to be applied. To add filters to the Product Table, the Enable Filters toggle should be activated.
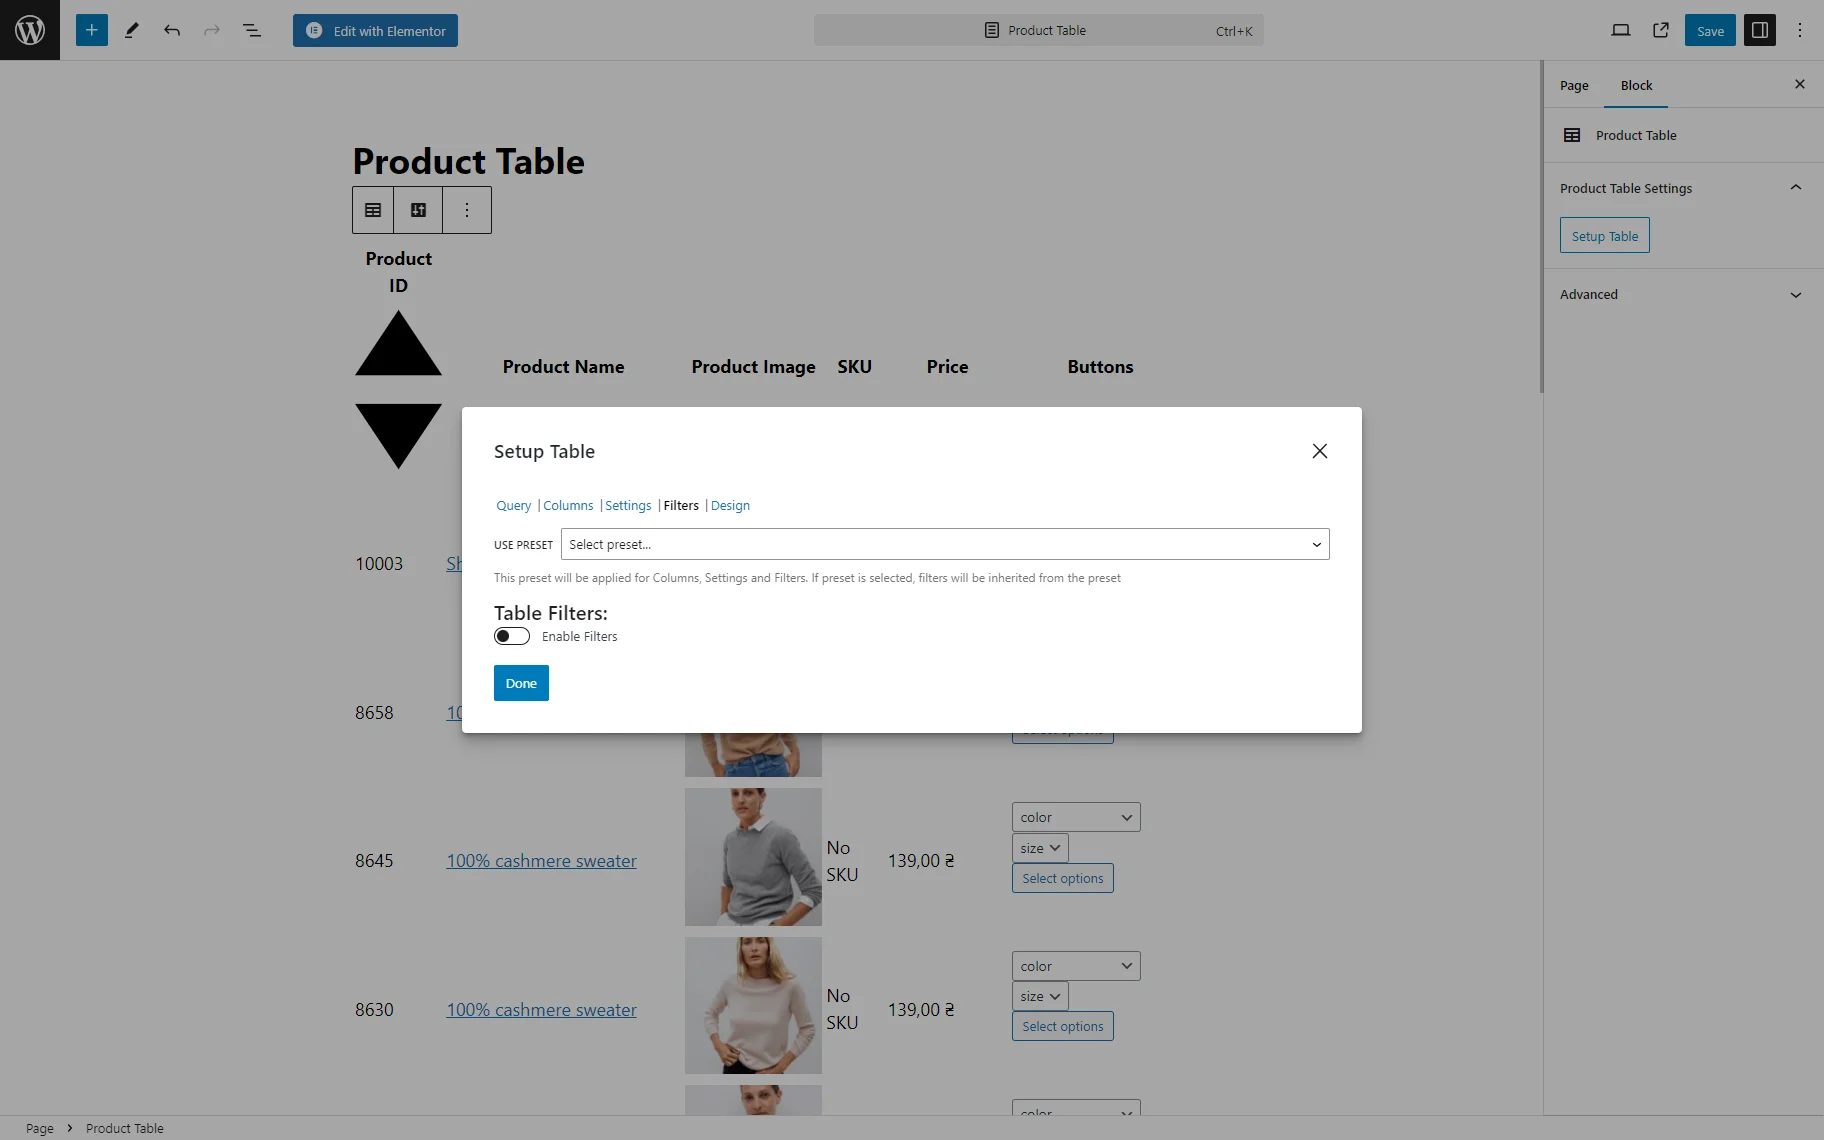
After enabling this toggle, the Taxonomy Filter (filters by a certain term of the selected taxonomy) and Search Filter (filters by a search phrase) will be added. Also, the Attributes Filter (filtered by a certain attribute) can be added by selecting it from the drop-down list with the “Select a filter…” text in the search bar and pressing the “Add Filter” button below this drop-down list.
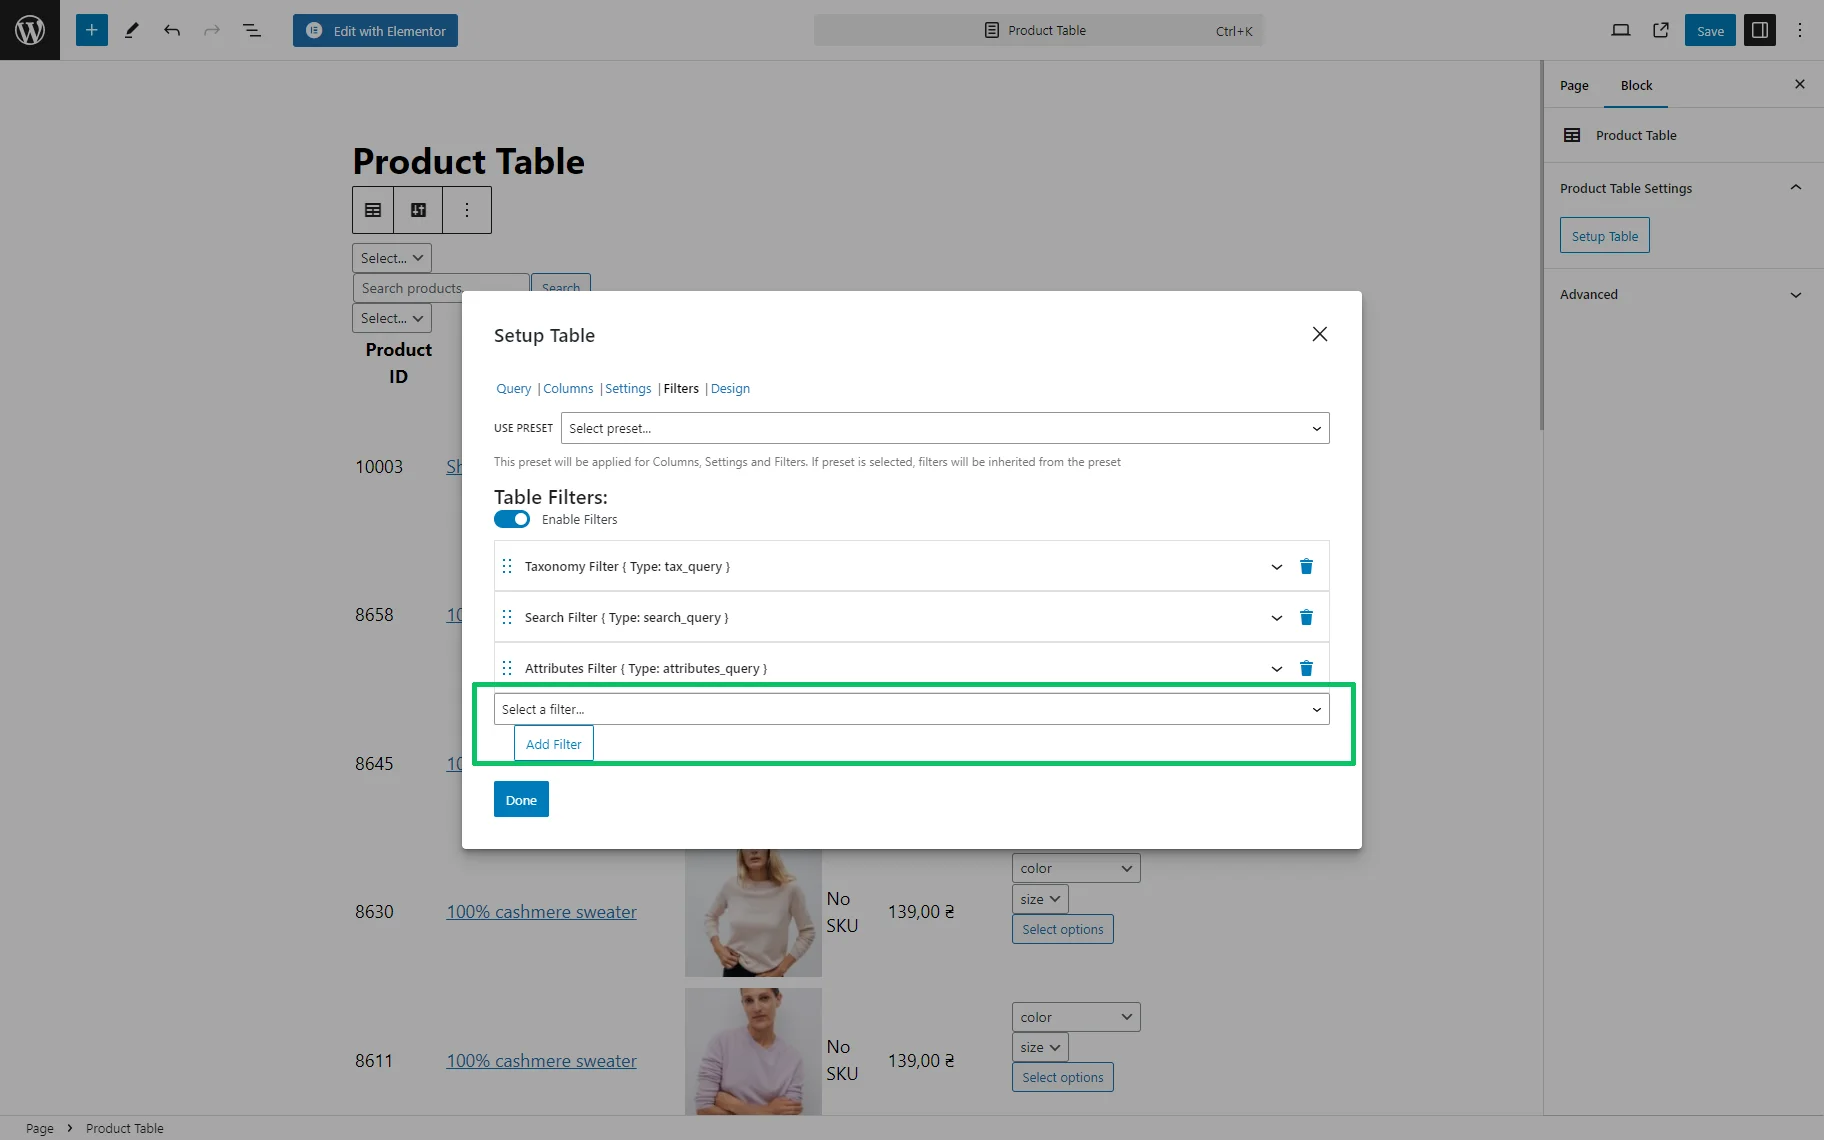
The filter settings can be unrolled by pressing the “drop-down list” button, and filters can be deleted by pressing the “recycle bin” icon near the corresponding filter.
For an in-depth understanding of how the filtering works, the JetProductTables Dashboard Settings Overview tutorial can be followed.
Design tab of the Setup Table pop-up
This tab contains a redirection link to the global settings tab.
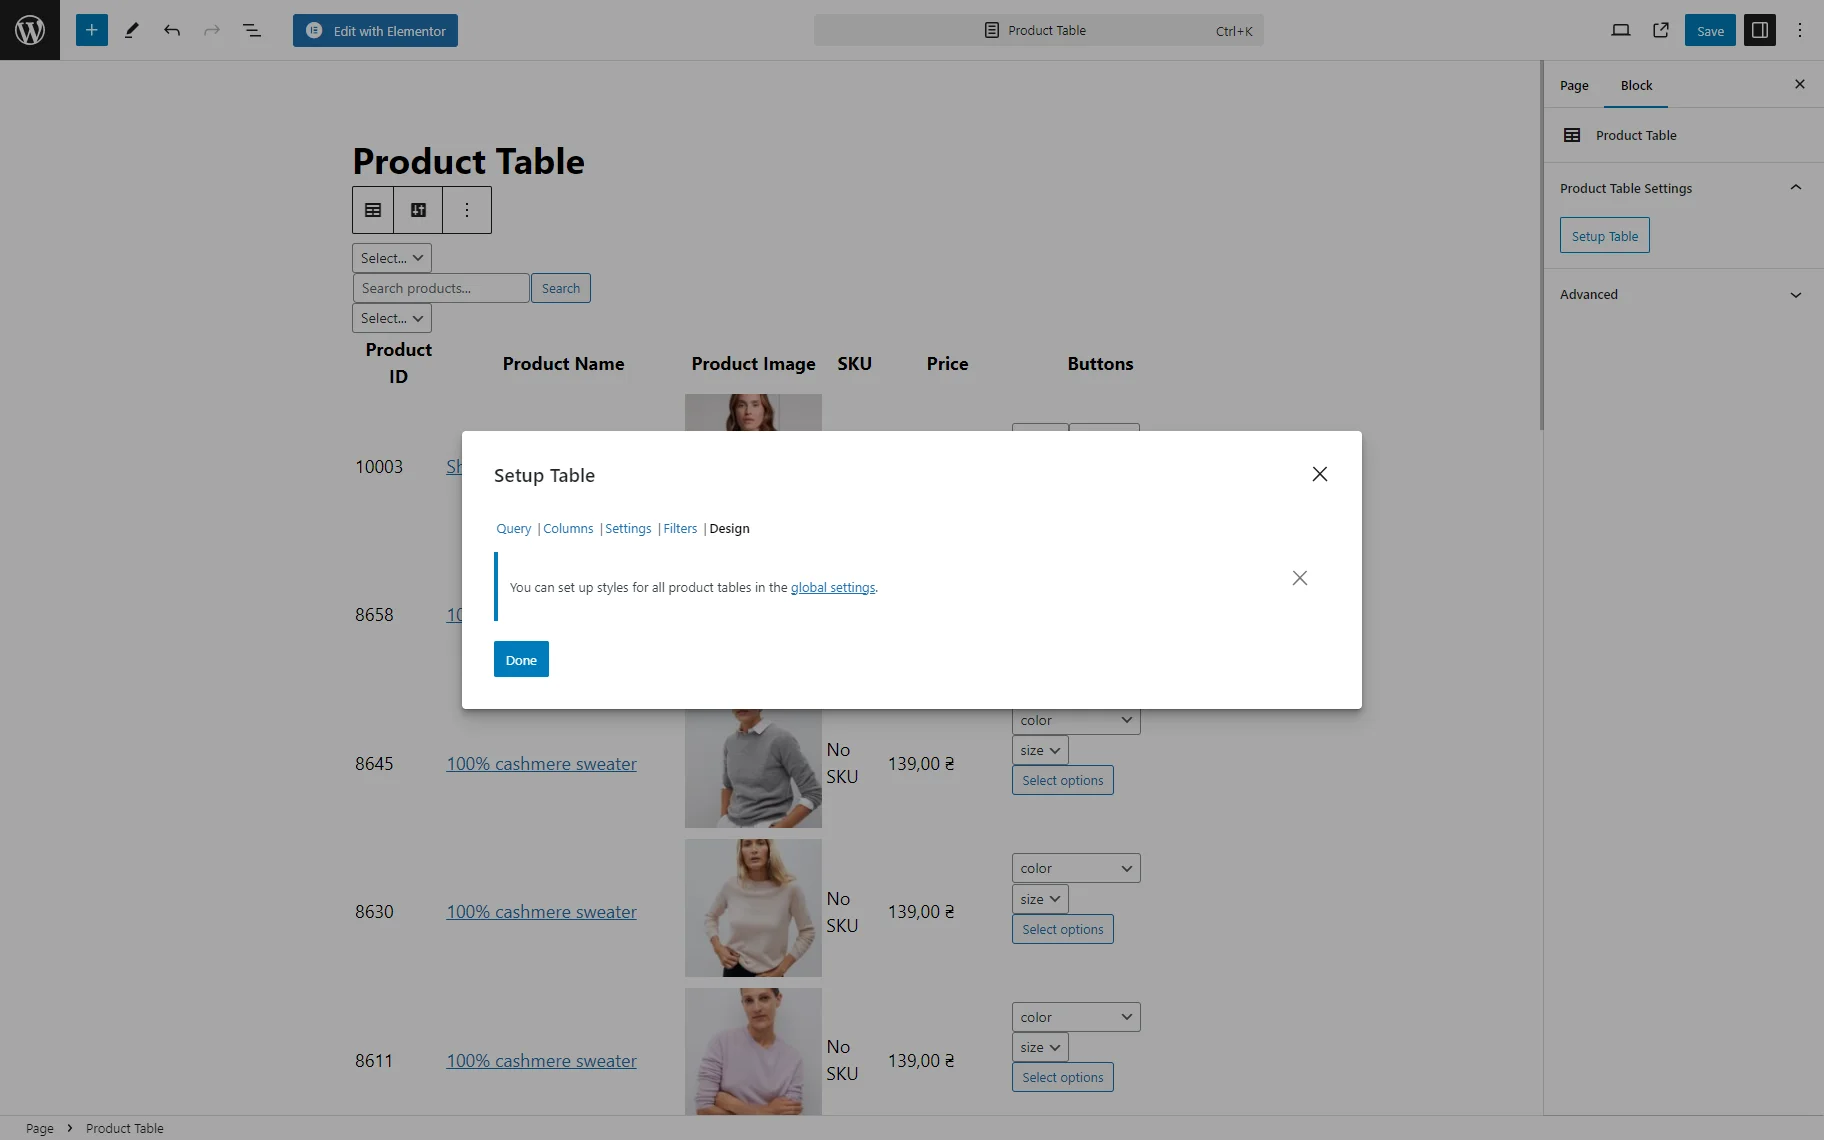
Once pressed, one will be redirected to the WordPress Dashboard > WooCommerce > Settings > Product Table > Design tab, where fonts, colors, and other design elements can be managed.
After clicking the “Save” button, the global design settings will be saved and applied to the Product Table blocks placed on the pages or templates.
Finally, after adjusting all settings of the Product Table block, the “Done” button should be pressed.
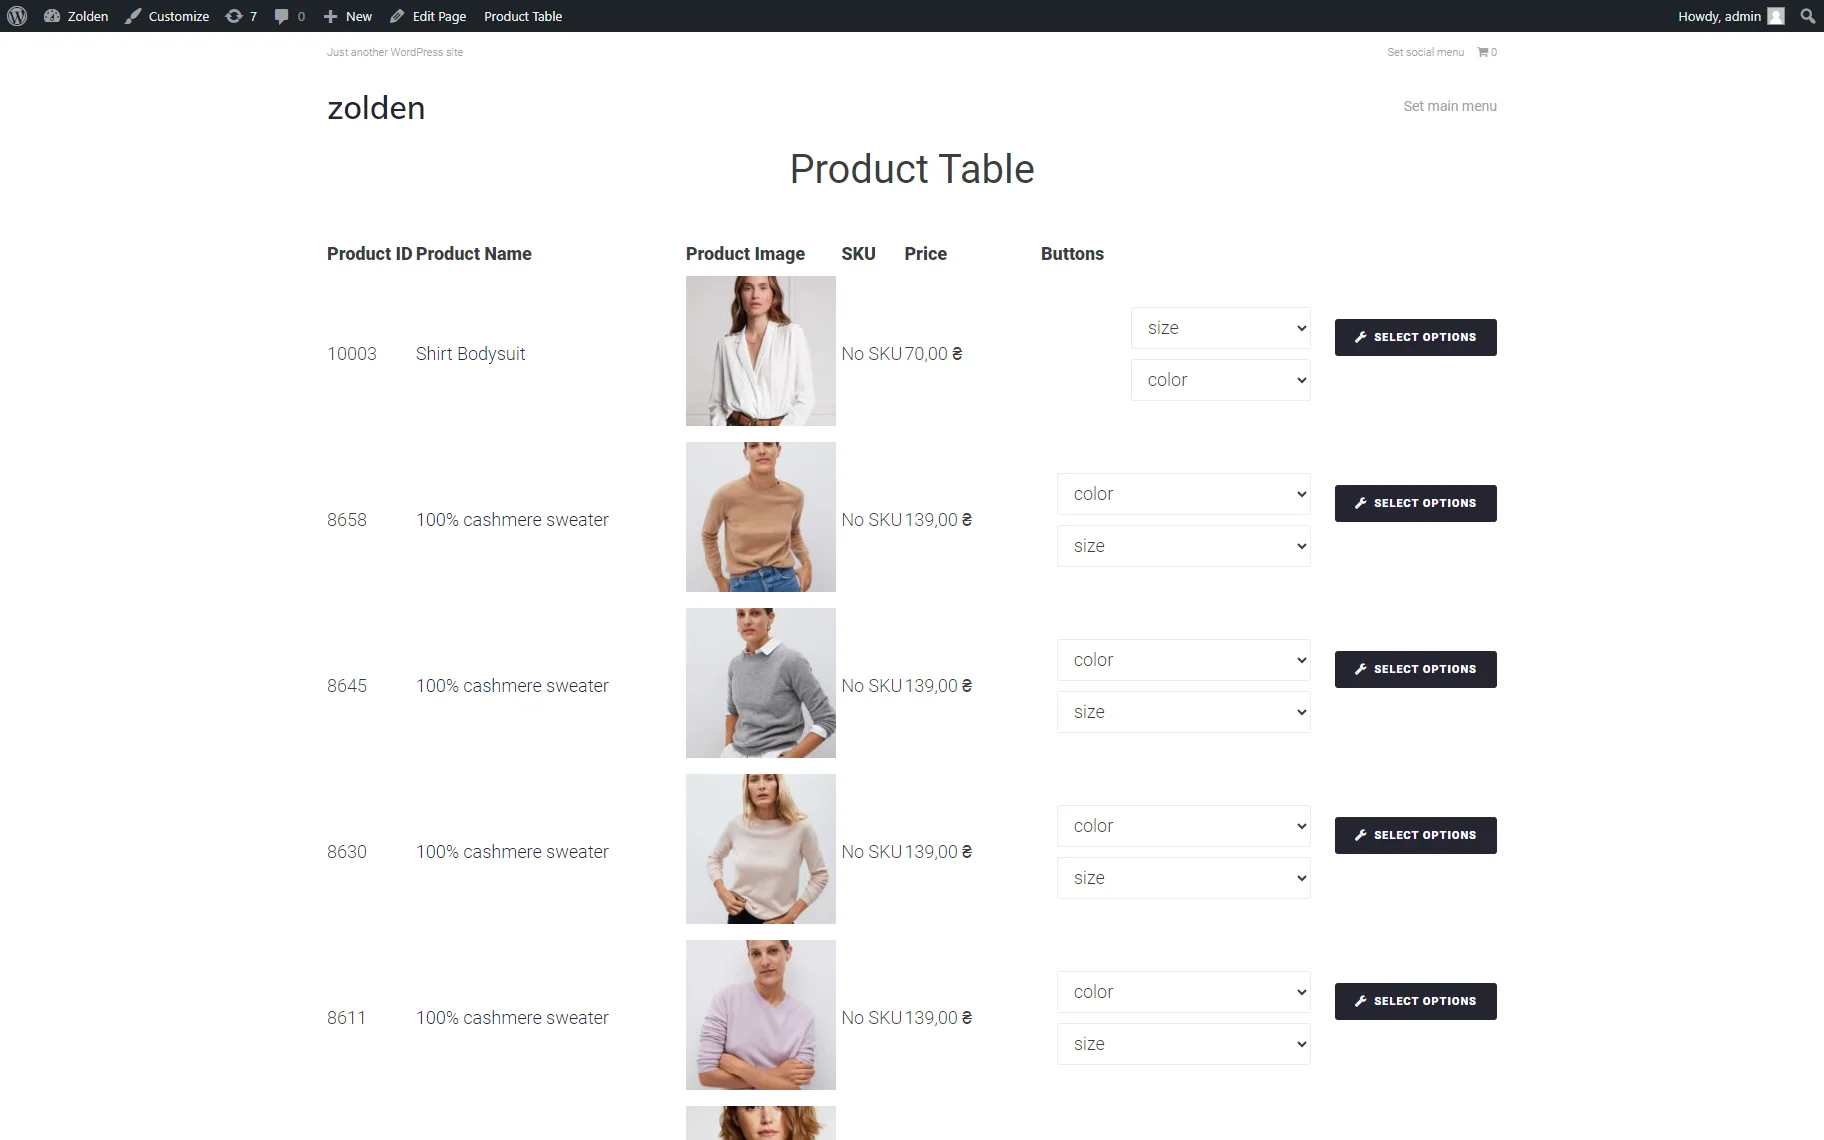
The Product Table Block on the Front End
To observe how the block works, one should press the “Publish/Save” button and navigate to the front end.
The How to Showcase Product Table on the Front End tutorial provides more information about displaying Product Tables using the Product Table block, shortcode generator, or WooCommerce integration.
That’s it. Now you know how to display the WooCommerce objects via the Product Table block and customize the table’s appearance (i.e., use presets, show/hide the needed columns, apply different types of filters, add navigation elements and a header/footer, and manage the layouts for different devices).