How to Use MCP Server with VS Code + GitHub Copilot
This tutorial explains how to connect the JetEngine MCP Server to VS Code and GitHub Copilot, set up authorization, and start using AI tools in your WordPress website.
Before you start, check the tutorial requirements:
- JetEngine plugin installed, activated, and updated to at least version 3.8.0
This guide explains how to connect the JetEngine MCP Server to a third-party AI client. As an example, we’ll use VS Code + GitHub Copilot, but the same steps also work with other MCP-compatible clients, including the web version of ChatGPT.
Open the MCP Server Settings in JetEngine
So first, go to WordPress Dashboard > JetEngine > JetEngine > MCP Server tab and ensure the Enable MCP Server toggle is activated.
From this page, you need the MCP Server URL to use later.

Prepare Authorization (Required for All AI Clients)
WordPress natively supports only one authentication method for external applications, so to authorize your AI client, navigate to WordPress Dashboard > Users > Profile (or open the needed user editing page).
Scroll to Application Passwords, enter the New Application Password Name (e.g., “VS Code Copilot”), and click “Add Application Password”. The generated password can be copied and saved in another location, since you won’t be able to retrieve it from this page later.

Combine your login and the application password in the following format:
<username>:<application-password>For example:
admin:GxPt cXdX Ufgm 5Eka meXs wPQ8Then convert this string to Base64 (you can use any online Base64 converter). The resulting string will be used as your authorization token in your AI client.
Add the MCP Server to VS Code + Copilot
Open VS Code, open the Command Palette (“Ctrl+Shift+P” for Windows/Linux or “Cmd+Shift+P” for macOS), and search for “MCP: Add Server.”

Then, select “HTTP (HTTP or Server-Sent Events).”

Enter the MCP Server URL, in our case: http://localhost/mysite/wp-json/jet-engine/v1/mcp/
To the created piece of code, add the Authorization header, so it will look like this:
{
	"servers": {
		"my-mcp-server-b5d09d2b": {
			"url": "http://localhost/mysite/wp-json/jet-engine/v1/mcp/",
			"type": "http",
			"headers": { "Authorization": "Basic ${input:wp_token}" }
		}
	},
	 "inputs": [
    	{"type": "promptString","id": "wp_token","description": "<Base64String>", "password": true }
  ]
}
The <Base64String> should be replaced with your actual Base64 string.

Use the JetEngine MCP Tools in Copilot
Once added, Copilot can now read your site’s MCP-accessible context and execute safe operations via JetEngine’s MCP tools.
For example, you can ask Copilot for help writing macros, taking the site’s context into account.
First, run the MCP tools that read context from your site:
#resource-get-configuration
Then, use:
#resource-get-macros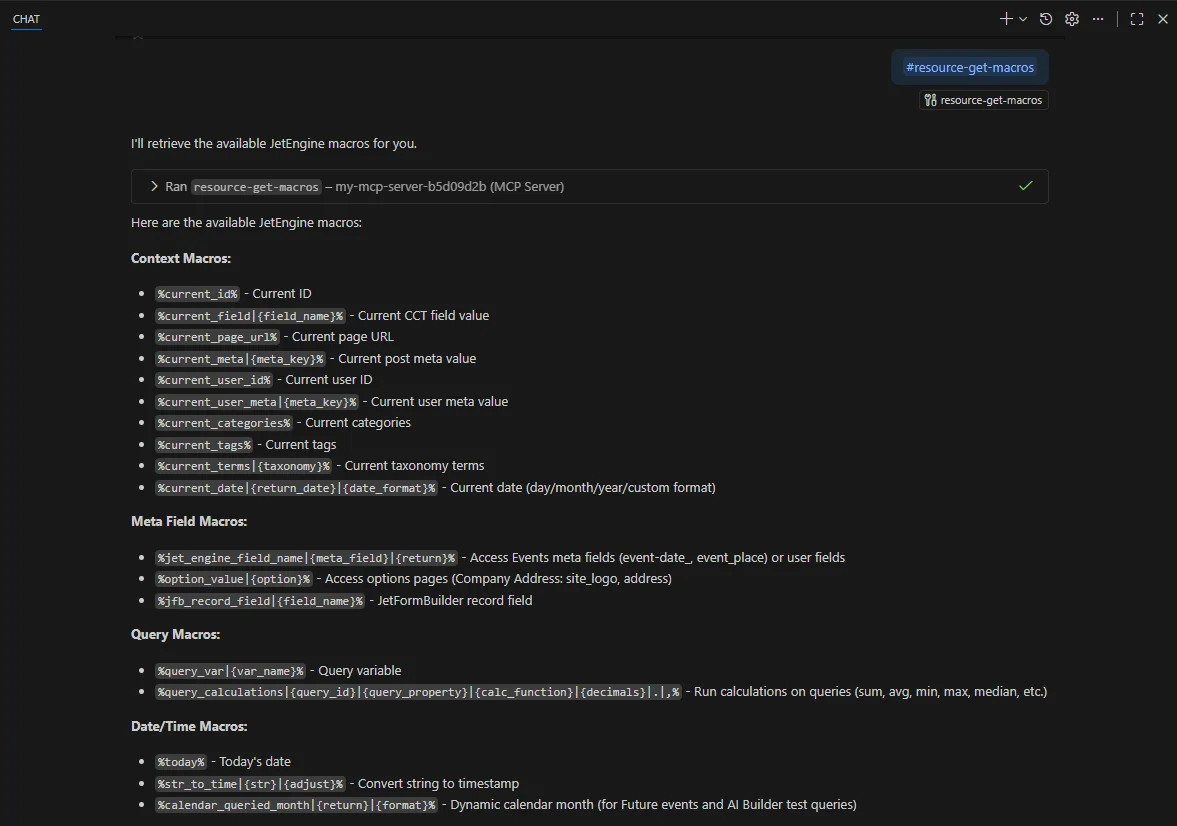
Next, you can ask the AI to create the necessary macro based on the existing content:
Generate a JetEngine Macro that outputs a list of events sorted by date.
The Copilot Chat suggests such a macro to retrieve data from the “Future events” query:
%query_calculations|7|ID|first|0||%That’s all. Now you know how to connect the JetEngine MCP Server to VS Code and GitHub Copilot, set up authorization, and start using AI tools in your WordPress website.