How to Enable Elementor Editor for Different Custom Post Types
After reading this tutorial, you will learn how to obtain the possibility to customize your custom post types directly in the Elementor page builder.
Before you start, check the tutorial requirements:
- Elementor (Free version)
After creating a Custom Post Type (“Products,” “Testimonials,” etc.) in the WordPress Dashboard, additional styling options may be required. To be able to customize the custom post in Elementor, the corresponding button may not be available in the post editor.
To activate the button, one needs to complete the following steps.
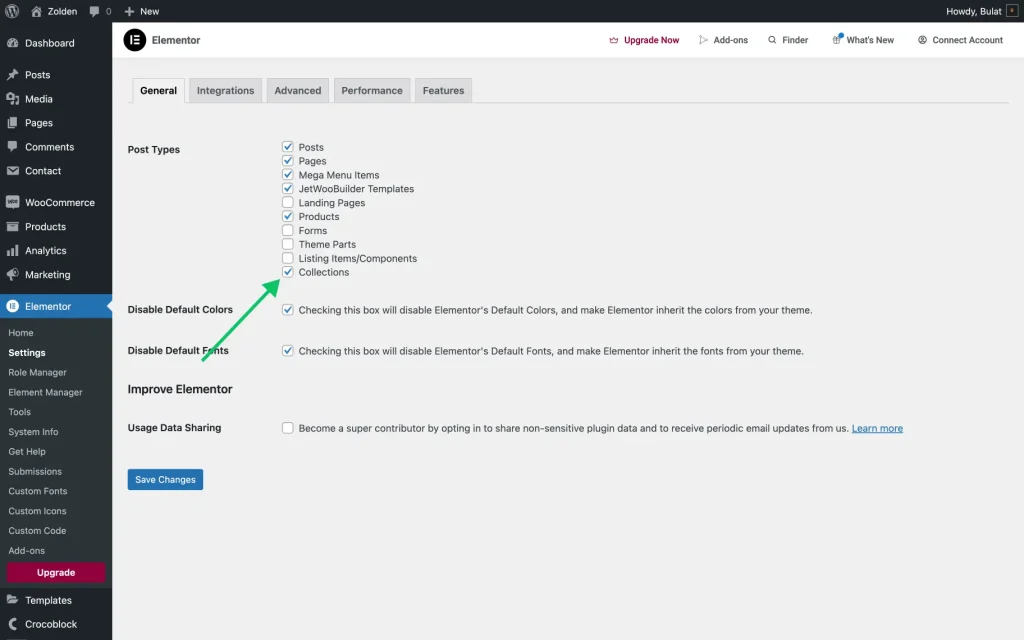
Follow the WordPress Dashboard > Elementor > Settings path.
In the General section, tick the CPT that needs to be edited with Elementor and click the “Save Changes” button. We’ve created a “Collections” CPT for demonstration purposes.
Then proceed to the Custom Post Type (depending on the website structure, it can be anything like Listing items, Theme parts, Portfolio items, or any other types).
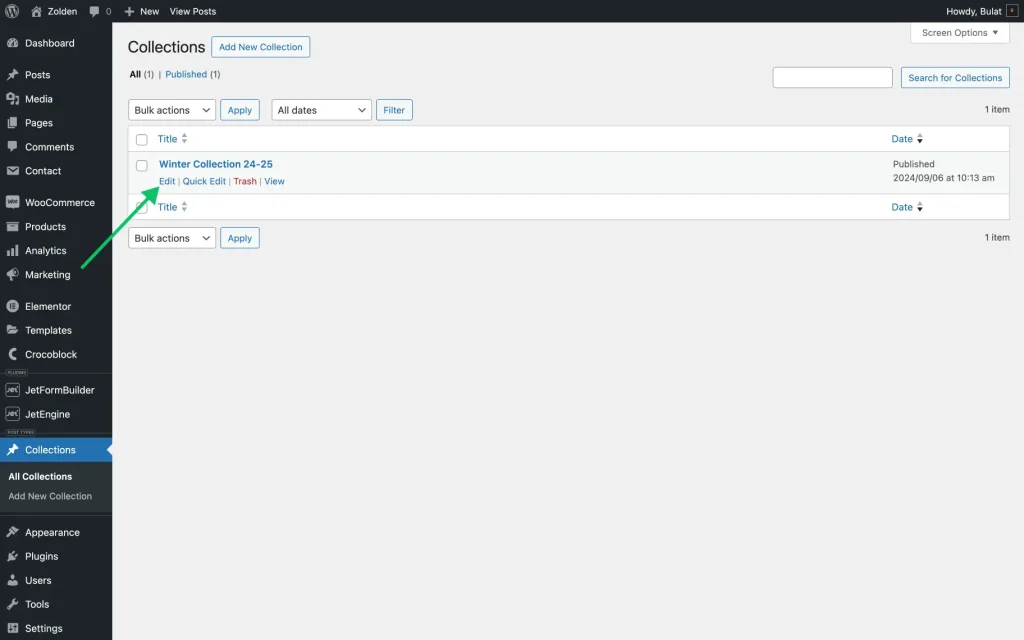
Here, we have a “Winter Collection 24-25” created in the “Collections” CPT.
To edit the post, click the “Edit” button.
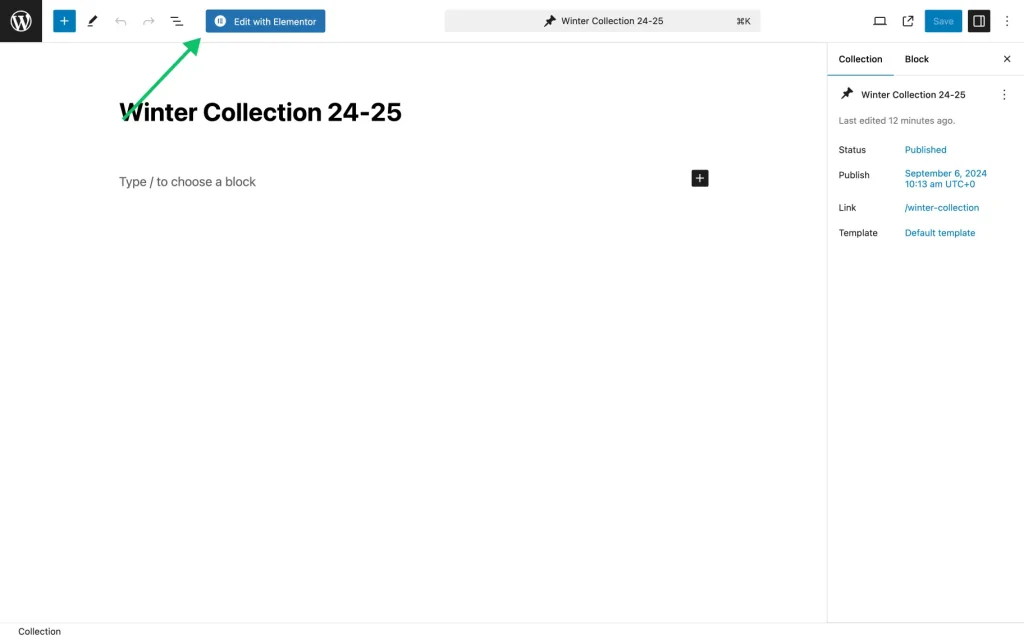
As we’ve selected the CPT in the first step, we can now edit its posts with Elementor. The top panel has a corresponding button: “Edit with Elementor”.
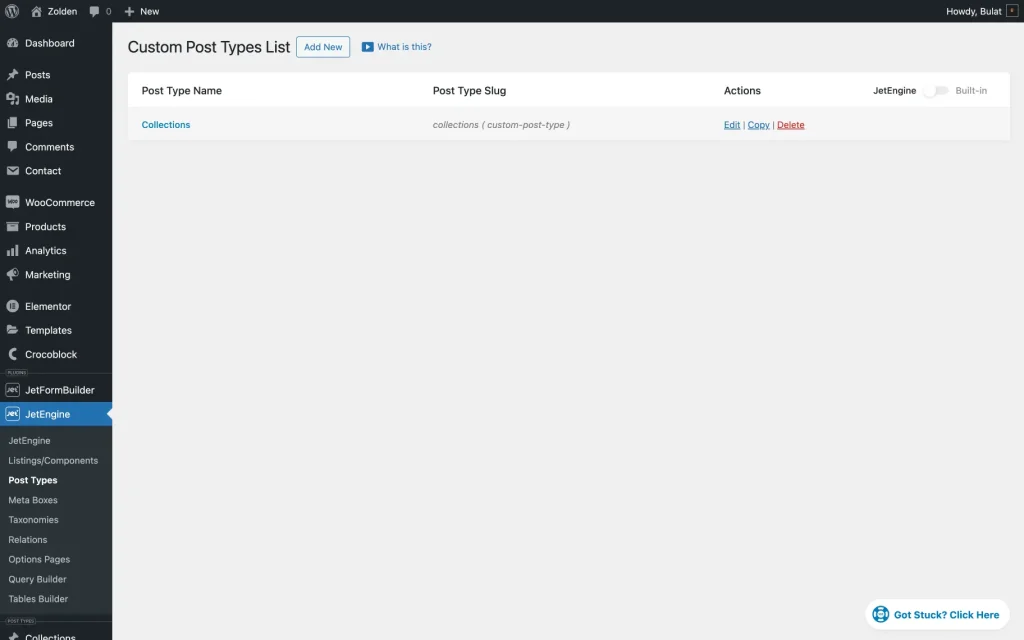
Follow the WordPress Dashboard > JetEngine > Post Types path to create a new custom post type.
By following this tutorial, the possibility to edit custom post types with the Elementor page builder will be successfully enabled.


