How to Use WooCommerce Sale Products Widget
Find out how to add WooCommerce Sale Products to your online store with the help of the JetElements plugin.
Display sale products easily on your website’s page with the WooCommerce Sale Products widget. With this widget, you can add products that are on sale and sort them using custom orders.
This tutorial will teach you how to add sale products on your website with the WooCommerce Sale Products widget. Let’s have a closer look at this process.
1 Step — Add a sale price to the products
First of all, open your WordPress Dashboard and navigate to Products > All Products. Choose the product which you want to rate as a sale product and click on the “Quick Edit” button.

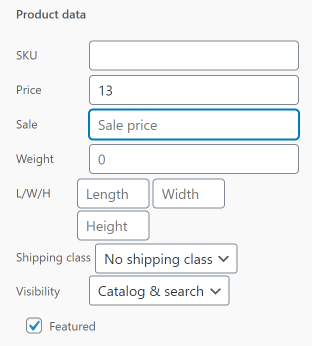
Find the Product Data block. Here you can set a Sale price for the chosen products. Don’t forget to click on the “Update” button to save the changes.

2 Step — Add the widget to the page
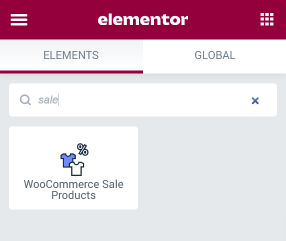
When you are done adding the sale prices, open the page where you would like to place the Sale Products block in the Elementor page builder. Find the WooCommerce Sale Products widget in the left-side menu and drag it to the section where you want to place it.

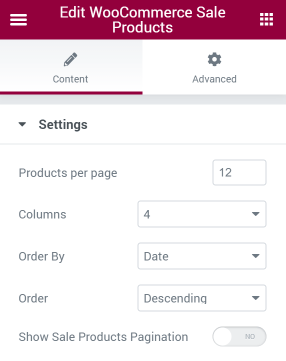
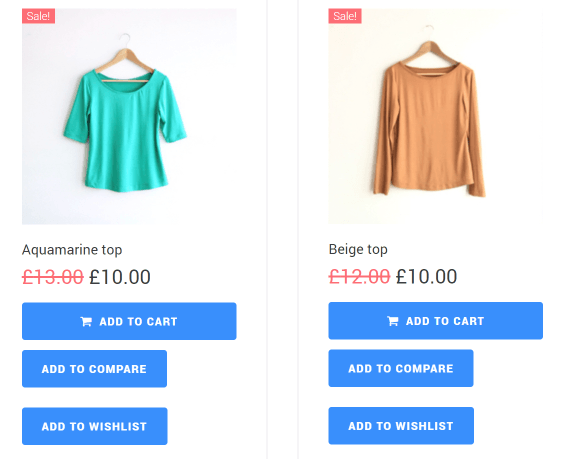
Afterward, you’ll see products that are on sale on your page. In the Content settings block, you can choose the number of Products per page and set the number of Columns. Also, you’re able to Order products by Title, ID, Date, etc.
Moreover, there’s an opportunity to choose Descending or Ascending Order for products. With the help of the Show Sale Products Pagination toggle, you can show the grid separated into pages.

When you’ve finished with customization, click on the “Publish” button and enjoy the results.

Now you know how to add sale products to your website’s page built with Elementor with the help of the WooCommerce Sale Products widget. Congrats!