How to Use WooCommerce Best Sellers Widget
This brief tutorial uncovers the process of adding the WooCommerce Best Sellers widget to your site using the JetElements plugin.
The WooCommerce Best Sellers widget will come in handy if you want to showcase the best-selling products on pages built with Elementor. With this widget, you can show the most sold products on your website and arrange them in columns just in a few clicks.
From this tutorial, you will learn how to display best-seller products on your website with the help of the WooCommerce Best Sellers widget.
1 Step — Add the widget to the page
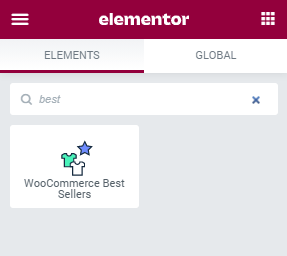
Firstly, open the needed page and click on the “Edit with Elementor” button to start. Find the WooCommerce Best Sellers widget and drag it to the section where you want to place it.

Bestsellers products are chosen automatically. The ones that have the biggest number of sells are now gathered to the grid.
2 Step — Define the settings
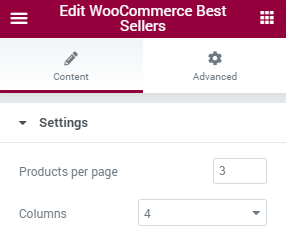
In the Content settings block, you’re able to select the number of Products per page and set the number of Columns from one to six.

When you’re done with the settings, click on the “Publish” button and preview the results.
Actually, these easy steps are all you have to do to add the best-selling products to your website. Hope this tutorial was useful.