WordPress Post Options Overview
This tutorial uncovers the way to add a new post to a WordPress site. Here you’ll discover all post options that you can customize according to your needs.
A post is a significant structural component of your website. It allows you to share your latest news and ideas with your followers and visitors. This tutorial intends to lead you through the post creating procedure. Keep up with the following instruction to succeed in creating your new post.
Adding a New Post
First of all, open your WordPress Dashboard. You can see the menu on the left with numerous options. Hover over the Post section to reveal the Add New block, which you have to click.

Fill in all the necessary fields, such as a title and the content field. The last step is to click the Publish button on the right.
Let’s move on to figure out all the post options.
Post Options

- Title field – here, you can type in your post heading. Try to make it unique and flashy.
- Content field – here, you can write down anything you want. Don’t forget to include the corresponding picture. Alternatively, you can add videos, links, as well as audio files.
- Permalink – is a link connected to your post. If you want to make any changes to it, just click the Edit button on its right.
- Preview – here, you can find out how your post will look on your site. And then, you should decide if your post needs any further formatting and improvement.
- Save draft – use this option if you don’t want to publish your post yet, but the information you already have, satisfies you, and you don’t want to lose it.
- Publish – click this button whenever you are ready to present your post to your visitors, and it will appear on your webpage.
- Format – in this section, you have a right to choose the format of your oncoming post. There are such formats as Standart, Gallery, Image, Link, Quote, Video, and Audio.
- Categories – here, you can choose an existing category that you want to add your post. You can also create a brand-new category by using the Add New Category option.
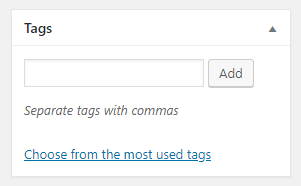
- Tags – in this field, you can add tags, which are the keywords representing the main idea of your post. The note below the field informs you to separate tags with commas.
- Post Attributes – here, you can select different layouts for your post. Thus, your post will be displayed the way you prefer.
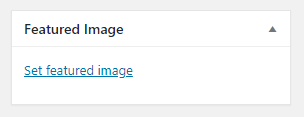
- Featured Image – is an option that allows you to add an image, which will be displayed as the main image on your post page, in sliders, Facebook, and other social networks if you share a link.
- Page Formats Settings – an option for customization of different post formats. In your post, you can use images, links, quotes, audio, and video and adjust settings here.
- Page Settings – if you want to use Breadcrumbs on your site, turn it on in this option.
- Excerpt – here, you can type in the short extract from your post, which will lure each and everybody to read your full post. If you don’t define the excerpt, it’ll be created automatically.
- Send Trackbacks – makes it possible to notify legacy blog systems that you’ve linked to them. Insert a website’s URL into the field. If there are more than one URLs, simply separate them with commas.
- Custom Fields – use these fields to add extra metadata to your post. E.g., author, genre, publication date, subject, etc.
- Discussion – in this field, you can either allow or forbid commenting, trackbacks, and pingbacks of this page.
- Comments – this section lets you leave comments. Just click the Add comment button to do it.
- Slug – in this field, you can input the URL valid name for your post. If you don’t do it, WordPress generates it on its own.
- Author – here, you can set the author of your post by choosing from a list of users.
Attention! If any of these sections are not visible to you, click the Screen Options button in the upper-right corner of the Edit Post window to check the boxes you want to appear.


Now you are aware of how to add the new post and all features of the Posts section.


