
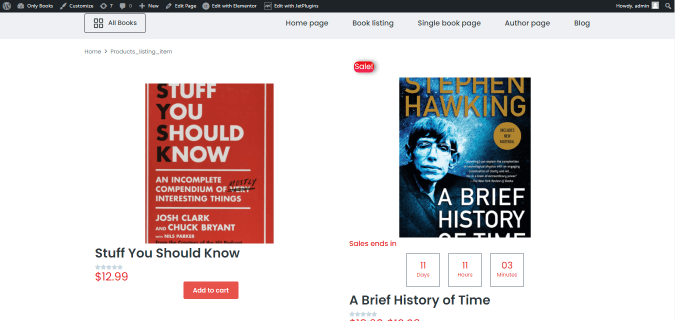
How to Add Sale and Best Seller Badges to WooCommerce Products
This tutorial details how to add badges with texts to WooCommerce Product listings and apply the Dynamic Visibility conditions for their displaying refer to product options. It uses the dynamic tags of the JetEngine tools to get WooCommerce data.
Adding the Heading Widget
Navigate to the JetEngine > Listings tab and open the listing template with applied dynamic tags (here, Products_listing_items). Open the listing template and drag and drop the Heading widget where needed to place a badge.
If you want to put it at the top of the item, add the Inner Section widget previously.
Creating the Sale Badge
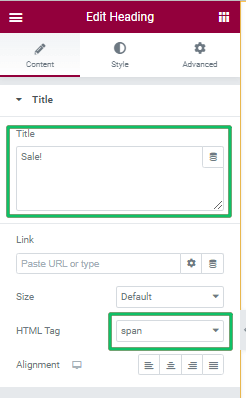
Add the text to the badge (here, Sale!) to the Title field and select the span option as an HTML tag of the badge.
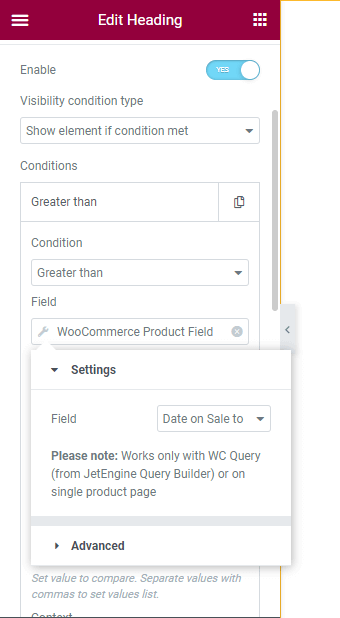
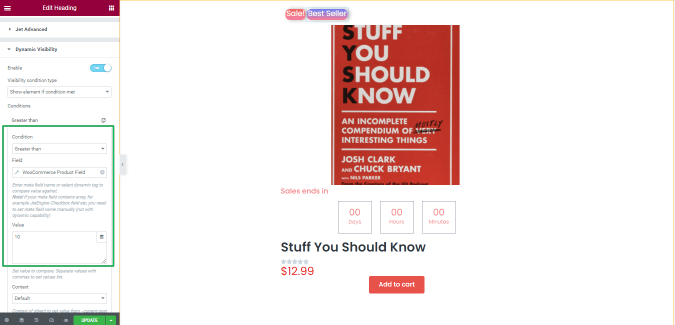
Navigate to the Advanced settings of the widget.
Unroll the Dynamic Visibility settings and move the Enable toggle.
Select the Show element if condition met option from the Visibility condition type drop-down menu.
Select the Exist option from the Conditions drop-down menu.
Press the Dynamic Tag and select the WooCommerce Product Field option from the Field drop-down menu. Thus the Setting field turns on: select the Plain Sale Price option from the drop-down menu.
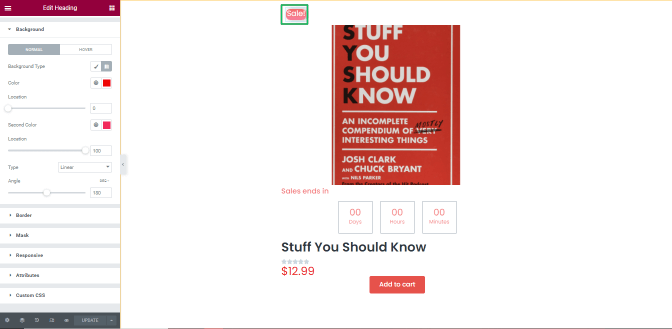
Apply the custom style settings to the badge.
Press the “Update” button to save changes.
Update the page with the applied Listing Grid widget.
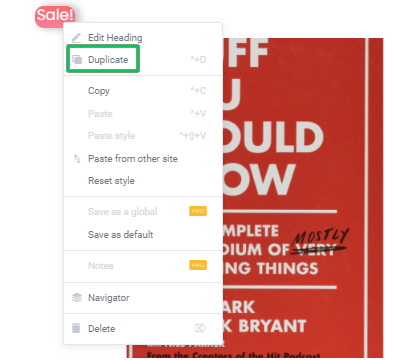
Adding the Best Seller Badge
To add another badge (i.e., the Best Seller), duplicate the Heading widget: click the right button of your mouse on the widget and select the Duplicate option.
Edit the following settings to the duplicated Heading widget.
- type the text you need into the Title field (here, Best Seller);
- apply the stylish options to the widget appearance;
- unroll the Dynamic Visibility settings of the Advanced setting tab and type the condition for classifying the WooCommerce product as a bestseller. Select the Greater than option from the Condition settings for the best seller badge and type the number of sales in the Value field (here, five).
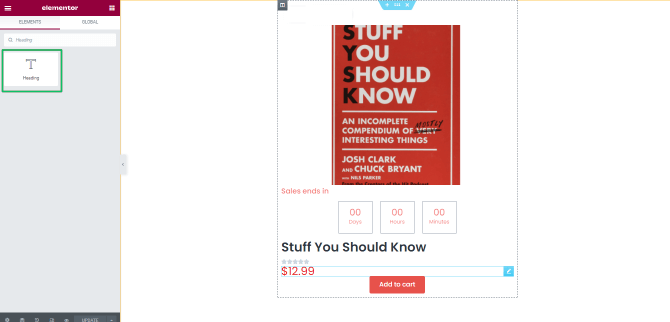
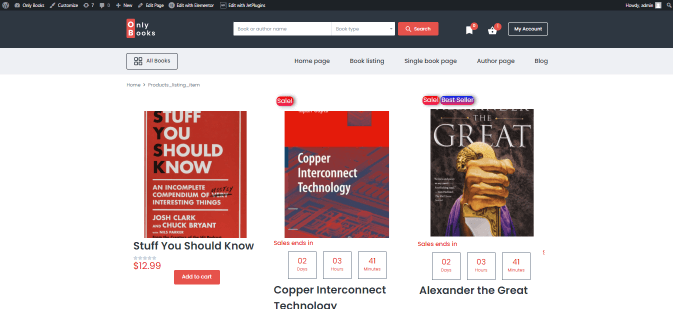
Press the “Update” button to save changes. Update the page with the applied Listing Grid widget. The page on the front end looks as follows:
That’s all about adding badges to WooCommerce products.