How to Set Proper Memory Limit in WordPress Environment System Info
This tutorial explains how to check the memory limit set for your WordPress installation and how to increase it.
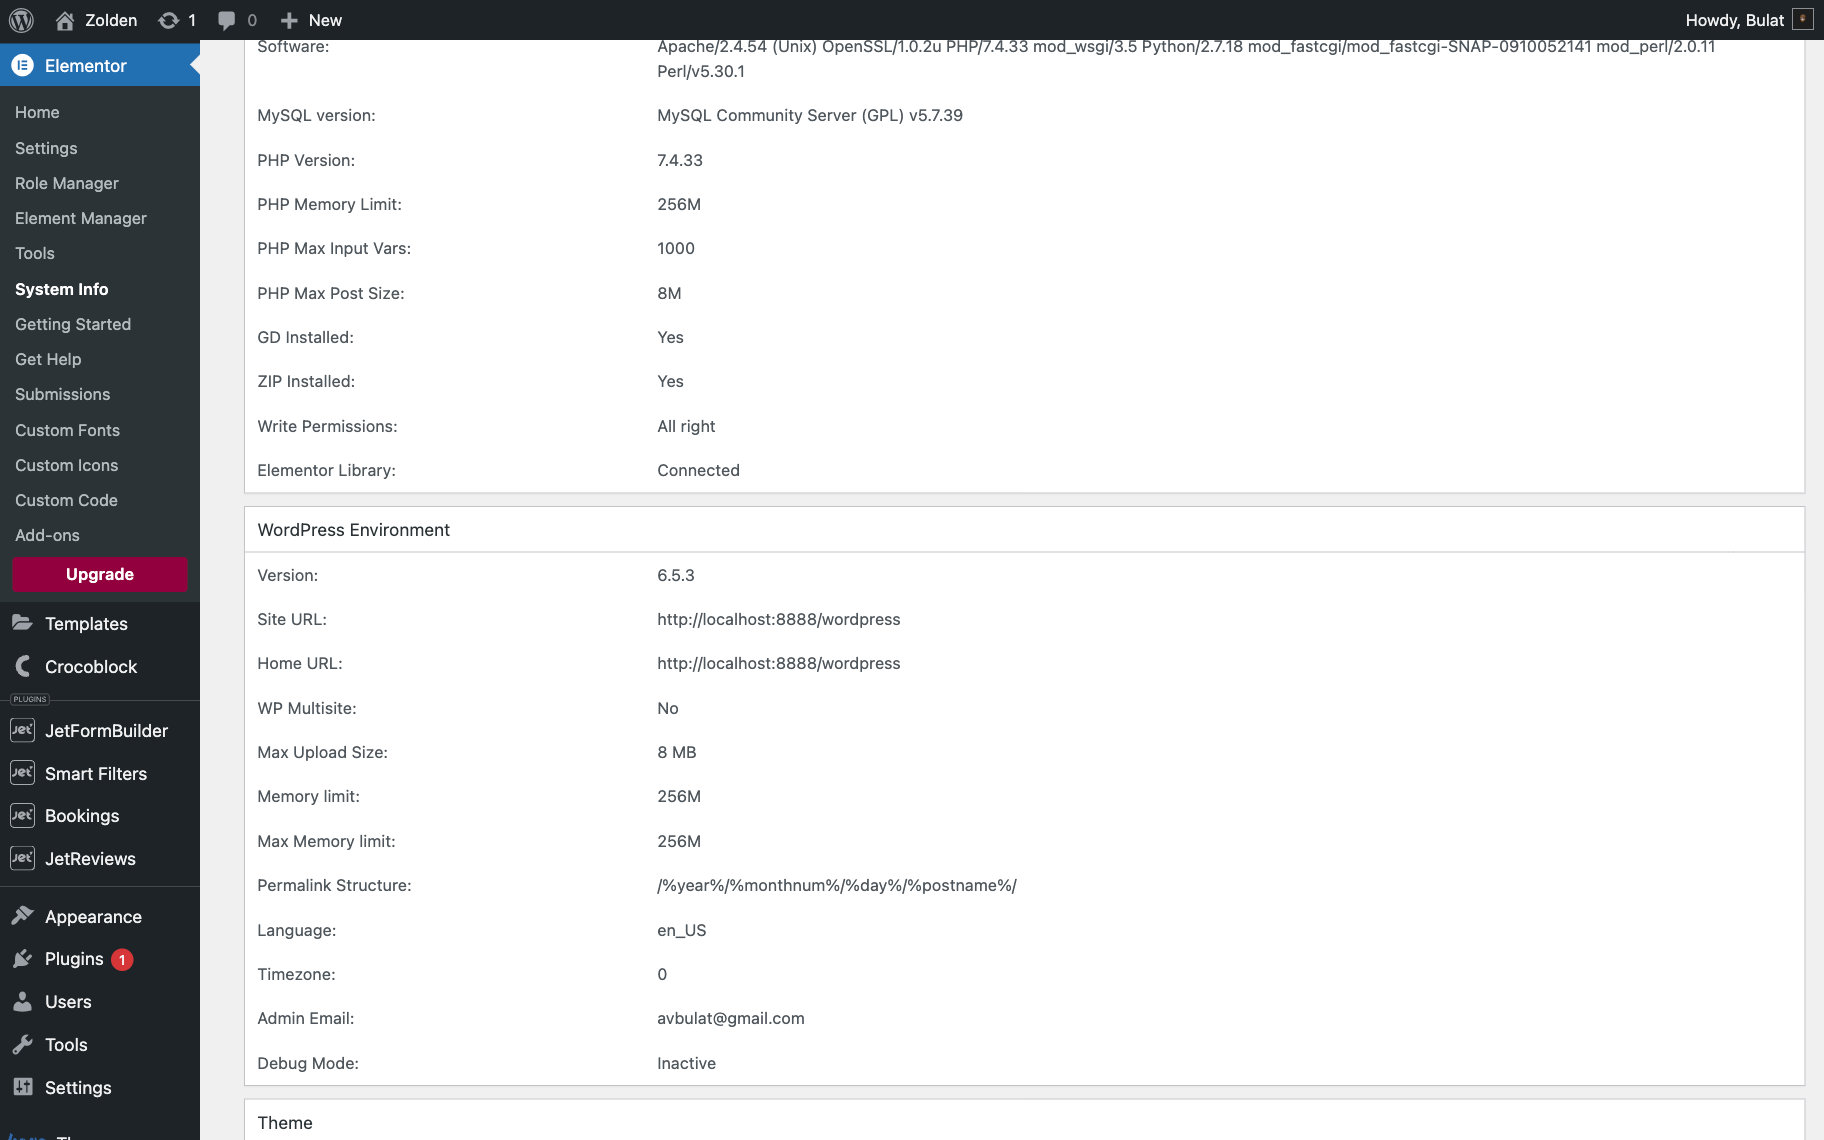
WordPress Environment System info is the information about your current WordPress installation. It gives you tips about the version of the WordPress engine used on the website. You can also learn the website’s URL, file max upload size, and memory limit value.
WordPress Environment System Info (Based on Elementor)
To find the block, navigate to WordPress Dashboard > Elementor > System Info section. The second block is the WordPress Environment.
Importance of Checking
First, you can find information about your WordPress version here. If your version is not the latest, you should upgrade it. Besides that, check the URL of the site to see how the link to your site looks.
Second, here, you’ll see a function of WP Multisite. It is a mode for working with many WordPress projects using one general database. If you decide to create more than one site, you should set up a Multisite. Also, there is information about the maximum size of uploads.
Third, you’ll see the info about the structure of permalinks, language, timezone, admin email, and debug mode.
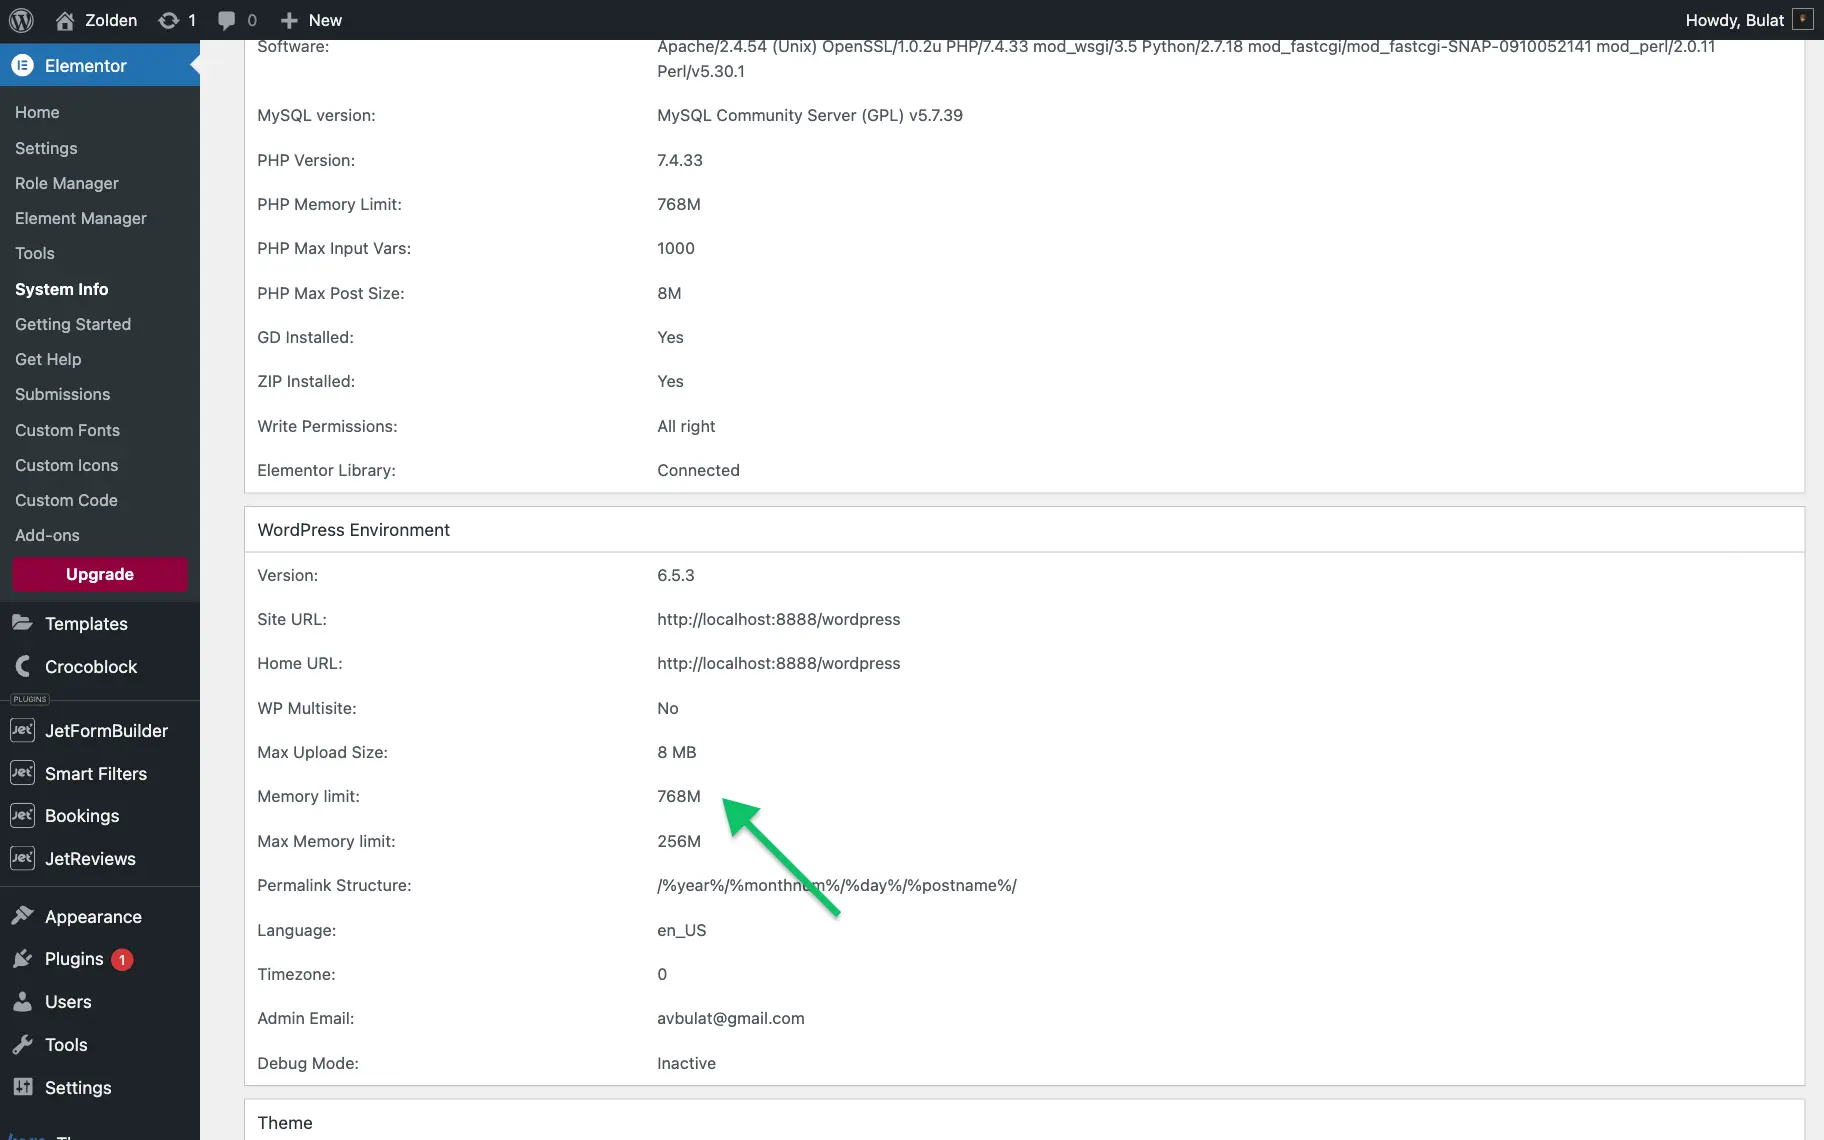
Finally, the most important thing you have to check is the Memory limit. By default, it is 256M. While actively working with WordPress, you can run into the Memory limit exceeded error, which will prevent you from continuing. To avoid this, you should set up the proper memory limit.
Increasing the Memory Limit
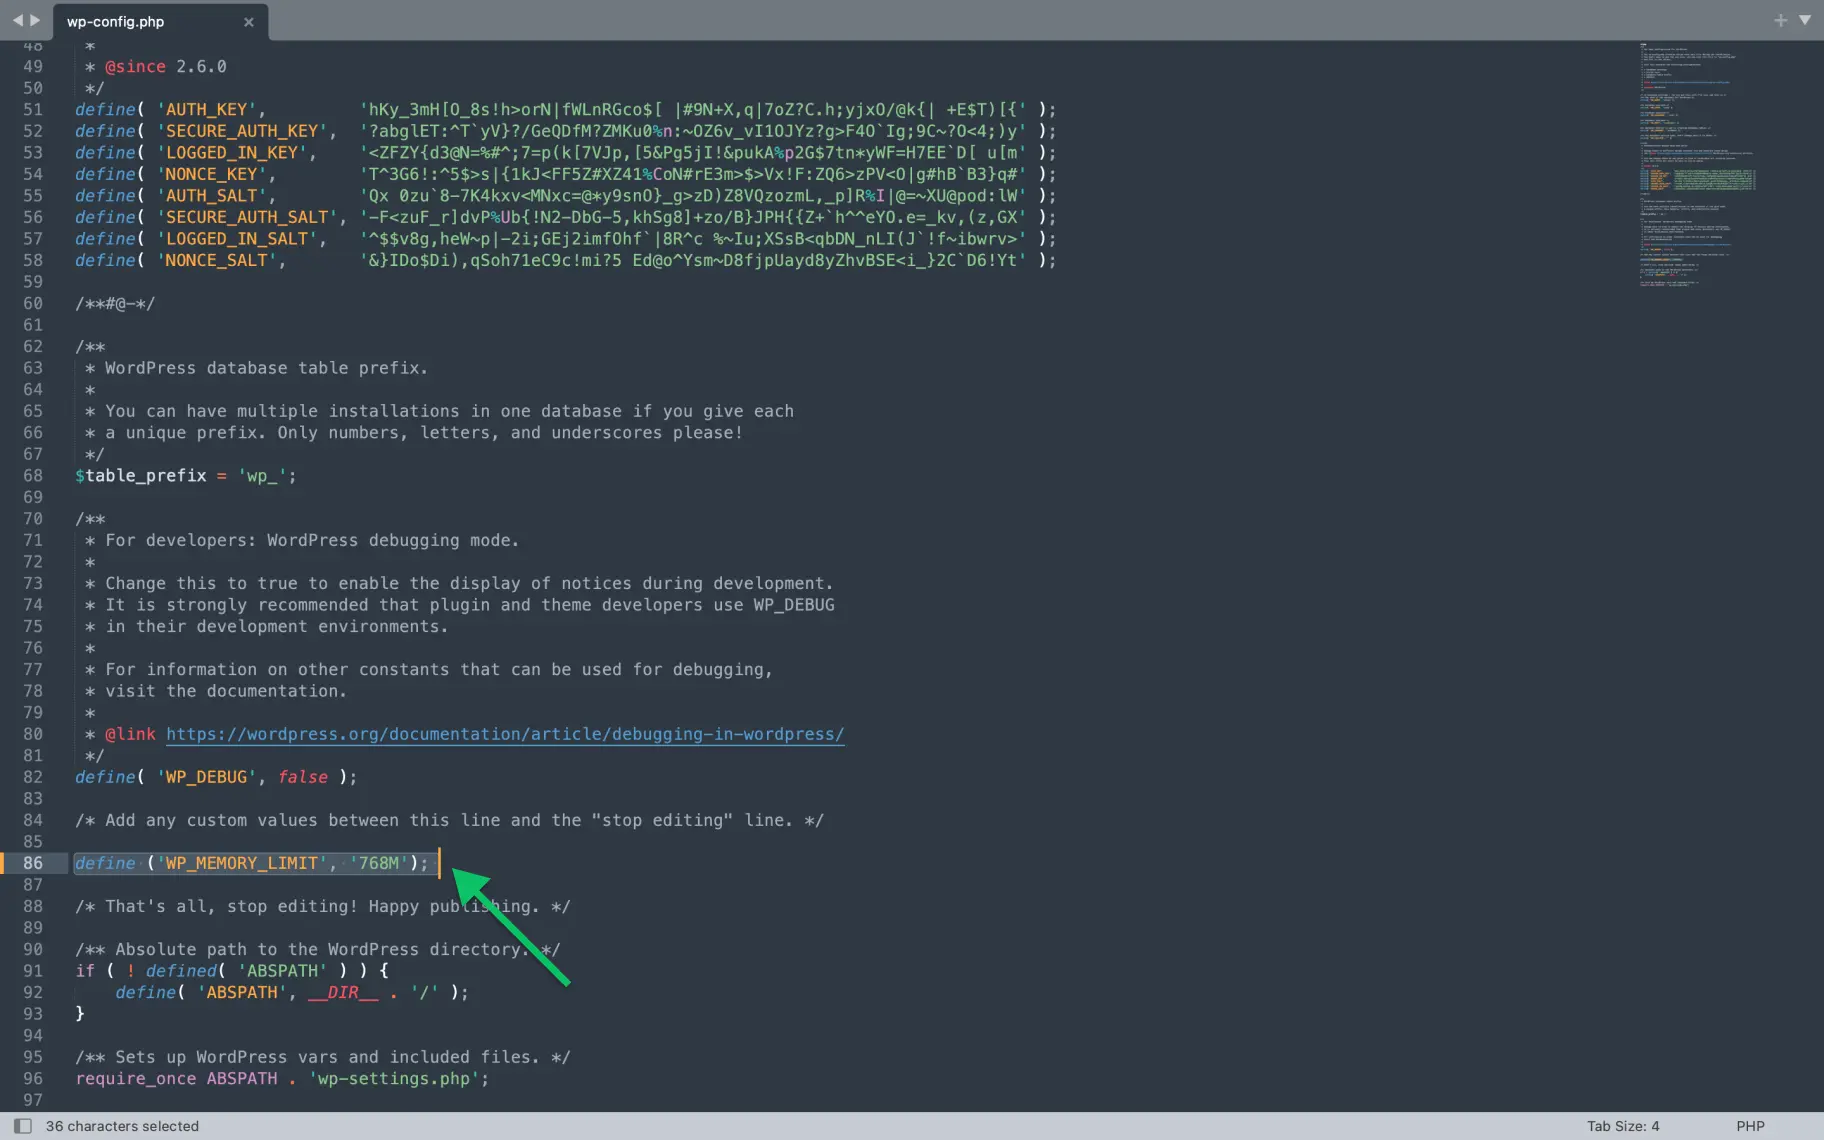
Use the File Manager application on your hosting or an FTP connection to access the public_html folder where your website files are located. There you need to find the wp-config.php file.

Open the file and scroll down until you see the line saying:
/* Add any custom values between this line and the "stop editing" line. */Copy the following line:
define ('WP_MEMORY_LIMIT', '768M'); Paste it into the file and save the changes.
Then, go to the System Info block and check the changes.
That’s it; this tutorial will help you avoid the WordPress lack of memory error.