How to Create Default WordPress Categories
This tutorial will help you structurize your post archives with the help of the Category feature.
It’s always a good idea to keep everything neat and organized in your life, isn’t it? This can be also applied to your website. With this in mind, you can classify the content you supply by using categories. When you categorize your posts, it becomes easy for your visitors to navigate around your website, and they can rapidly find the necessary info.
For this reason, you can assign any category to several posts. Thus, when a newcomer enters a category, he can view all the relevant posts.
This tutorial aims to make the process of categorizing simple and smooth for you with the help of the JetEngine plugin.
Adding a New Category
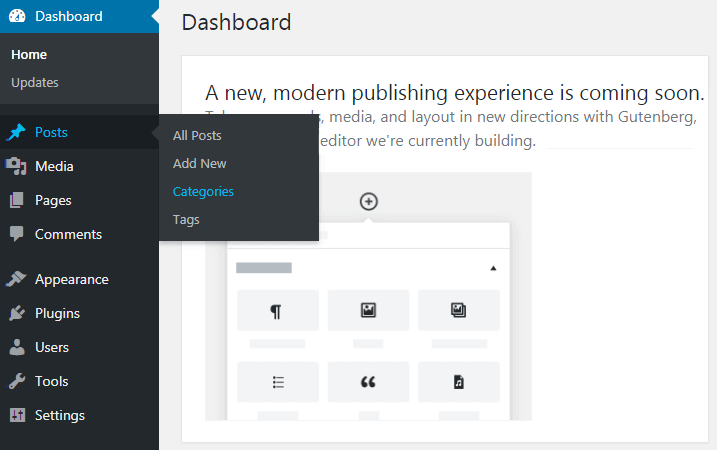
Move to your Dashboard and find the Post option in the menu. Hover over it to reveal the Categories. Click it in order to create and customize a new category.

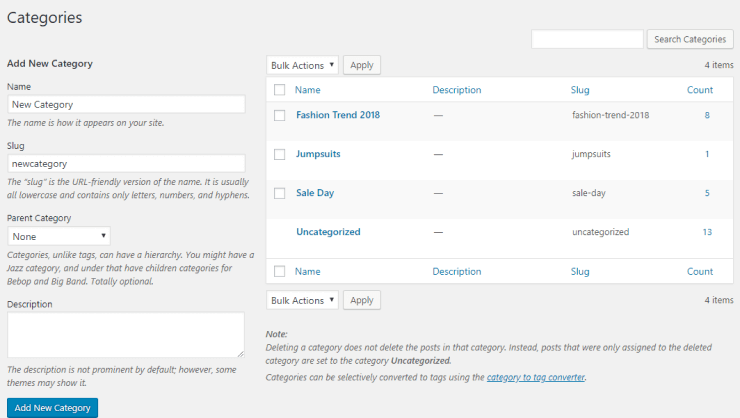
Fill in all the required fields and click the Add New Category button.

- Name — it will be seen for the readers of your website;
- Slug — it is how your category is named within the URL address;
- Parent category — if you want to include your category in a wider one, choose it in this field. Otherwise, it will become a parent category by default;
- Description — here you can provide your visitors with a quick overview of a particular category.
Now your category is represented in the list of categories on the right of your screen. Here you can easily edit or preview it.
Adding a New Section
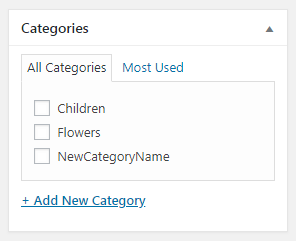
If you navigate to the Posts > Add New section, you can find your brand-new category in the Categories box on the right. By the way, you can create a new category here by just clicking the Add New Category button.

With all these things considered you can start your work with WordPress categories.