How to Apply the Read More Widget to the Content
Find out how to organize content in a compressed way with the help of JetTricks and its Read More widget.
The Read More widget for Elementor provides an opportunity to hide particular sections and make the page’s layout more minimalistic and attractive. Unlike the content hidden by Unfold widget, the section you hide with the Read More widget can’t be closed after the user opens it. However, this widget also allows you to show the hidden sections one by one. If you would like to learn more about the Unfold widget – check out this tutorial.
Let’s explore how to use the Read More widget for Elementor.
Add the Section You Want to Hide
Navigate to the Page or Post where you need to add the Read More widget. Click the “Edit with Elementor” button to proceed.
The Read More widget will hide the specific section, so you need to create it first. Click the “Add Section” button at the bottom of the page, choose the section layout, place all the necessary widgets there, and customize the section via the tools of the Style tab.
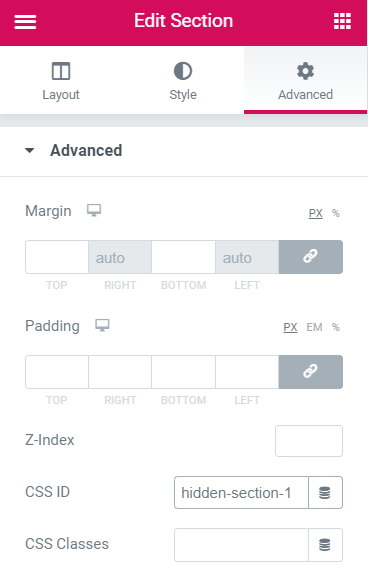
After you finish creating the section’s design, open the Advanced tab of the section. There you will see the CSS ID field where you should type in the unique name of the section, for example, “hidden-section-1”.
Add the Read More Widget
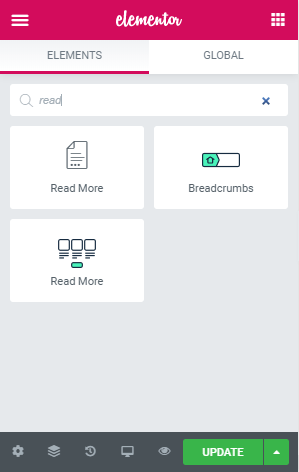
Find the Read More widget in the Elements panel and drag it to a suitable location.
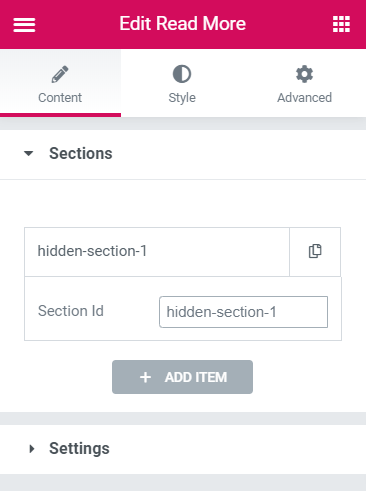
On the left sidebar, you’ll see the Sections and the Settings section. In the Sections block, you can define what sections to hide. Click the “section_1” item and type in the CSS ID of the section you want to hide in the Section ID bar. You can add as many hidden sections as you need by clicking the “Add Item” button. The hidden sections become grey, and that is an indicator you did everything right.
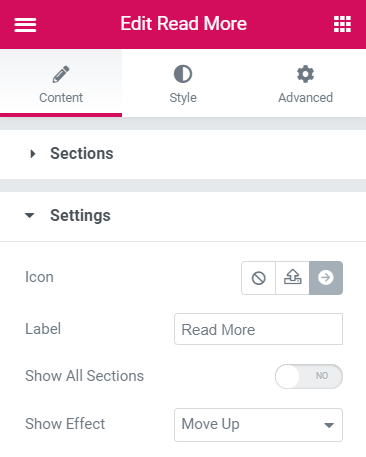
In the Settings block, you can change the appearance of the “Read More” button.
- Icon – here, you can choose the icon for the button. You can either choose it from the icon library or download your own SVG file;
- Label – this is the text that will be shown on the button, its title;
- Show All Sections – if you turn this toggle on, all the hidden sections will be shown at once after the user clicks on the “Read More” button. Otherwise, the sections are shown one by one, and the user will have to hit the “Read More” button every time he wants to see the next section;
- Show Effect – here are 6 variants of the hidden section showing animation, so you can choose the most fitting one.
Сlick the “Publish” or “Update” button and proceed to the preview in order to see the result.
That’s all you have to do to organize content in a compact way with the Read More widget.