How to Create the Post Tiles Carousel
Read how to create post carousels using the Smart Posts Tiles widget.
Before you start, check the tutorial requirements:
- Elementor (Free version);
- JetBlog plugin installed and activated.
Posts carousels created by the Smart Posts Tiles widget of the JetBlog plugin allow you to apply movement to posts tiles and choose the tile, choose the number of posts in the carousels, set the autoplay speed, show/hide a slider, select the control arrows, and more.
This tutorial details how to arrange posts in carousels with different settings.
Adding the Smart Posts Tiles Widget
Open the page and find the Smart Posts Tiles widget.
Drag and drop this widget.
Arranging Posts in Carousels
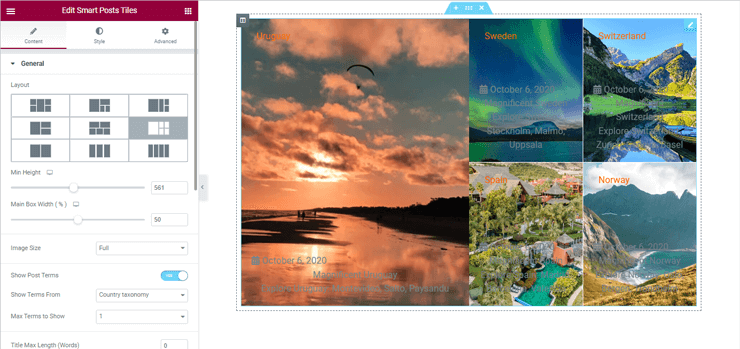
Navigate to the General settings tab of this widget and select a tile layout to display posts. This tile layout will be used for the post carousel.
Add the content to display.
Read the Smart Posts Tiles Widget Overview to know how to arrange blog posts in the form of an attractive tile layout.
Carousel Settings
Navigate to the Query & Controls settings tab and turn on the Enable Carousel toggle.
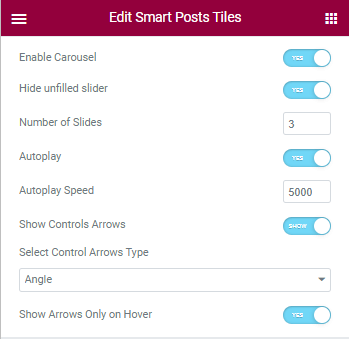
If enabled, this toggle turns on the following:
- Hide unfilled slider toggle, if enabled, hides this widget if there are not enough posts for the slider and shows only the posts tile.
- Number of Slides ranges from one to twenty displaying sliders (not posts).
- Autoplay toggle, if enabled, turns on the Autoplay Speed field to type the speed of slider movement (one is the fastest speed, and 5000 is the slowest speed).
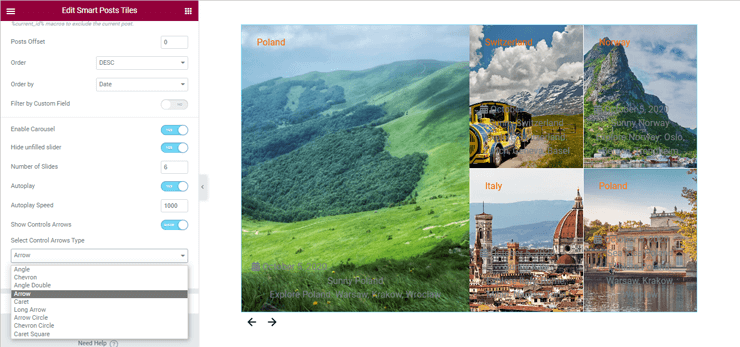
- Show Controls Arrows toggle, if enabled, allows Select Control Arrows Type from the drop-down menu (i.e., Angle, Chevron, Angle Double, etc.).
- Show Arrows Only on Hover toggle allows showing the arrows of the specified type only on hover.
That’s all about the carousel settings of the Smart Posts Tiles widget.