How to Create Load More Button in the Listing Grid Widget
Due to the wide range of the JetEngine plugin functions, we have created a detailed tutorial on how to use the Load More functionality.
Before you start, check the tutorial requirements:
- Elementor (Free version)
- JetEngine plugin installed and activated
Load more option can help you organize the listing and save space on your page. In general, with Load More, you can hide one part of the listing by adding a button or another widget that will showcase another one.
You can set the number of columns and posts to organize the listing in the most preferable way.
There are only a few simple steps to set up this function, let’s get to know them.
Enable Load More Option
Open your WordPress dashboard and find the page or post where you would like to place a Listing Grid with the “Load More” button. Open the page in the Elementor page builder and click on the Listing Grid widget. In the Content left-side menu tab, open the General section and scroll to the bottom. Find the Load More toggle and enable it.
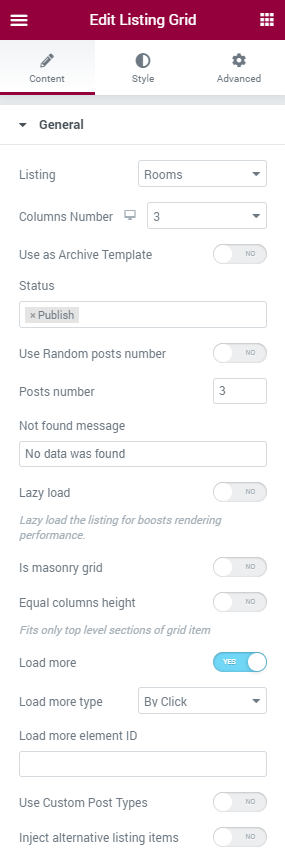
After that, two additional features will appear. The Load more type drop-down menu allows you to choose when the additional sections of the Listing Grid are shown – when the user clicks the button or when they scroll the page down. In the Load more element ID field, you have to define what element will be used as a “Load More” button.
Add Appropriate Widget
You can use any element as a “Load More” button – image, text, button, animation, etc. Let’s see how different elements can be linked with the Listing Grid.
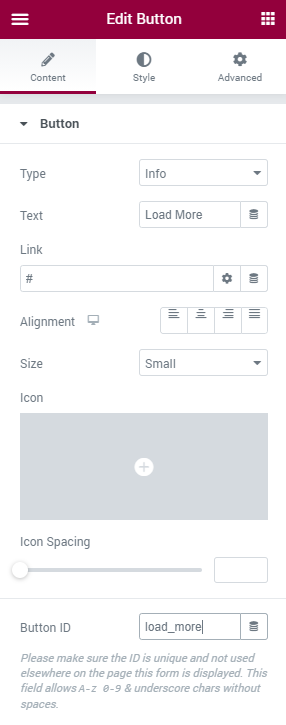
If you are using the Button widget, your next steps are pretty simple. Drag the widget to the page and place it under the listing grid. Change the button’s title, add the icon, define the alignment, and fill in the Button ID field at the bottom of the Button menu section.
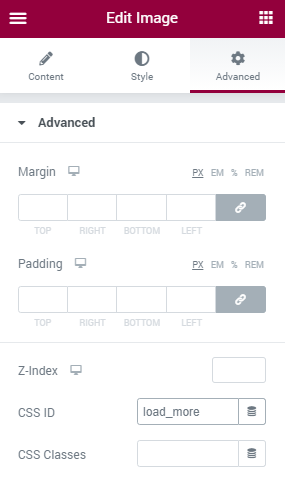
If you are using any other element (let’s assume it is an Image widget), you should also drag it to the page and place it under the listing grid. After that, open the Advanced tab of the left-side menu, unfold the Advanced section, and fill in the CSS ID field.
No matter what element you prefer to use – copy the ID you have chosen for it and proceed to the next step.
Link Widget to Listing Grid
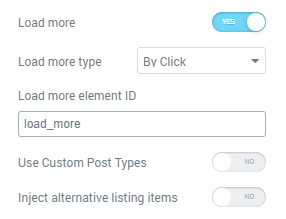
Go back to the Listing Grid widget settings. Paste the copied ID into the Load More Element ID field.
When you are done, click the green “Update” button on the bottom of the menu and watch the result on the front end.
That’s it; this function will help you to create a structured and attractive page without losing the content.