WordPress Installation on Live Server (Based on Bluehost)
From this tutorial, you’ll learn how to install WordPress on Bluehost to start creating your website.
This tutorial is meant to guide you through the process of WordPress installation. As you might know, there are lots of web hosting services, such as HostGator, SiteGround, GoDaddy, and much more.
This specific tutorial is based on one of the most popular web hosts – Bluehost, to which you can subscribe using this link.
Generally speaking, the process of WordPress installation can be roughly divided into three steps. This allows to upload WordPress to the server, create a database, and actually install the WordPress CMS. Keep reading to learn about these steps in more detail.
Uploading WordPress to Server
First, you need to download the latest version of WordPress to your hard drive. As a result, the compressed WordPress package will be downloaded to your computer.
Next, navigate to your Bluehost server cPanel and open the File Manager tool.
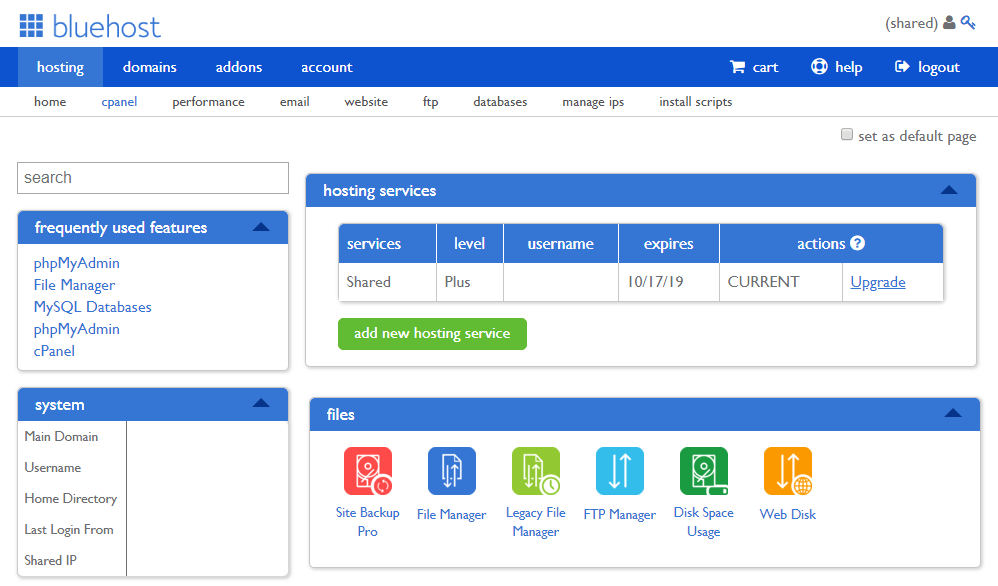
Then select the Web Root directory and click the Submit button.

You will be redirected to the File Manager panel, where you have to click the Upload button on the top bar in order to upload your WordPress archive.
Click the Choose File button and select the files you want to upload. The progress bar in the bottom-right corner indicates how much time is left before the uploading is finished.
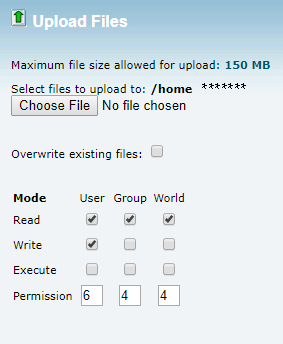
As soon as you see the Complete notification, you can go back to the file manager. Click the Go Back option to do so.
Now extract the WordPress package. Check the file you’ve just uploaded and click the Extract button on the top bar. After the extraction finishes, you can delete the archive from your file manager.
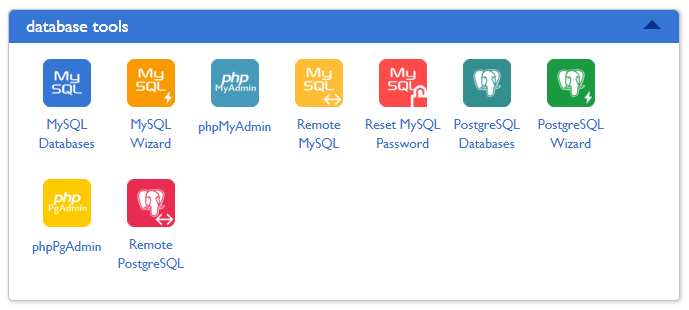
Then you need to scroll down and navigate to the database tools block on your cPanel. Here click the MySQL Wizard tool to create a new database.
Creating a Database and Database User
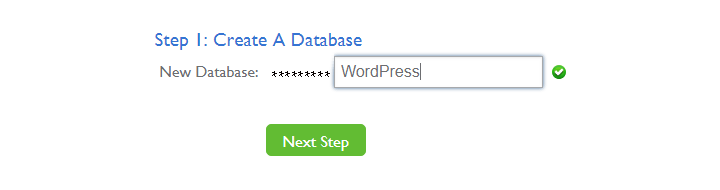
Type in your new database name in the corresponding field. Save it somewhere safe in order to have access to it whenever it’s necessary. Click the Next Step button to move further.
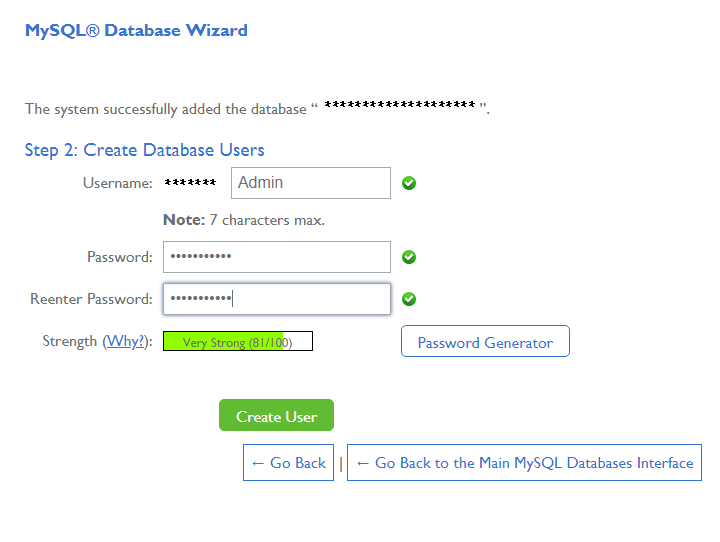
Create a new database user. Thereupon, fill in all the required fields and don’t forget to save these credentials somewhere within your reach. Then click the Create User button.
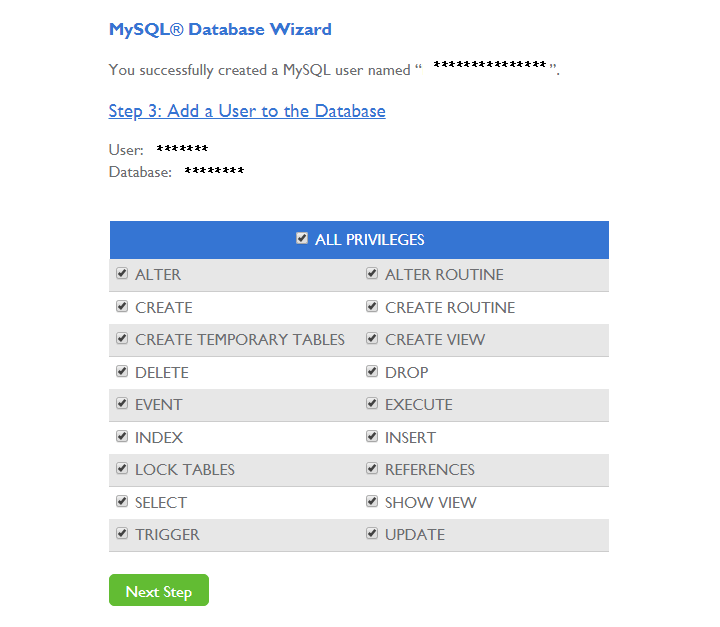
Since you’ve succeded with previous steps, you are ready to Add a User to the Database. Check All Privileges and click the Next Step button.
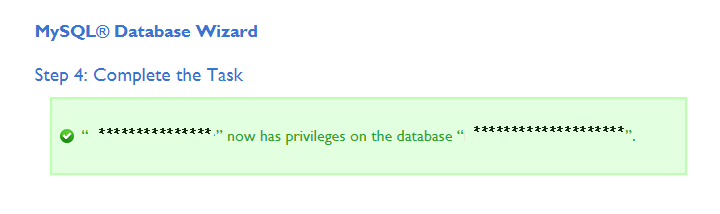
Finally, you proceed to a green notice, that informs you about the particular user’s privileges to the newly created database.
The Actual WordPress Installation
Open your browser and input your domain address in the address bar. Don’t forget to specify the WordPress installation folder at the end. The WordPress installation screen will open.
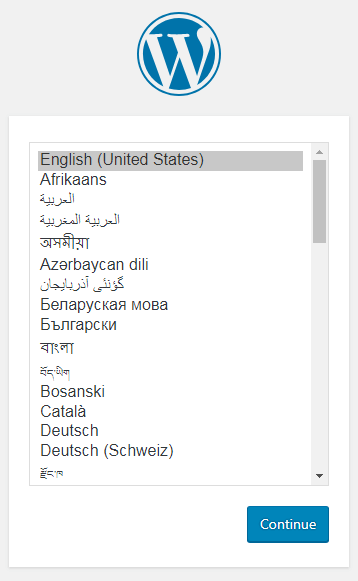
Now you can see the Select language dropdown, where you can choose a language, which is convenient for you. Click the Continue button.
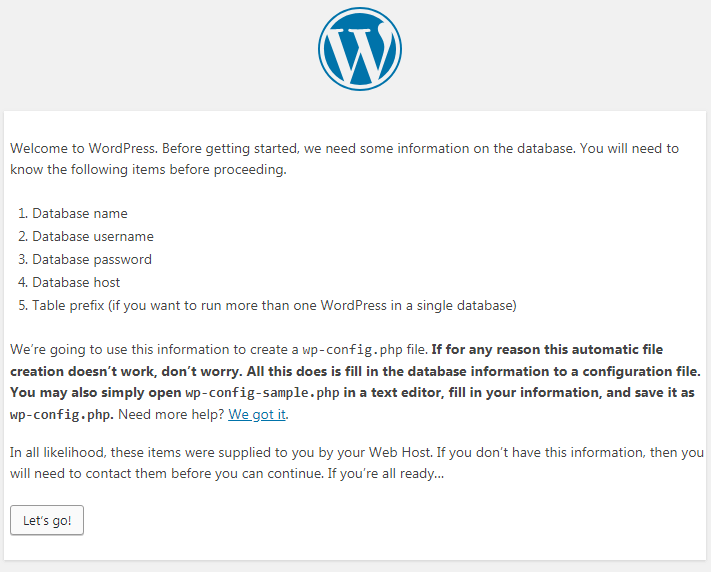
The next screen informs you that you need your database details to proceed further. Click the Let’s go button to move on.
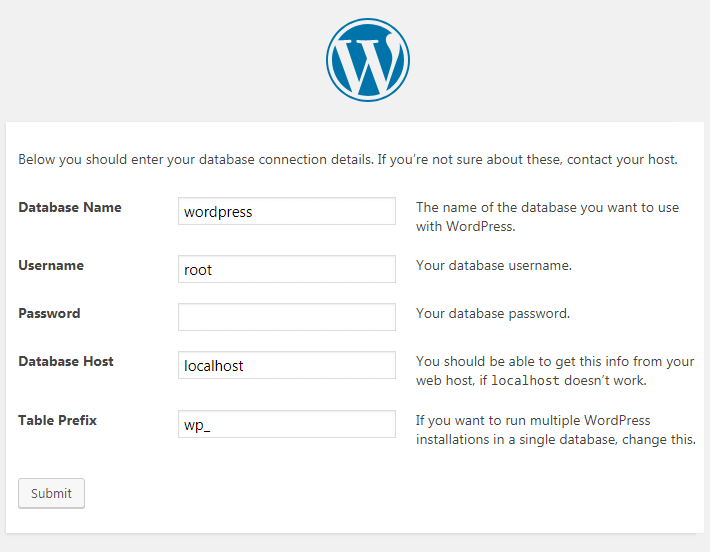
Fill in the next tab’s required fields, such as Database Name, Username, and Password. (Pay attention that this is the same data from steps of Creating a database block!) Click the Submit button to continue.
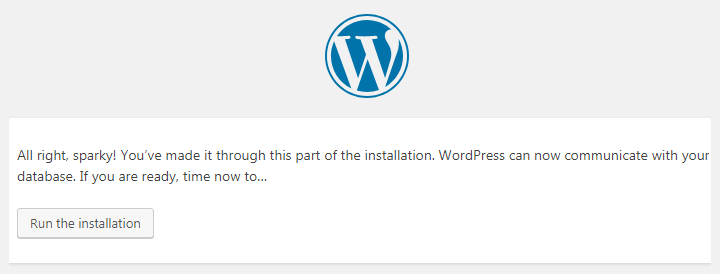
Afterward, click the Run the Installation button.
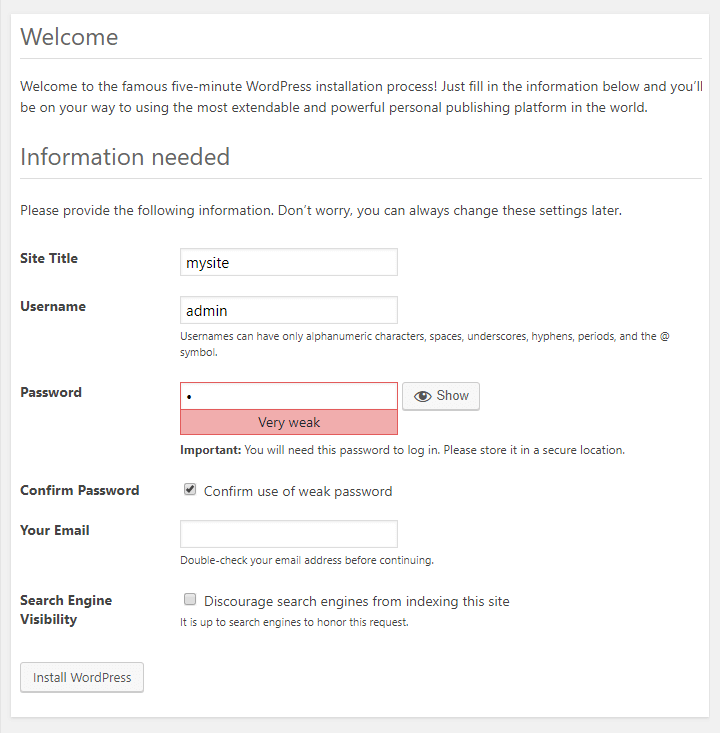
The Welcome screen informs you that it will take only five more minutes to finish the WordPress installation process. Type in all the necessary information, such as Site Title, Username, Password and your Email. Don’t forget to save all this information. After that, you proceed to the Success! screen by clicking the Install WordPress. Click the Log in button to log in to your WordPress Dashboard.
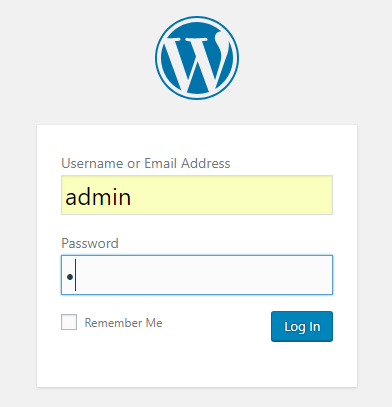
Now input your Username and Password to move further. Click the Log in button. Finally, you can open the WordPress Dashboard.
That’s all; now you know how to install WordPress on a live Bluehost server.