Options Pages Overview
This tutorial provides a detailed description of creating and customizing the Options Pages with the JetEngine plugin.
What is an Options Page?
An Options Page in JetEngine is a custom admin page inside the WordPress Dashboard that stores site-wide meta fields. It acts as a centralized container for reusable data that can be displayed anywhere on a website — in pages, headers, footers, pop-ups, and more.
What it does:
- Stores global values such as company details, contact information, and address in one location;
- Centralizes data management — a value can be updated once in the Options Page, and it’s updated across the entire site (in header, footer, and other pages);
- Provides a simple way to manage site-wide content without editing templates or individual posts. For example, it allows clients or non-technical users to adjust global data.
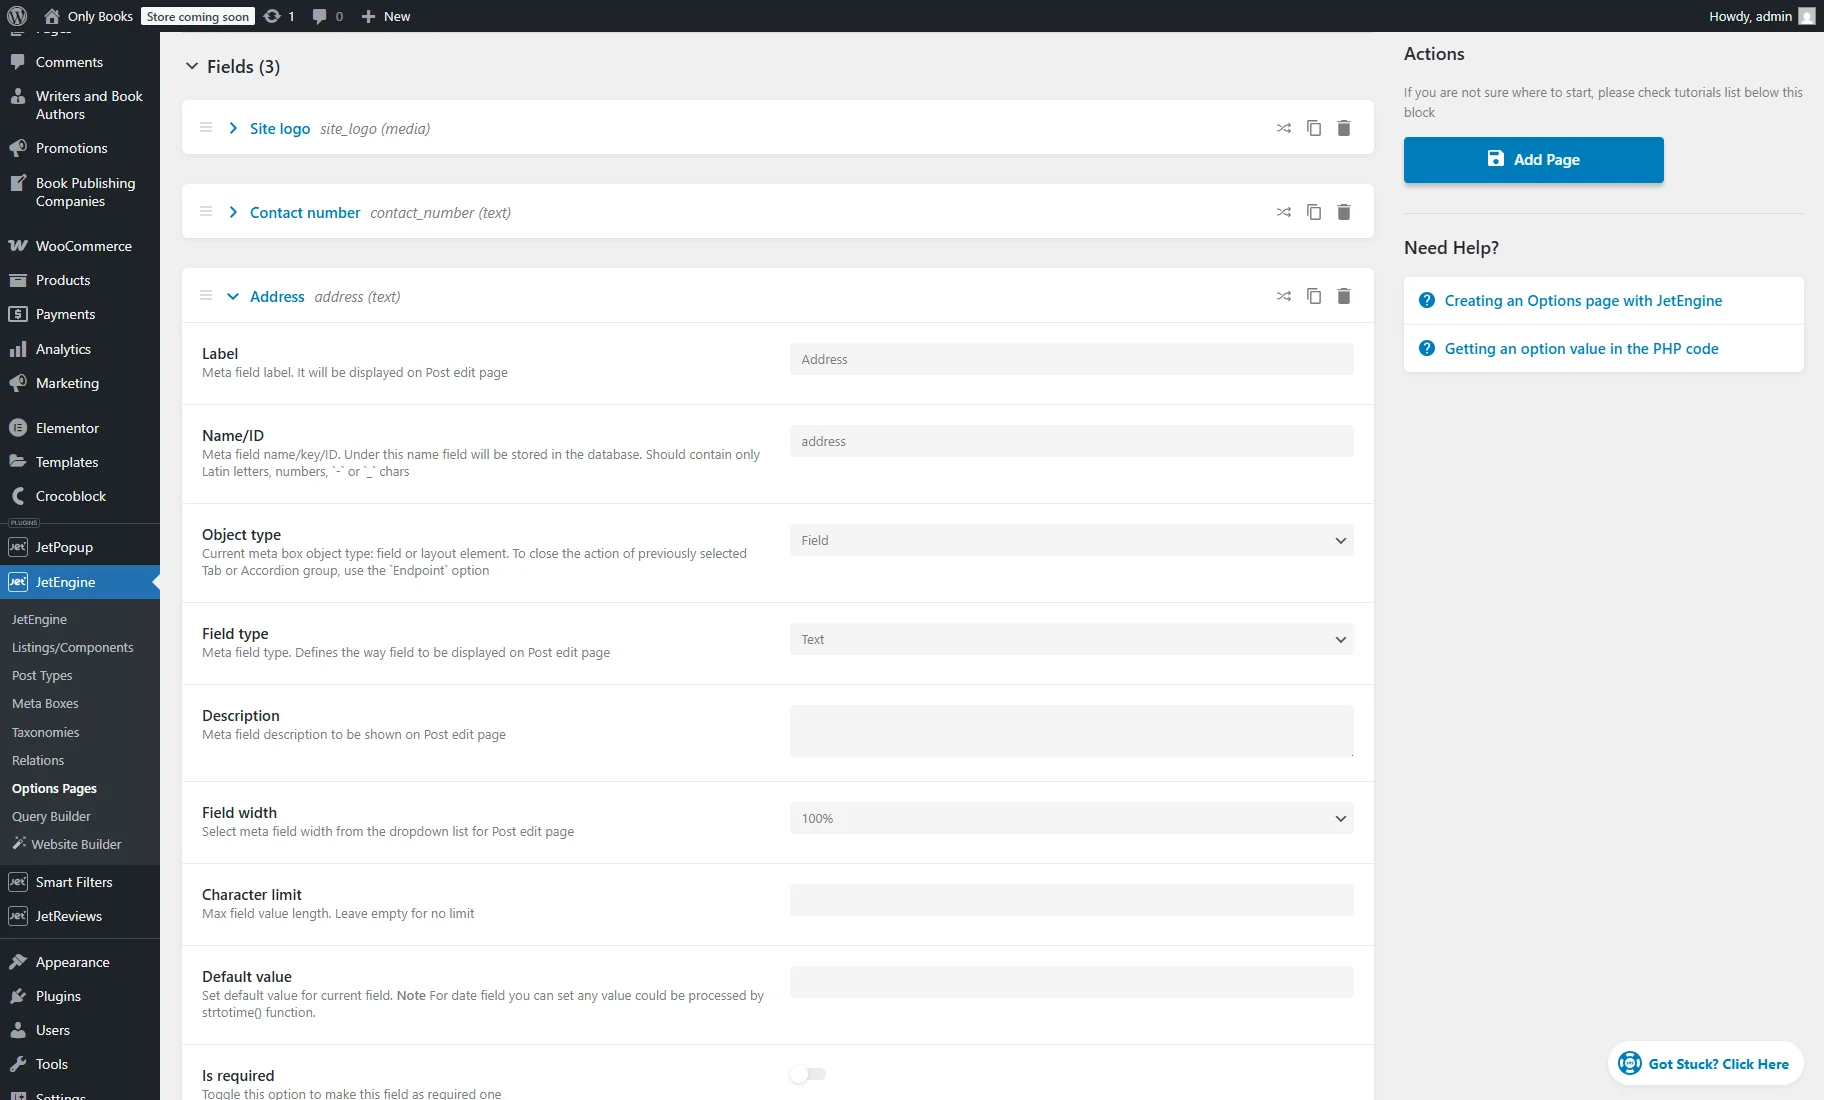
Options Page Settings
General settings
A new Options Page can be created in the WordPress Dashboard > JetEngine > Options Pages > Add New directory.
The General Settings section contains such options:

- Page title — the name of the Options Page;
- Page slug — will be generated automatically from the Page title and can be edited. It should consist of Latin letters only and should not have spaces;
- Menu name — defines how the page appears in the WordPress dashboard;
- Parent Page — this dropdown can be left empty to create a top-level menu page, or one can select an existing page to nest it;
- Menu icon — allows selecting an icon visible in the admin menu;
- Access capability — allows restricting access to the page. For more information, check the Roles and Capabilities article;
- Menu position — allows selecting an existing menu item to add a page after;
- Fields storage type — allows selecting how field values are stored. The “Separate” option can be chosen to store each field value in its own option;
- Add prefix for separate options — appears if the “Separate” option is selected. If enabled, it adds the page slug as a prefix for separate options.
- Hide field names — allows hiding field names on the options page, leaving only the inputs visible.
Meta fields
In the Meta fields tab, custom fields can be added to the Options Page, and they will store the required data.
After all the settings are set, the “Add Page” button can be pressed.
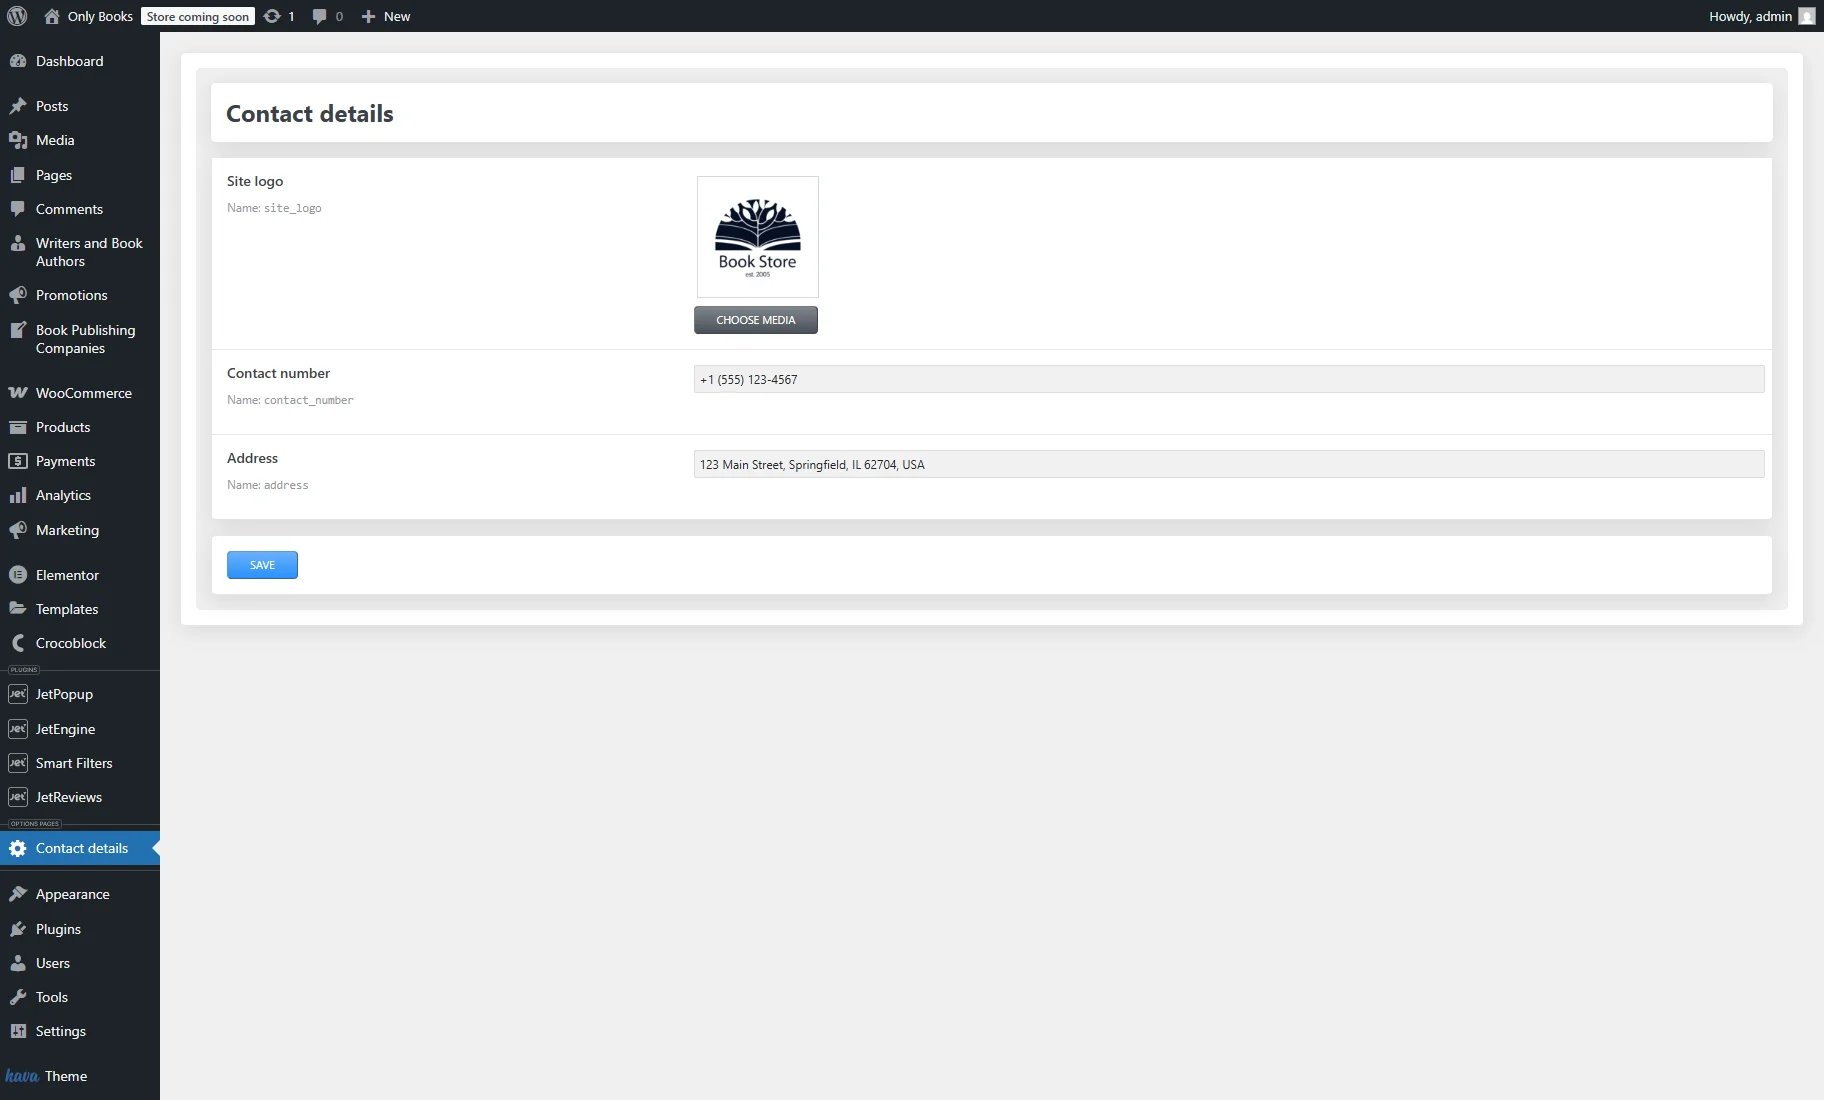
Options Page Filled with Content
After the creation, the Options Page tab can be opened in the WordPress Dashboard.
Here, the meta fields can be filled in, and the “Save” button can be pressed.
Options Page’s Meta Field Values Display
One can display information from the custom fields of the Options Page on a page, footer, header, etc., using the Elementor, WordPress block editor, or Bricks builder.
The dynamic widgets/blocks/elements can be used, which support dynamic content.
For example, in the Dynamic Field settings, the “Options” Source should be selected and the Option should be specified.

After the page or template is updated, the view can be checked on the front end.
That’s all. Now you know how to create and customize the Options Pages with the JetEngine plugin for your WordPress website.