How to Use Headline and Animated Text Widgets
This tutorial explains how to create a headline using the Headline and Animated Text widgets included in the JetElements plugin.
Before you start, check the tutorial requirements:
- Elementor (Free version)
- JetElements plugin installed and activated
In this guide, we will go through the settings for the Headline and Animated Text widgets in Elementor, covering content, animation, and styling options.
Headline Widget
The JetElements Headline widget is an Elementor widget that allows you to use versatile typography settings and classic and gradient text colors. It also allows you to apply images to the text. Follow the instructions to learn how to create a headline.
First, open the page where you want to add a headline in the Elementor page builder. Find the Headline widget and drag-and-drop it into a new section.
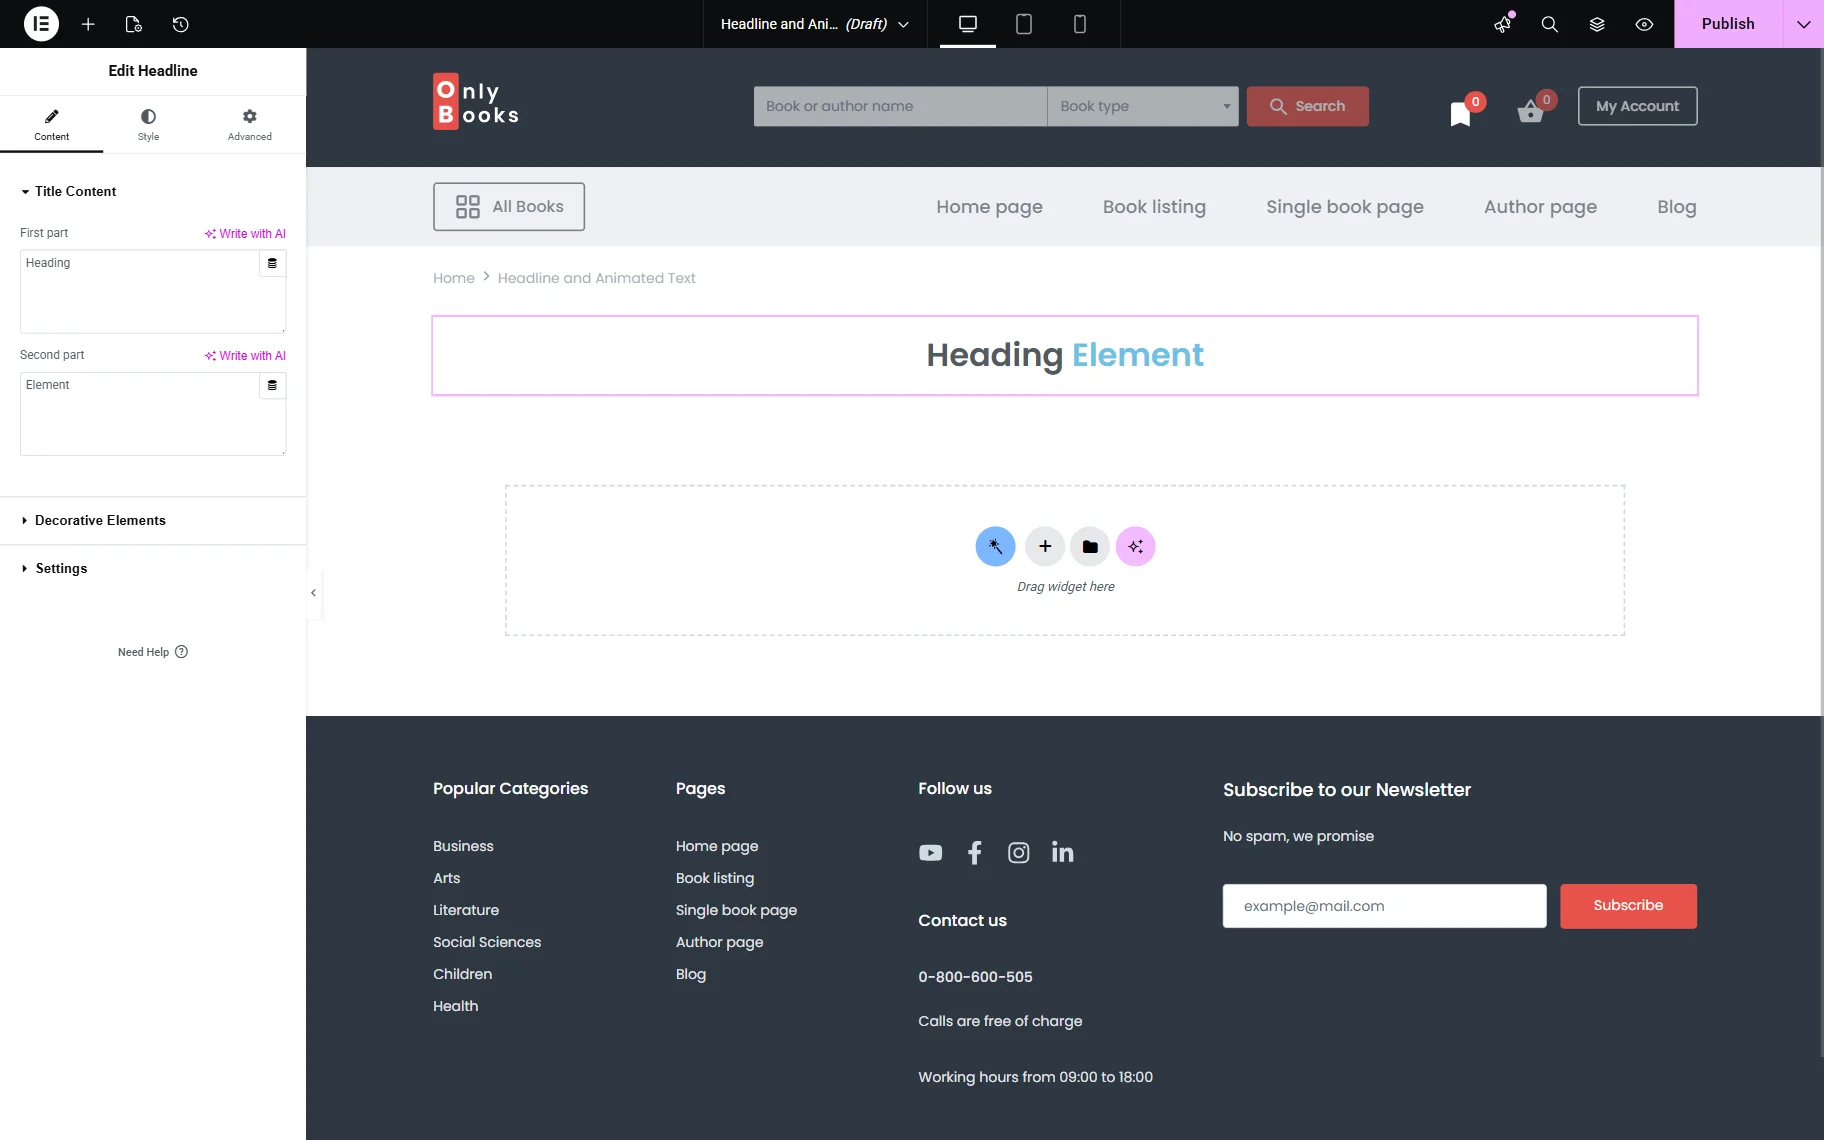
Move to the Title Content section of the Content menu tab. Here, you can enter the First and Second parts of the title.
Also, you have access to the “Dynamic Tags” functionality, which allows you to display dynamic content in your headline when the widget is used in templates.
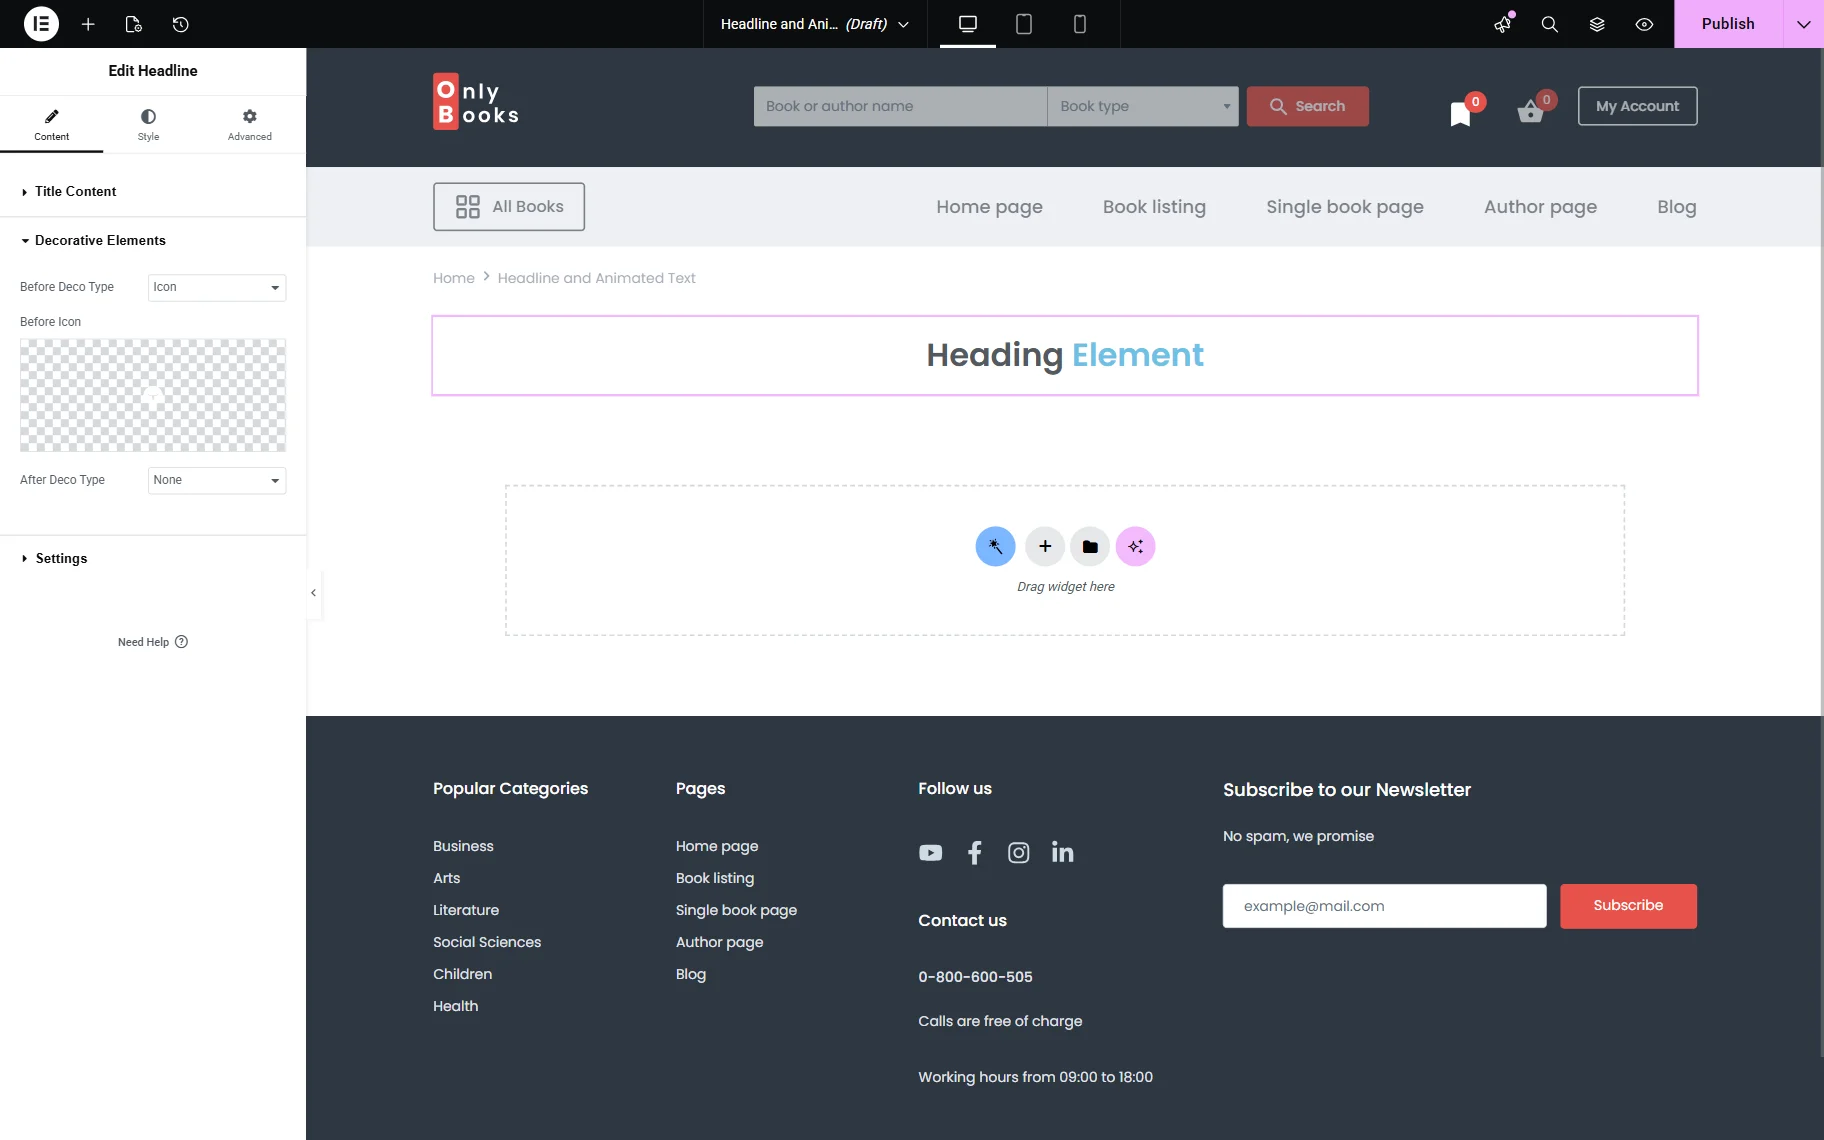
In the Decorative Elements section of the Content tab, you are able to add Before and After Deco Type. These can be either an image or an icon.
Depending on the selected option in the Before and After Deco Type fields, you can select either an icon or an image in the corresponding fields.
Finally, proceed to the Settings section. Here, you will find the following settings:

- HTML Tag — choose one of the heading tags. Proper heading markup is needed for the title to be ranked by search engines. “H1-H6” specifies the importance of the heading in comparison to other headings. This way, “H1” is the most important heading, while “H6” is the least important. Non-heading tags such as “div,” “span,” and “p” can be used for styling purposes when the text does not need to be treated as a heading by search engines;
- Direction — select how the first and the second part of the heading will be placed on the page. If you choose the “Horizontal” option, they will go in one line, one after another. With the “Vertical” option, the second part will be placed under the first;
- Alignment — choose the alignment of the text;
- Space Between Parts — a toggle that is activated by default. If you turn it off, the parts of the headline will go one after another without any spacing;
- Link — paste a link to make the headline clickable.
Proceed to the Style menu tab. All you need to do now is create a design that meets your taste and needs.
Save the page and check the result on the frontend.

Animated Text Widget
In this part of the tutorial, you will learn how to create a headline using the Animated Text widget, which can play the role of a heading.
Open the necessary page in the Elementor page builder and search for the Animated Text widget. Drag and drop it into a new section.
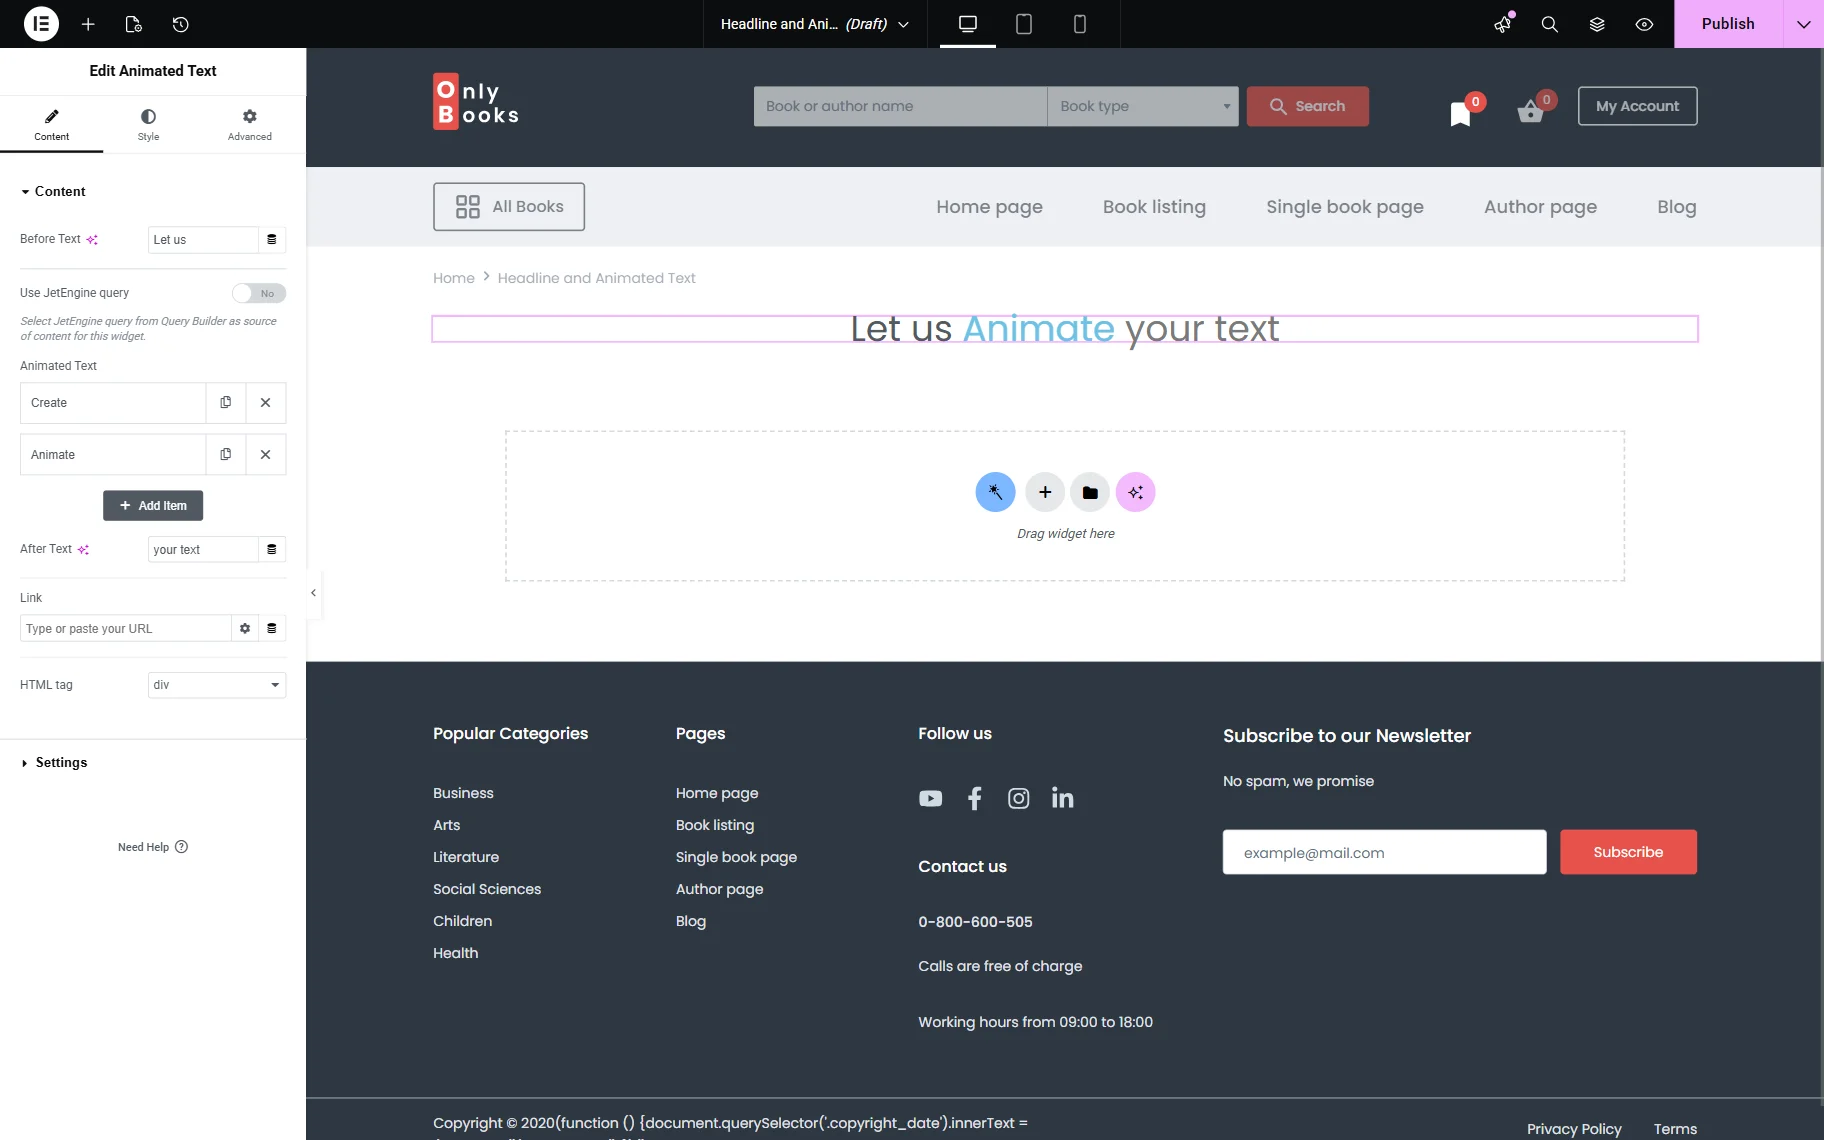
The Content section of the Content tab is where you create your new headline. There are three parts of a heading: Before Text, Animated Text, and After Text.
Before Text and After Text never change; however, the Animated Text part keeps changing, with each item replacing the previous one. You can add as many Animated Text items as you wish.
In the Content section, you can also choose the HTML tag for the headline.
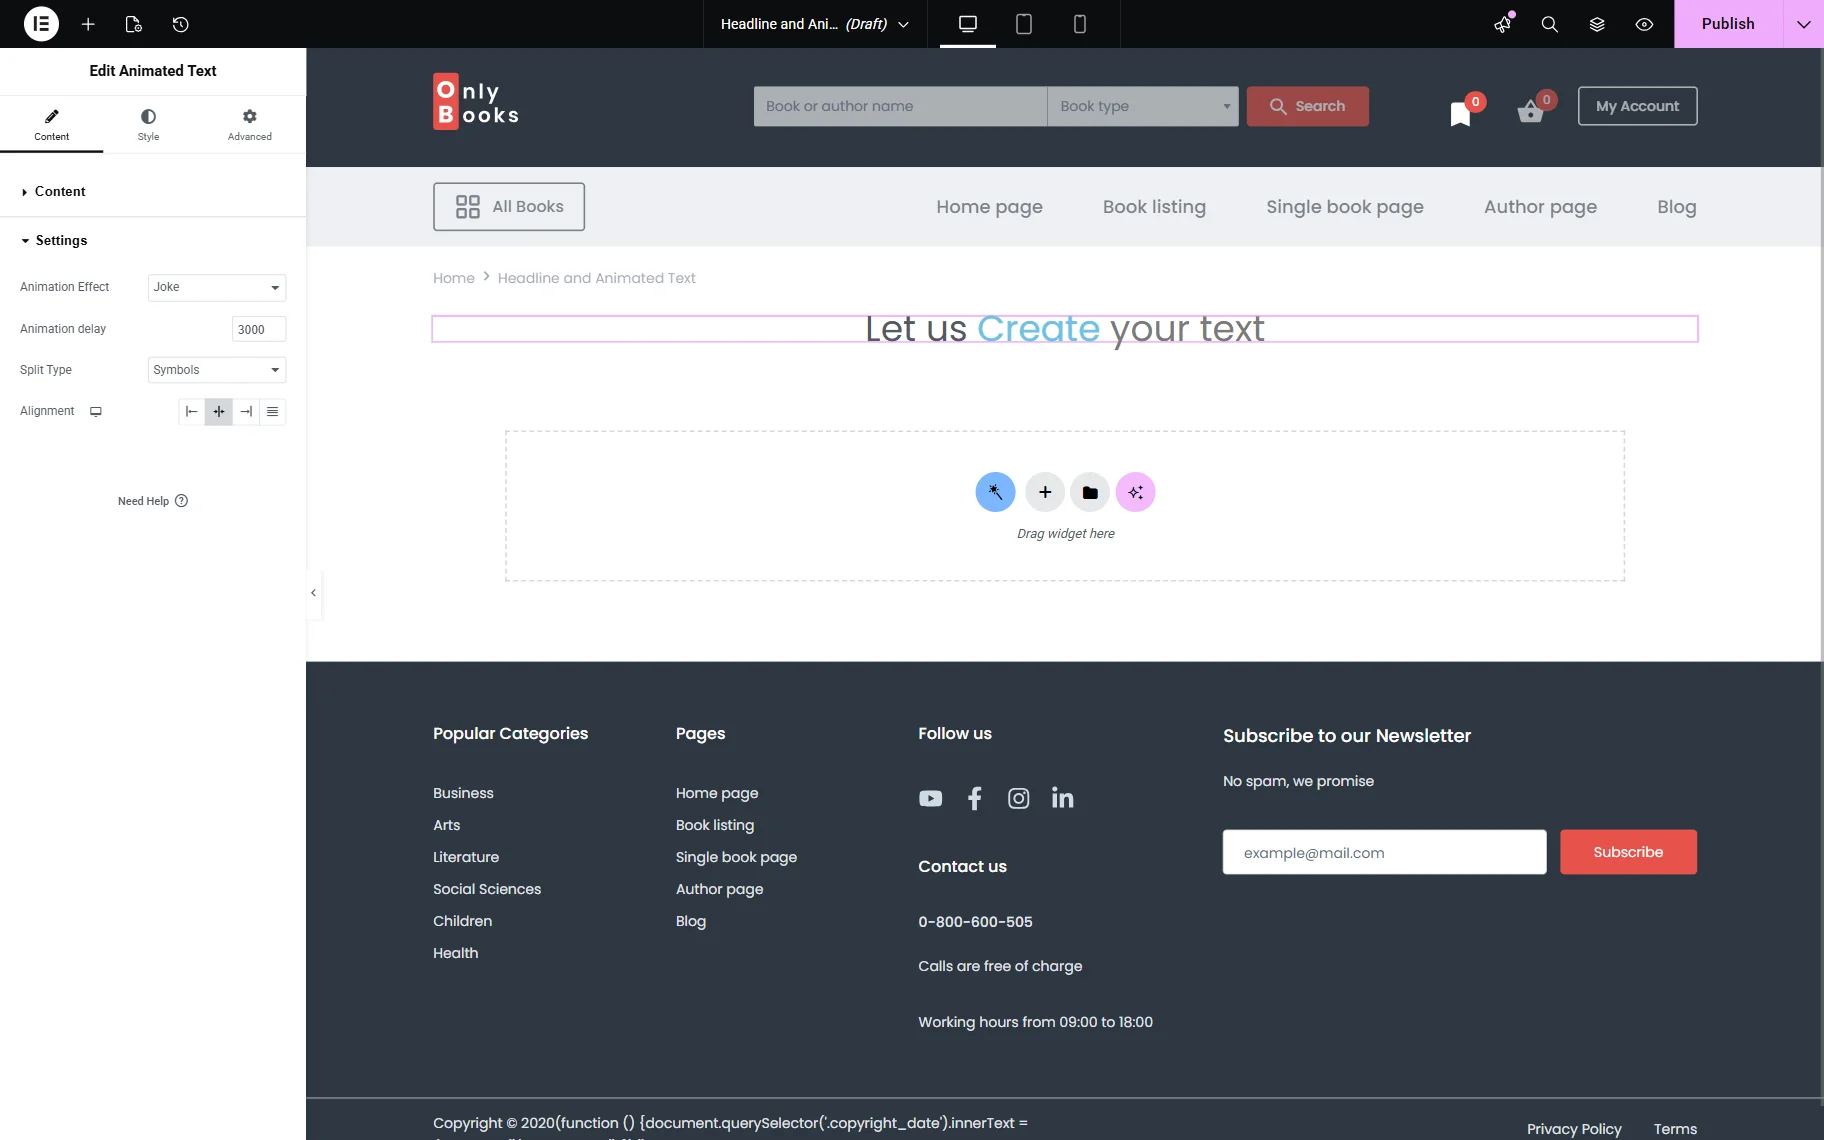
Proceed to the Settings section of the Content menu tab, and in the Animation Effect dropdown, choose an effect among “Joke”, “Kinnect”, “Circus”, “Rotation fall”, “Simple Fall”, “Rotation”, “Anime”, “Label”, “Croco”, “Scaling”, “Fun”, and “Typing” options.
In this block, you can also fix the time value between two animated text items by changing the Animation Delay.
Another feature in this section is Alignment, which lets you adjust the position of the animated text.
Then go to the Style block, where you can personalize all the parts of a headline.
Save the page and check the result on the front end.

That’s all about adding and adjusting the Headline and Animated Text widgets with the help of the JetElements plugin for WordPress websites.