Bar Chart Widget Overview
This tutorial explains how you can use the Bar Chart widget of JetElements and customize it according to your requirements.
Present statistical results of surveys on your website using horizontal or vertical bars with different heights or lengths, which are corresponding to the values. Display and compare the frequency, amount, or measure clustered into categories in a graphical way using the Bar Chart widget of the JetElements plugin.
1 Step — Drag and drop the widget in Elementor
Open the page in Elementor editor, find the Bar Chart widget in the panel with widgets and drop it in a certain place.
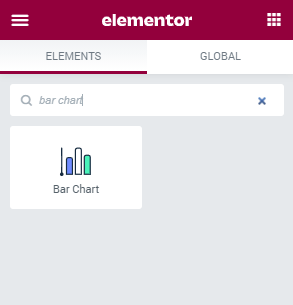
2 Step — Fill the chart with content
You can see the widget’s settings block on the left. In the Content tab, there are two sections – Chart Data, and Settings.
Let’s go through the Chart Data section first.
- Bar Type. Here you are able to select if the bar will be horizontal or vertical;
- Labels. As you can see, by default the chart has three sets and each of them has three bars in it. Labels field allows you to give every set of bars a separate name. If there is more than one set, you have to separate the names with a semicolon;
- Scale Axis Range. In this field, you can set the maximum number of the scale according to your needs;
- Step Size. The number you put into this field will define the size of the step. When your maximum scale is “10”, the step size “1” is just fine. However, to make the chart more illustrative, when the maximum scale is “1000” it probably will be better to set the step size to “10” or even “100”. Play with the numbers to make the chart understandable for the users.
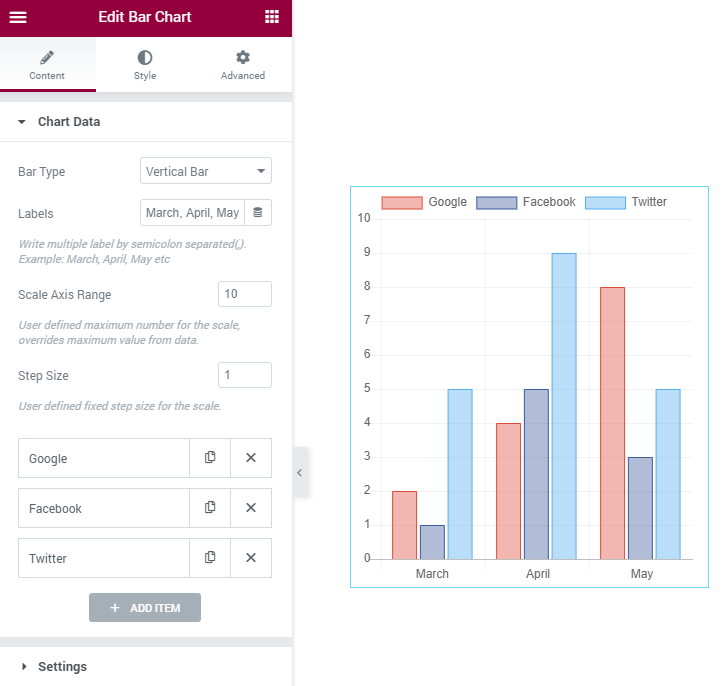
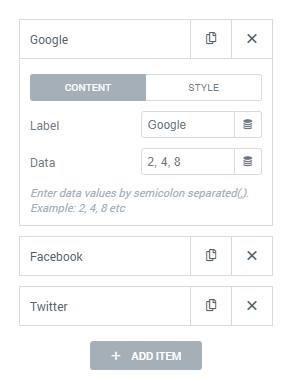
At the bottom of the Chart Data section, there are Items. Those items represent the bars that the chart includes. It is possible to customize each item as you want. Click the item and the window with available adjustments will appear. Every item has two tabs with settings in them.
- Content. In the Label field, you can name the bar and define its value in the Data text area. If there are several sets of bars you can insert several values here and separate them with semicolons.
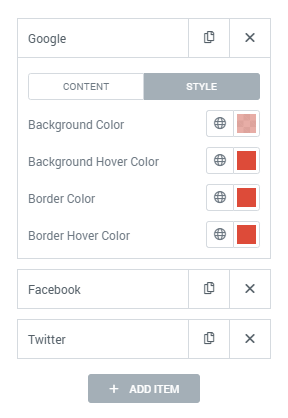
- Style. Here in this tab, you can define the colors of the bar and its border in normal state and when the user hovers a pointer over the section.
3 Step — Get along with the settings
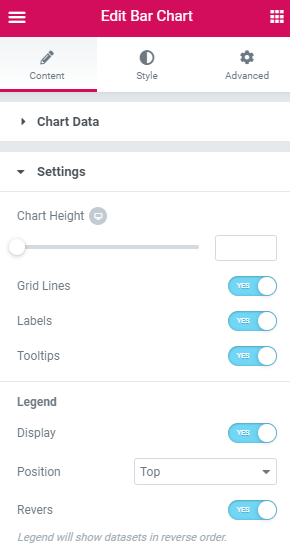
In the Settings section of the Content menu tab, you can choose the general features of the chart appearance.
- Chart Height. You can set the height by typing the number to the field or do it manually by moving the slider;
- Grid Lines toggle enables the displaying of a grid on the background of the chart;
- Labels and Tooltips toggles turn it displaying of the corresponding data;
- In the Legend subsection, it is possible to set the options for the legend. Display toggle defines if the legend will be shown and the Position drop-down menu allows you to choose where it will be shown;
- Enable the Revers option for showing datasets in reverse order in the legend.
4 Step — Style the chart up and see the result
Click the Style menu tab and you will see a lot of style settings for the chart, labels, legend, and tooltips. You can define the font settings, border width, and pick colors.
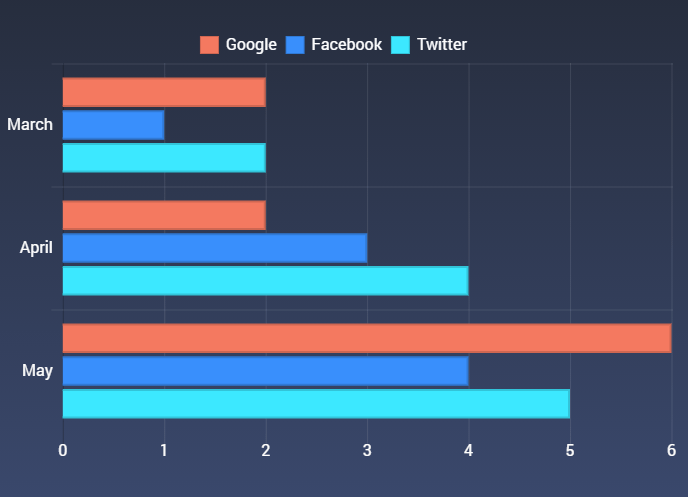
When you finish setting the widget, click the “Update” button, and view the chart on the frontend.
Hope, this tutorial was informative for you. Group the data and demonstrate them in the form of a graph with bars using the JetElements Bar Chart widget.