How to Use Custom Query to Display Posts
From this tutorial, you will learn how to create a custom query and add it to JetElements Posts widget to arrange posts in a certain order.
We are presenting how to work with WP Query Generator generating arguments for WP_Query class to present the posts according to the set query parameters using the Posts widget from JetElements.
Creating a custom query in WP Query Generator
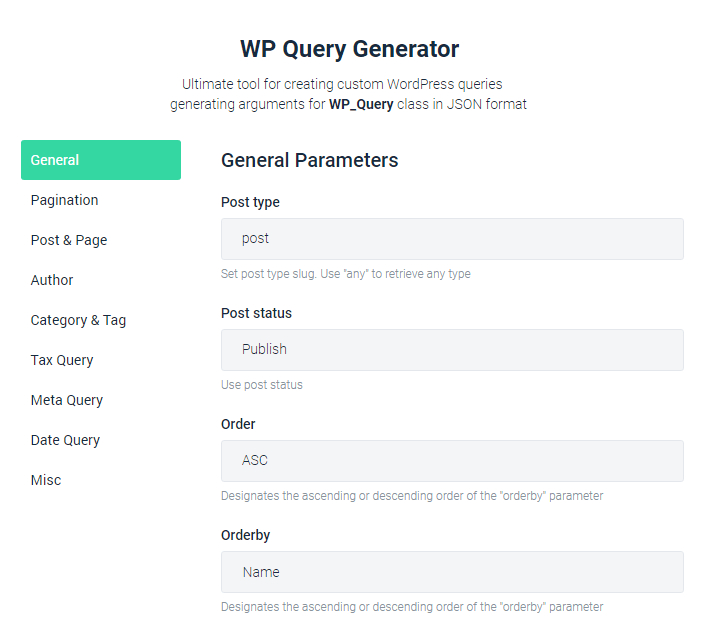
First of all, we should open the WP Query Generator tool and start setting the needed parameters for creating a custom query.

- We need to specify the Post Type slug, which is “post” in our case.
- In the Post status field, we can select what posts to display (such as “Publish”, “Pending”, “Draft”, etc.). We want to show published posts, so we have chosen the “Publish” option.
- Then we choose the “ASC” option in the Order drop-down list, so the queried posts will be showcased in ascending order.
- Last but not least, we specify the Order by parameter. If we select the “Name” option, the posts will be sorted by their names.
When all parameters are set, we can see the generated query below. It can be copied in JSON or PHP format. We click the “Copy to Clipboard” button and proceed with customizing the Posts widget in Elementor.

There are a lot of varied parameters, which can be set according to your needs and purposes. You can learn more about the provided parameters here.
Adding a custom query to the Posts widget
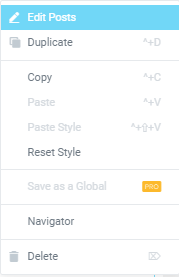
In Elementor editor open the page, where you placed the Posts widget and click the “Edit Posts” button.

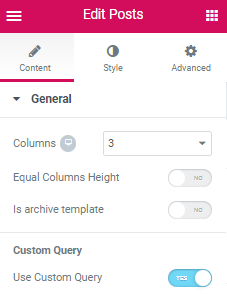
On the left, there is a panel with various settings for the widget. In the Content tab, find the Custom Query subsection and enable Use Custom Query toggle.

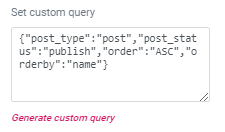
After that, input the generated query in the field below.

Everything is done. Now the posts are displayed in the adjusted order using custom query method.

Try to use a custom query in the JetElements Posts widget and you will be impressed by how useful and easy it is.