Testimonials Widget Overview
From this tutorial, you will learn how to create an eye-catching review block on pages using the Testimonials widget of the JetElements plugin.
The Testimonials widget of the JetElements plugin is a tool for showing custom feedback about your products or services and increasing the trustworthiness of your company. This overview demonstrates how to add testimonials to a page made with Elementor and customize their design.
Preparation
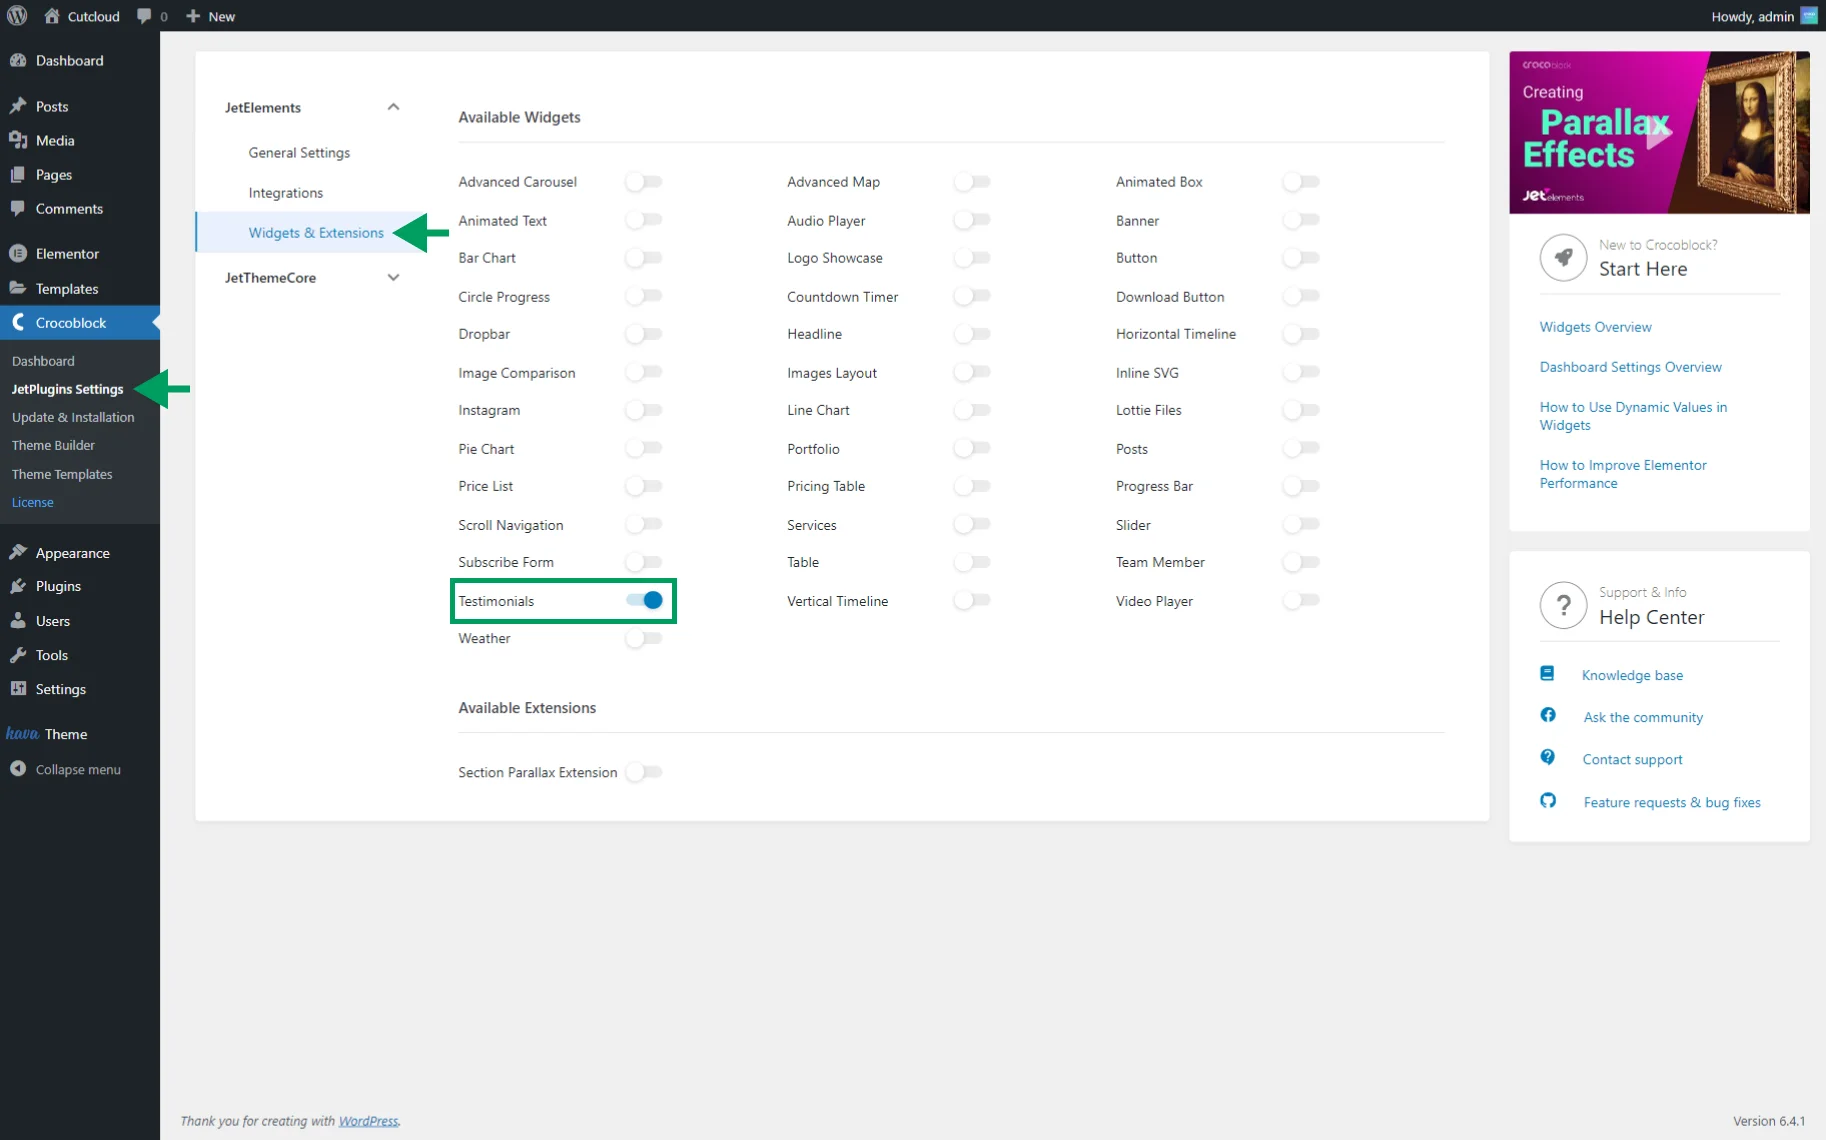
Firstly, enable the Testimonials widget in WordPress Dashboard > JetPlugins > JetElements > Widgets & Extensions.
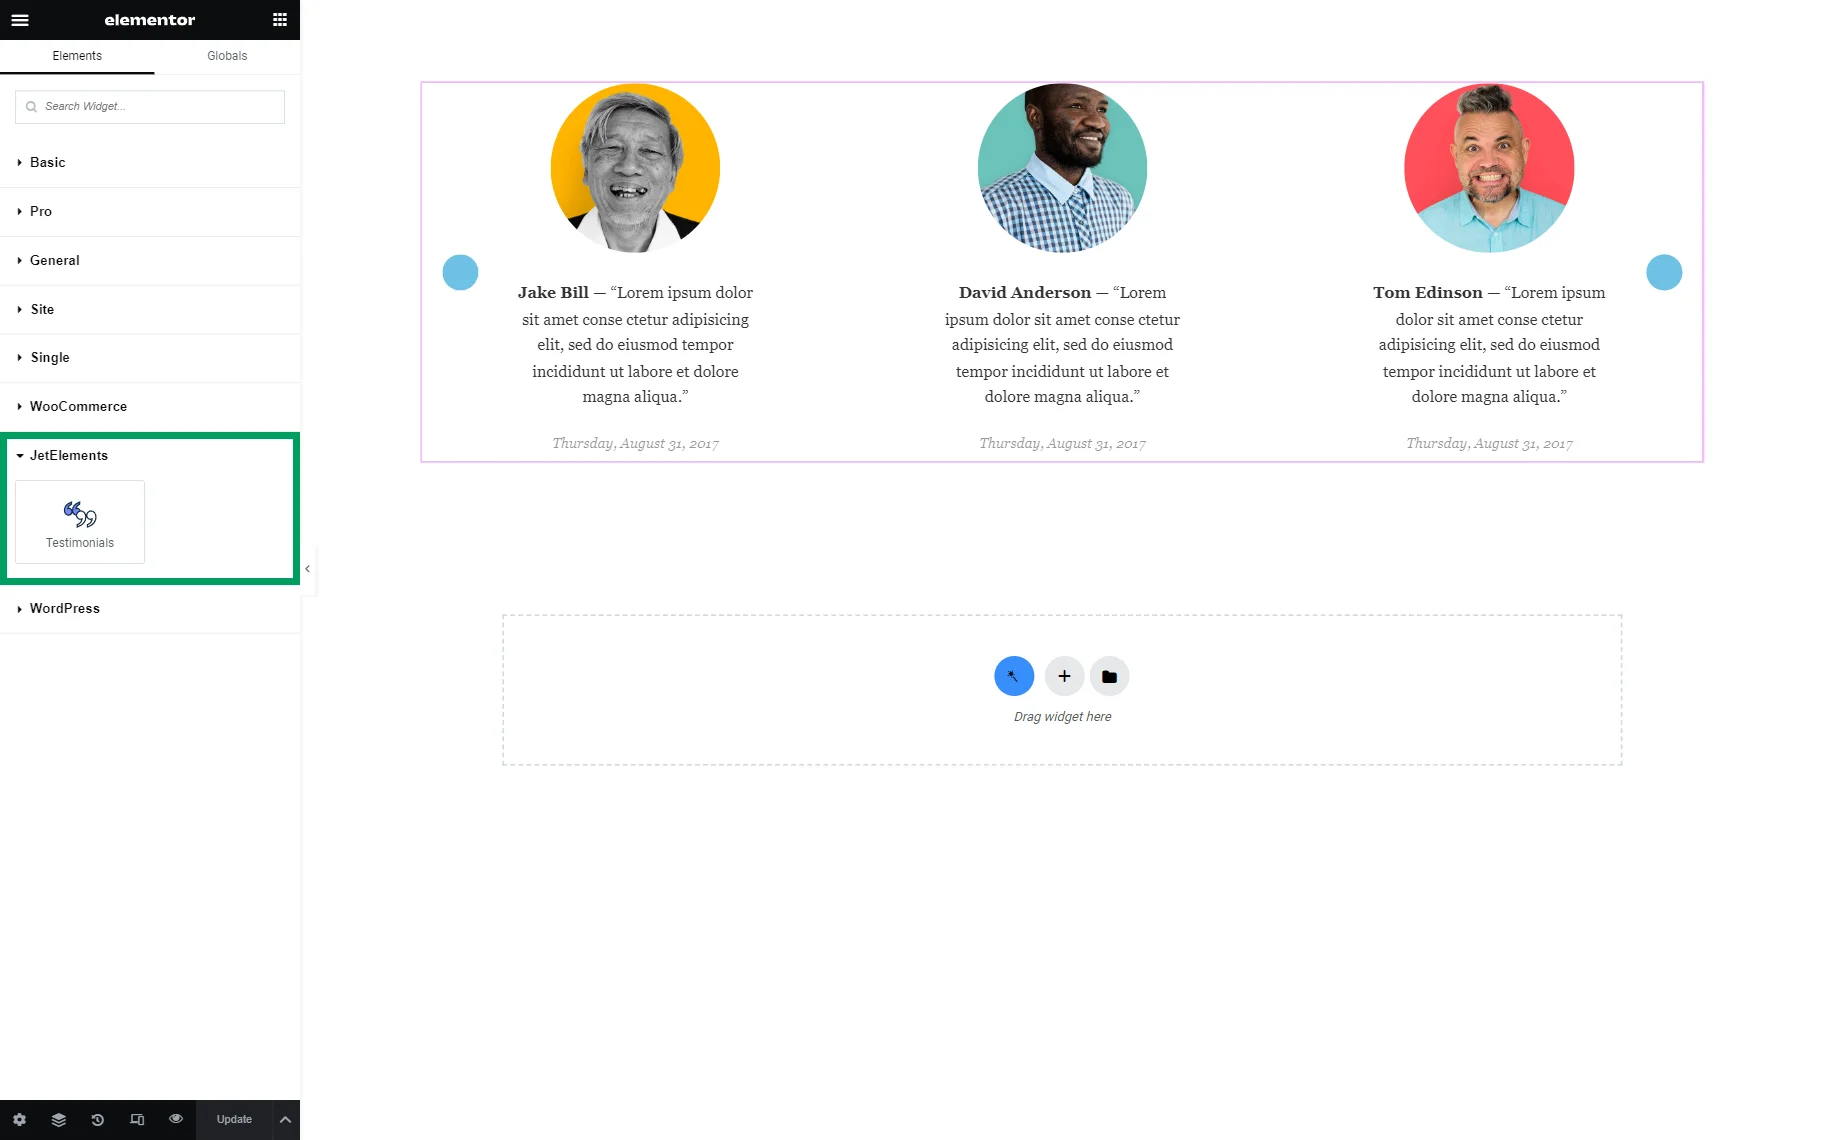
After that, the Testimonials widget becomes available in Elementor in the JetElements section.
Items Settings Section
In this section of settings, one can manually define the content of the items in the testimonials slideshow. If the JetEngine plugin is activated on the site, the Testimonials widget can dynamically generate the list of testimonials from a JetEngine query.
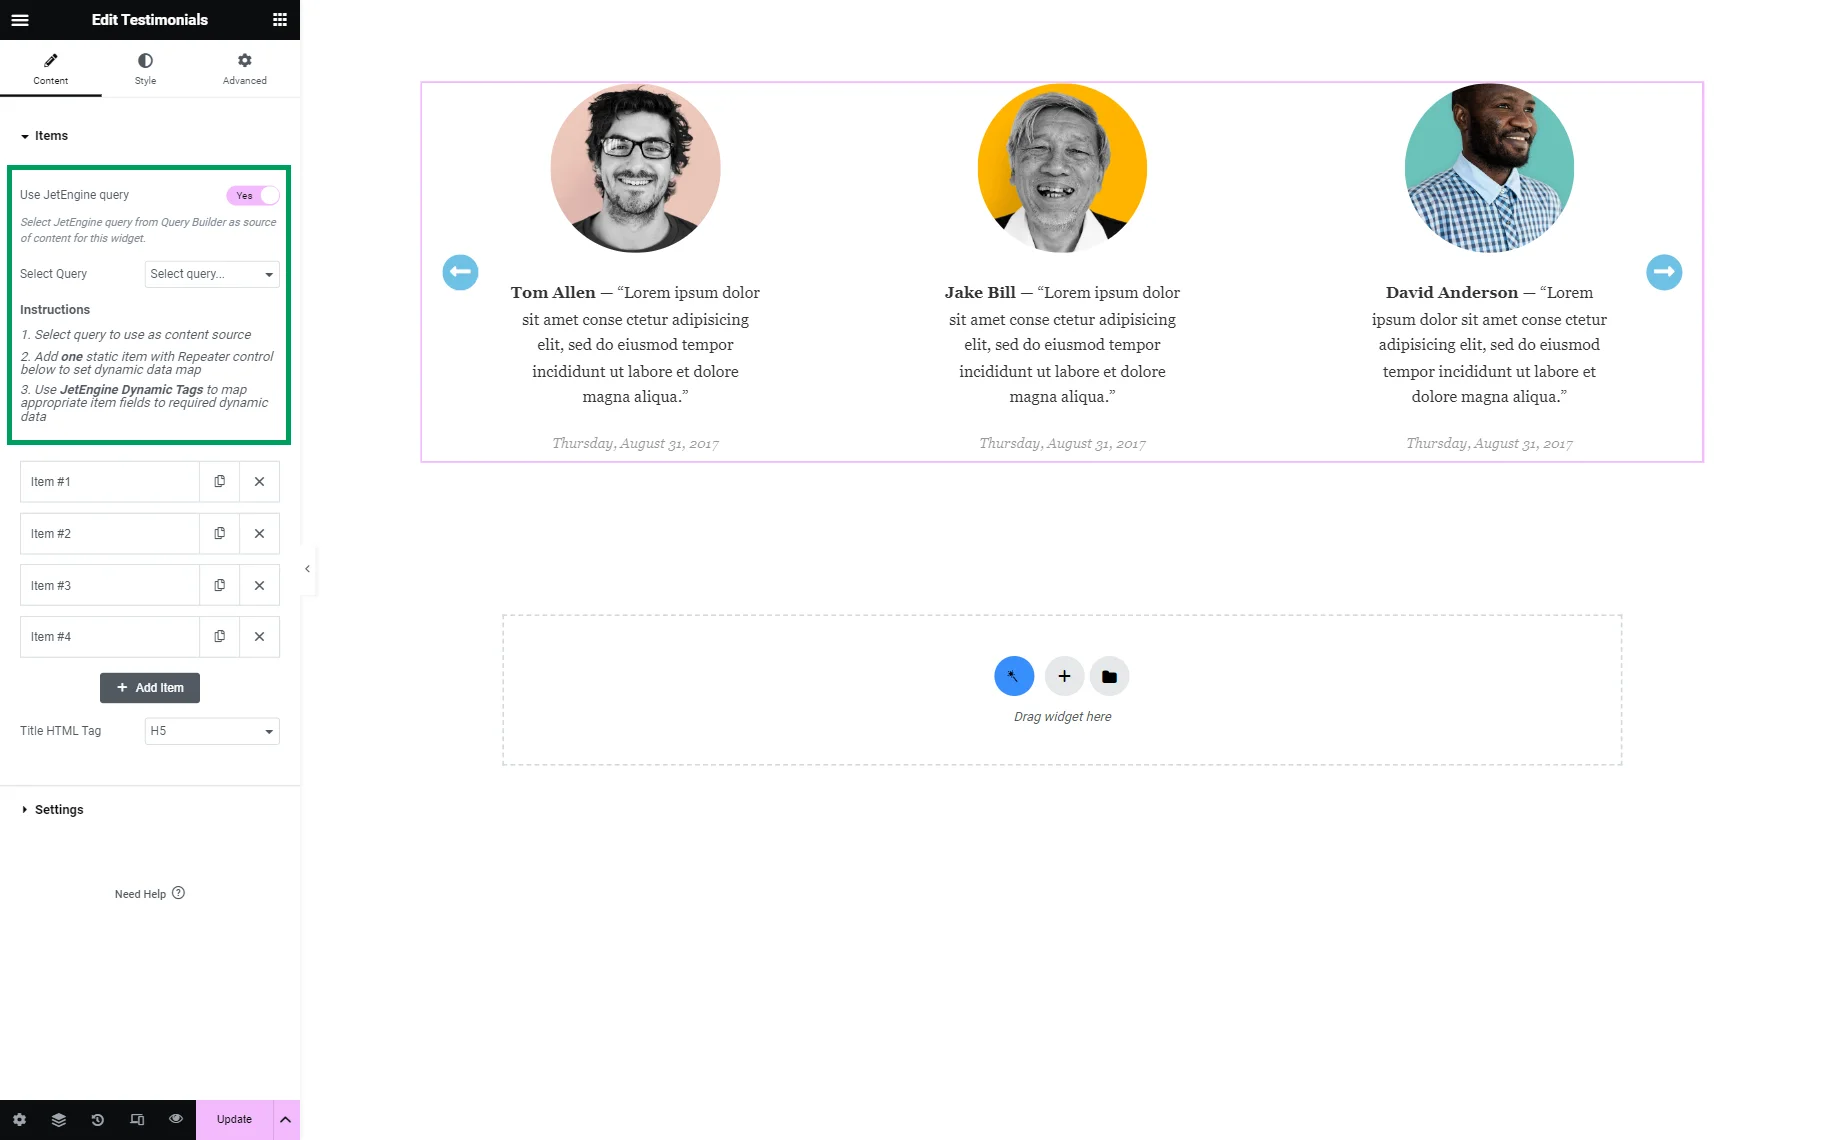
You can activate the “Use JetEngine query” toggle and follow the provided instructions to populate the items from the query results. Our video tutorial on “How to Create Dynamic Work Experience Timeline” presents a step-by-step guide on configuring this part of settings in widgets that support custom queries.
If the JetEngine plugin is disabled, the list of testimonials must be populated manually. Let’s take a closer look at the settings of each item.
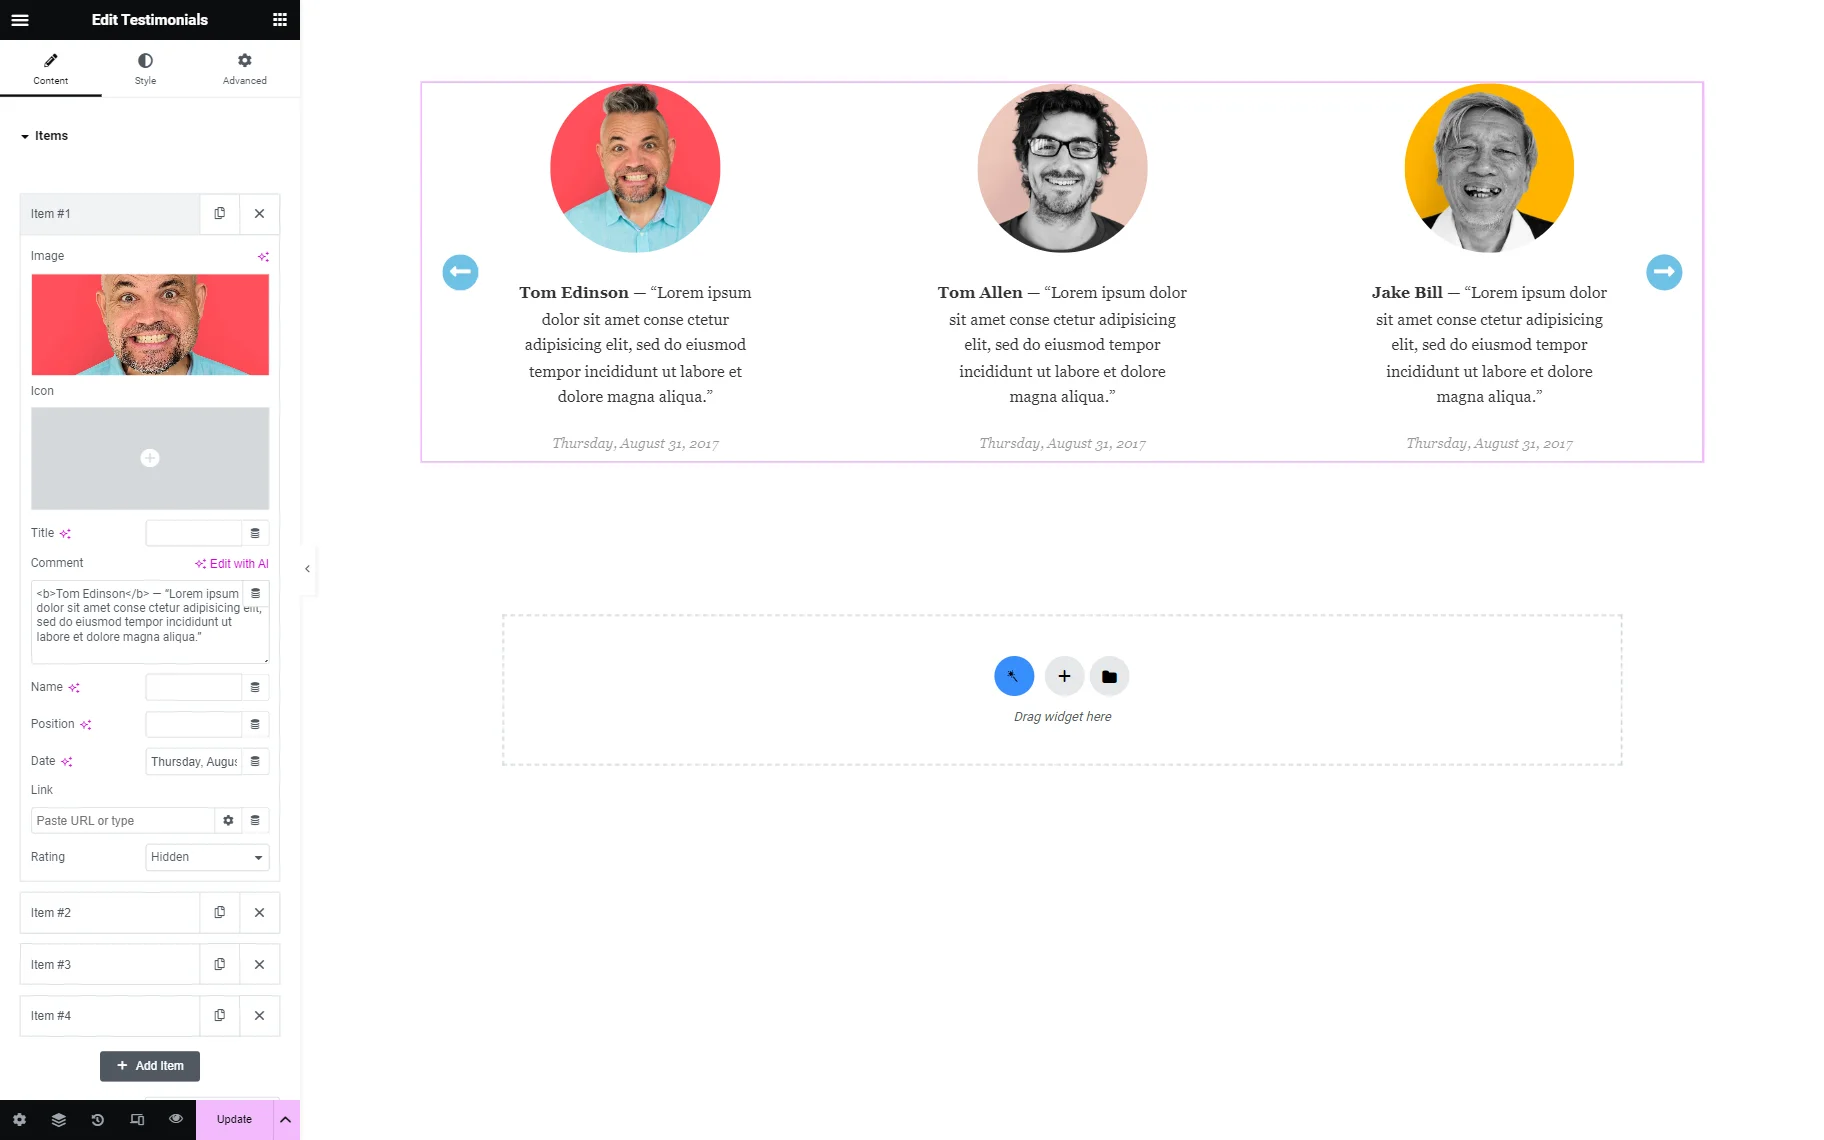
- Image — choose the image that will be displayed in the testimonial. It can be selected from the Media Library or uploaded from the computer. It is also possible to use the “Dynamic Tags” button to take the picture dynamically from a post thumbnail or a meta field if the JetEngine or Elementor Pro plugin is installed;
- Icon — add an icon to display it instead of the picture or use it with the picture simultaneously. You can choose it from the Icon Library or upload a custom SVG file;
- Title — give a separate title to each of the testimonials. It is possible to use the “Dynamic Tags” button to take the Title dynamically from a post property or a meta field if the JetEngine or Elementor Pro plugin is installed;
- Comment — complete this text area with an individual’s comment about the product or service. If the JetEngine or Elementor Pro plugin is installed, you can use the “Dynamic Tags” feature to fetch the content dynamically;
- Name and Position — display the name and position of the individual providing a comment about the product. Both fields support the “Dynamic Tags” feature;
- Date — insert the date of the comment. This field supports the “Dynamic Tags” feature;
- Link — place the link to a personal page or a social media account if the individual providing feedback has them and grants permission for their use. The provided URL will be linked to the Image of the testimonial. The “Link Options” button offers additional settings for the URL. To fetch the link dynamically, Dynamic Tags can be utilized;
- Rating — show the 5-star rating and define the number of filled stars here.
You can add as many new items as you need by clicking the “Add Item” button.
The last setting of this section, “Title HTML Tag,” allows changing the HTML tag, which will represent the testimonial’s title in the page layout. The “H5” option is the default one.
Settings Section
The last of the submenus is the Settings section, which contains a list of general slideshow options.
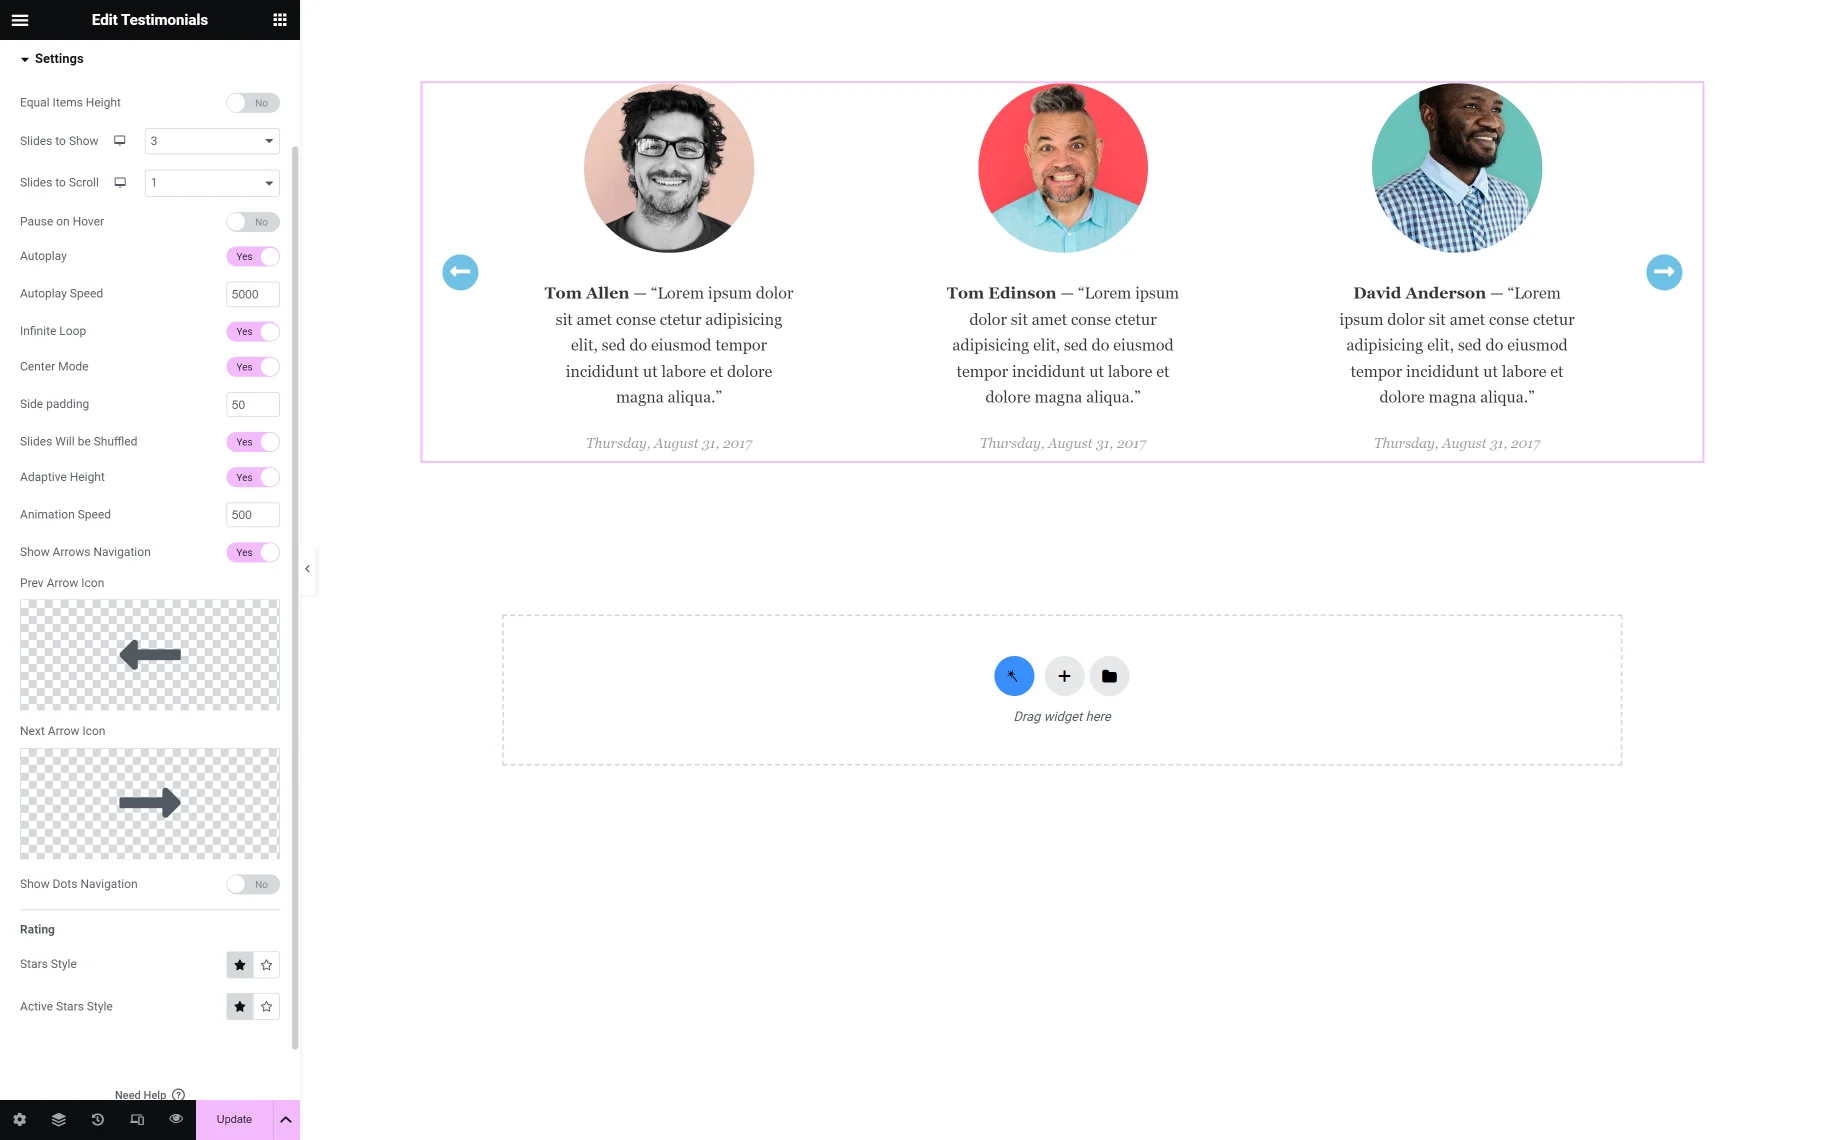
- Equal Items Height — unifies the height of the slides when turned on;
- Slides to Show — defines how many slides are shown at the same time;
- Slides to Scroll — allows picking the number of slides to move at a time;
- Pause on Hover — stops the slideshow movement when the user hovers the pointer over a testimonial;
- Autoplay — makes the slideshow move automatically. If this toggle is enabled, the Autoplay Speed can be set in milliseconds;
- Infinite Loop — makes the slider move infinitely and show the first item in the carousel right after the last one;
- Center Mode — displays the main slides in the center, while parts of the previous and the following slides appear on the sides. With the Side padding, it is possible to control which part of the adjoined slides will be displayed;
- Slides Will be Shuffled — overrides the order in which the testimonials were added and makes them appear in random order. The order refreshes on each page load;
- Adaptive height — adapts the slide’s height to the amount of content in it;
- Animation Speed — sets the speed with which the slide movement occurs in milliseconds. The lower this number is, the faster the animation effects are played;
- Show Arrows Navigation — allows navigating between slides with arrows. If the toggle is enabled, the Prev Arrow Icon and the Next Arrow Icon can be selected from the Icon Library or uploaded as an SVG file;
- Show Dots Navigation — allows switching the slides with dots that are located below the testimonials;
- Stars Style / Active Stars Style — sets the style of the rating stars.
Finally, proceed to Style settings to customize the appearance of the Testimonials widget according to the requirements.
After tuning everything, click the “Update” button to save the changes.
That’s all. Now you know how to use the Testimonials widget from JetElements for your WordPress website.