How to Connect JetEngine to Apps Using Uncanny Automator Pro
The tutorial explains how to connect the JetEngine plugin to different third-party apps using the Uncanny Automator Pro plugin, set triggers, actions, and use tokens.
Before you start, check the tutorial requirements:
- Elementor (Free version) or Block editor (Gutenberg)
- JetEngine plugin installed and activated
Downloading and Installing Uncanny Automator Pro
Navigate to the Uncanny Automator site and log in.
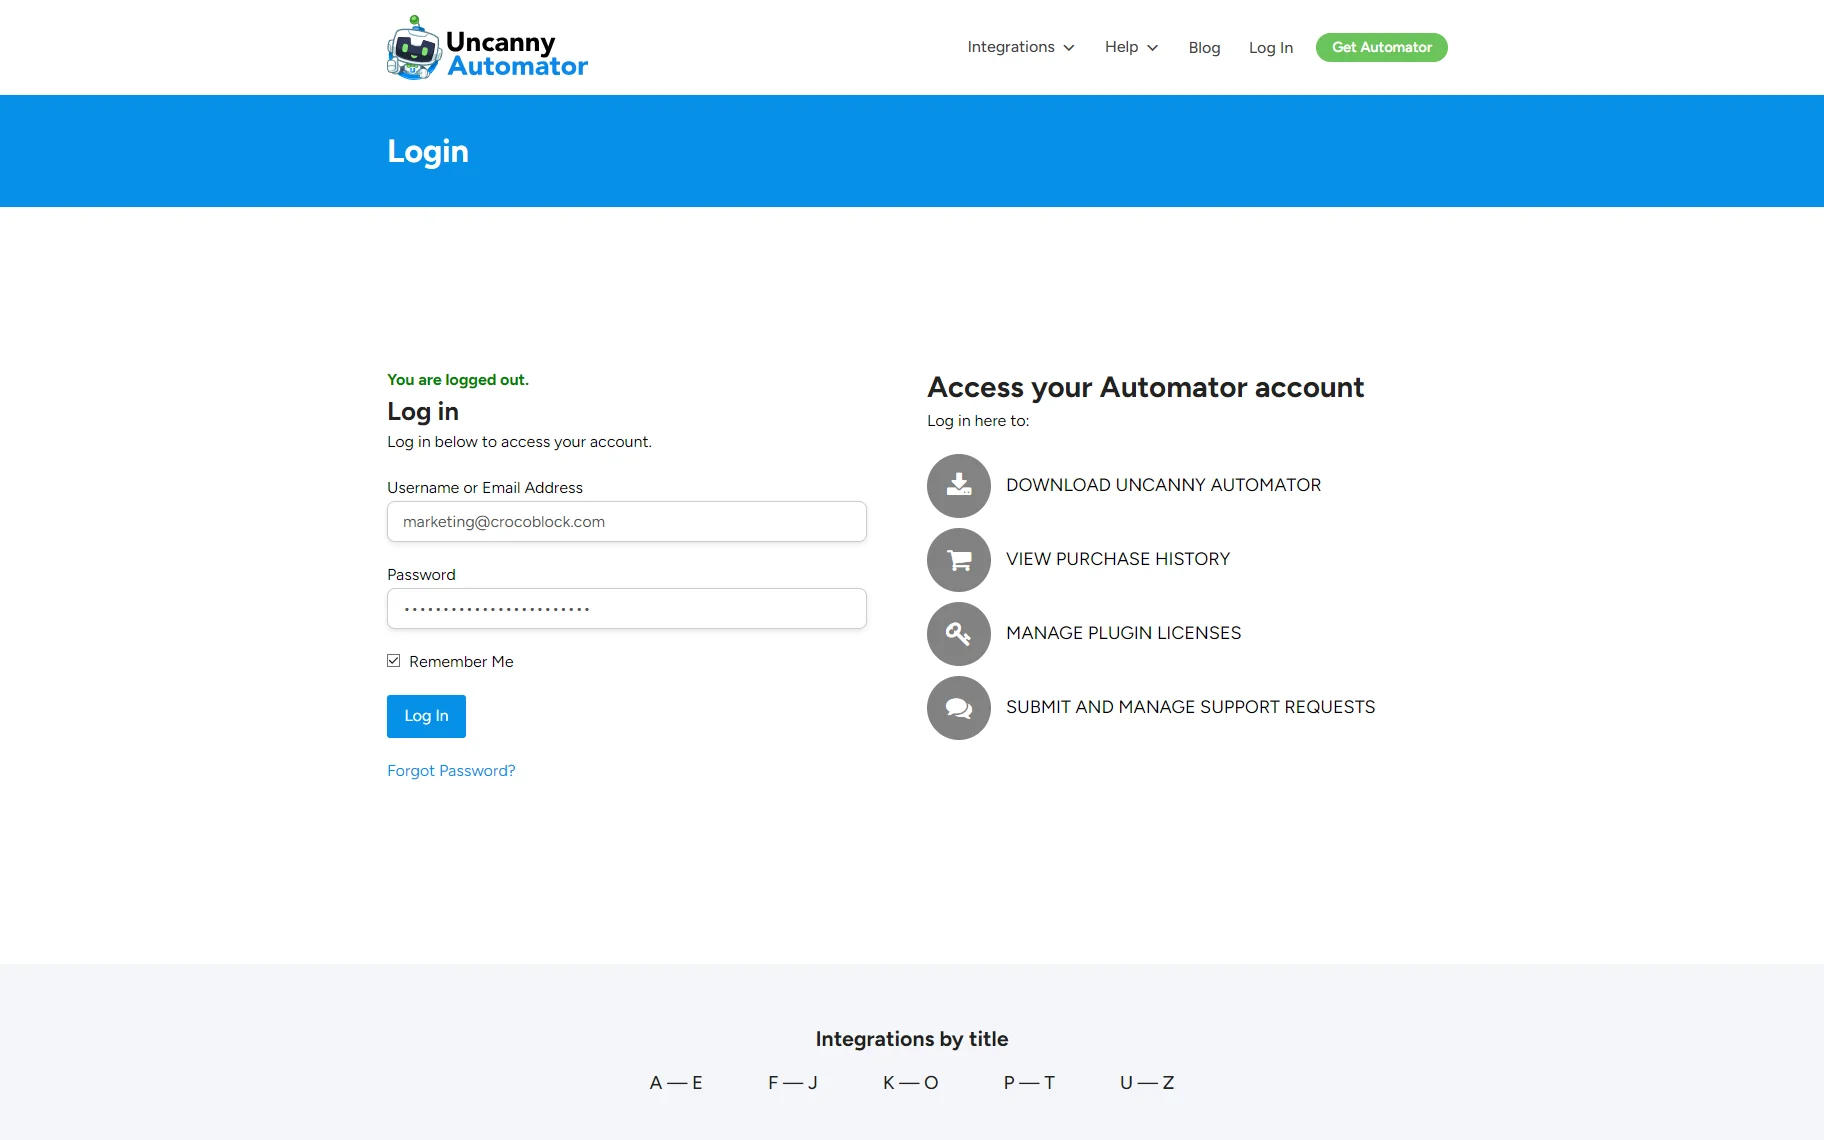
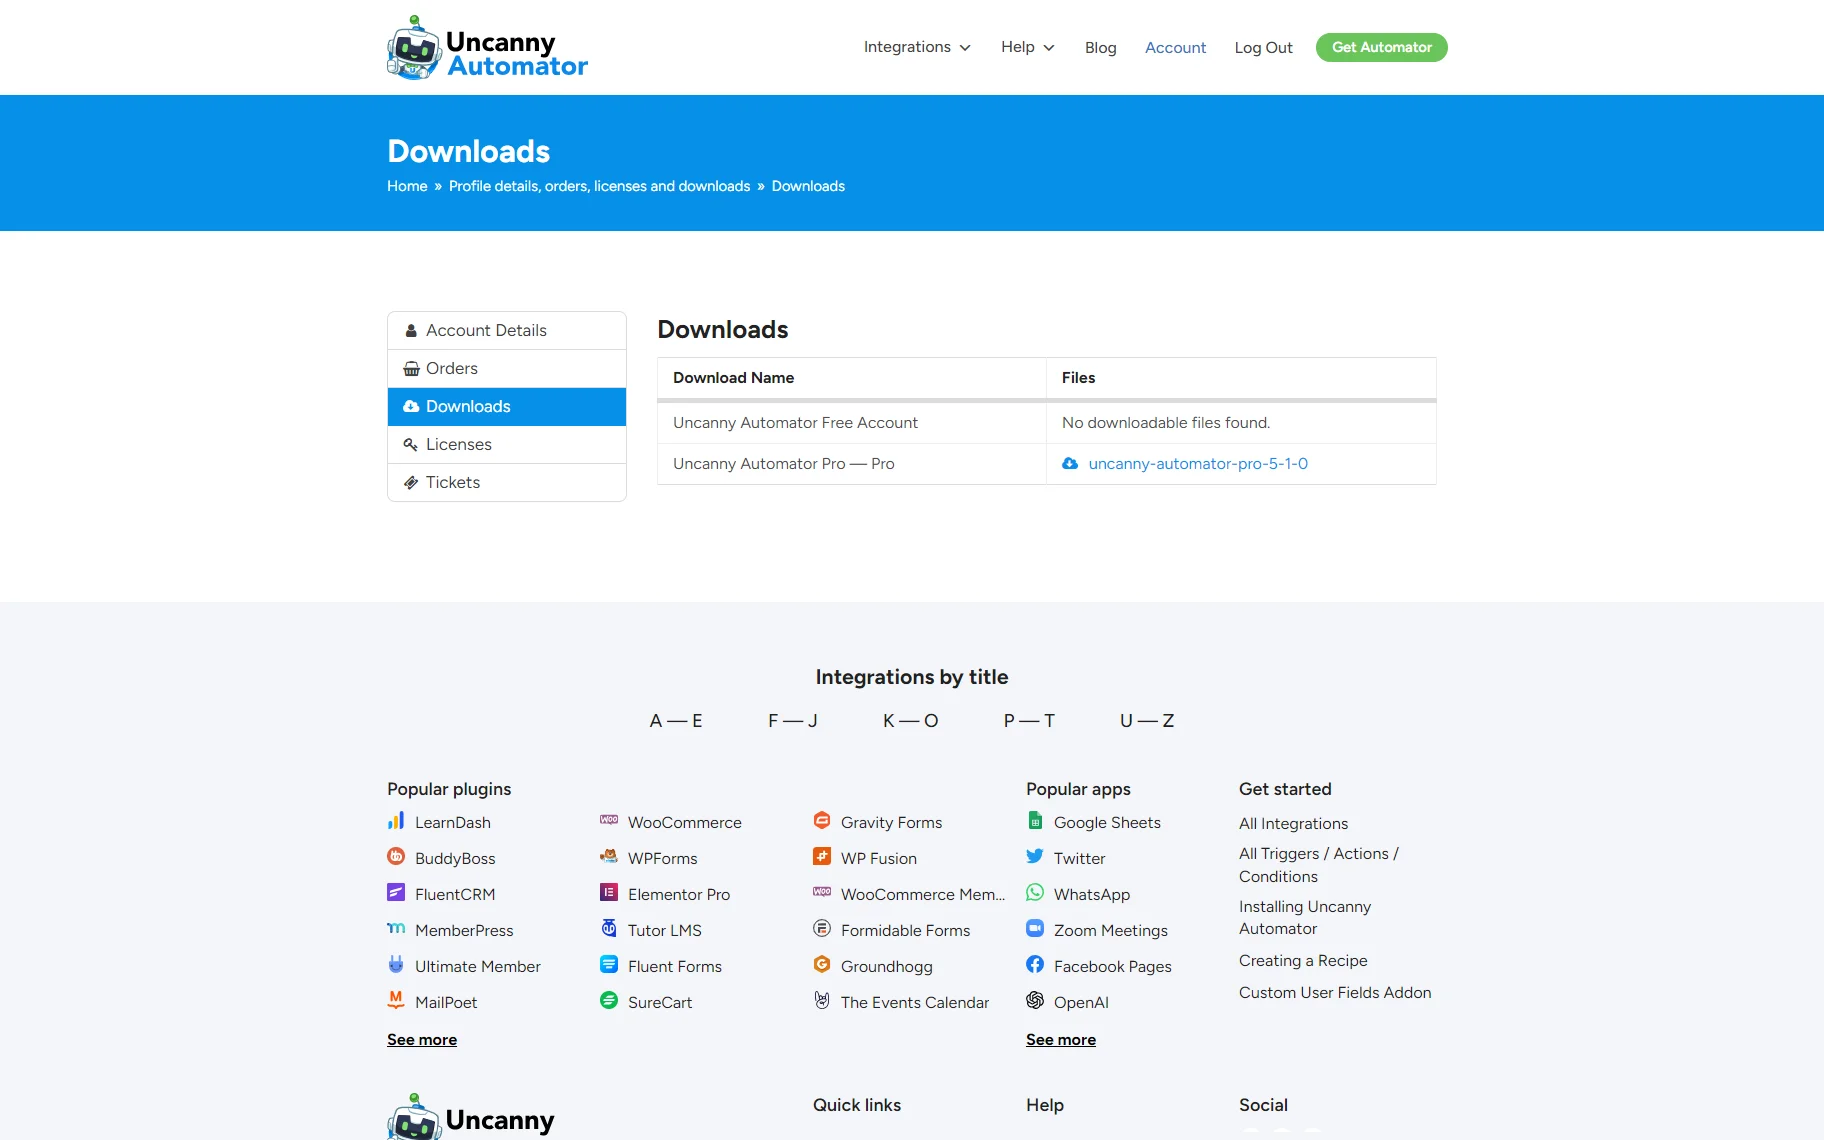
Click the Downloads tab of the site and download the plugin. Open the Licenses tab of the site and copy the license key.
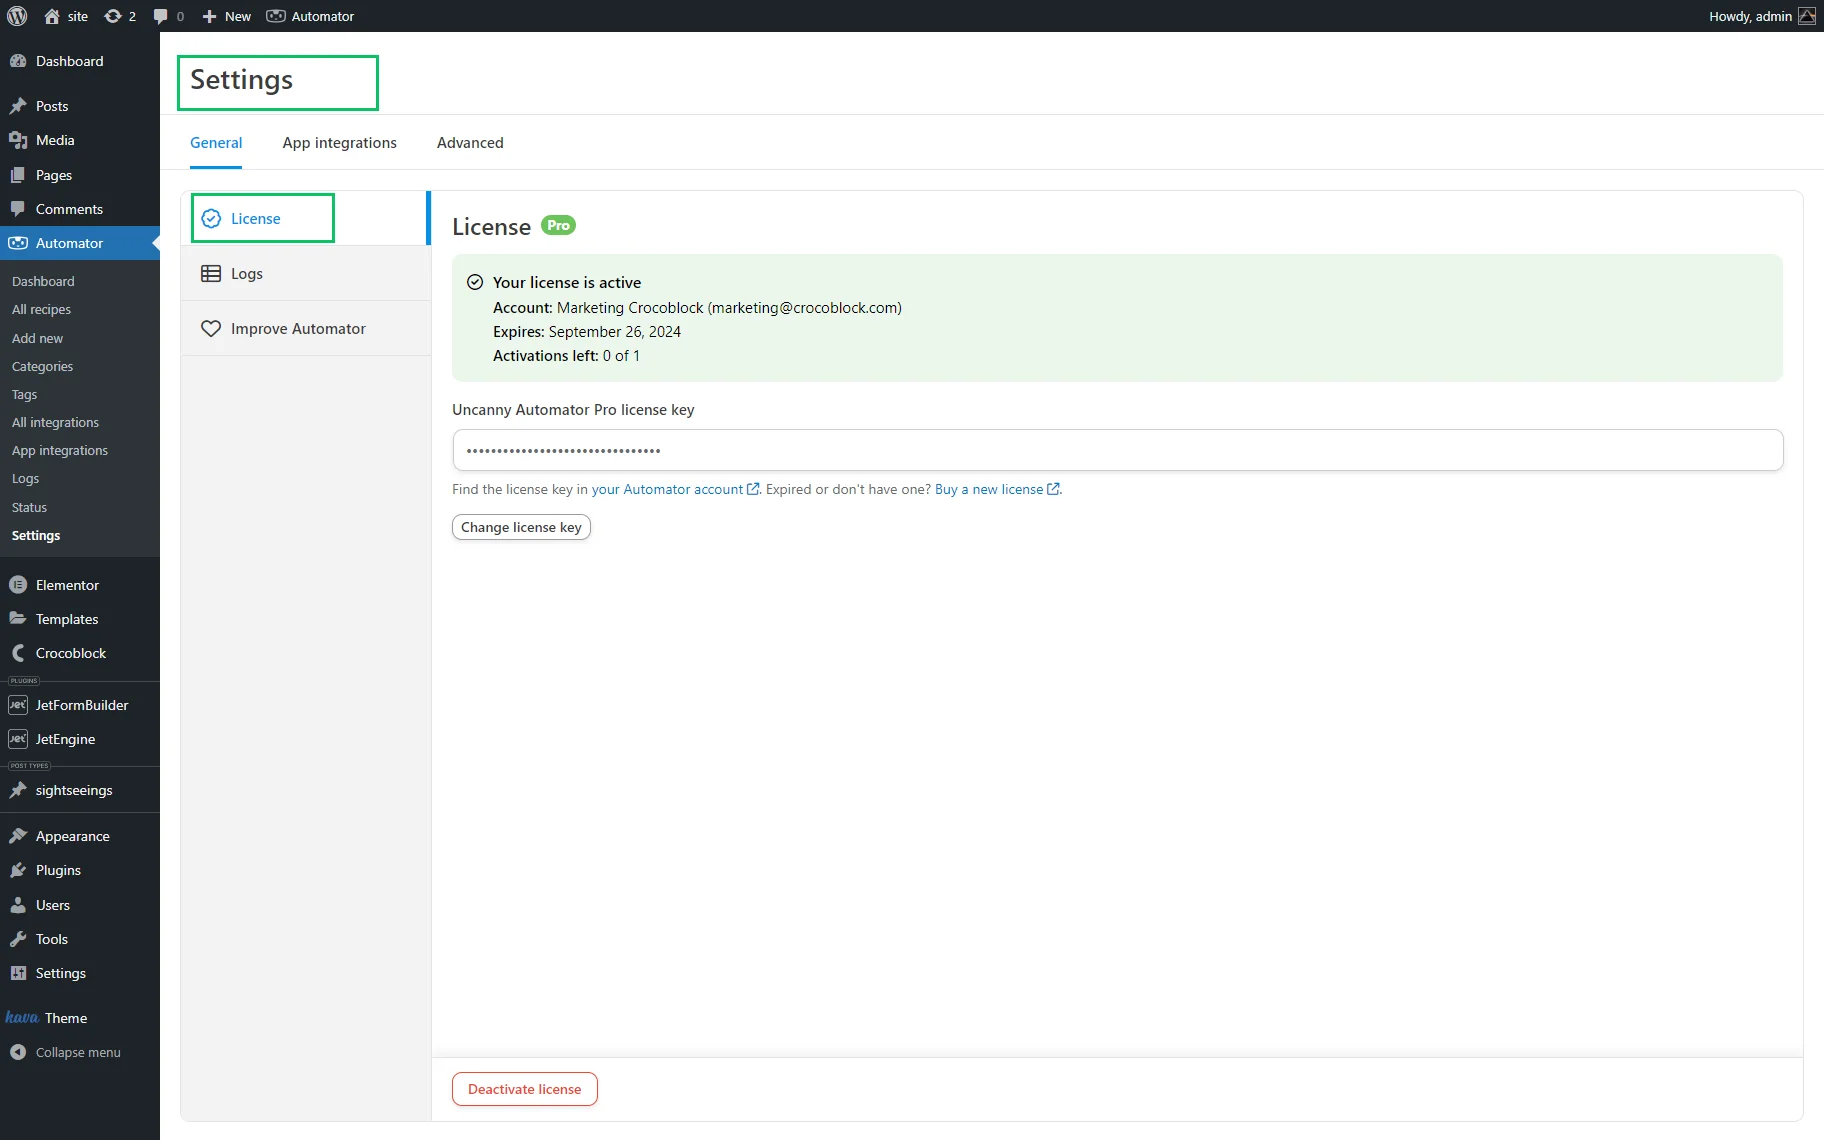
Install and activate the plugin. Paste the license key into the appropriate field of the WordPress Dashboard > Automator > Settings tab.
Selecting the Integration Type
To select the necessary types of integration, keep in mind the following features:
- The JetEngine plugin can be connected with the Uncanny Automator Pro version only.
- Uncanny Automator provides two types of triggers 一 further actions (so-called recipes) for logged-in WordPress users (the Free version) and for all users (the Pro version).
- The Pro version supports many triggers per recipe, but the Free version supports one trigger per recipe.
- The Uncanny Automator recipe type cannot be changed later.
Integration Preparations
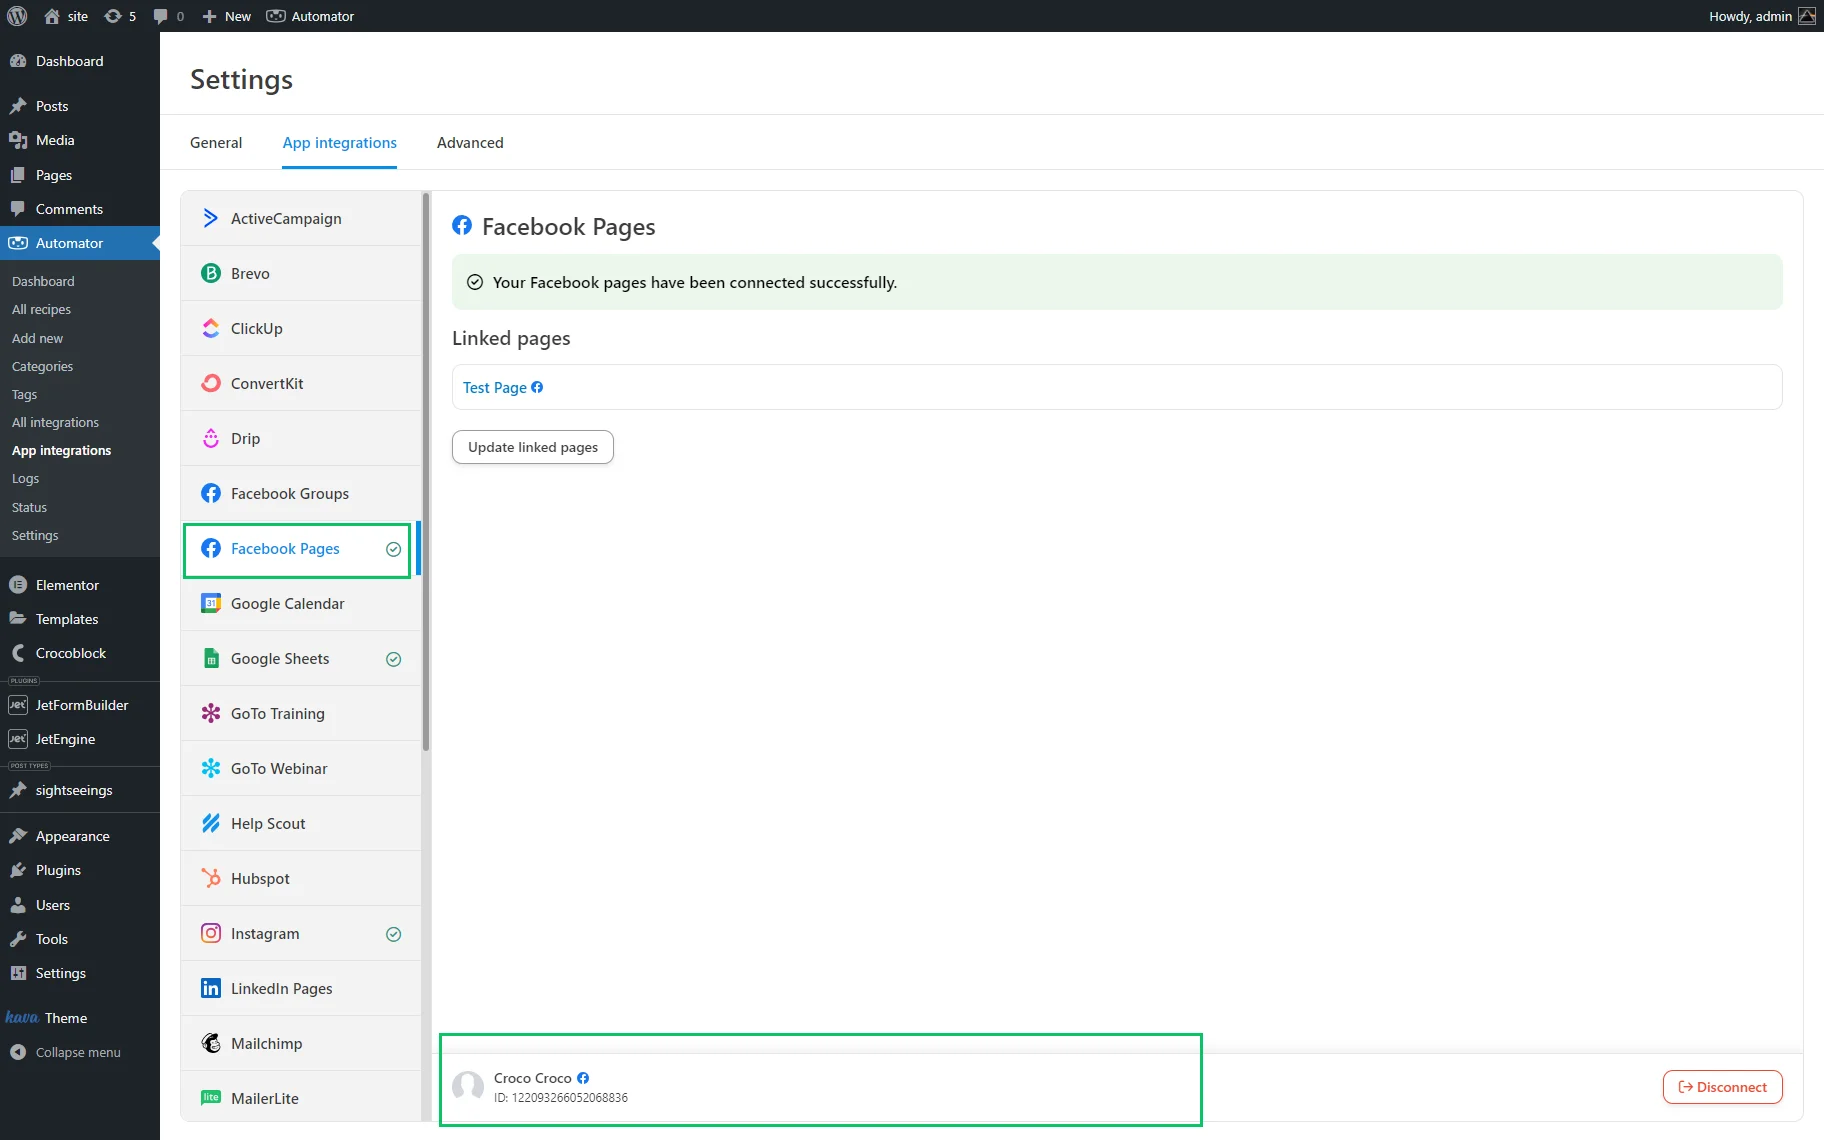
To integrate the Uncanny Automator plugin with different applications, create the appropriate account (i.e., Google Calendar, Google Sheets, Facebook, LinkedIn, and more) and set its connection in the Automator > Settings > App integrations or Automator > App integrations tabs.
Select the necessary application, press the “Connect account” button, or set the connection during recipe specification.
For the current tutorial, the connection is set to a Facebook account.
Connecting JetEngine With Uncanny Automator
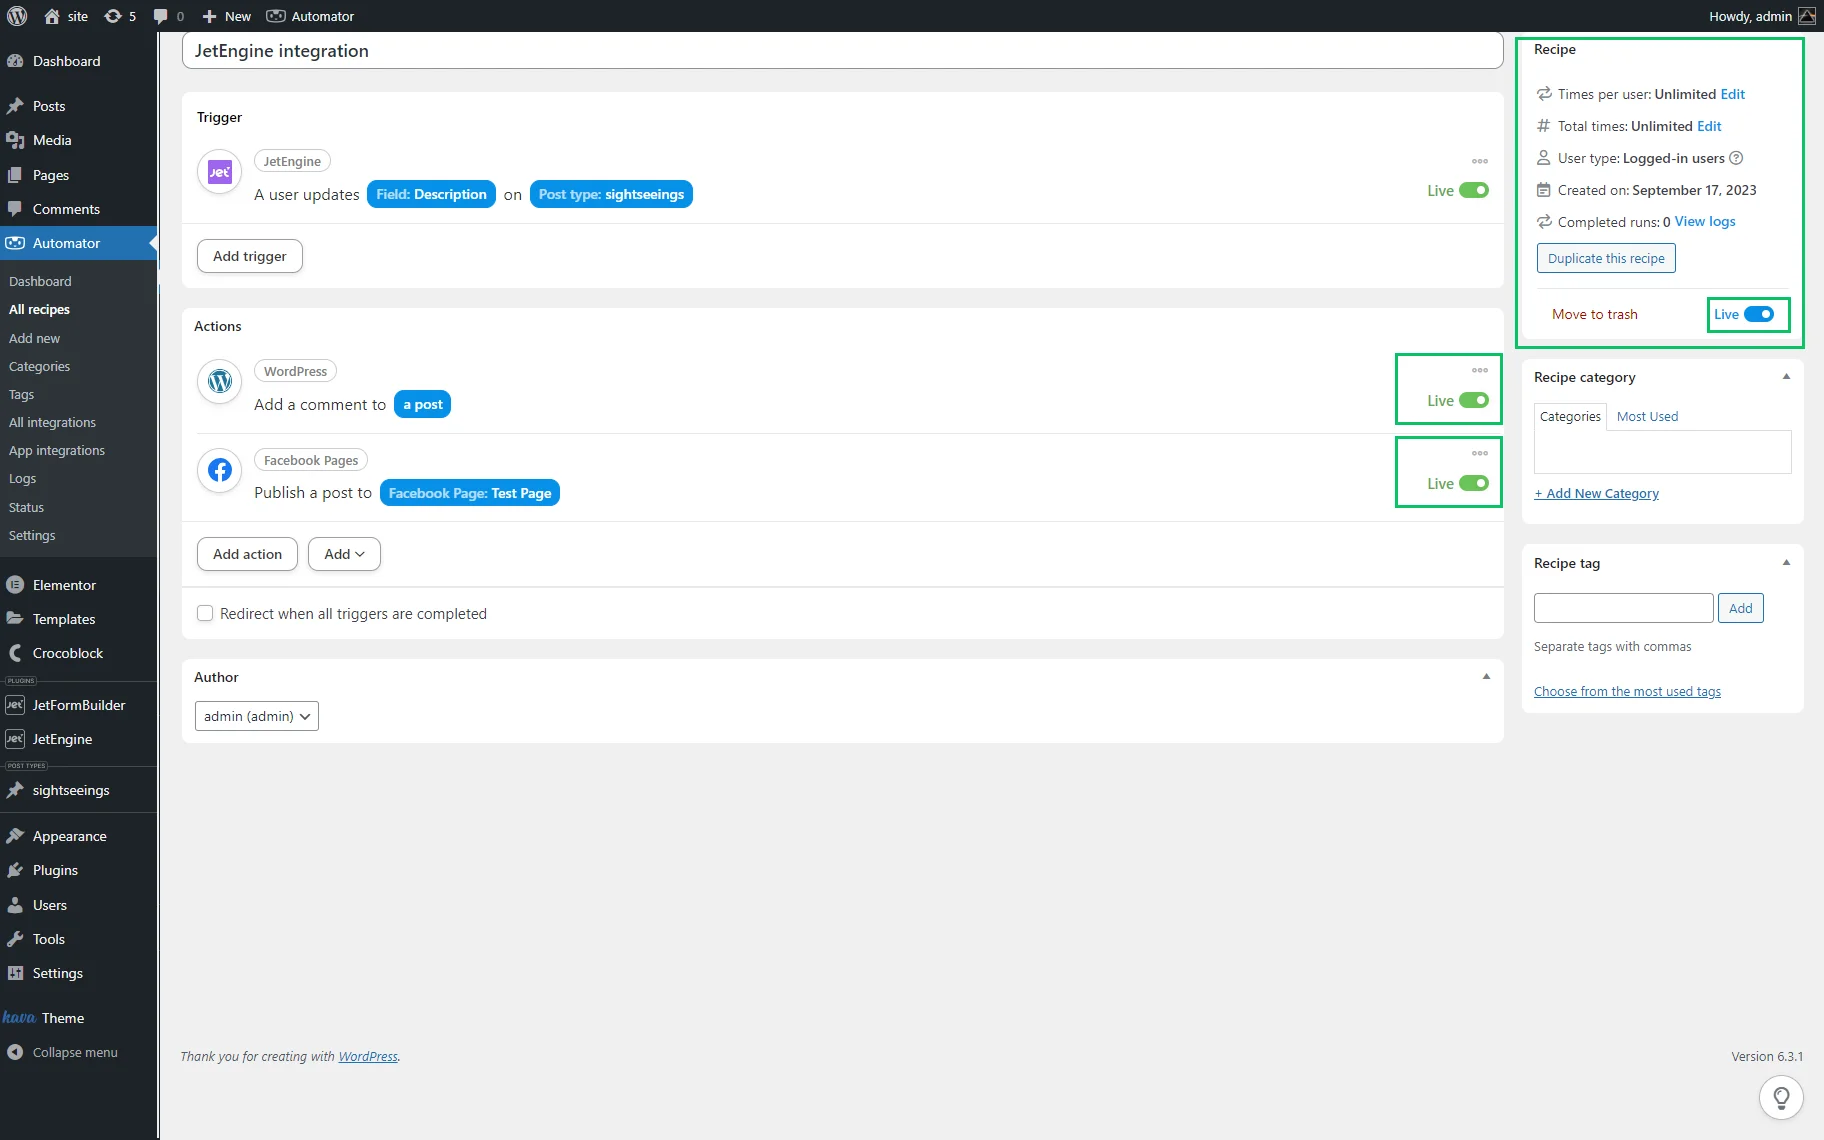
For this tutorial, we will automate the addition of a comment with tokens to a pre-created CPT (here, sightseeings) and a message to a Facebook post if a user updates a specific JetEngine field on a specific post type using Uncanny Automation Pro.
Creating the logged-in users recipe type
Navigate to the Automator > Recipes > Add new tab. Select the Logged-in users recipe type.

Type the recipe name (here, JetEngine integration) in the Add title field.
Setting a trigger
Navigate to the Trigger block and select JetEngine for integration.

Set a trigger: “A user updates a specific JetEngine field on a specific post type.”

Select the CPT and its field.

Press the “Save” button and move the “Draft” toggle to the “Live” position (this toggle is placed at the top right corner of the Trigger block).
Setting an action
Navigate to the Actions block, press the “Add action” button, and select the “WordPress” application for integration.
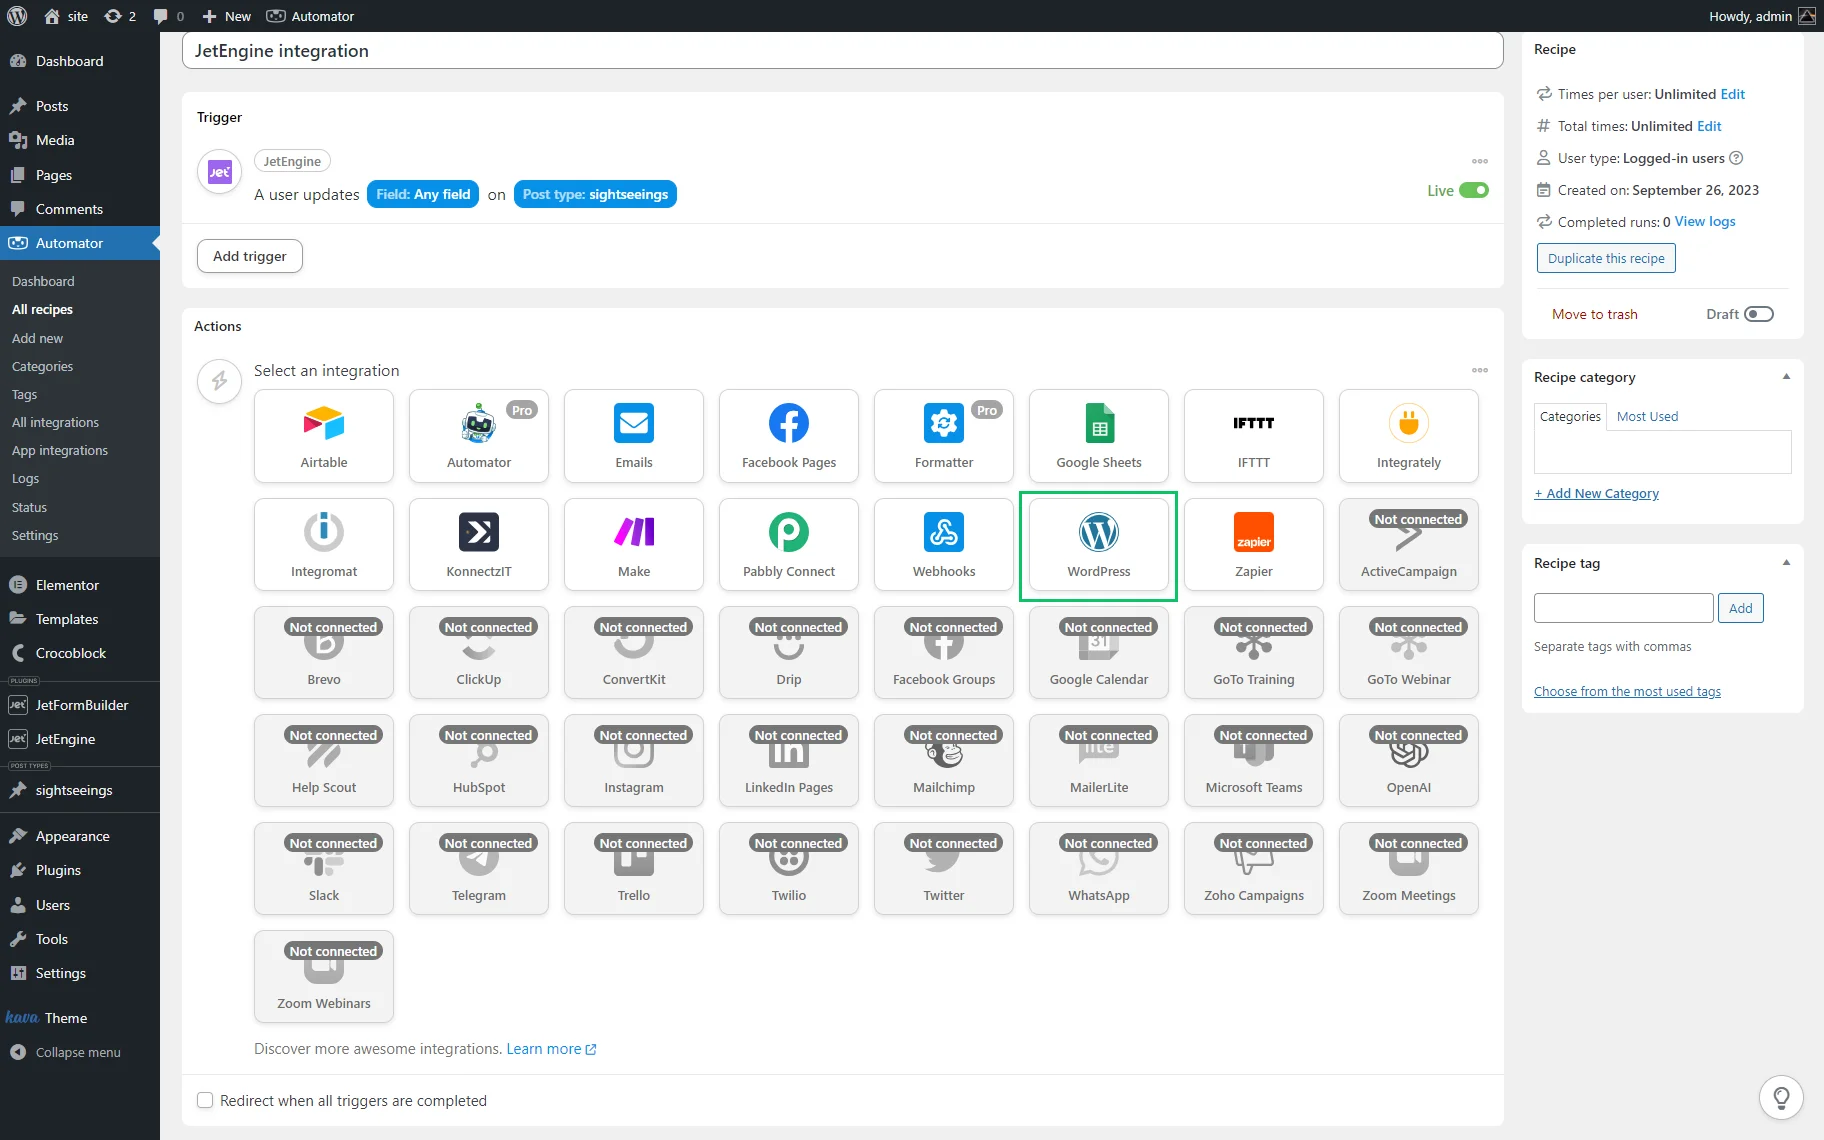
Select the “Add a comment to a post” option.
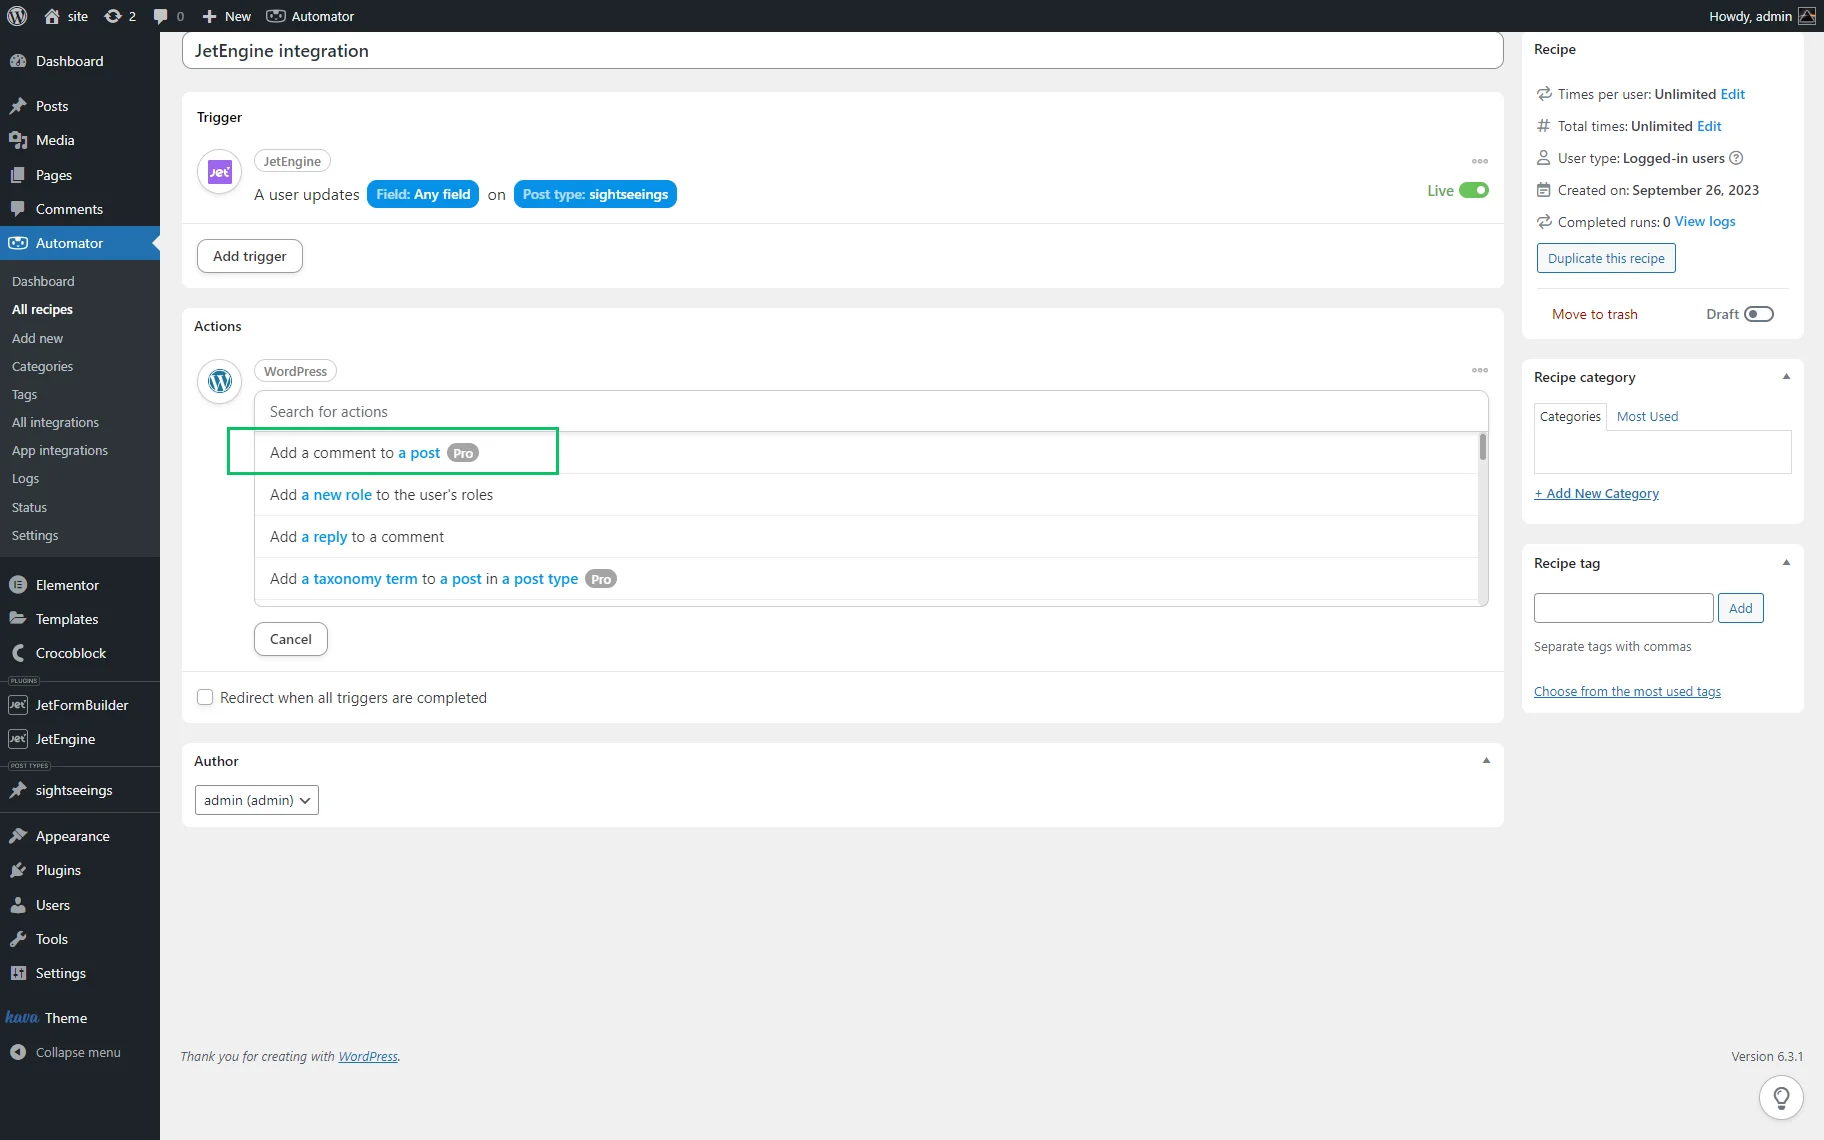
Select the following tokens from the drop-down menus:
- Post ID: meta field (here, description) of the CPT number 47;
- Commenter’s email: Common: User email;
- Name: Common: User username;
- Comment: type a text.

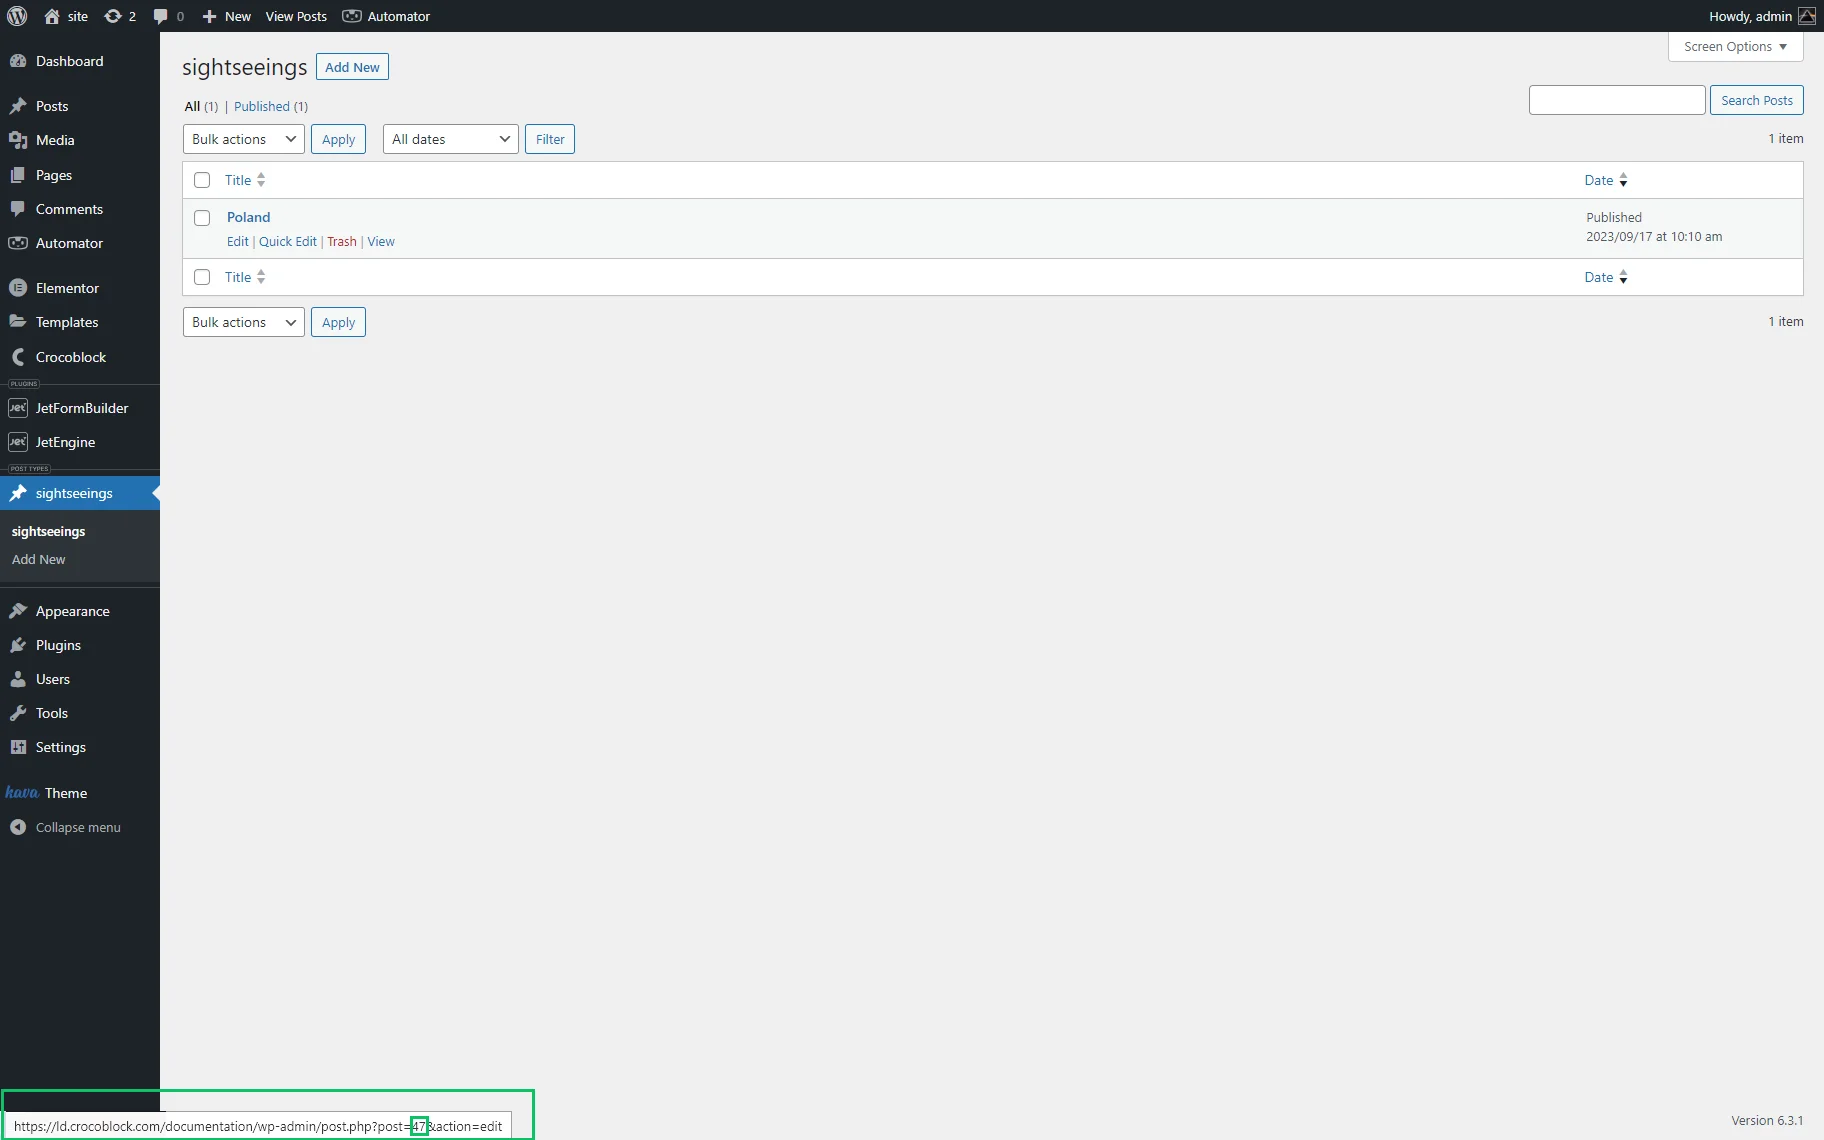
To find the CPT’s ID, navigate to the selected CPT (Poland) and find its ID in the page’s URL.
Press the “Save” button to save the action. Move the “Draft” toggle into the “Live” position to make the Actions block active (this toggle is at the top right corner of the Actions block).
If the recipe has one action, move the “Draft” toggle into the “Live” position to make the whole recipe active (this toggle is in the bottom right corner of the current Recipe block on the right sidebar).
Adding multiple actions
This recipe has another action – adding a message to a post on Facebook: press the “Add action” button and specify “Facebook” as the integration application.
Add text to the Message field. Press the asterisk icon if you need to add tokens.
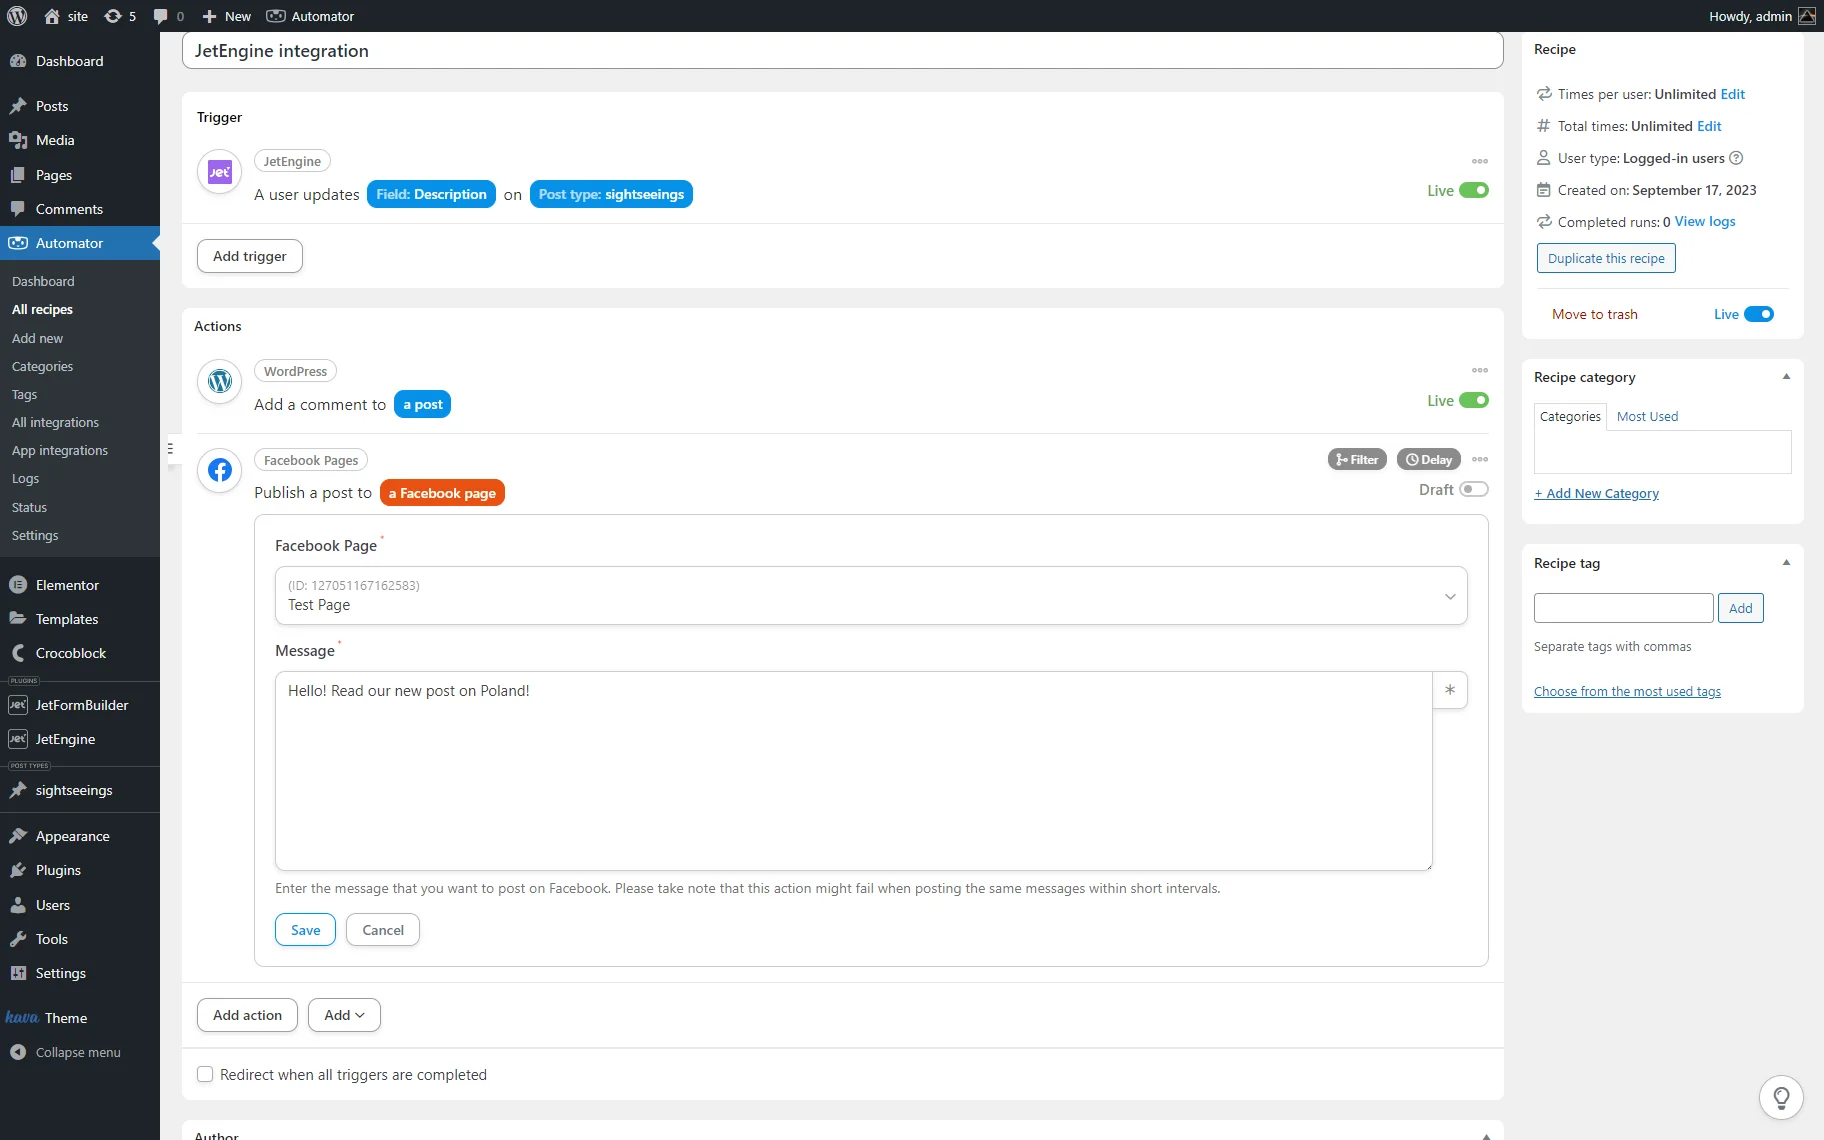
Press the “Save” button.
Activate the action: move the “Draft” toggle into the “Live” position (this toggle is at the top right corner of the current Actions block).
Activate the recipe: move the “Draft” toggle into the “Live” position (this toggle is in the bottom right corner of the current Recipe block on the right sidebar).
Checking the result
Navigate to the CPT and add data. For this tutorial, we added the data to the Description meta field. Publish the page.

The WordPress Dashboard > Comments tab will show the added comment.

Navigate to the connected Facebook account and check the added post.

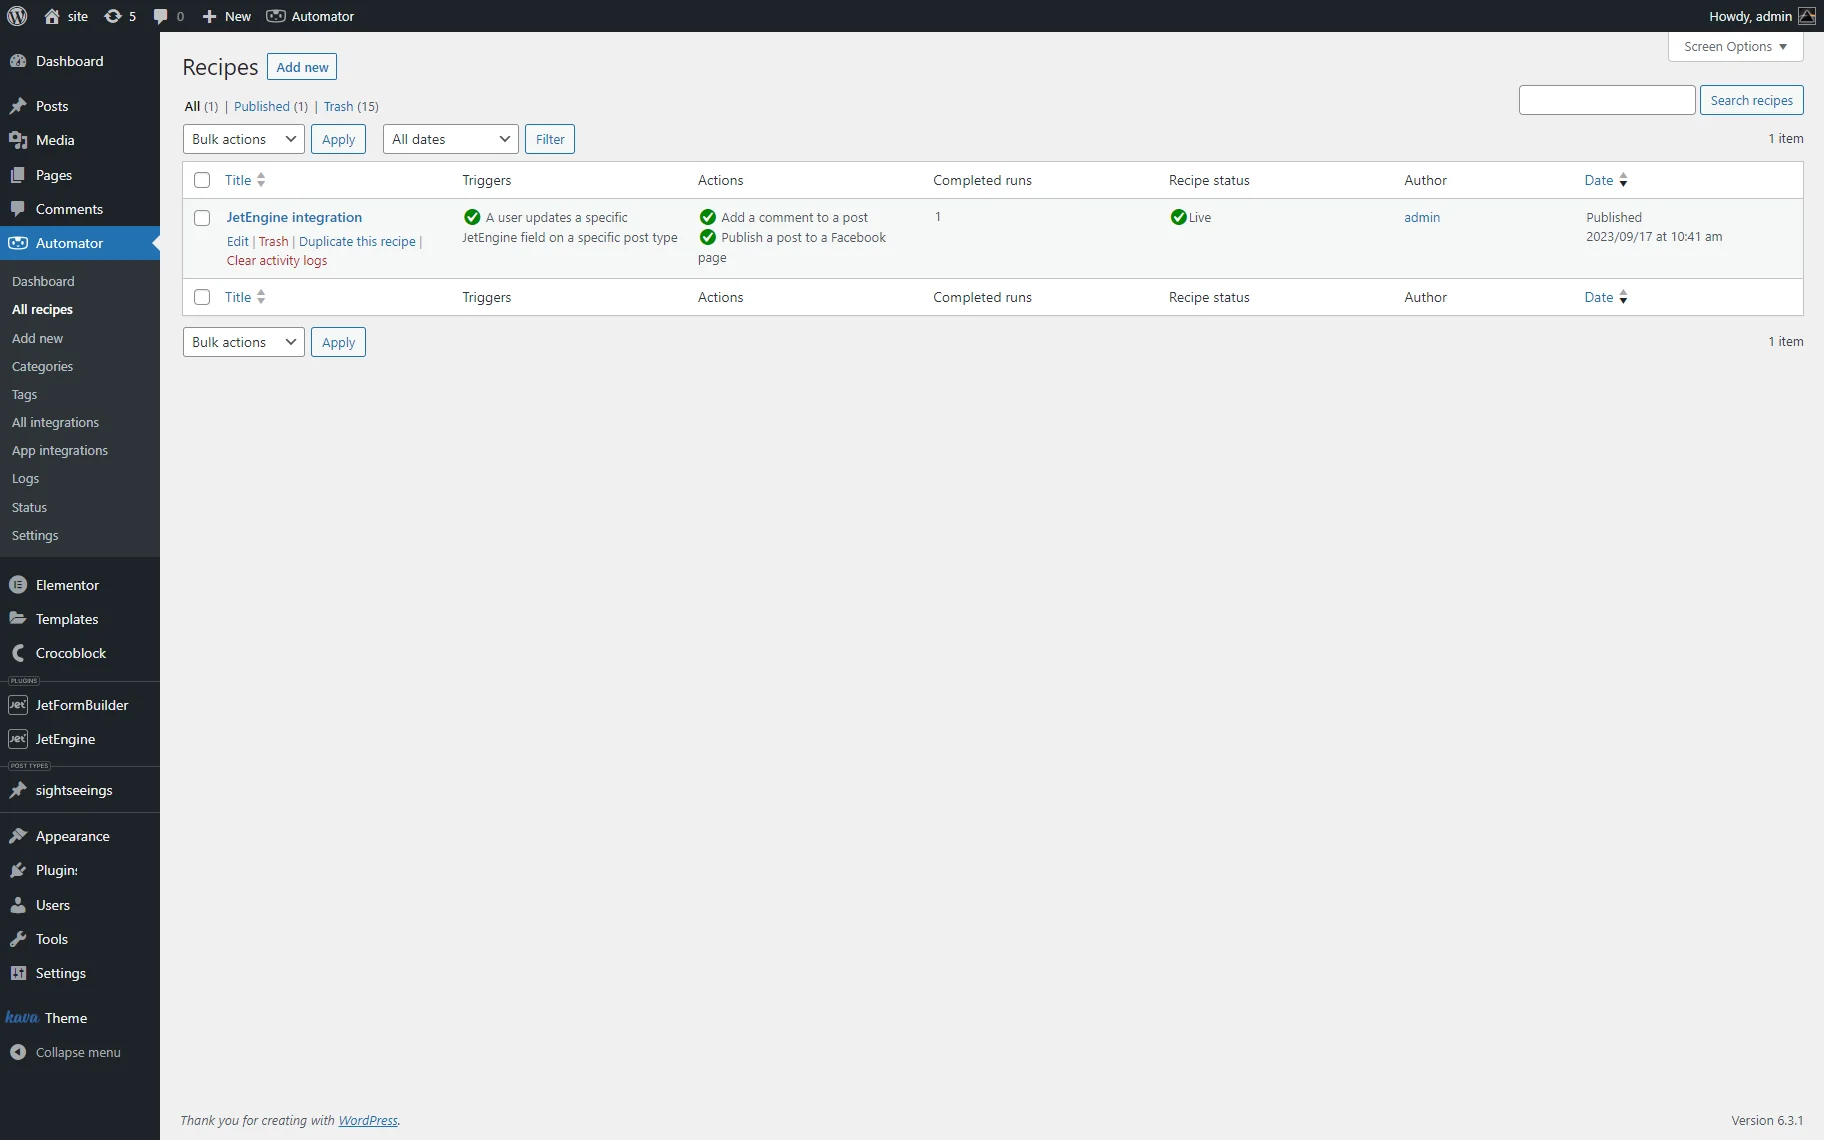
Navigate to Automator > All recipes to watch the number of completed runs of the recipe.
Now you’ve learned how to connect JetEngine to different apps using Uncanny Automator Pro on the example of adding comments to the WordPress CPT and messages to Facebook posts.