How to Create Dynamic Sale Notifications for WooCommerce SQL Query with Open AI
Discover how to generate the SQL query using the power of Open AI to display dynamic sale notifications for WooCommerce. Learn how to show visitors the last sale on the website and when the order was completed.
Before you start, check the tutorial requirements:
- Elementor (Free version)
- WooCommerce plugin installed and activated with several products created
- JetEngine plugin at least 3.2.0 version installed and activated
- JetPopup plugin installed and activated
This tutorial will show how to generate the SQL query with AI to show a notification of the most recent website sale: the product itself and the date/time.
Before you proceed further, ensure you have several completed orders on the website.
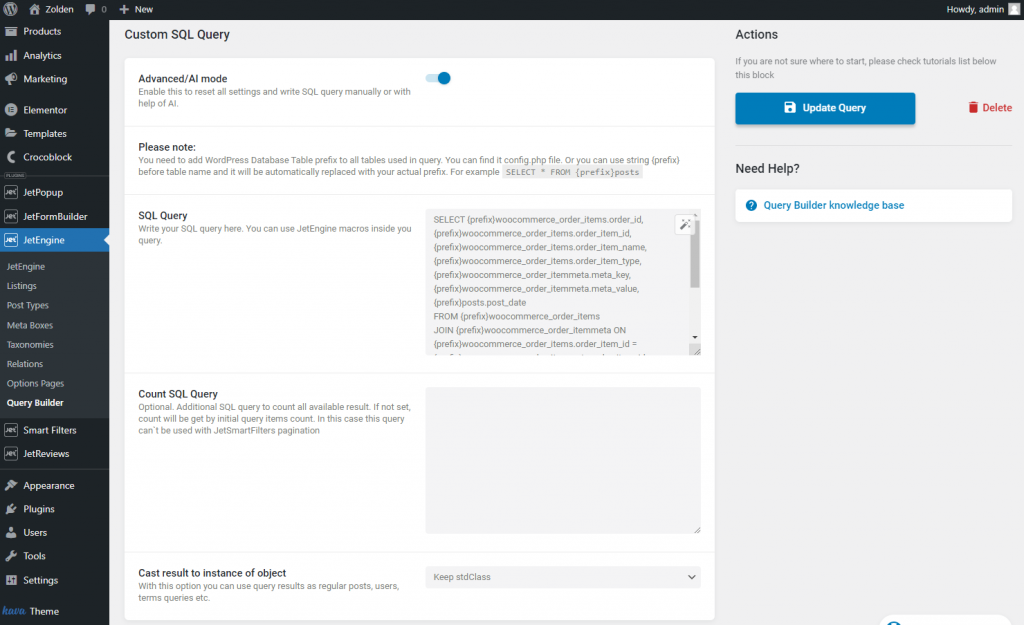
Create the SQL Query
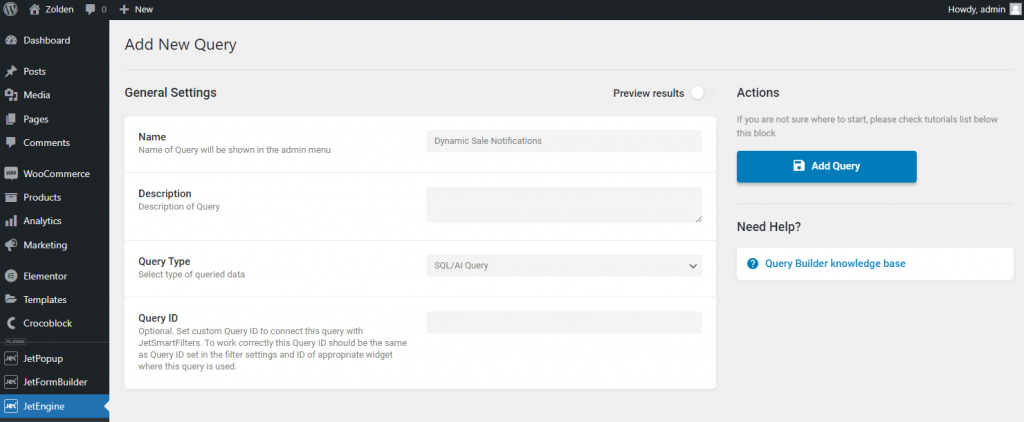
Follow the JetEngine > Query Builder path and push the “Add New” button.
Give the query a Name, and select the “SQL/AI Query” Query Type.
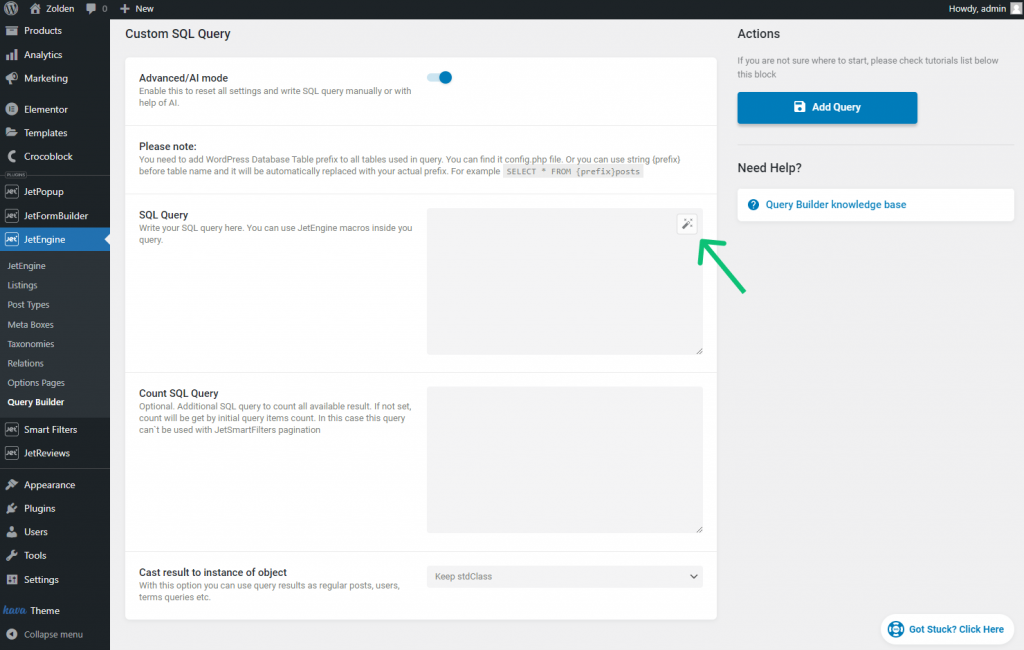
Enable the Advanced/AI mode toggle, and you’ll see that the settings are different than if you decided to write SQL query manually.
To use AI, press the magic stick icon, and the pop-up for the SQL query generation will appear.
Now the critical thing is to write the correct prompt so the AI understands the request.
I entered the “WooCommerce. Select all product IDs from latest order. Add to the response product_ID and order_date. Limit 1.” text into the Describe your query textarea.
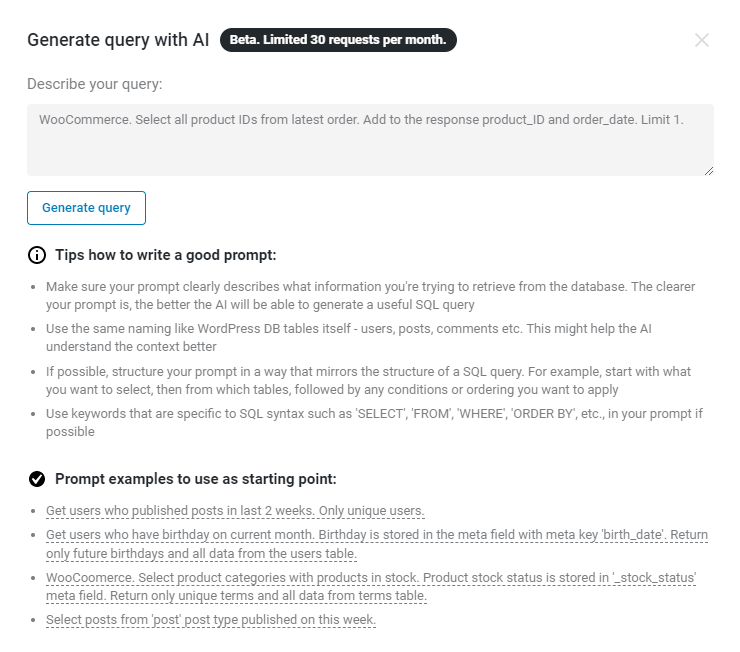
Hit the “Generate query” button, and get a generated query.
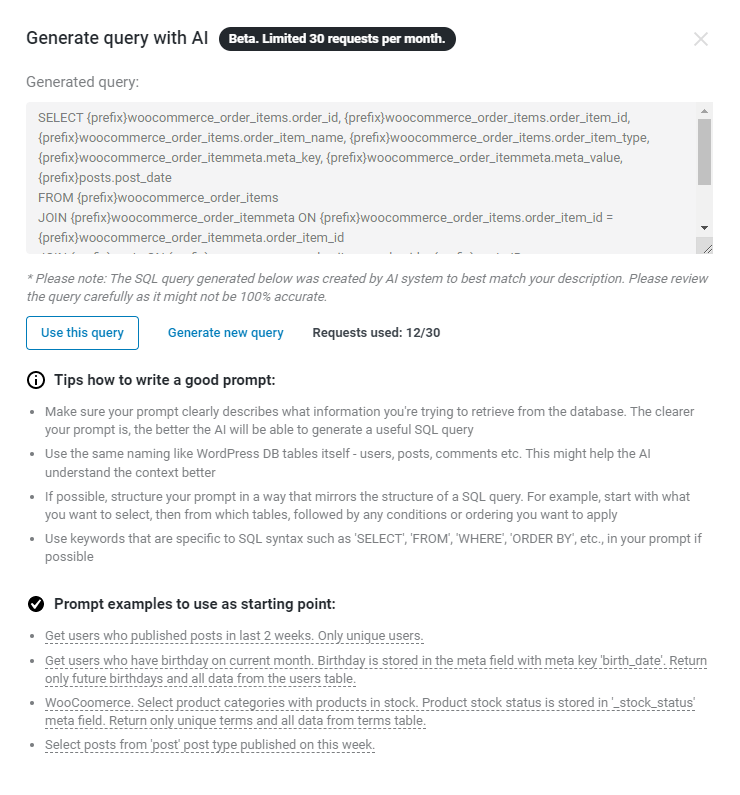
Check it and press the “Use this query” button. After that, you can see the generated query in the SQL Query field.
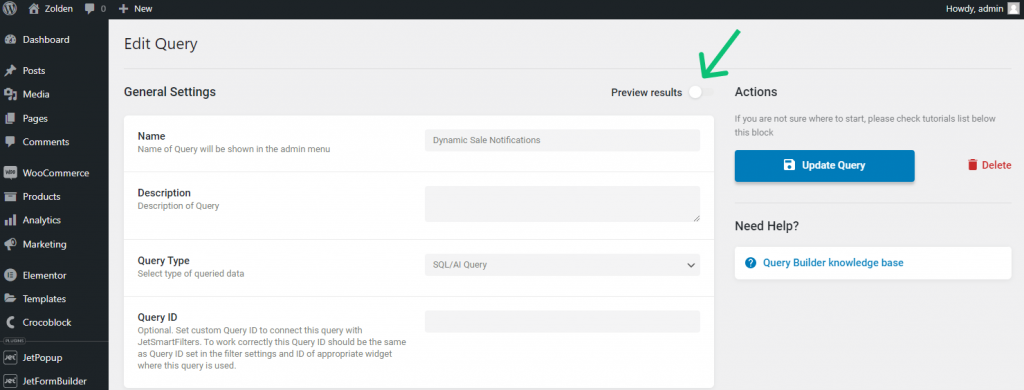
Return to the top of the page and enable the Preview results toggle.
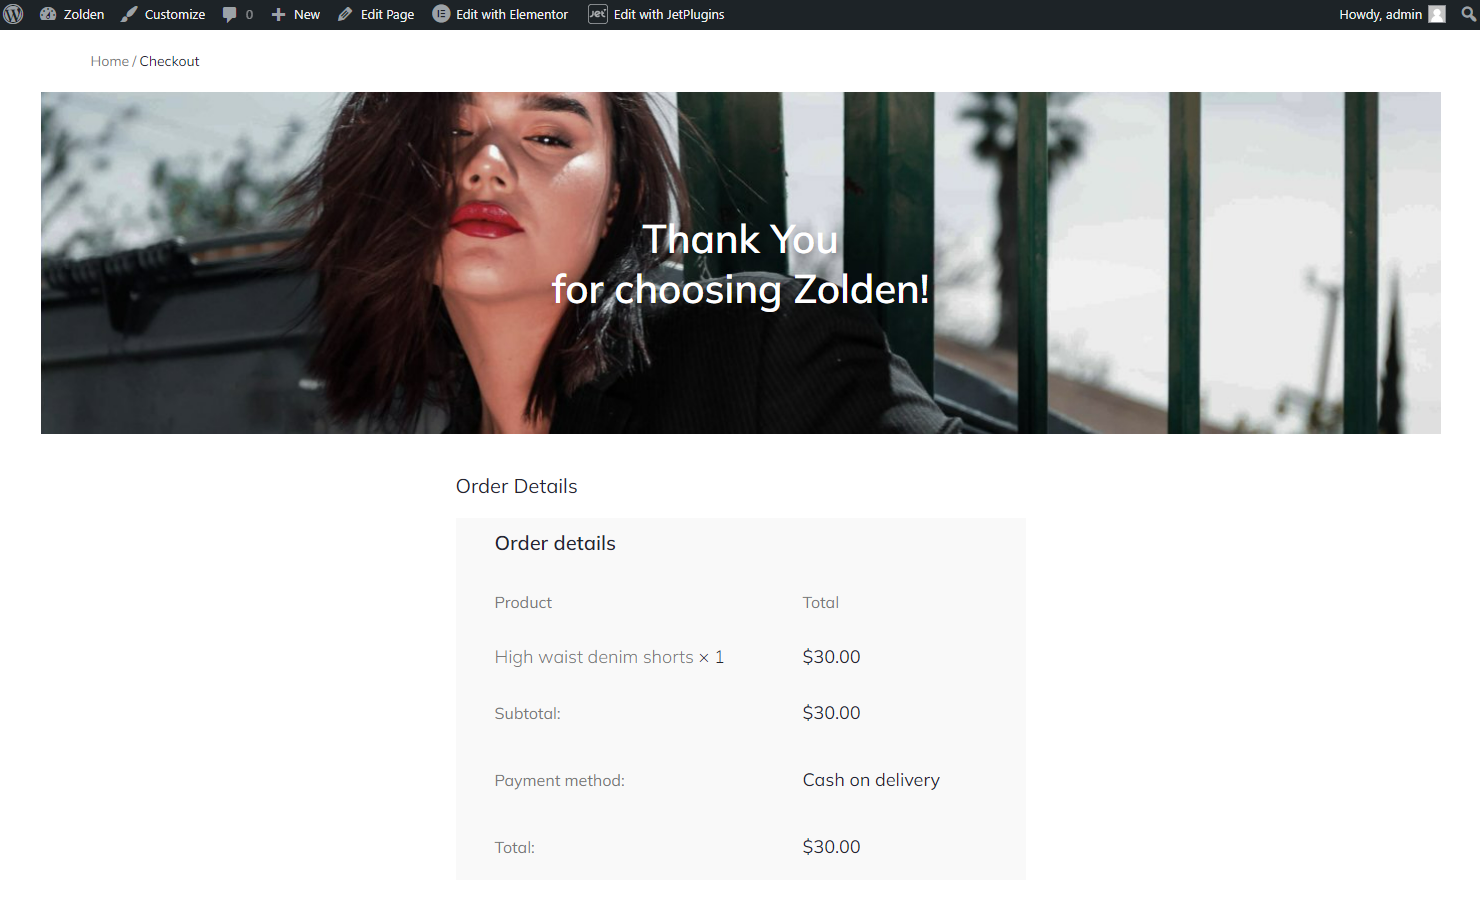
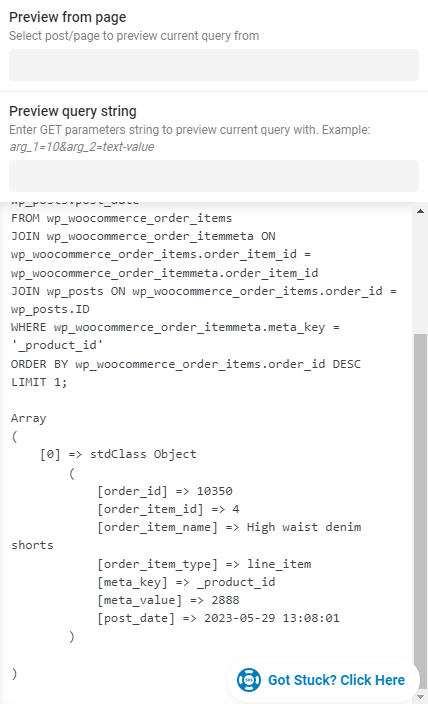
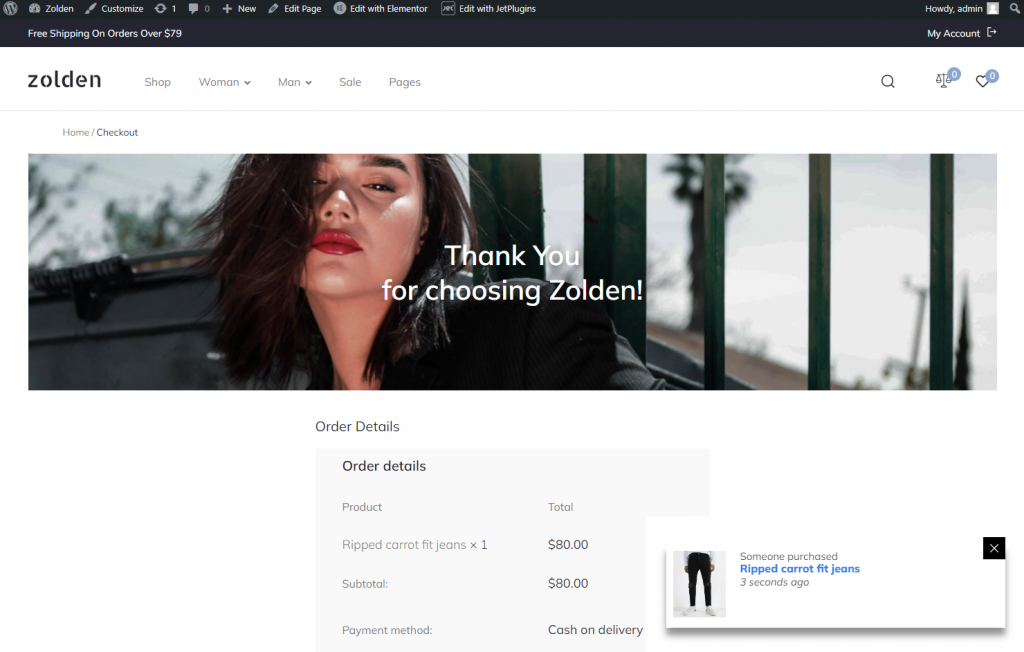
At the bottom of the preview pop-up, you can see the last order details. The order_item_name matches the last order (High waist denim shorts) on my website.
After you finish, press the “Add/Update Query” button.
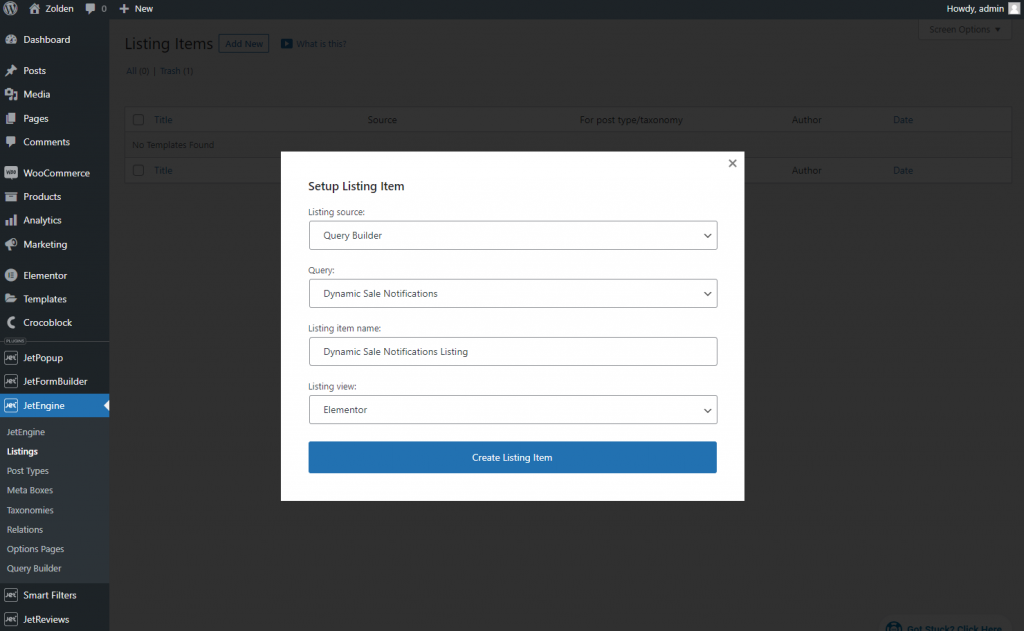
Create a Listing Item
Move to the JetEngine > Listings tab and click the “Add New” button.
In the Setup Listing Item pop-up, choose the “Query Builder” Source and pick the needed Query as well. Enter the Listing item name and choose the “Elementor” Listing view. Then, click the “Create Listing Item” button.
To show the “Someone purchased” label, I used the Header widget.
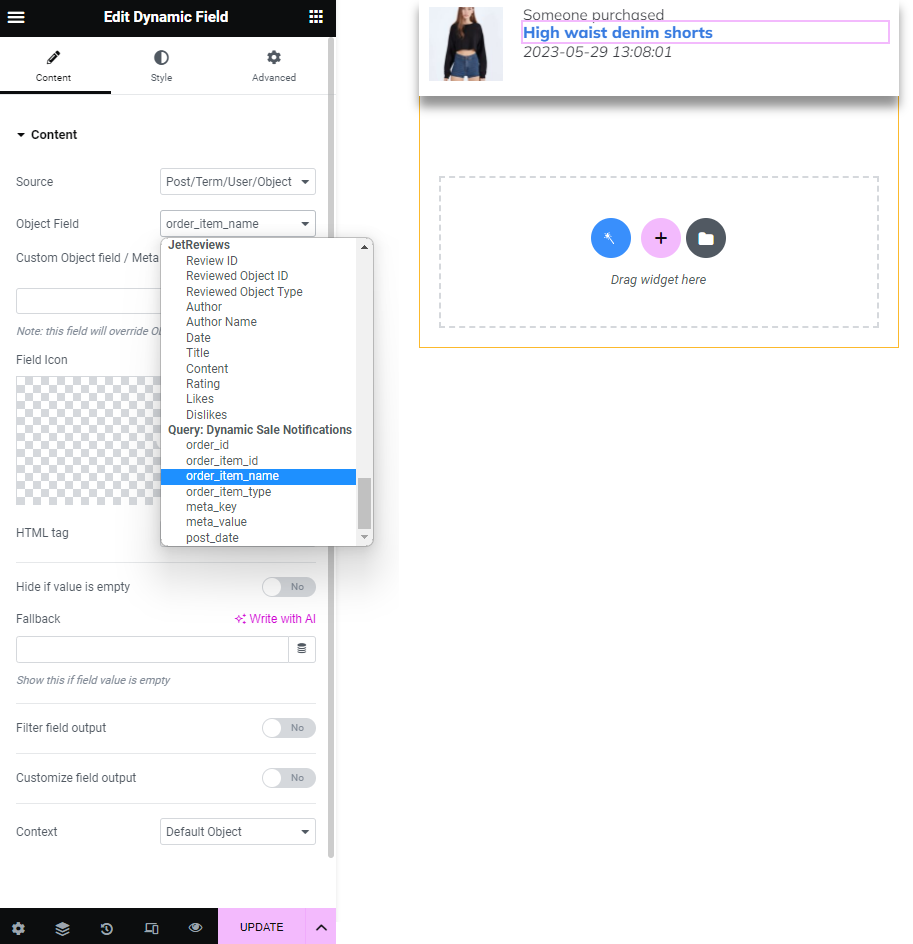
I used the Dynamic Field widget to display the order details. To learn more, proceed to the Dynamic Field Widget Overview.
To show the product title, select the “Post/Term/User/Object Data” Source and the “order_item_name” Object Field.
To display how much time has passed since purchase, select the “Post/Term/User/Object Data” Source and the “post_date” Object Field.
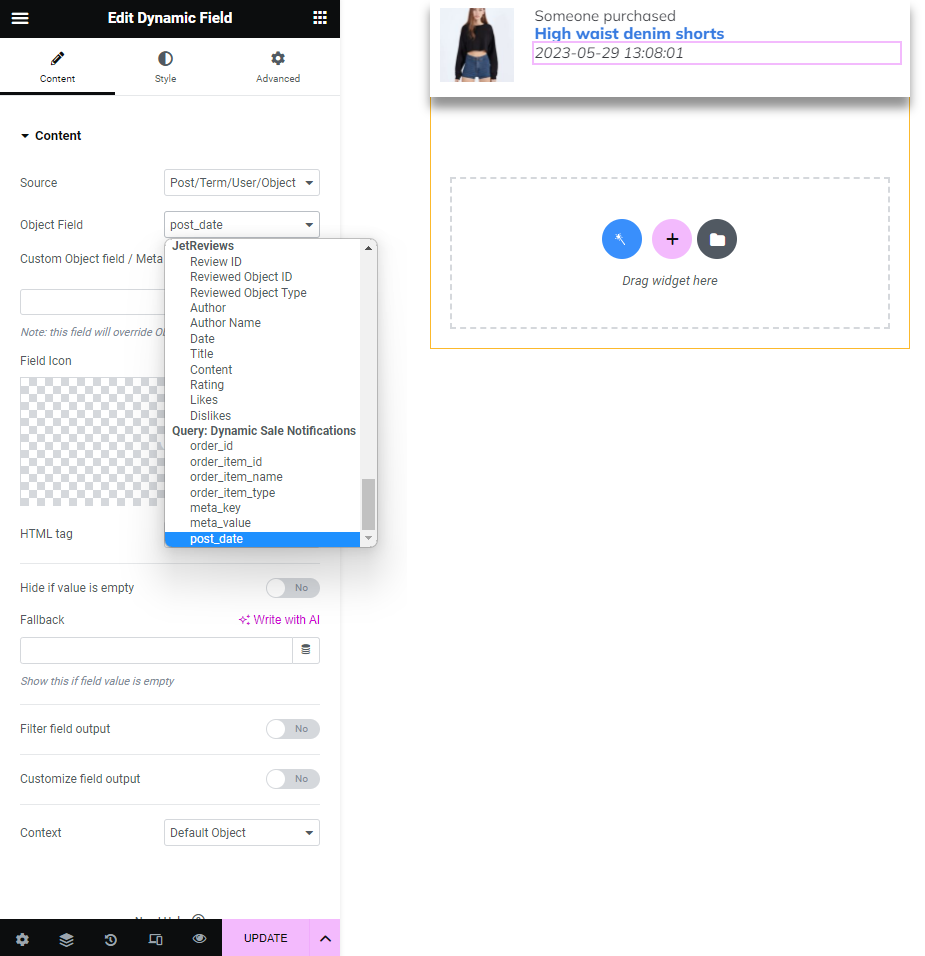
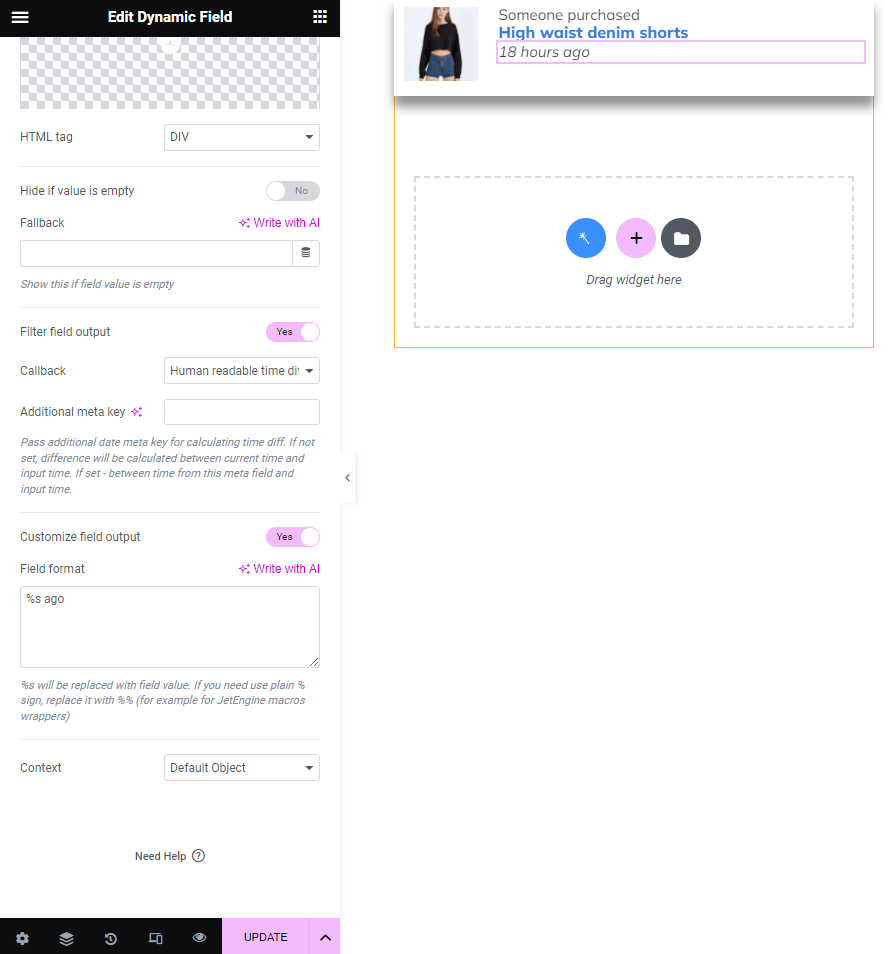
Then, enable the Filter field output toggle and pick the “Human readable time difference” Callback. Also, you can use the Customize field output option.
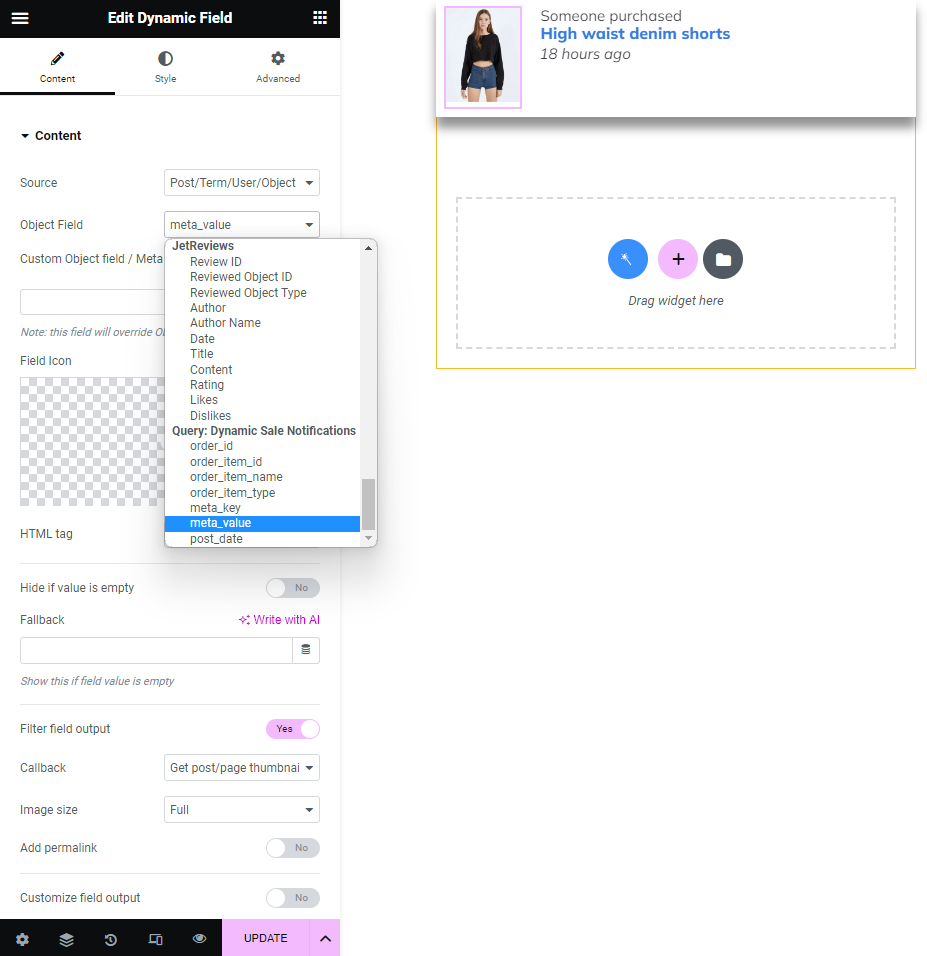
To show the product thumbnail, choose the “Post/Term/User/Object Data” Source and the “meta_value” Object Field. Enable the Filter field output toggle and pick the “Get post/page thumbnail” Callback.
After you done customizing, press the “Update” button.
Create a Pop-up
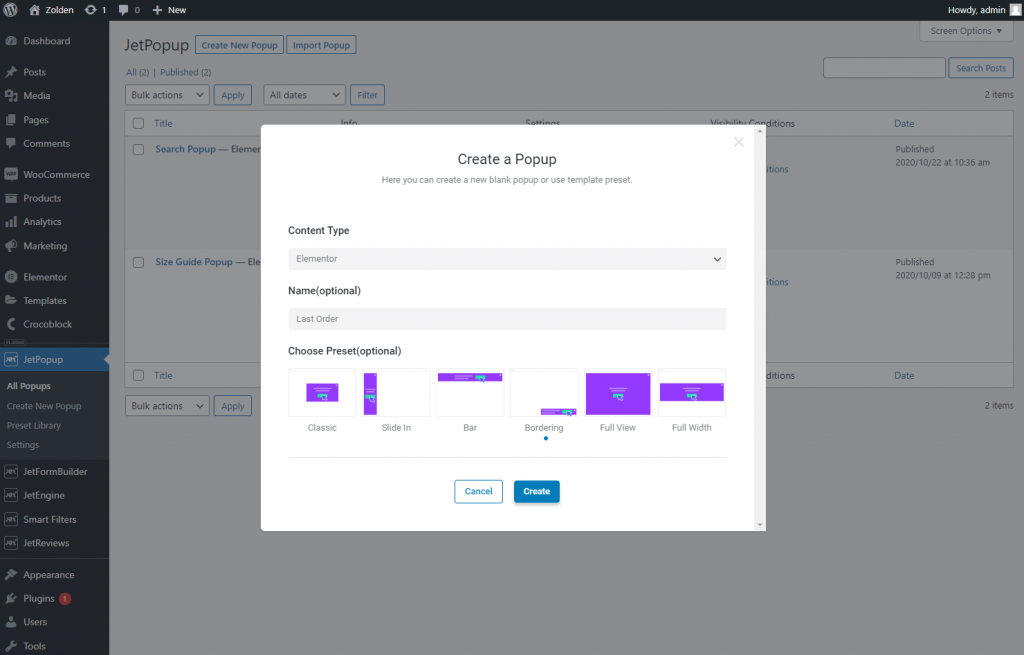
Proceed to the JetPopup > Create New Popup tab.
In the Create a Popup window, select the “Elementor” Content Type, pick the “Bordering” Preset, and click the “Create” button.
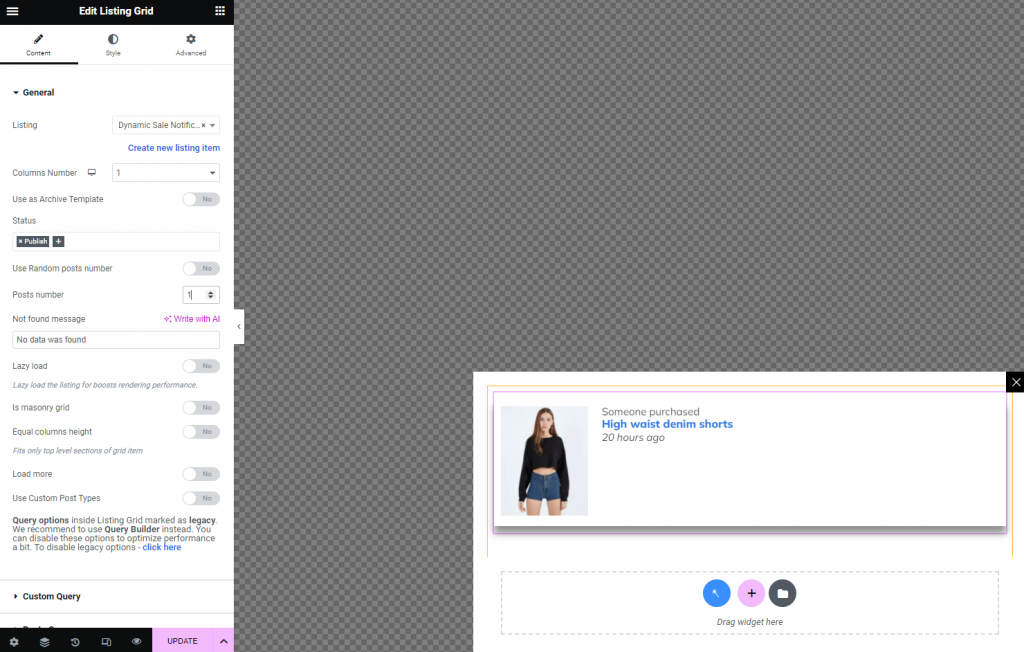
Drag-n-drop the Listing Grid widget to the container. Select the needed Listing in the drop-down menu, and set the “1” Columns Number and “1” Post Number.
Click on the Settings icon.
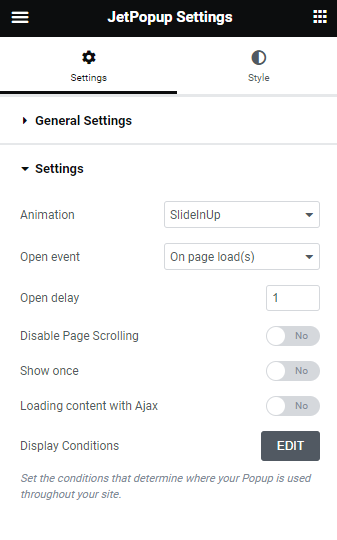
Open the Settings tab and customize the pop-up. I applied the “On page load(s) Open event – it opens a pop-up with a delay after the page loads.
You can learn more about pop-up creation and pop-up settings from the How to Create a New Popup Template in Elementor tutorial.
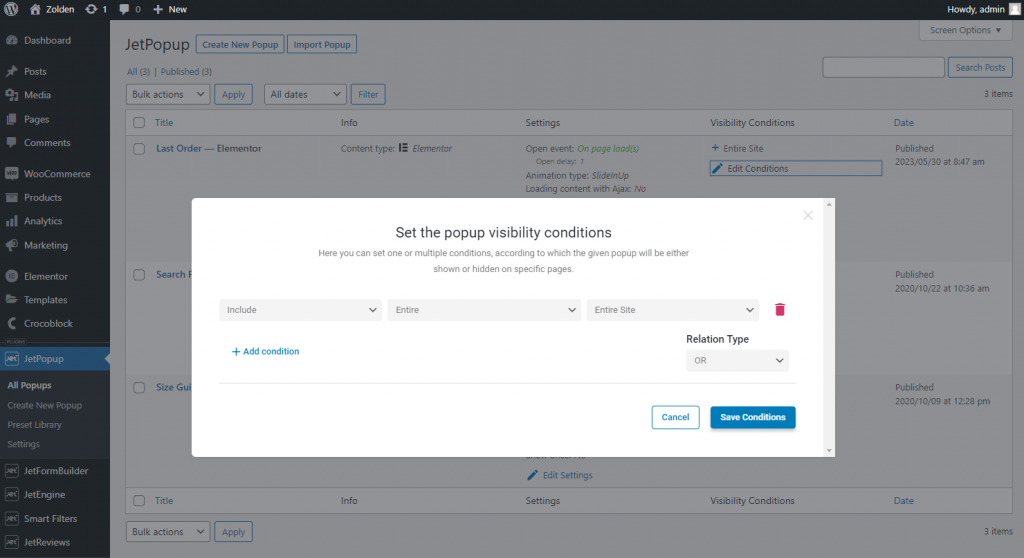
Then, press the “Edit” button near the Display Conditions option.
Set the visibility conditions in the appeared window. I set the “Include,” “Entire,” and “Entire Site” conditions. Learn more from the Popup Conditions Overview.
When you finish, hit the “Save Conditions” button.
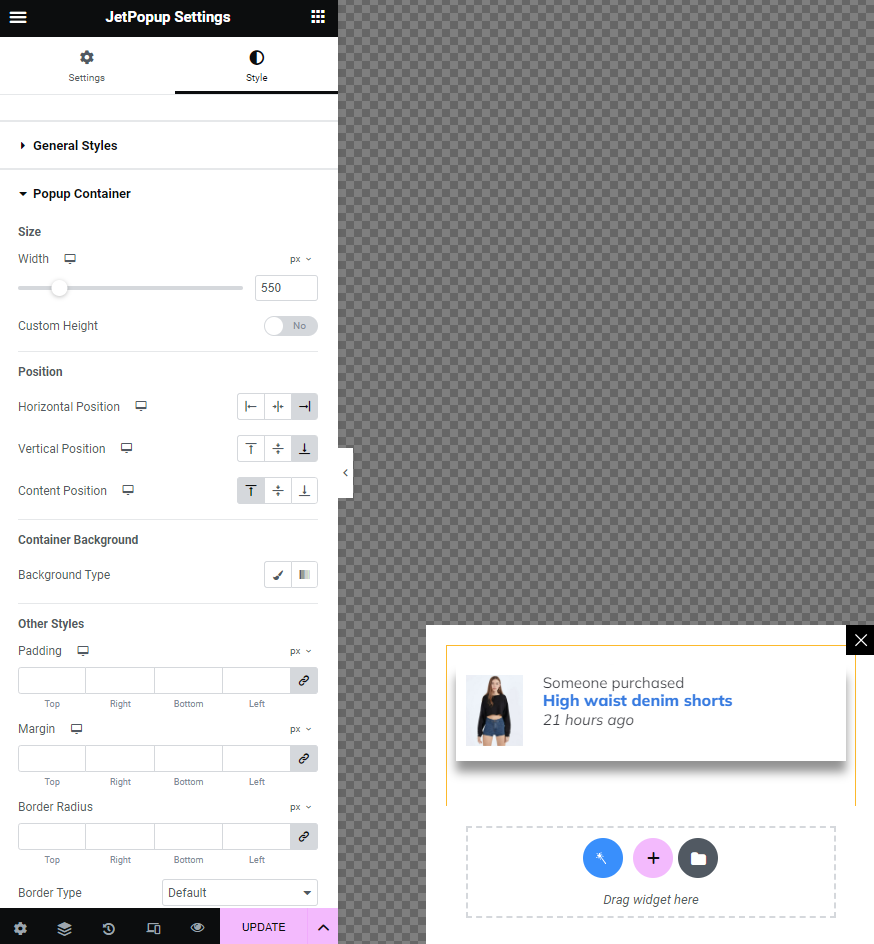
Return to the pop-up on the Elementor editing page and open the Style settings tab.
Here you can customize the pop-up style setting. To learn more, go to the Popup Style Settings Overview in Elementor.
For example, I changed the pop-up Width in the Popup Container tab.
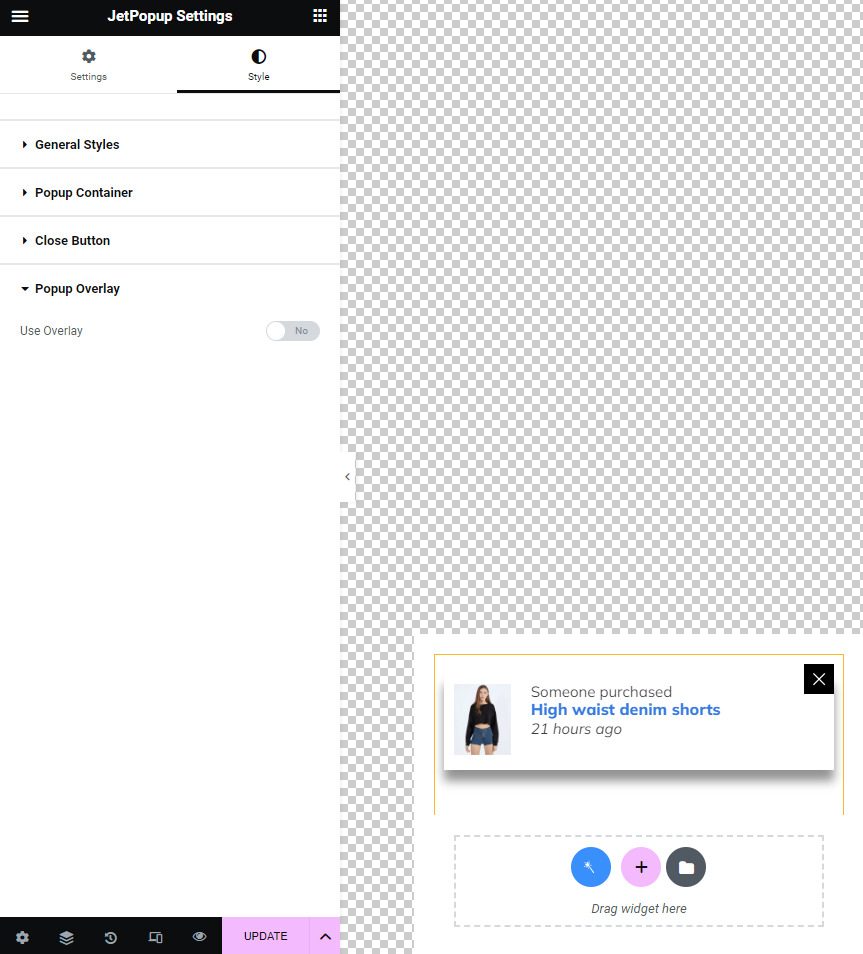
I changed the close button position with the Icon Transform option in the Close Button settings tab.
Also, I disabled the Use Overlay option in the Popup Overlay settings tab. If enabled, it covers the screen beyond the pop-up by darkening the background.
When you finish, hit the “Update” button.
Proceed to the front end. According to my condition, the pop-up will open on the entire website, so I went to a random page. The pop-up appeared according to the open event settings.
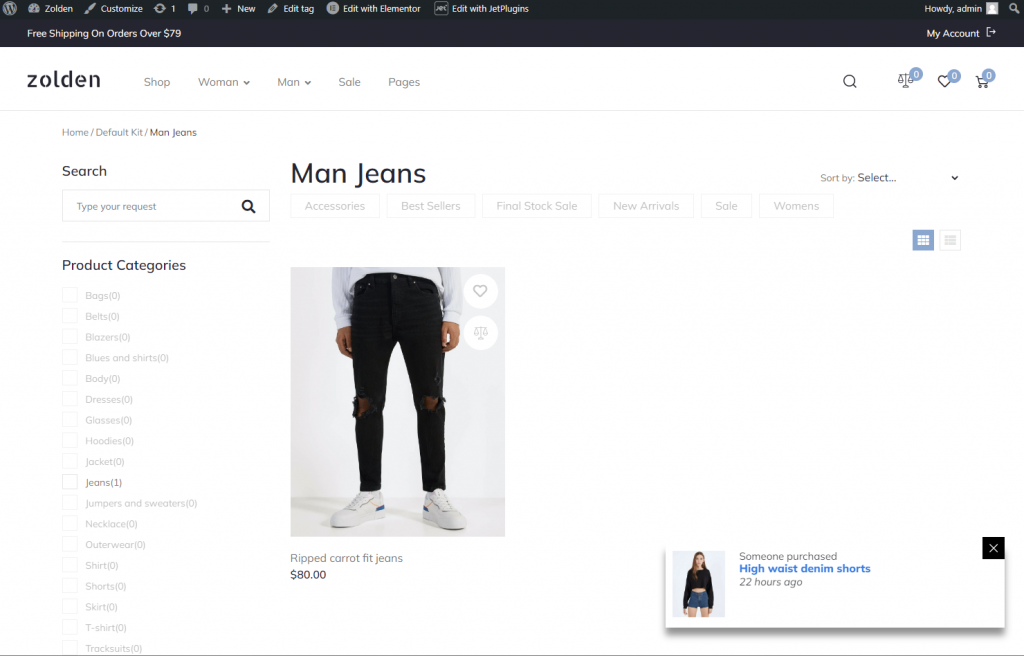
Let’s make a new purchase. As you can see, the dynamic notification was changed immediately.
That’s all. Now you can generate the SQL query for the WooCommerce dynamic notification sale using OpenAI.