How to Add WooCommerce Products to Mega Menu
Learn how to add WooCommerce products to your mega menu just in a few clicks.
In case you’re looking for a way for your menu to become something more than just the place where you display the links to your website’s pages, it’s time to think about adding a mega menu.
Its main difference from the simple dropdown menu is that when you hover over one of its main items, you can see a block with any content you want to add there.
If you’ve got a WooCommerce website, it’s quite possible to add WooCommerce products or product categories to such a mega menu block with the help of the JetMenu plugin for Elementor. Let’s find out how to do it.
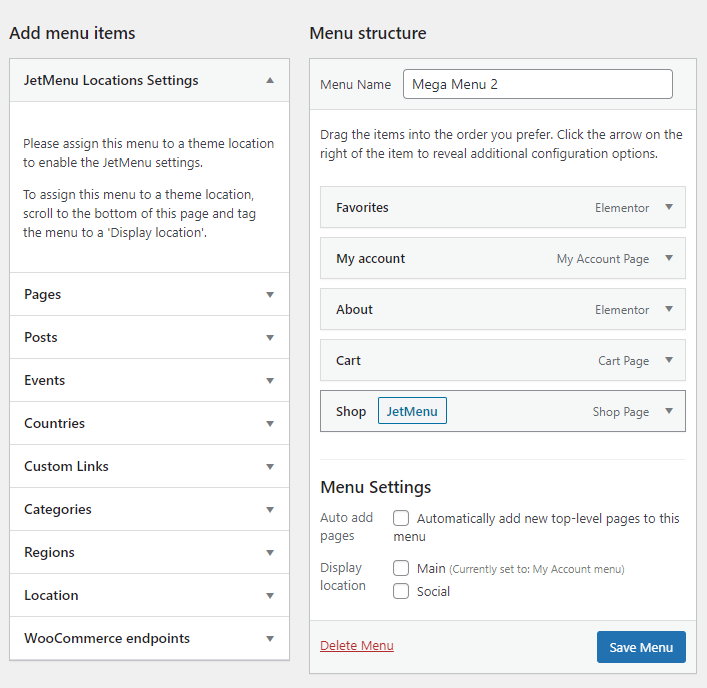
Navigate to the Appearance > Menus tab in your WordPress Dashboard. Hover over the item of your main menu to which you want to add a mega menu with WooCommerce products and click the JetMenu label to open its options.

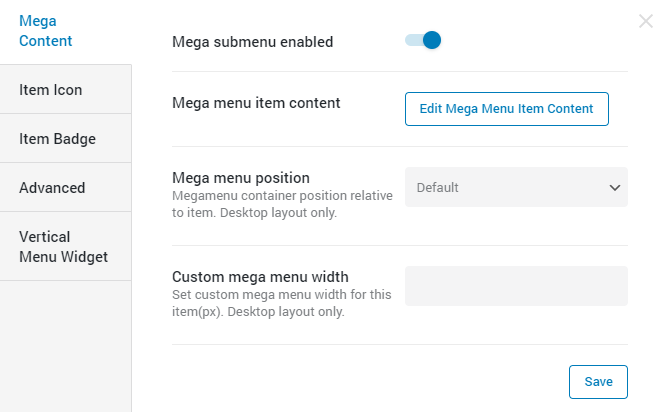
Toggle the Mega Submenu Enable Option to Yes and click the Edit Mega Menu Item Content button to proceed to the Elementor editor.

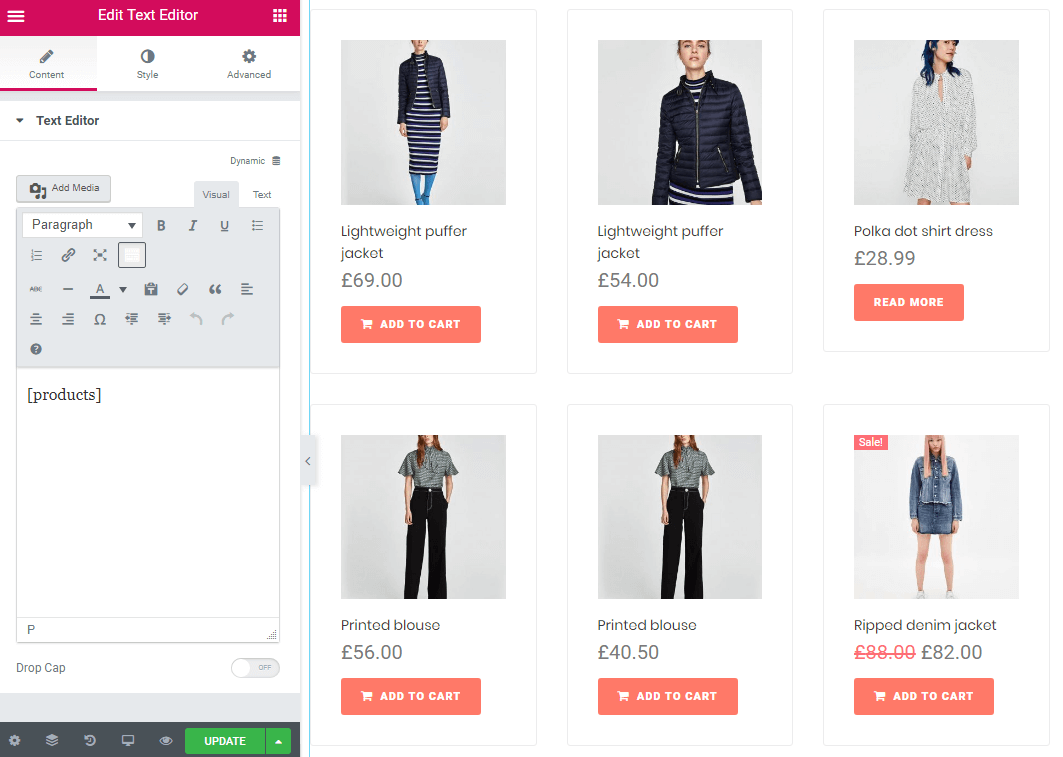
Drag and drop the default Text Editor widget and enter the corresponding shortcode for displaying the products. Usually, it is [products]. To learn more about the shortcodes, feel free to read this tutorial.

Click the “Update” button and exit Elementor by clicking the arrow on the top left. Click the “Save” button, close the popup window, and click the “Save Menu” button once again.
Visit your site to see the WooCommerce products included in one of the items of your Mega Menu.
Enjoy the renewed Mega Menu that can now help you promote products and boost your sales!