How to Use Different Style Presets for Different Menu Locations
This tutorial will show you how to use different JetMenu style presets while working with JetMenu.
JetMenu Style Preset is a unique combination of menu style settings. They are saved and available for applying to one or several of the menus in case they are set to different locations.
Once you’ve created the style preset you are pleased with, you are able to save it in order to use it again for different menu locations.
Creating Style Presets
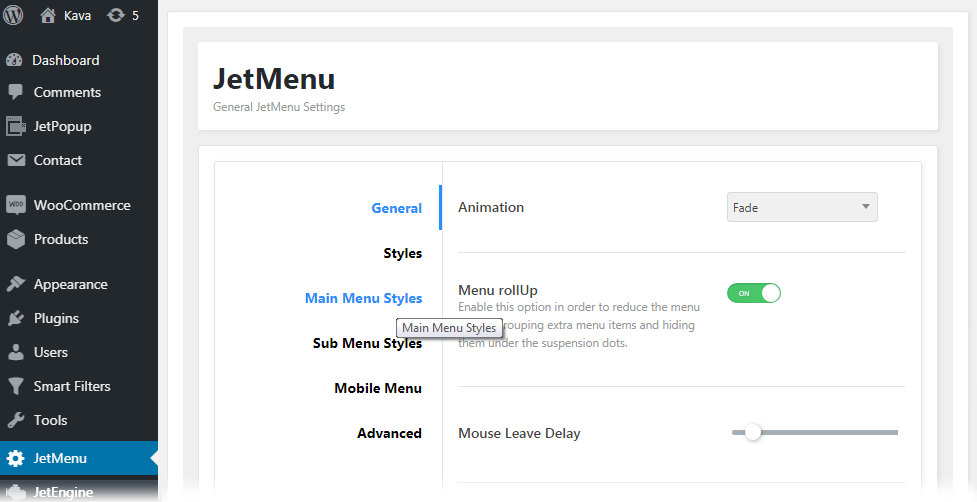
Open WordPress Dashboard and proceed to the JetMenu option. In case you don’t have such an option yet, please, install and activate JetMenu plugin.
Use all the style settings available for the menu appearance in General, Styles, Main Menu and Sub Menu Styles, Advanced and Mobile Menu blocks. Here you can change the appearance of the menu according to your needs. Click the Save button to save the changes.
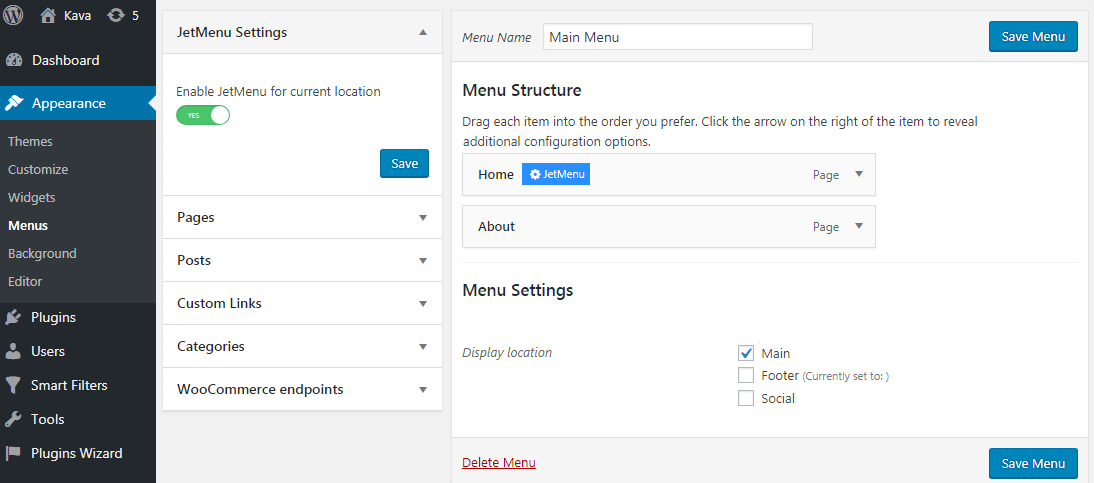
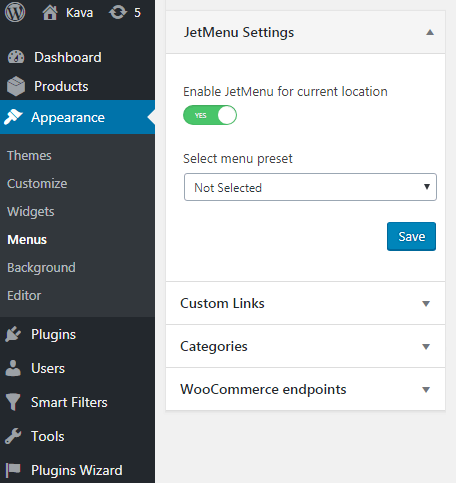
Make sure to navigate to Appearance > Menus and toggle Enable JetMenu for current location option to Yes.
Click the Save button and open your website’s frontend to check how the created style looks from front-end.
Feel free to make changes in the styles again if you don’t like the looks of it yet.
When you’ve created the style you need, open JetMenu tab and switch to the Presets Manager tab. Here you can create the new preset with all the style settings you’ve applied to the menu.
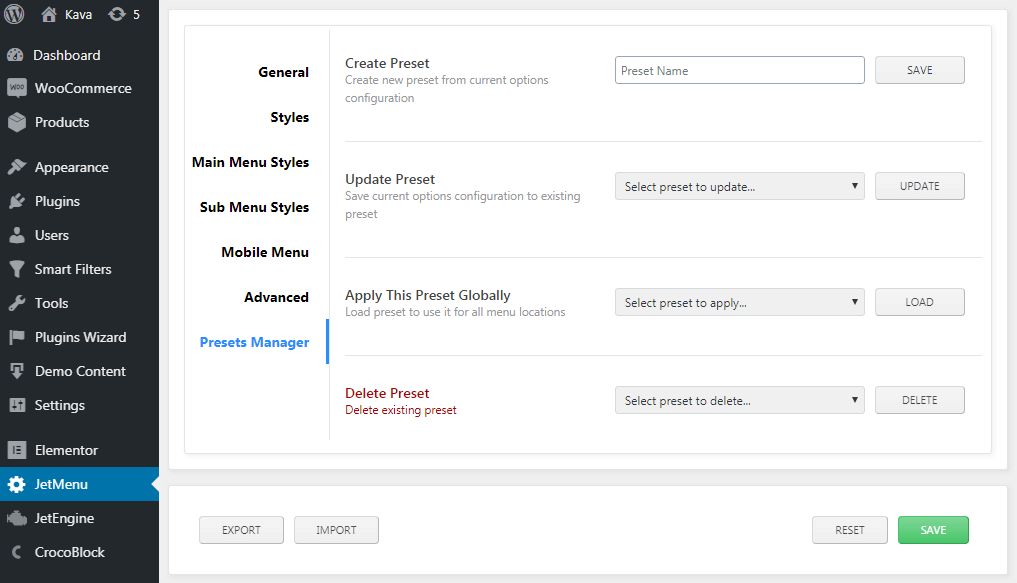
Pick a title for a preset in the Preset Name field and click the Save button.
In order to apply a different preset to the specific menu location, click the Save button on the right bottom of the page. After that, move back to Appearance > Menus tab. Here you’ll see Select menu preset dropdown as the second option in JetMenu settings block.
Feel free to apply a menu preset you’ve built to a specific menu that has the needed location.
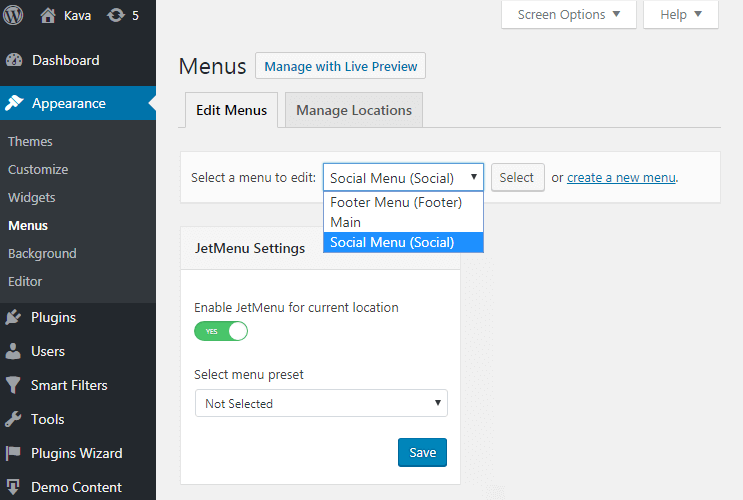
You can also create or choose for editing another menu with a different location. E.g., Footer or Social, and apply the same preset for it to use the same styles for other menus.
In case you want to apply this preset to all the menus, navigate to JetMenu > Presets Manager block. Select the preset you want to apply in the Apply this preset globally dropdown. Afterwards, click the Load button there. Then save the changes.
In case you want to set a different style preset to a different menu location, make changes you need. And then create a second preset the same way you’ve done before (as explained in steps 4-5).
You are able to select the style preset for the chosen location from the Select menu preset dropdown for any menu location you have on your site in JetMenu Settings block.
Click the Save Menu button and you’re done.
If you want to make changes in the saved presets, you are able to return to the JetMenu settings anytime and here update the preset.
To delete the preset you no longer need, select the preset you want to remove from the dropdown in the Delete Preset list and click Delete button.
As you can see, the process of creating different style presets for different menu locations doesn’t take too long. Hoping you’ll enjoy creating different presets for your versatile menus.