How to Create and Display Pricing Table
In this tutorial, you will learn how to build and display a WooCommerce pricing table on your WordPress website with the help of the JetProductTables plugin.
Before you start, check the tutorial requirements:
- Elementor (Free version), Block editor (Gutenberg), or Bricks
- WooCommerce plugin installed and activated
- JetProductTables plugin installed and activated
With JetProductTables, you can build a pricing table for your website to make subscription purchases easy for your customers. Let’s find out how to build a pricing table with our WP pricing table plugin and several ways to display this table on the front end.
Create a WooCommerce Product
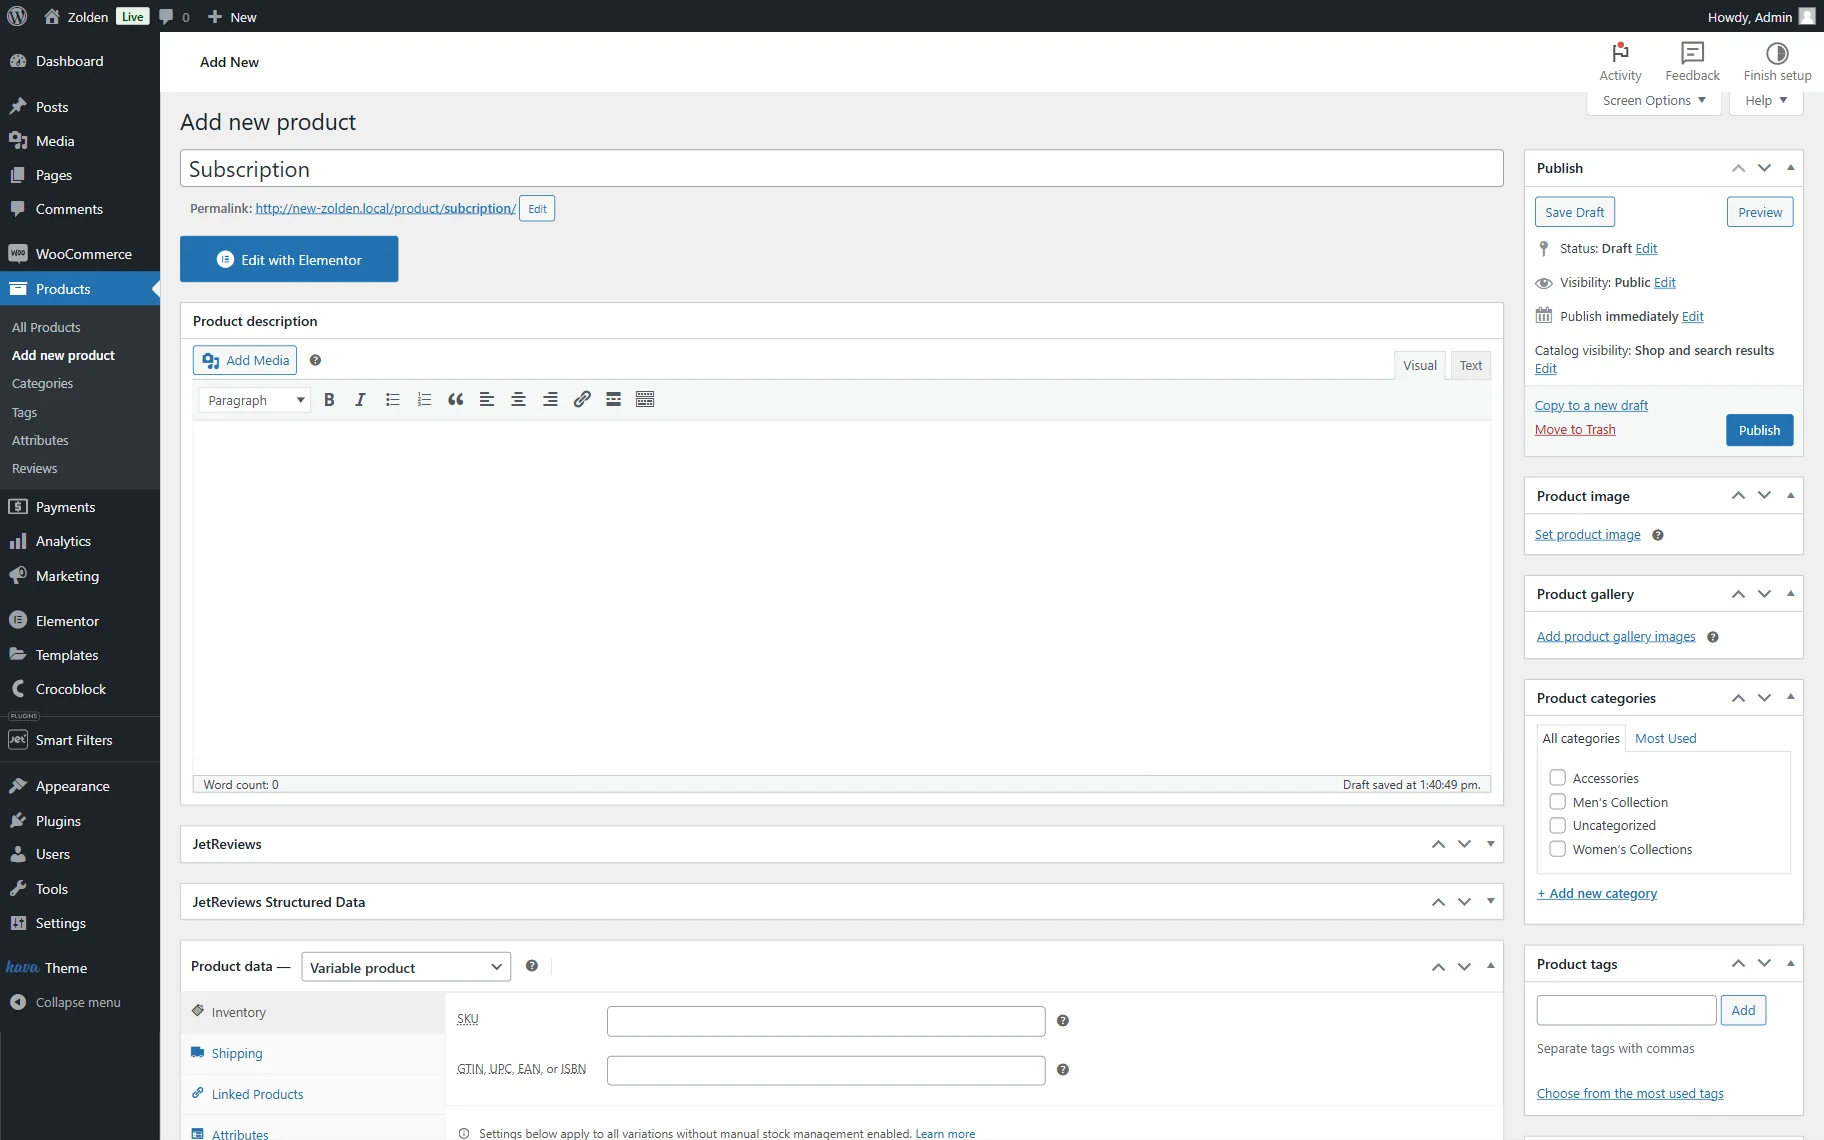
Open the WordPress Dashboard > Products > Add new product directory of the WooCommerce tab.
First, give a name to the product.
As we want this product to include several subscription plans, we make it variable by scrolling down to the Product data field and selecting the “Variable product” option.
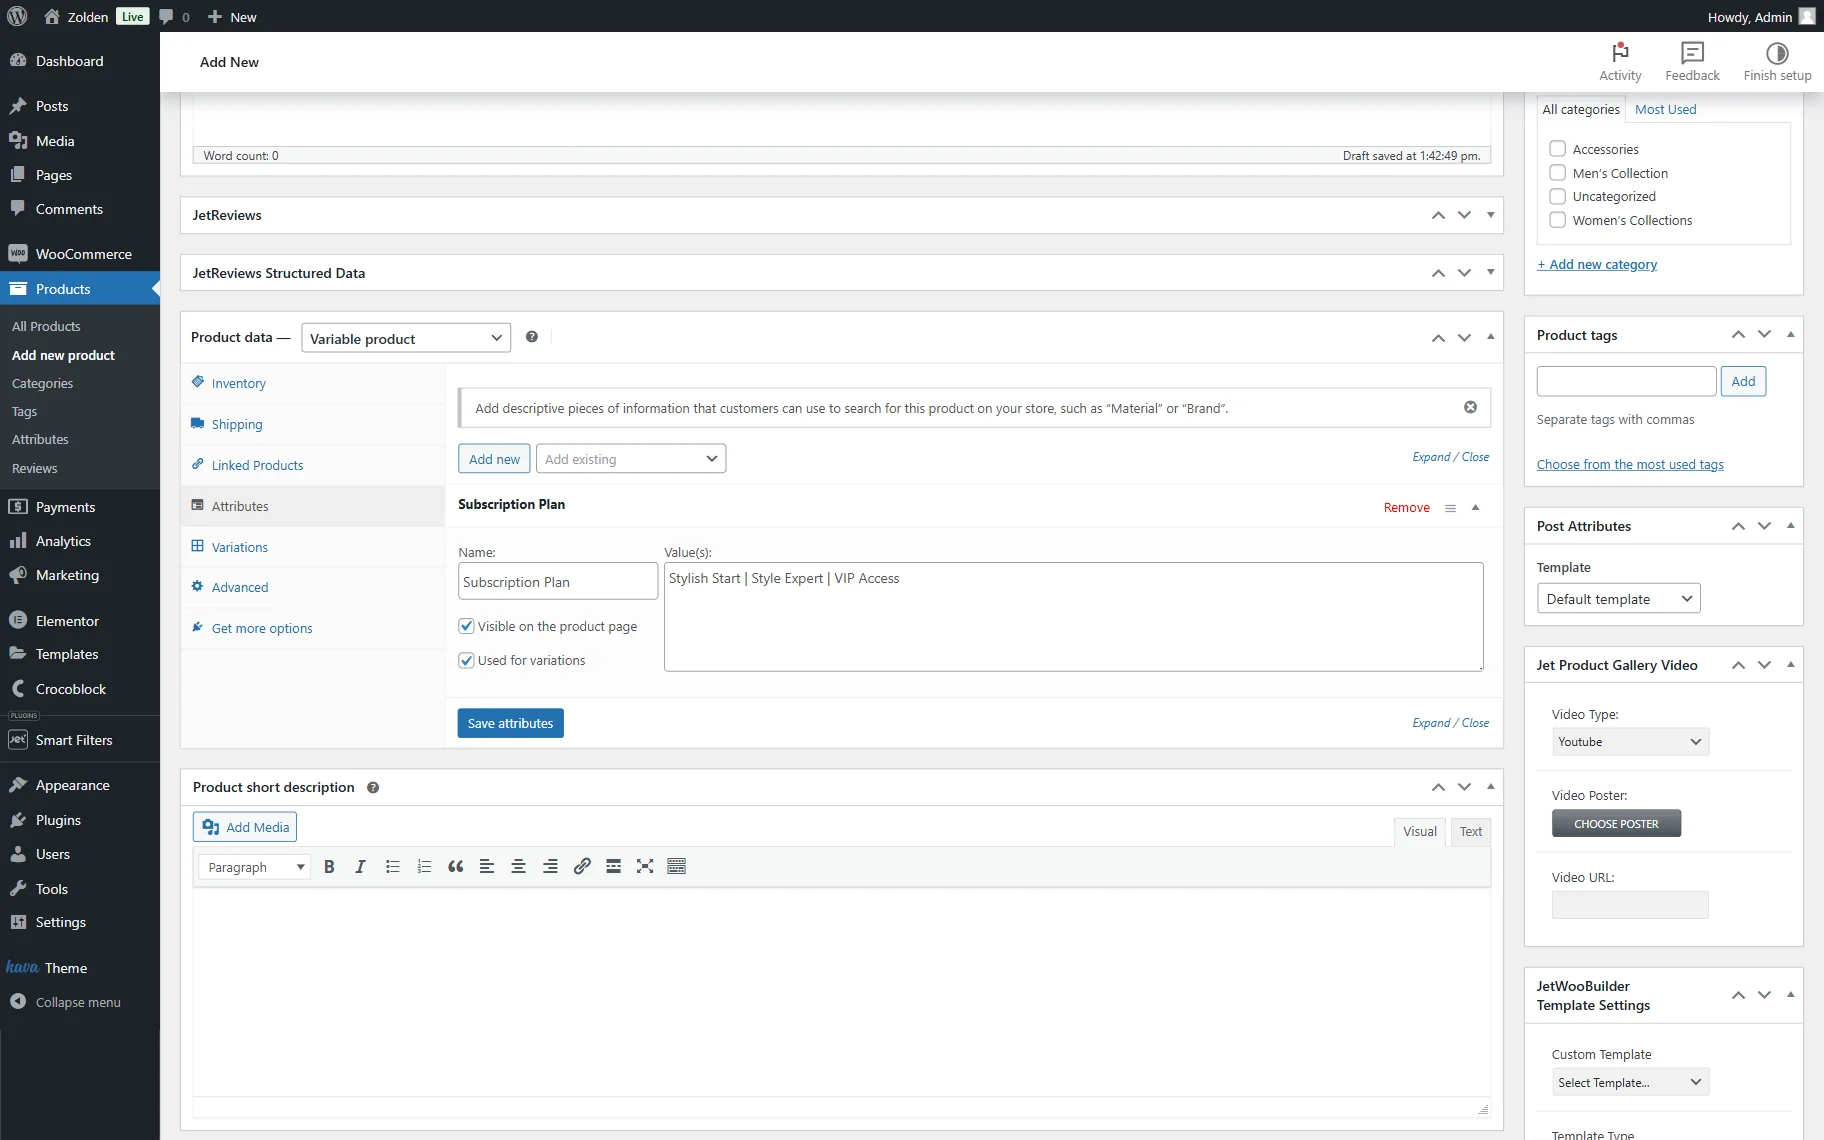
Then, we move to the Attributes tab and press the “Add new” button to add a new attribute to the product.
Complete a Name field (in this case, it is set to “Subscription Plan”) and add Value(s) in a format like this:
Stylish Start | Style Expert | VIP Accessso the “|” character separates the attribute values.
Make sure the “Used for variations” checkbox is activated and press the “Save attributes” button.
Now, move to the Variations tab and press the “Generate variations” button. Confirm the action once again in the browser.
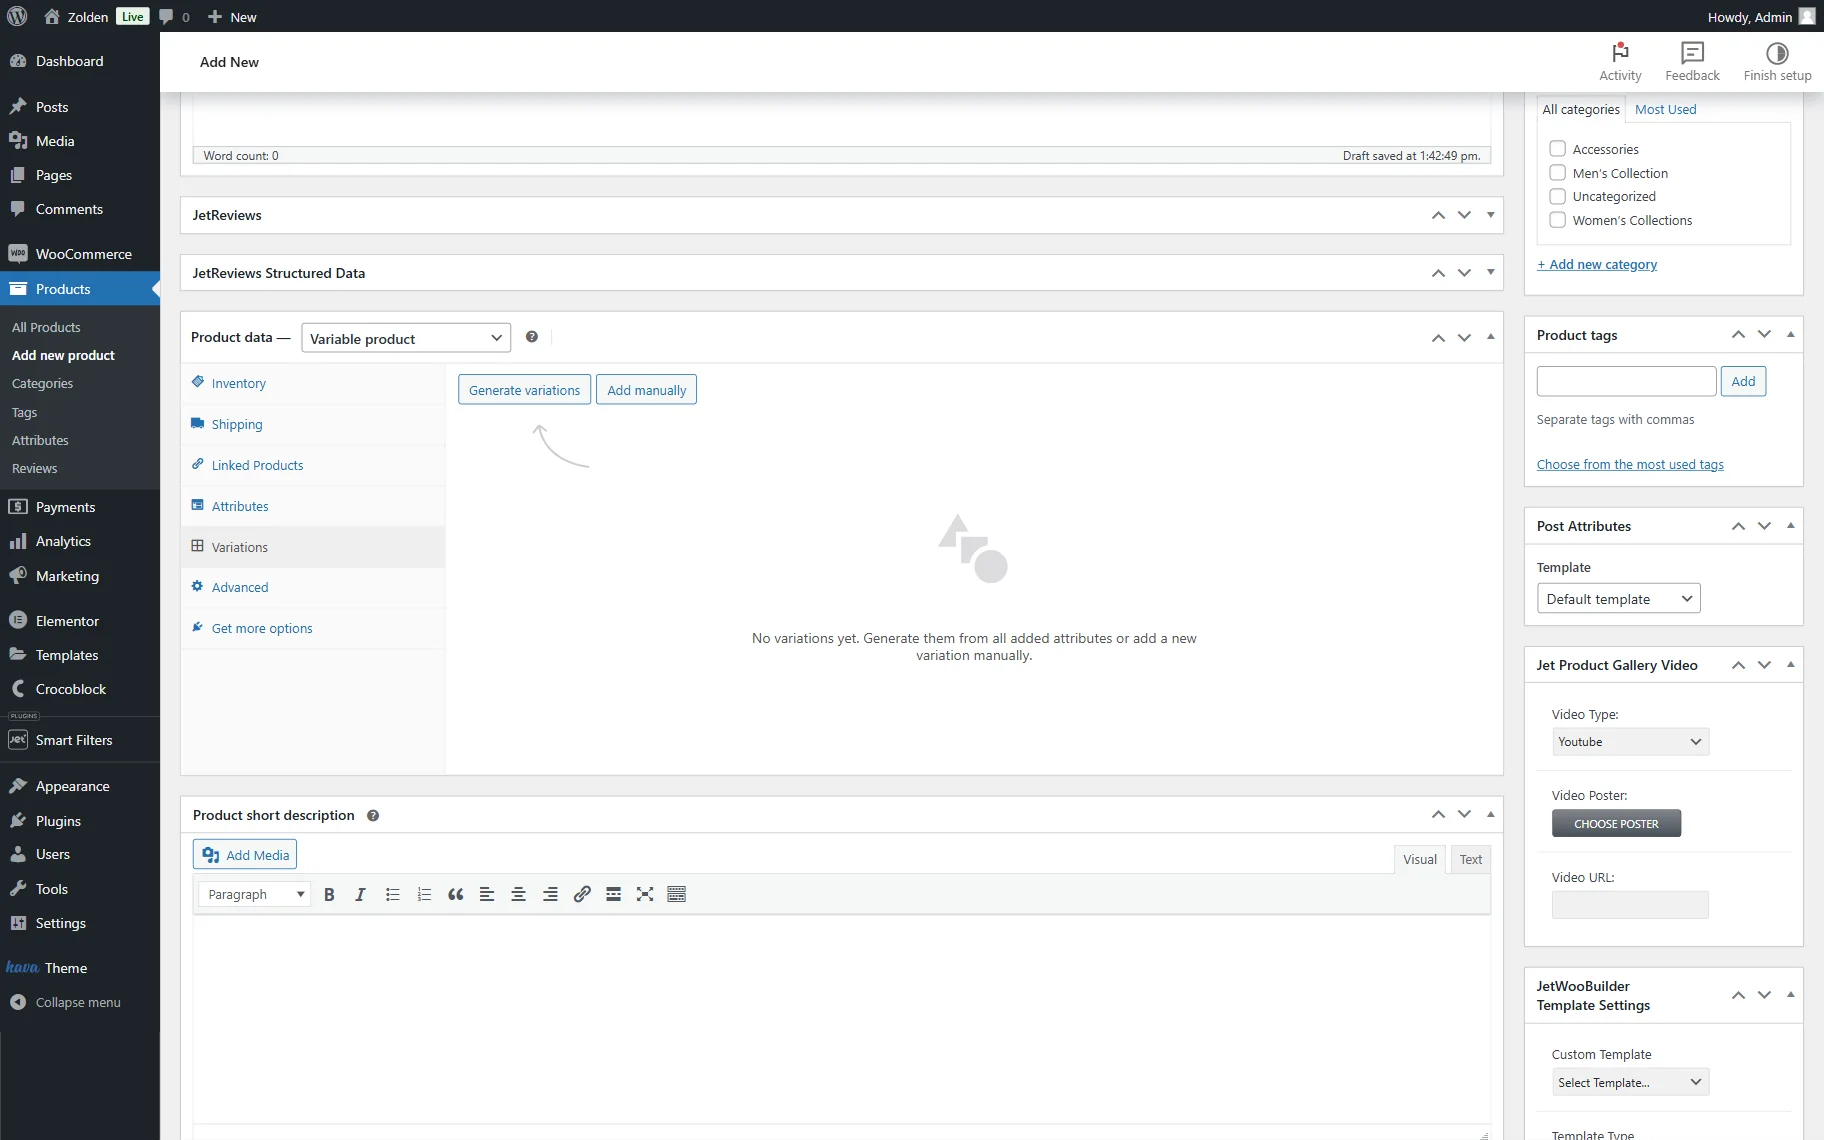
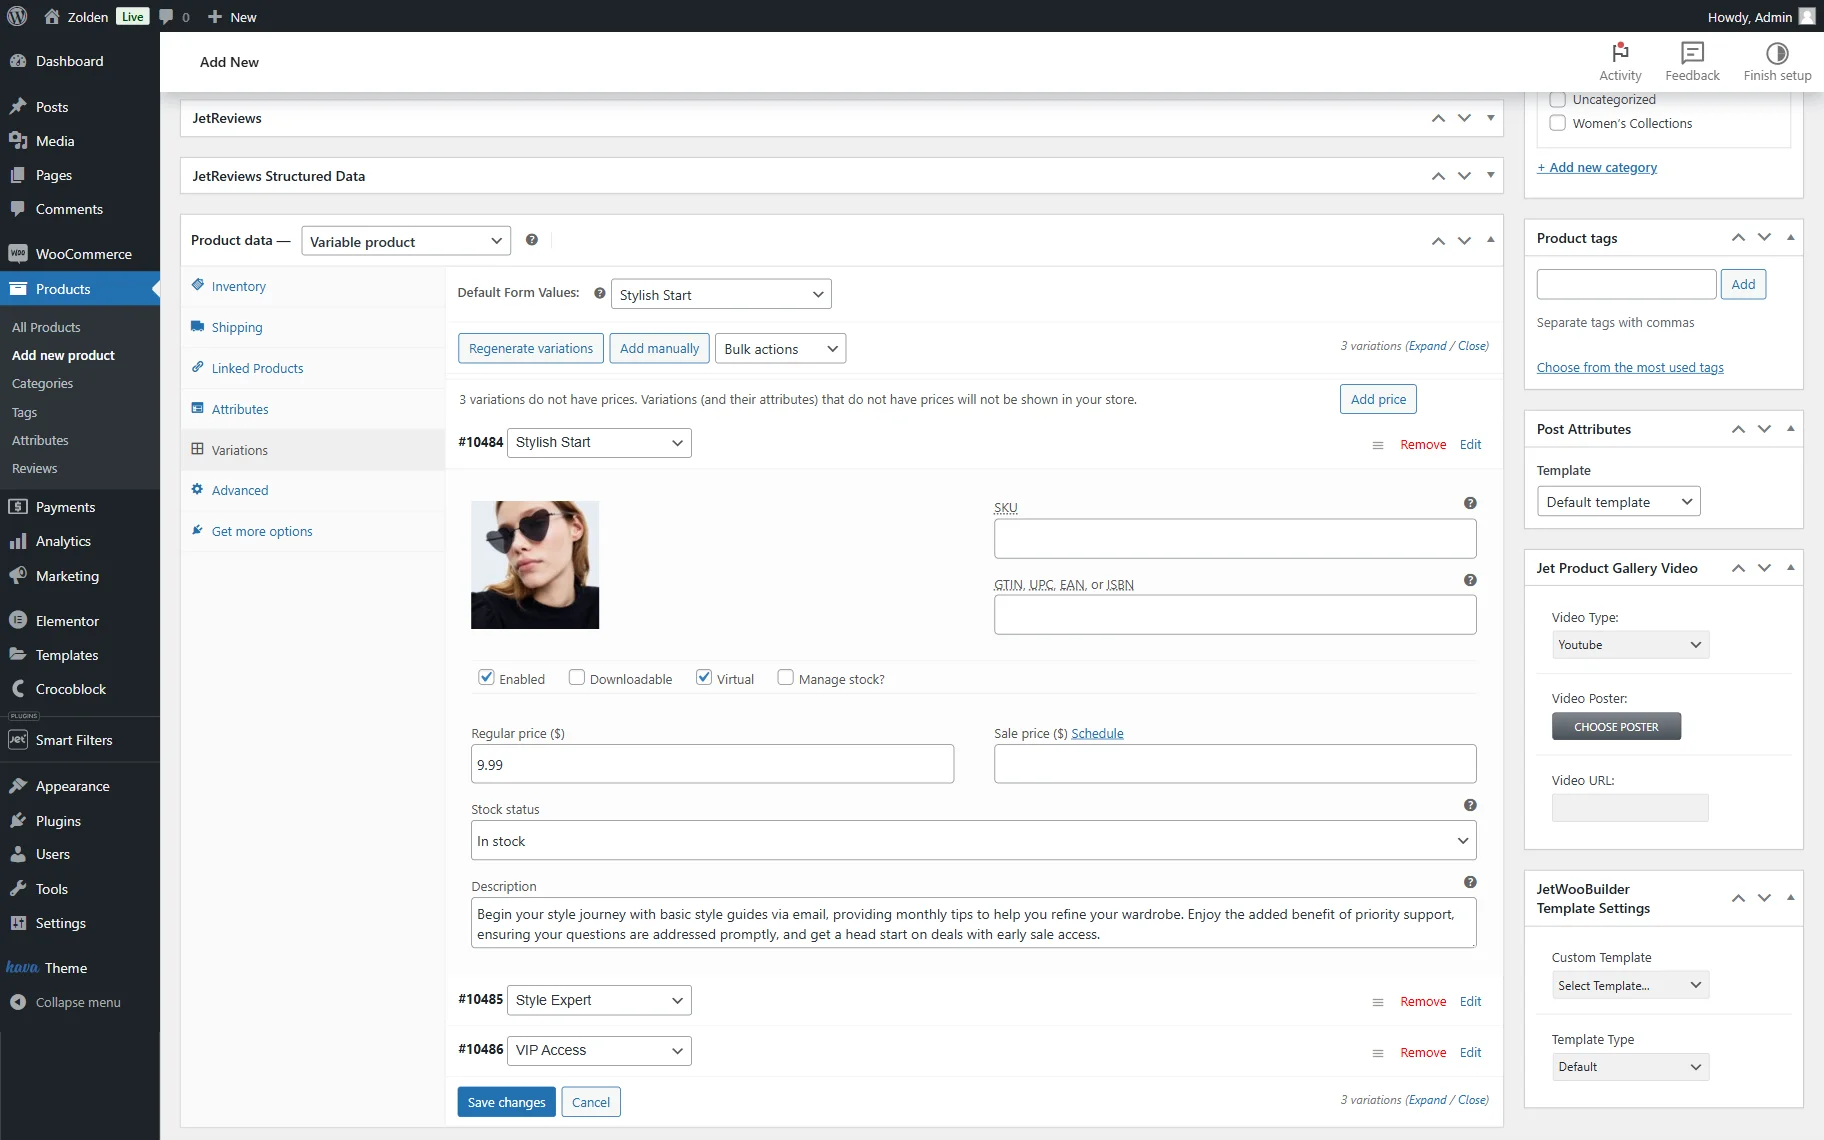
Then, click the “Expand” button to open the options settings all at once or the “Edit” button next to each option to edit them one by one.
Once the settings are opened, complete the needed fields. For instance, we set the product image, its Regular price, and Description.
Once all variations are set up and all settings are adjusted, you can click the “Publish” button to save the product.
Adjust Table Settings
Navigate to WordPress Dashboard > WooCommerce > Settings and open the Product Table tab to start building a product table.
Also, check the JetProductTables Dashboard Settings Overview to find out all about the available settings.
Here, in the opened Columns tab, set up the columns you want to see in your table.
For instance, we pick the “Full Description” option in the “Select a column…” dropdown list and press the “Add Column” button next to it.
Next, we delete the first “Product Name” column as the subscription plan name will be later displayed in the description field.
Additionally, we delete the LABEL of each column so the labels of the columns will be hidden from the table.

Then, we move to the Settings tab and set the DIRECTION to “Vertical” in the General tab. Although, you can leave it set to “Horizontal” by default to make the table horizontal.
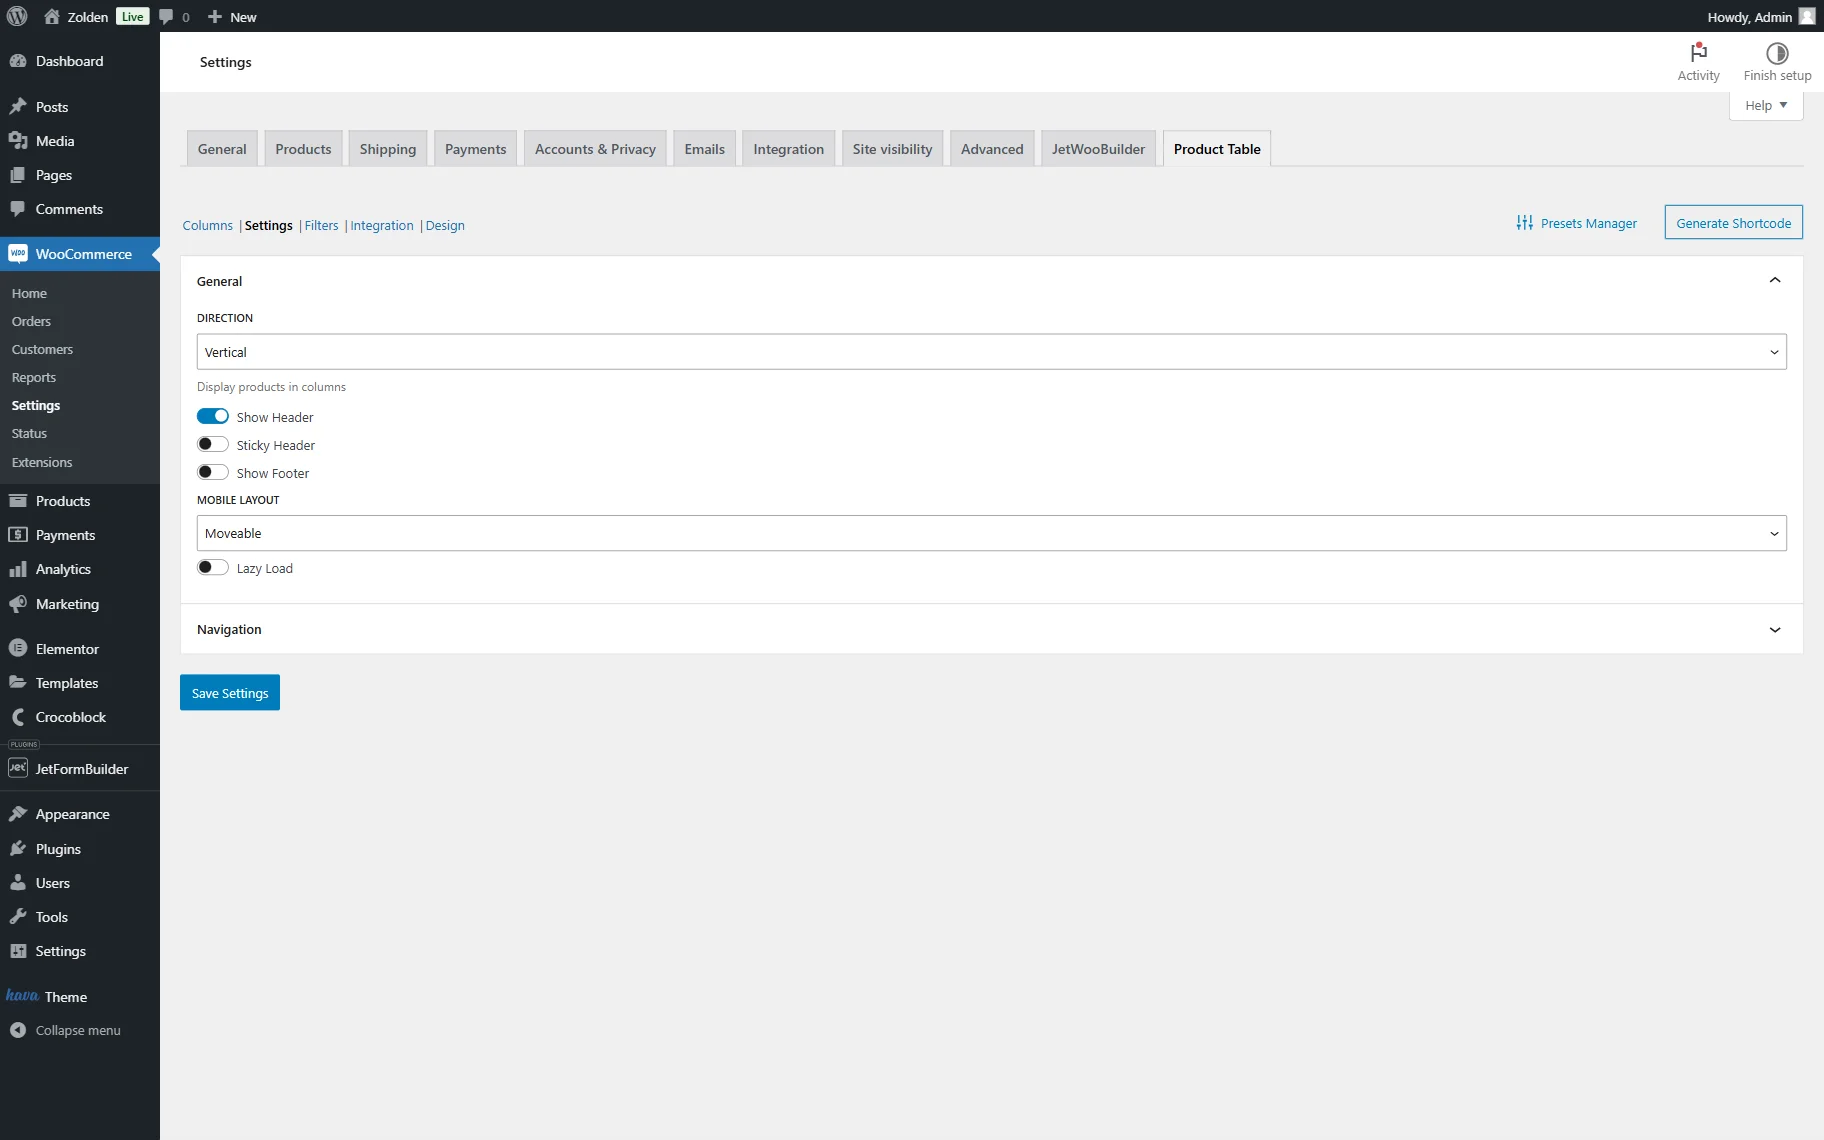
If desired, you can also work on the Filters and Integration tab; however, we leave default settings in this guide.
Next, move to the Design tab and adjust the appearance of the table.
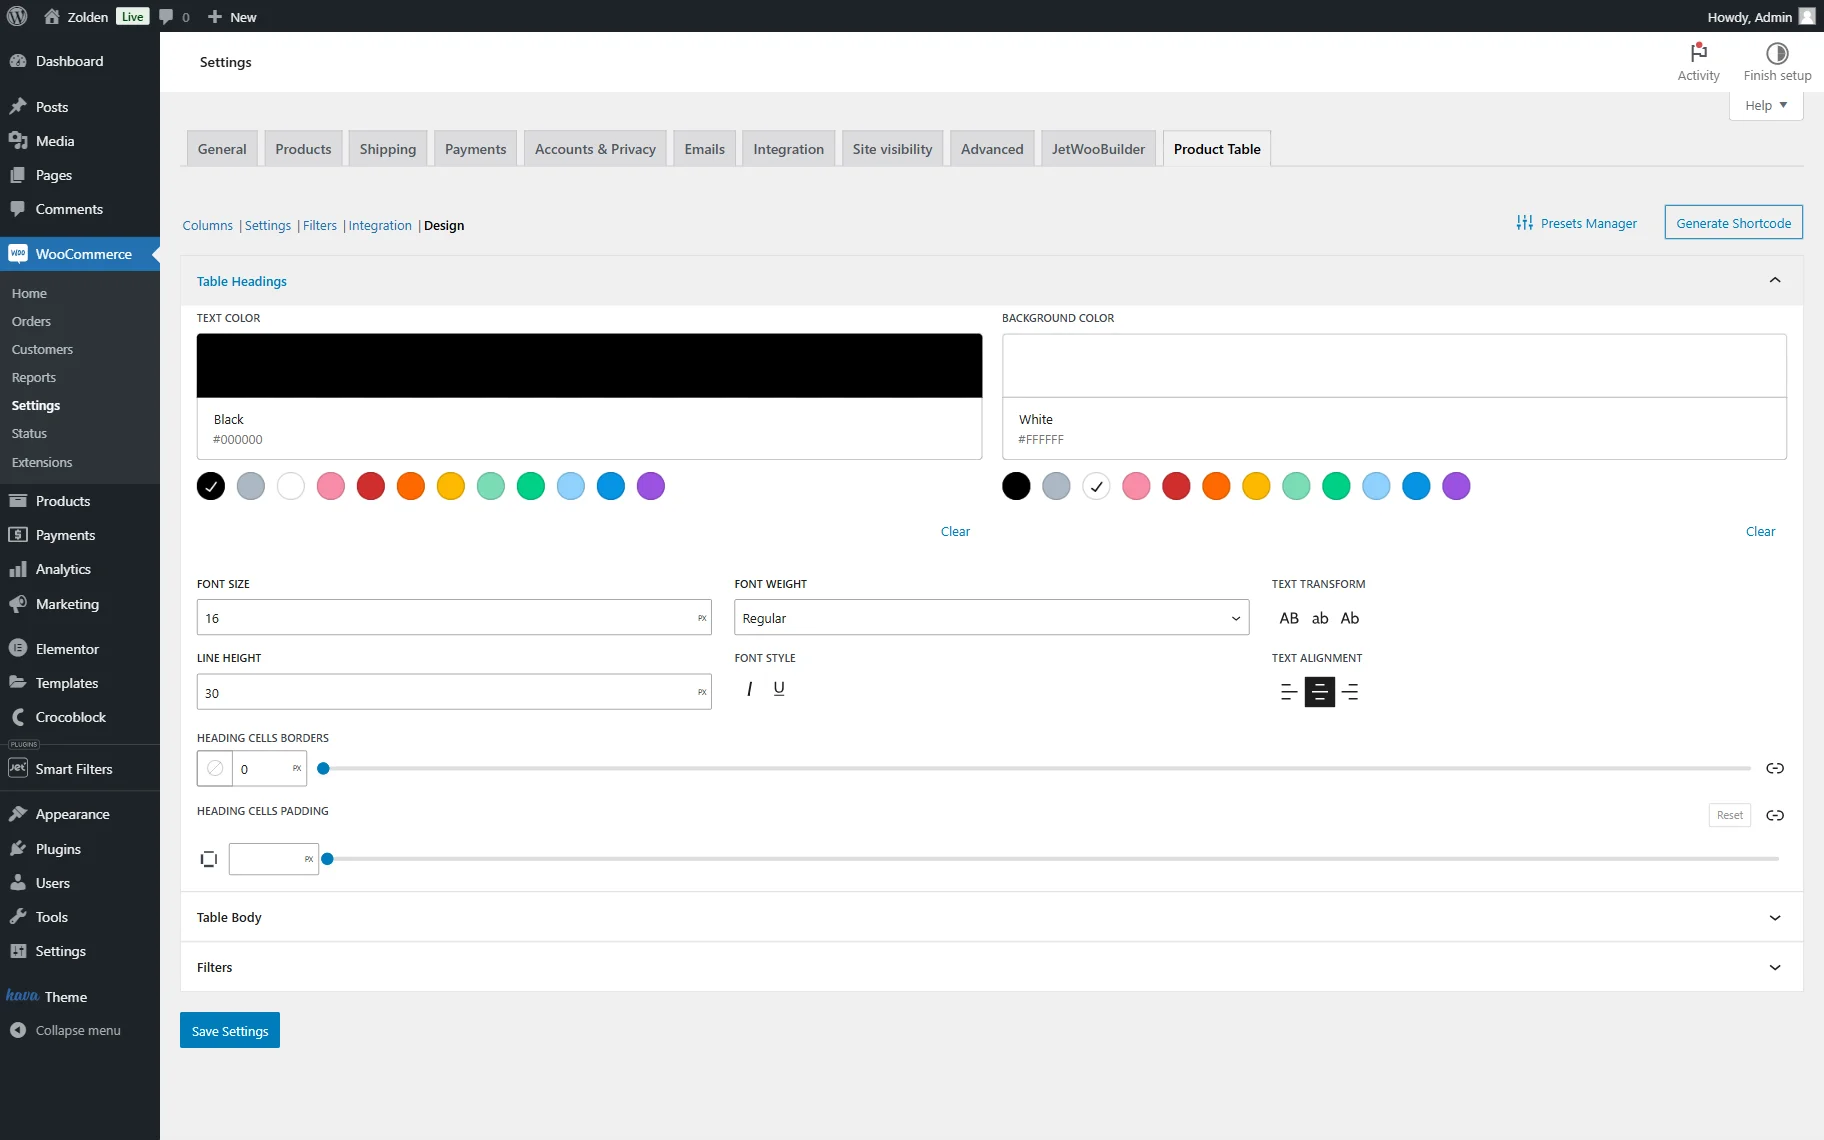
We leave the Table Headings tab as it is, as we deleted LABELS for the columns, and open the Table Body tab.
Here, we set the BACKGROUND COLOR to white and the ALTERNATE BACKGROUND COLOR to light blue.
We also change the BODY CELLS BORDERS to “2” and BODY CELLS PADDING to “75.”

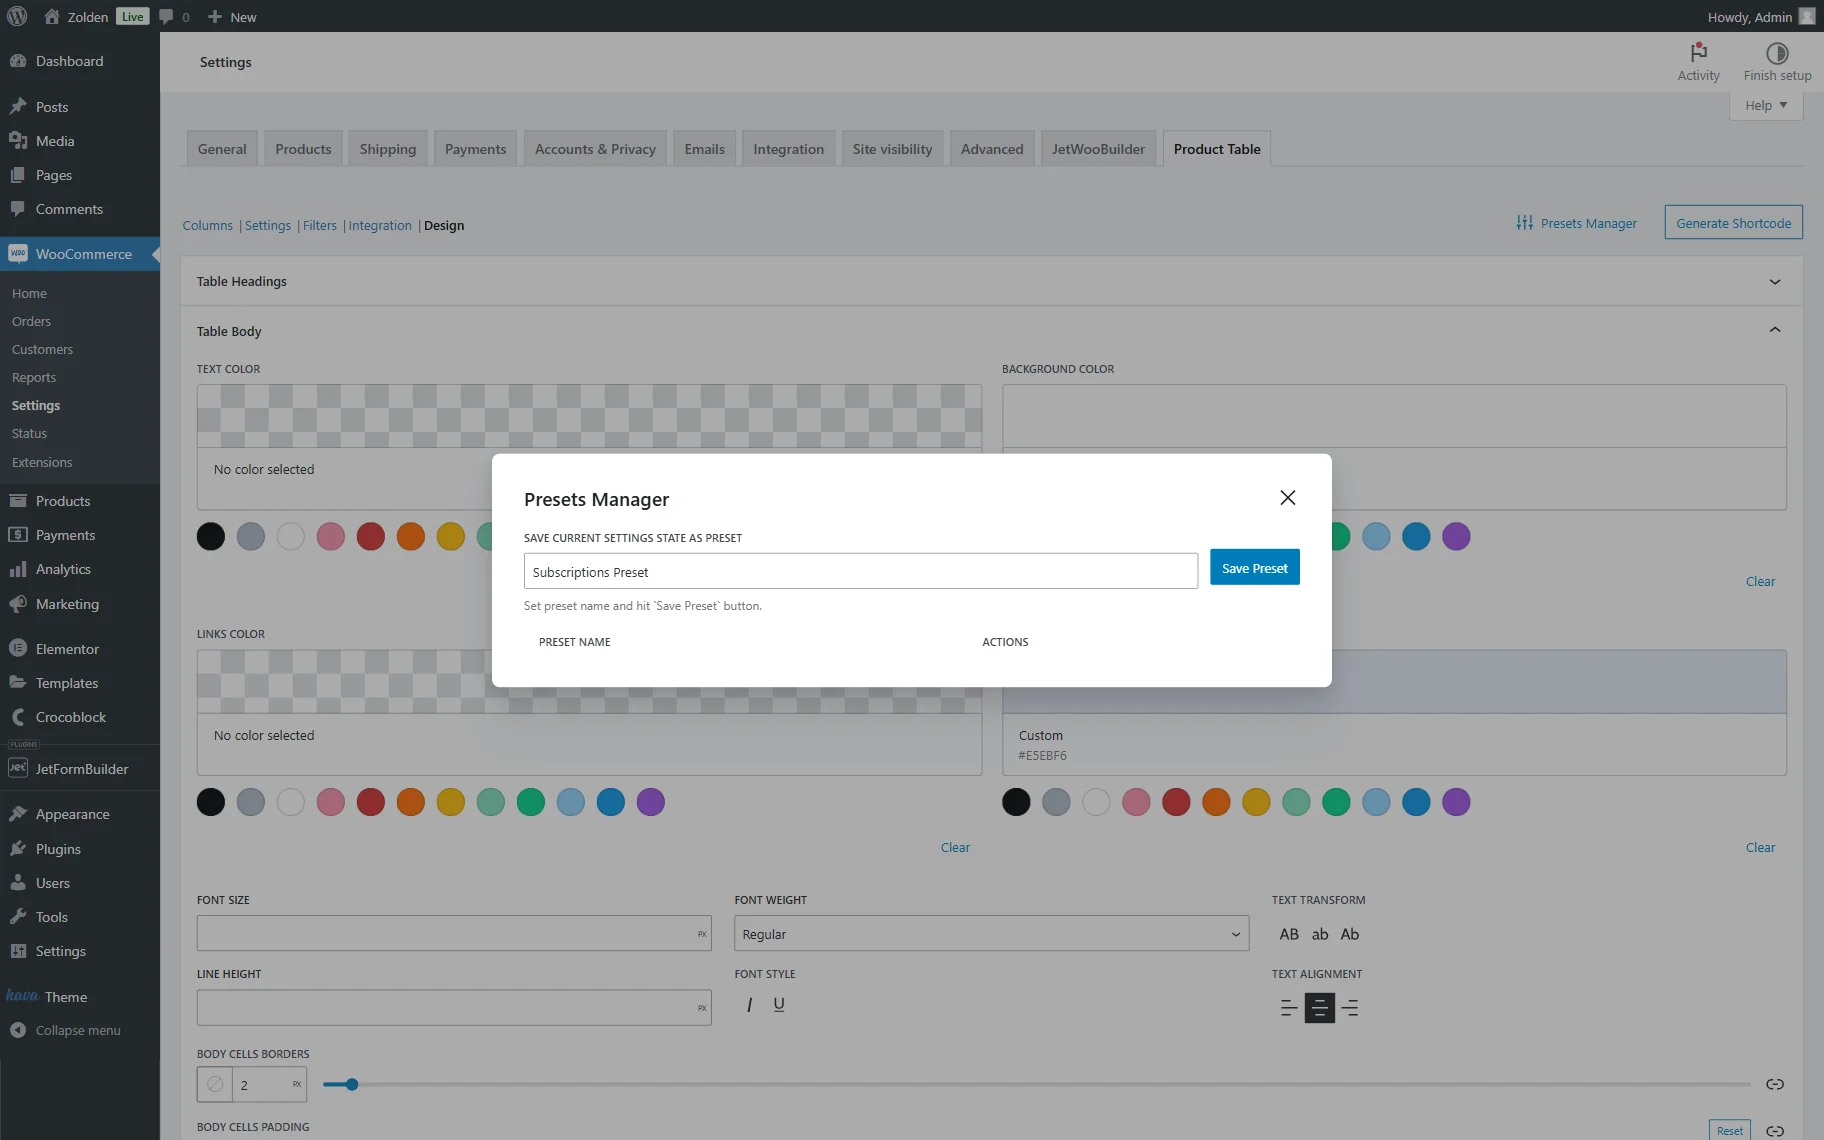
When the settings are adjusted, scroll up the page and press the “Presets Manager” button to save the current settings as preset.
Here, complete the SAVE CURRENT SETTINGS STATE AS PRESET field with the name of the preset. For instance, “Subscriptions Preset.”
Hit the “Save Preset” button.
Now, click the “Save Settings” button.
Add the Table to a Gutenberg Page/Template with a Product Table Block
Decide where to display the product table you have built: it can be either a page or a template. In this guide, we will add a table to the common Gutenberg page.
So, we proceed to WordPress Dashboard > Pages > Add New Page to build a new page.
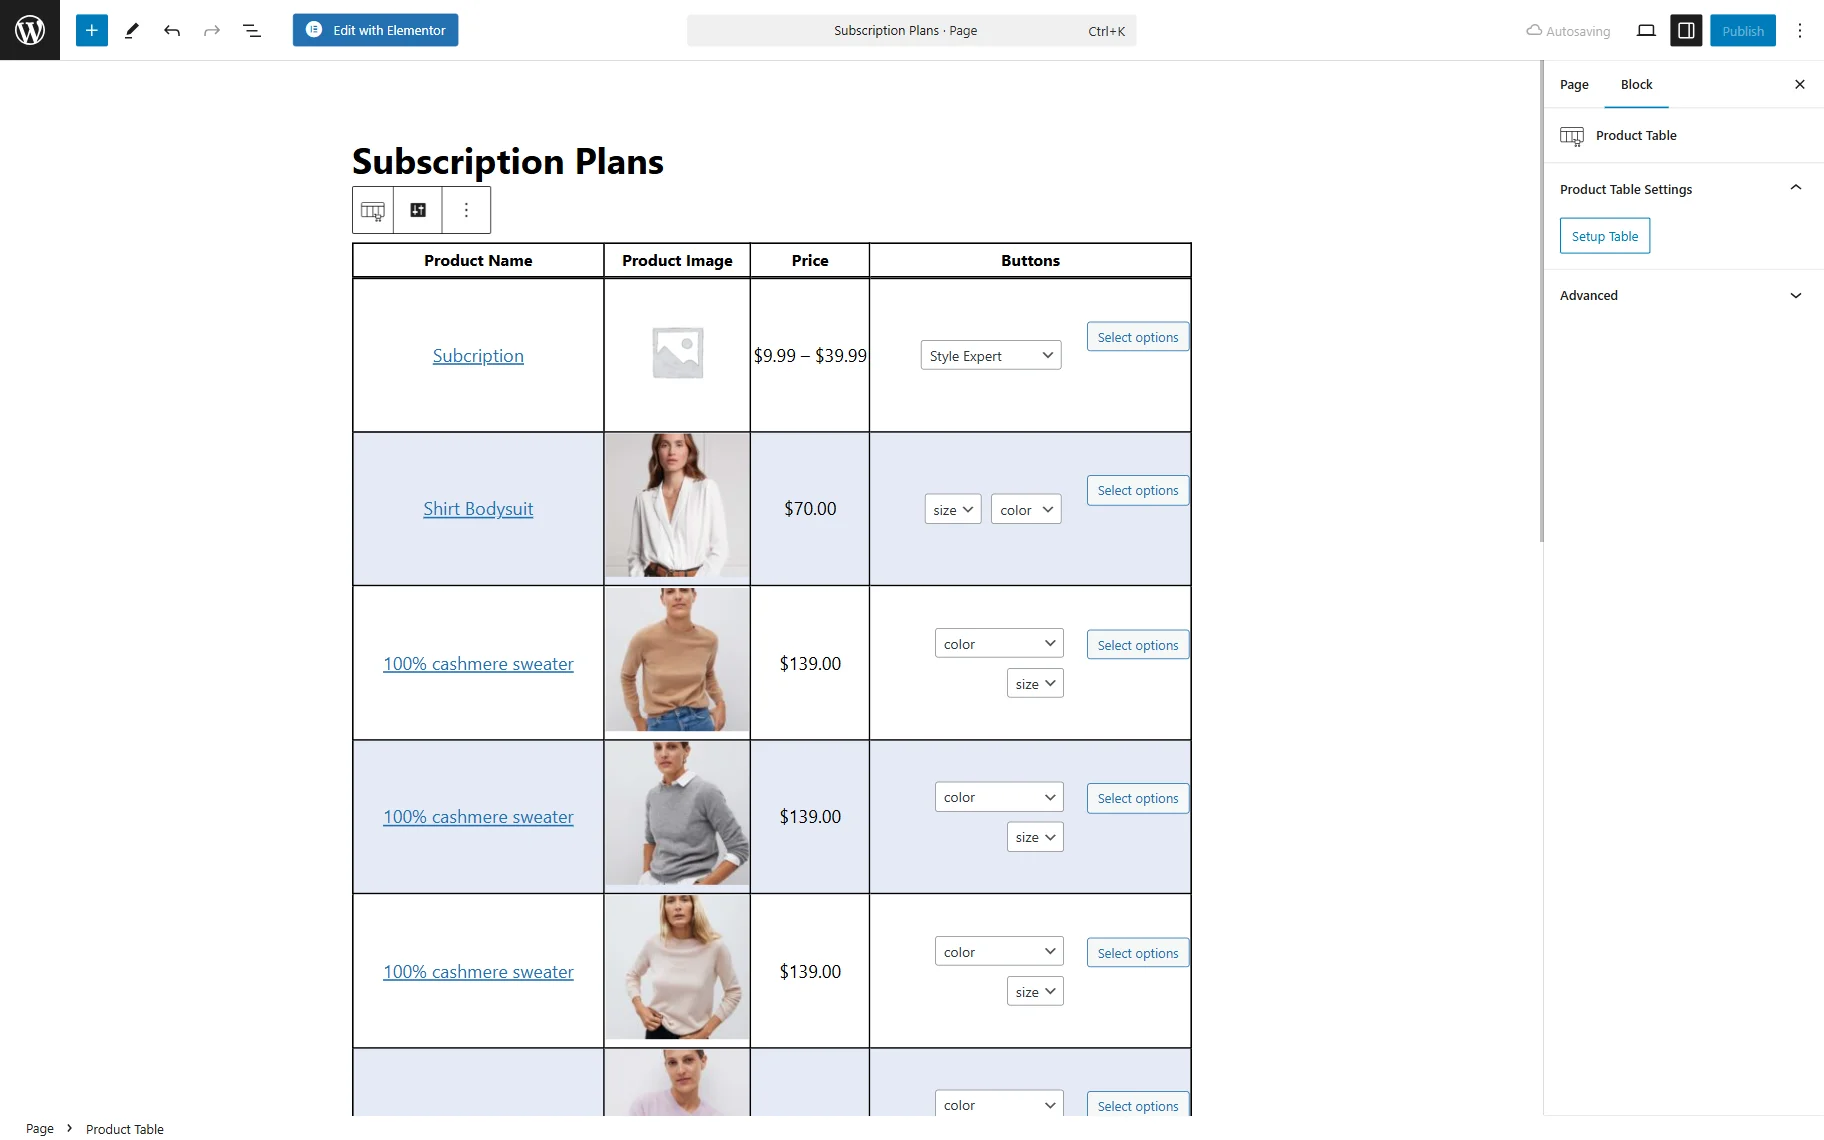
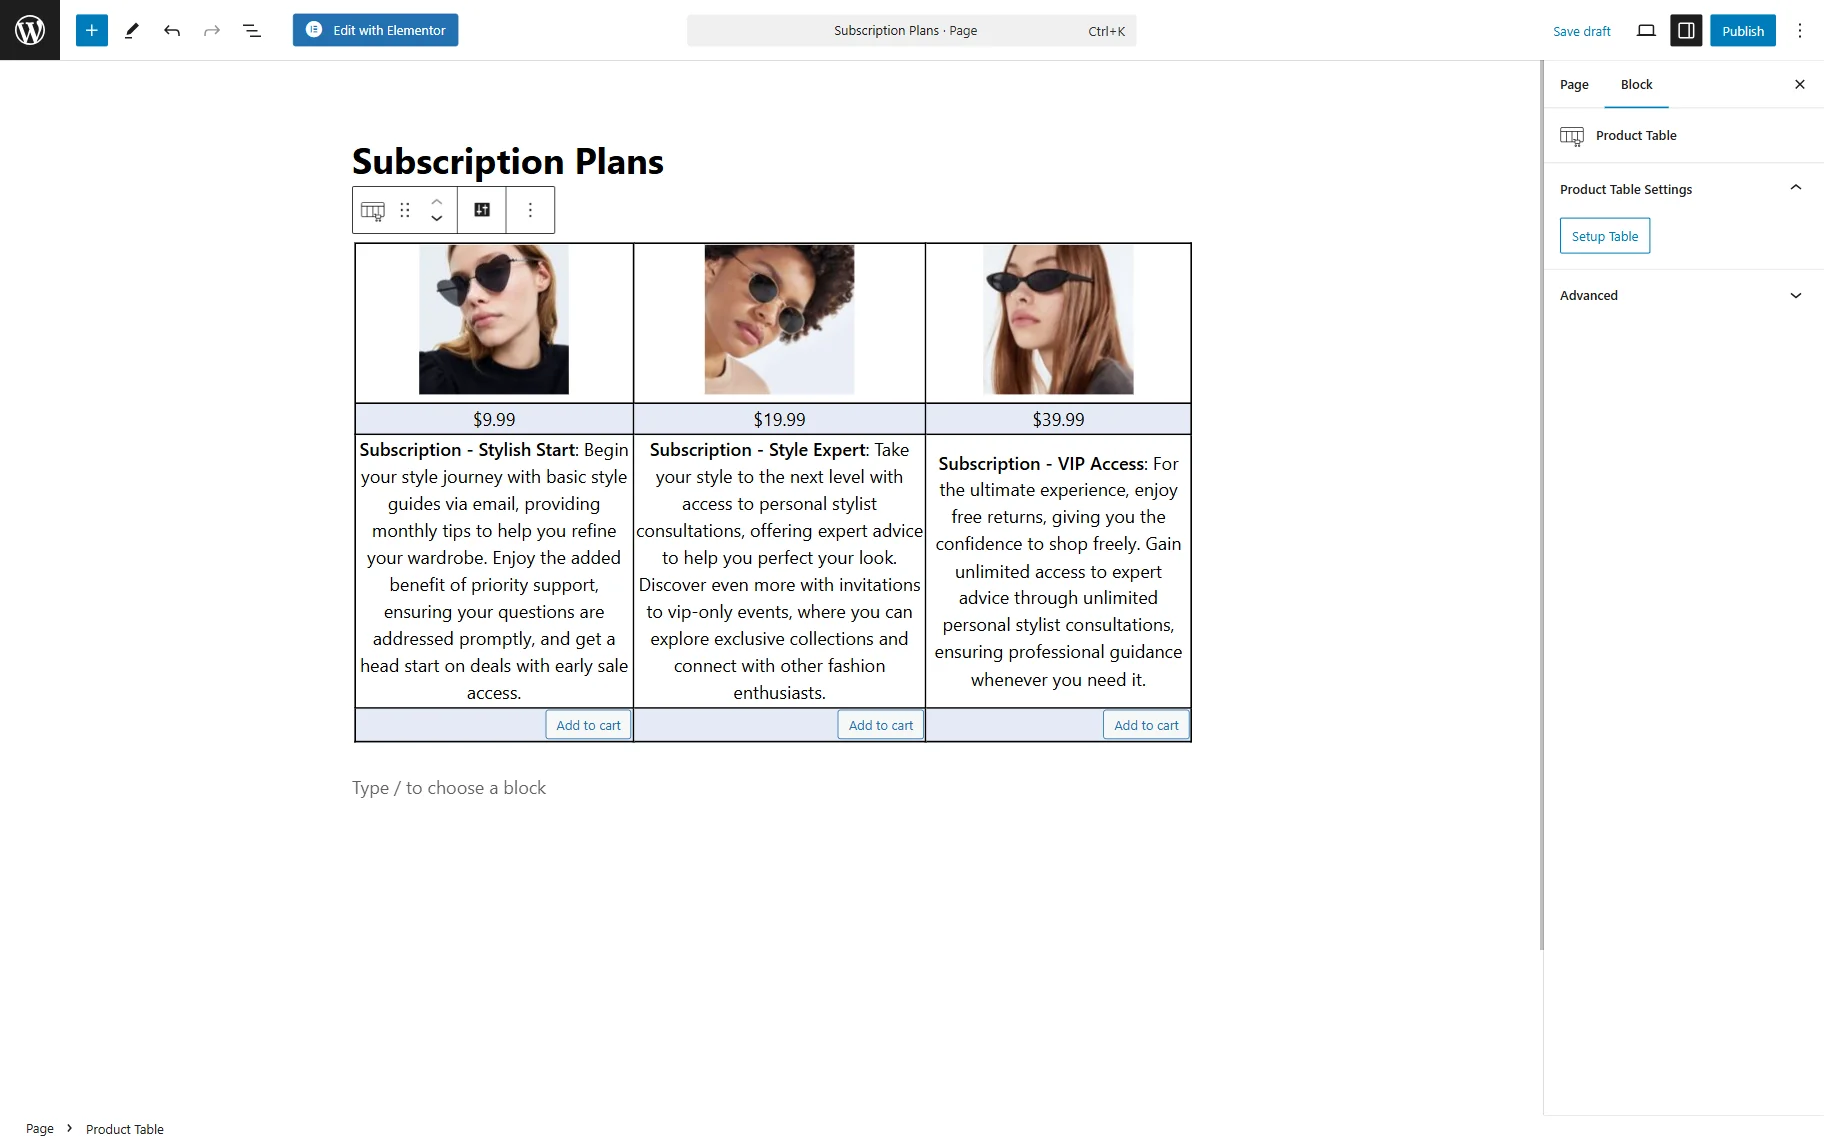
We complete the name of the page (“Subscription Plans”) and add a Product Table block.
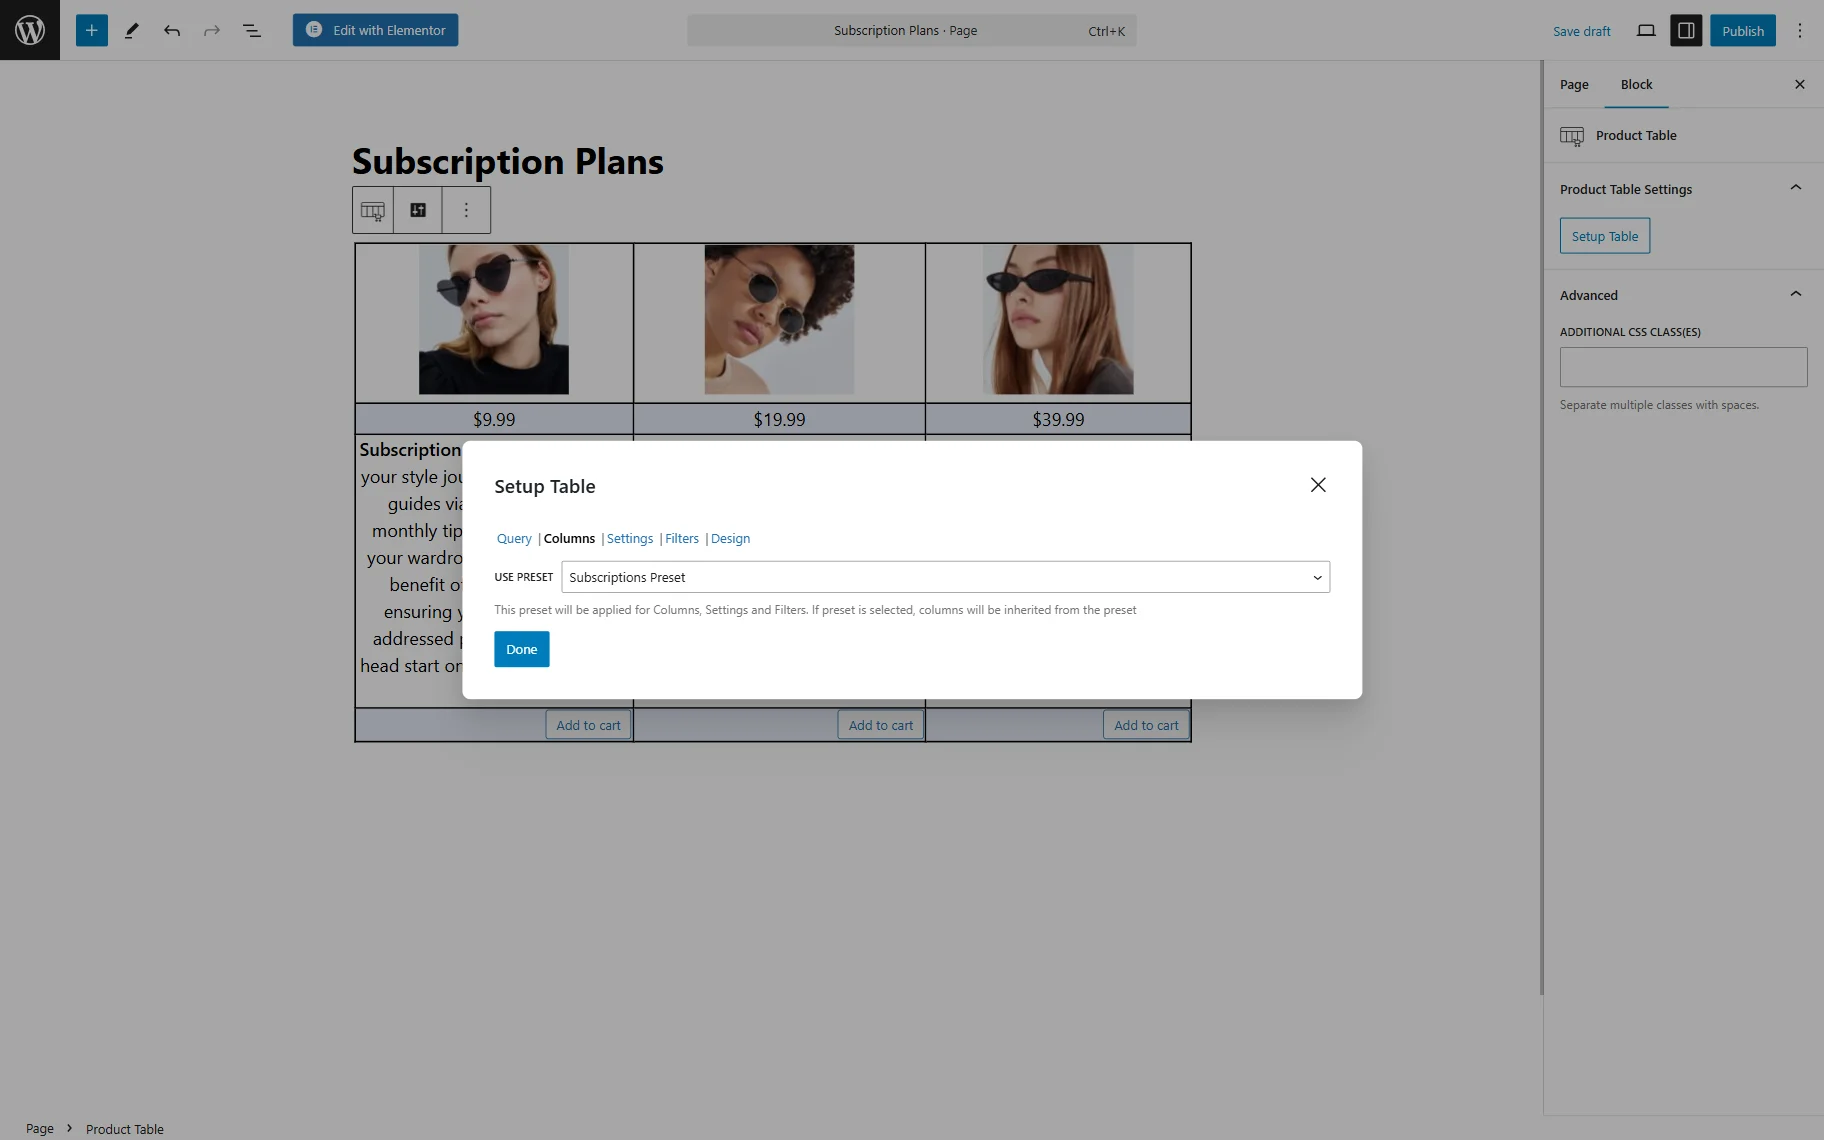
Now, the table displays all the products, but we need only the subscriptions. So, in the Product Table Settings tab, we press the “Setup Table” button to adjust the table so that it shows only the needed product variations and select the set preset.
In the opened Query tab, we pick the “Product Variations” QUERY TYPE and select the “Specific product ID(s)” option in the GET VARIATIONS FROM field.
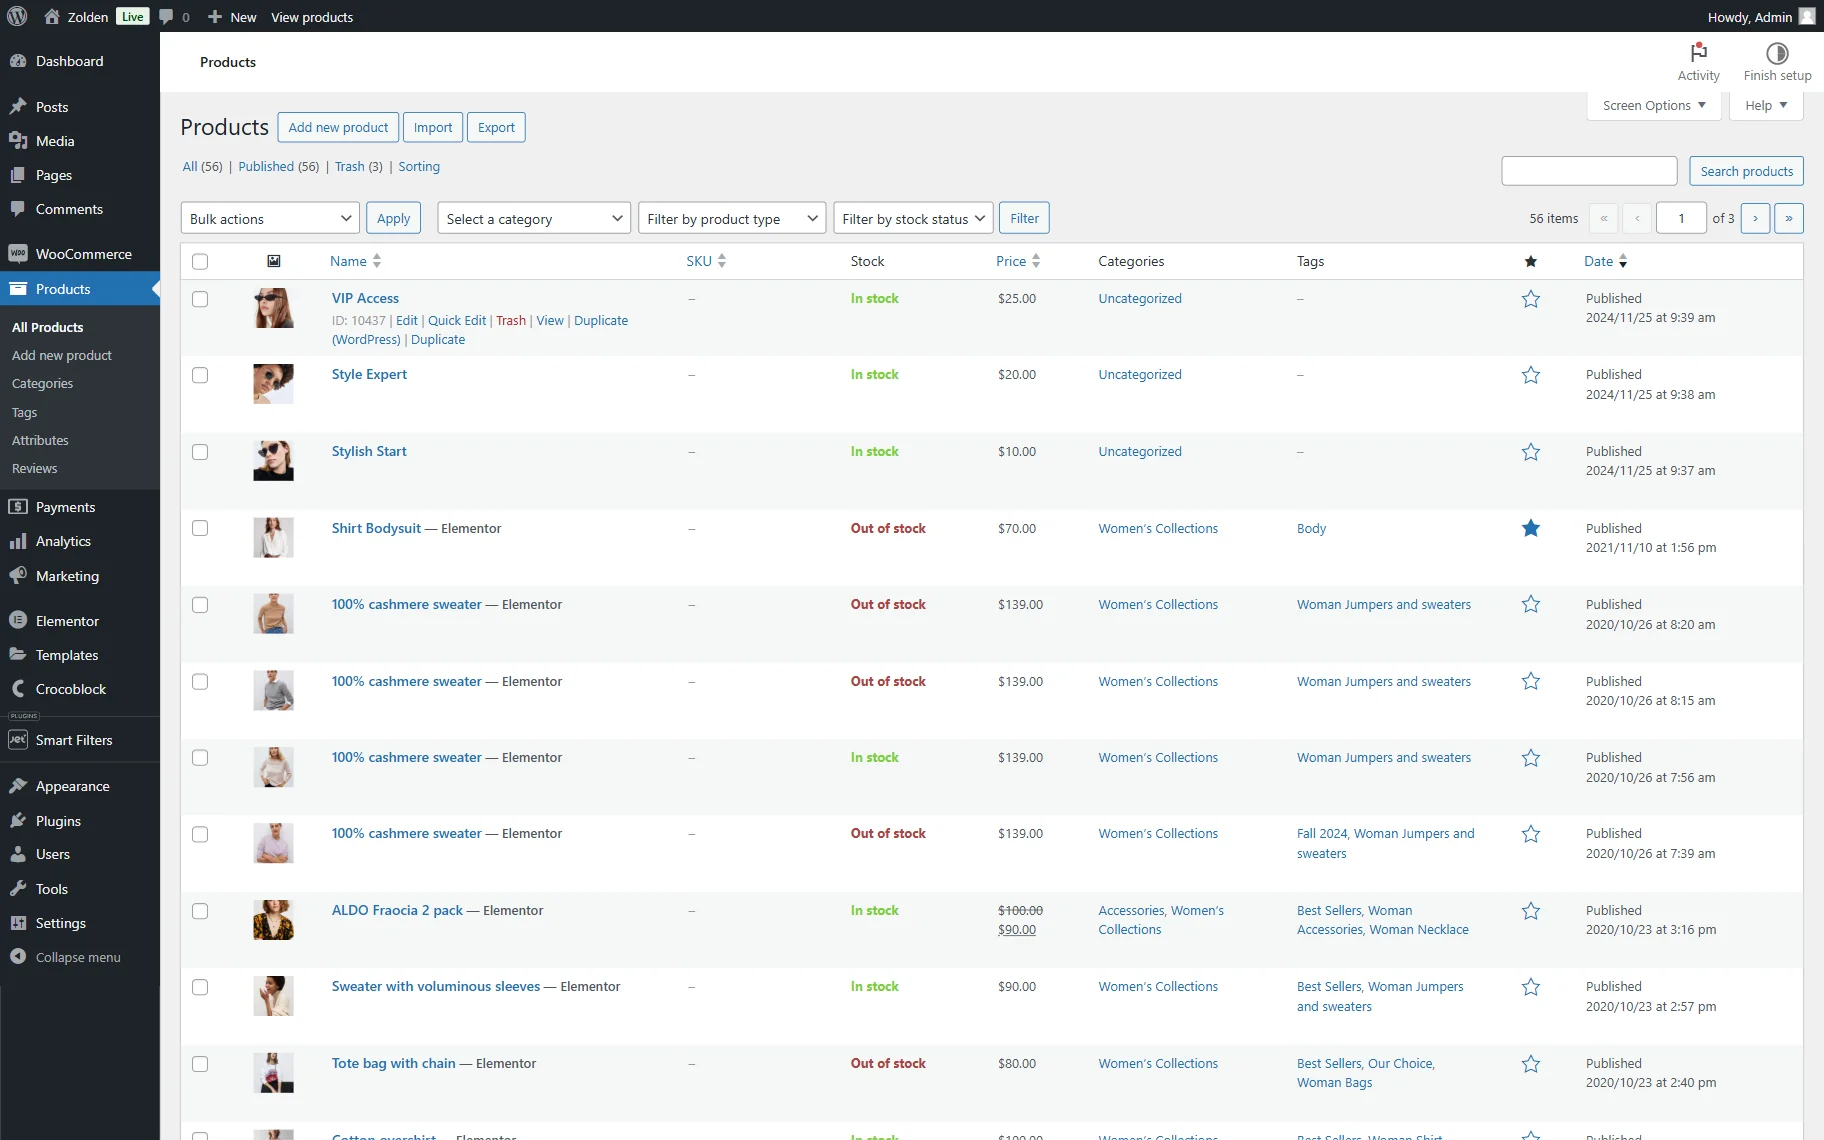
Next, we paste the copied PRODUCT ID(S) of the product we previously created. It can be found in the WordPress Dashboard > Products directory of the WooCommerce section by hovering over the needed product. In this case, it’s “10472.”

Next, move to the Columns tab and select the saved preset in the USE PRESET field.
Press the “Done” button to save the changes.
Customize the page additionally if needed and publish the page.
Add the Table to an Elementor Page with a Product Table Widget
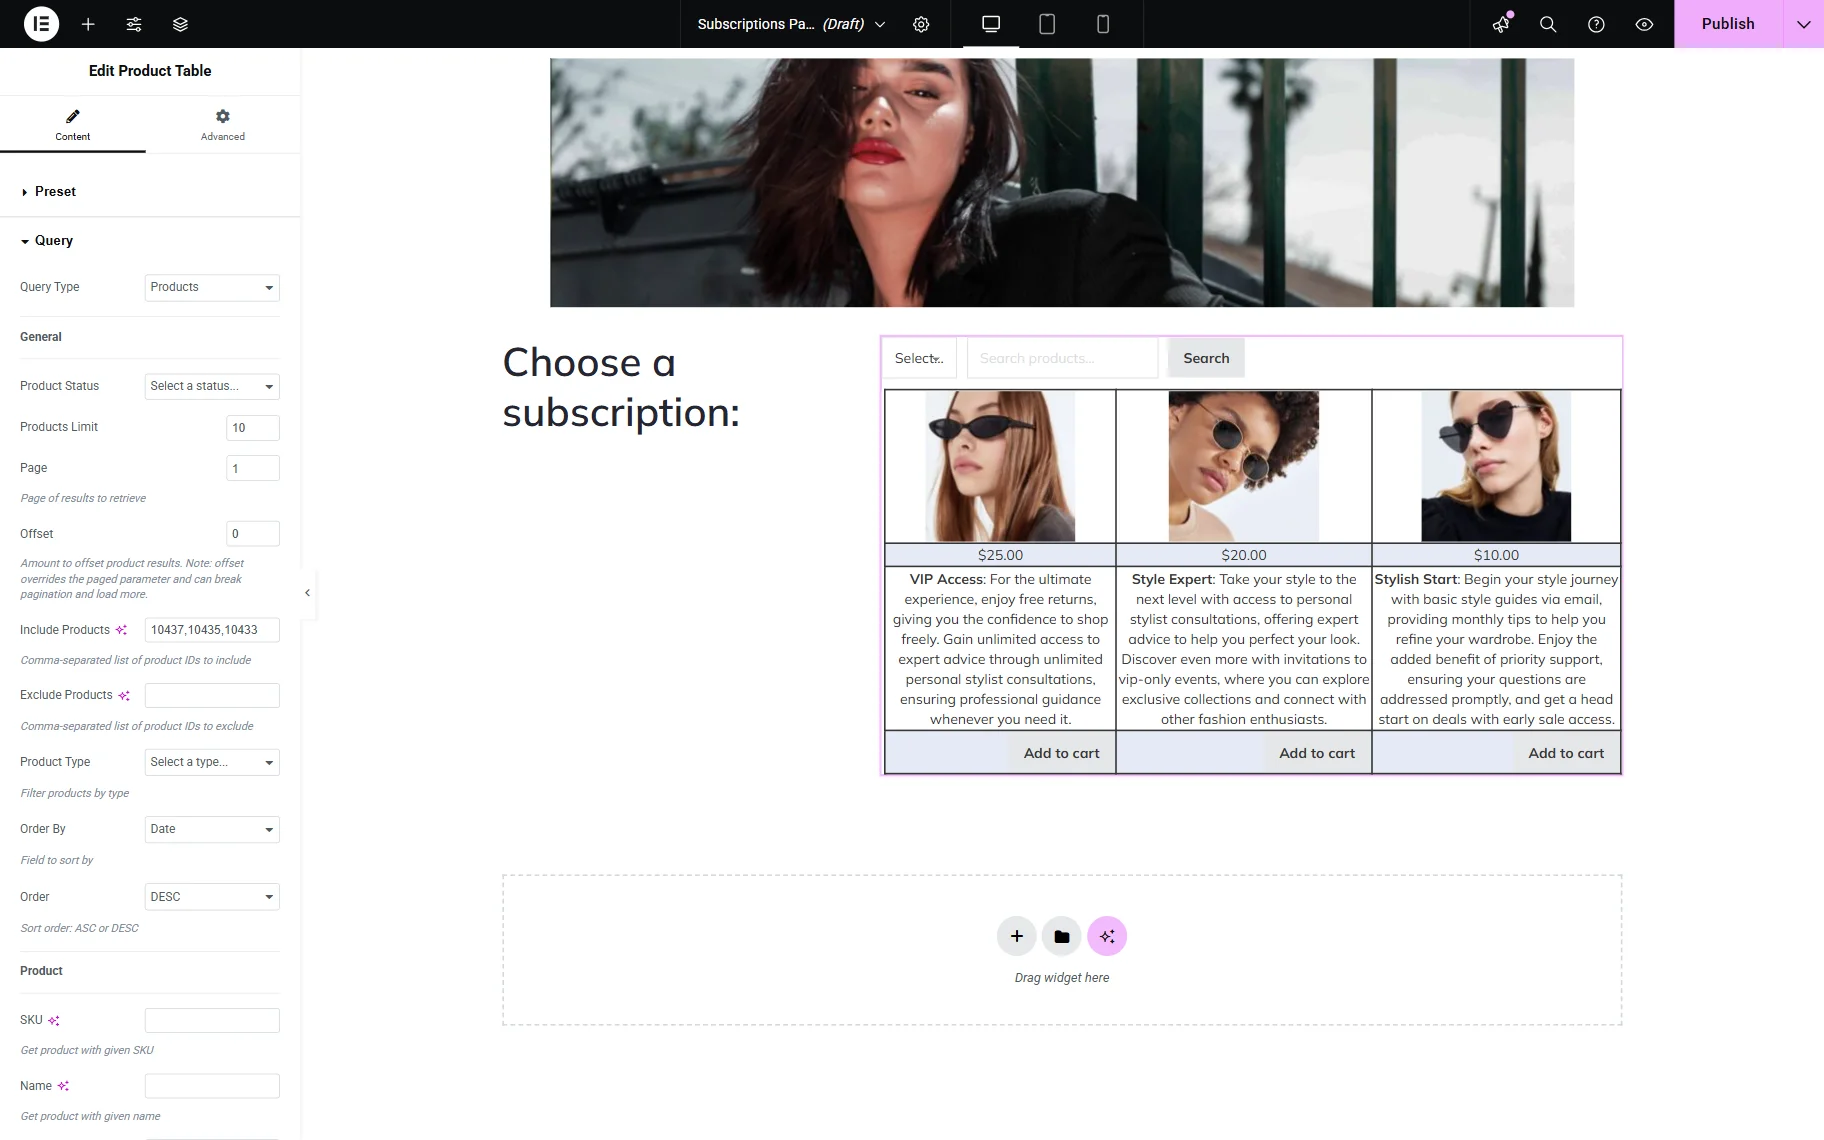
You can add a Product Table widget to Elementor as well. For this use case, we add subscription plans as separate products.
In the first Preset tab, you can select the preset if desired or leave the field empty. For example, we don’t use the preset this time.
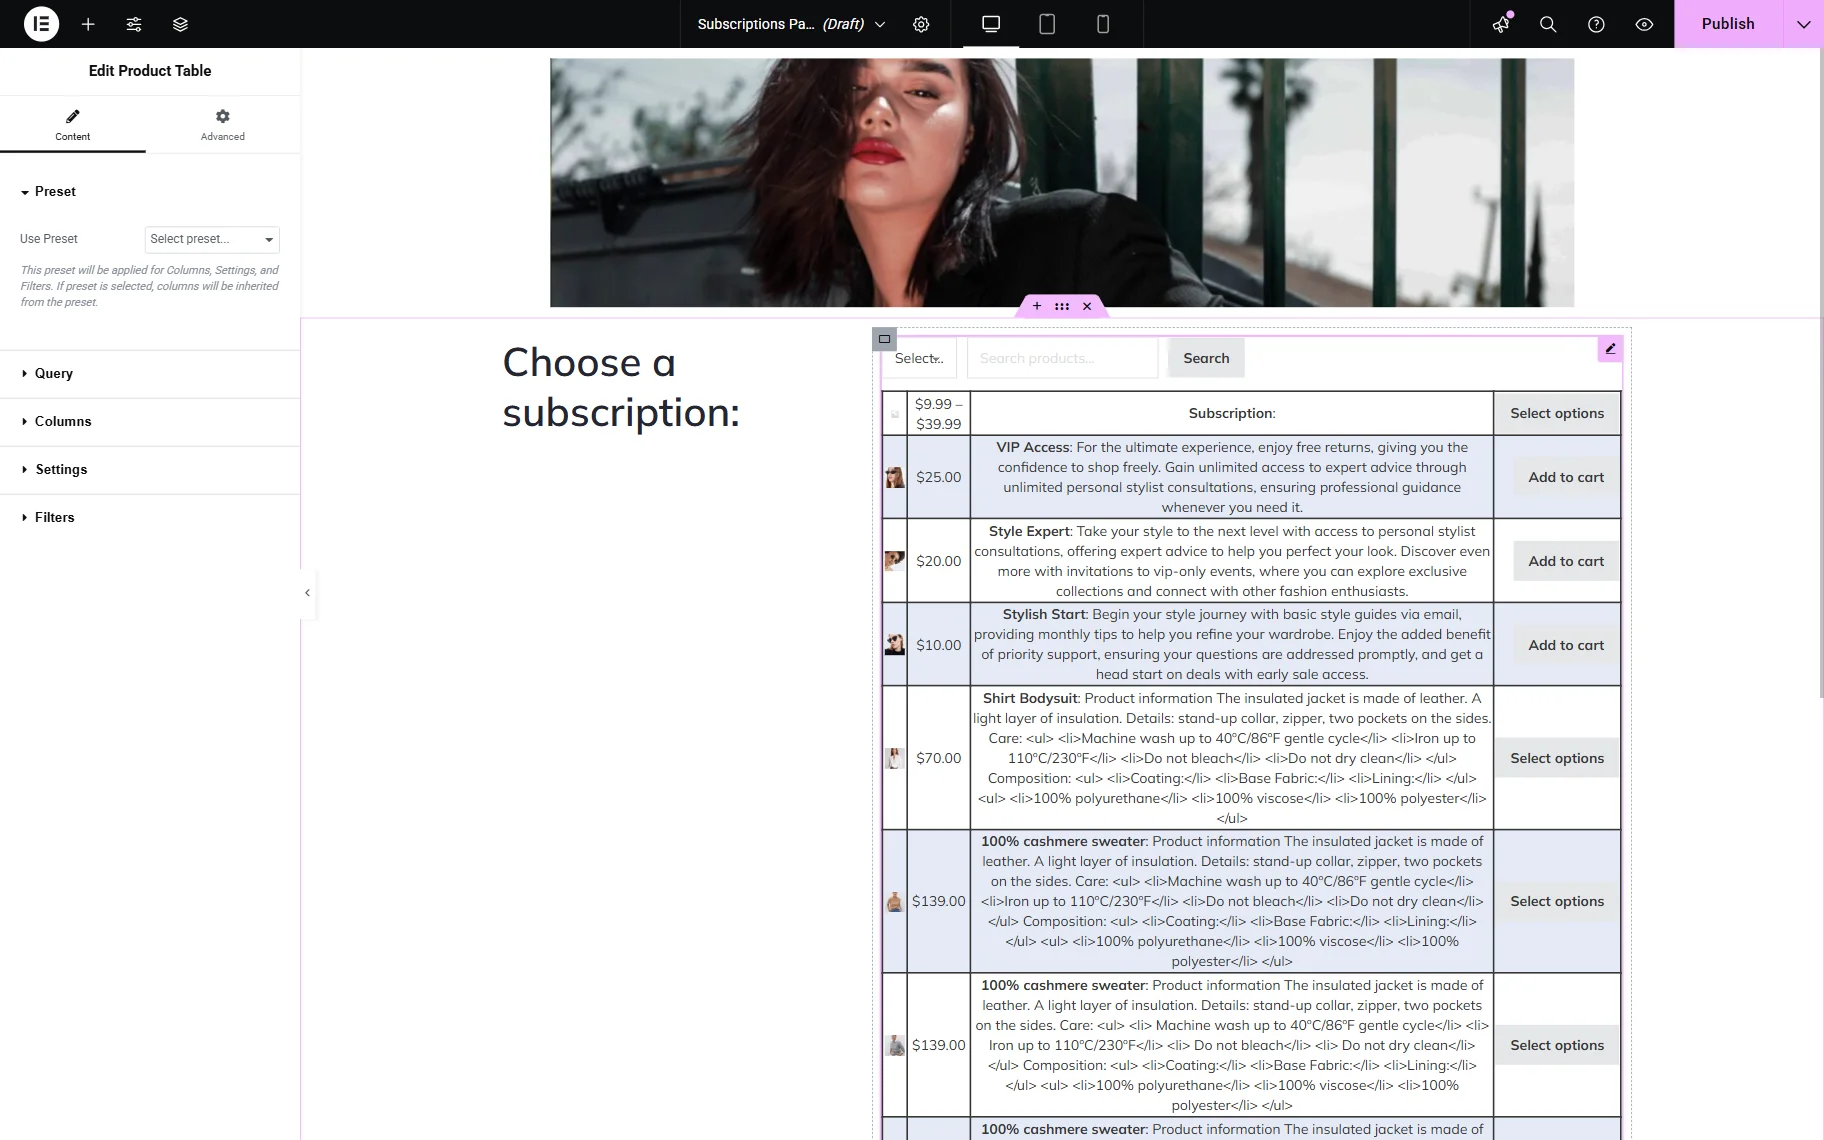
Proceed to the Query tab. Here, select the needed Query Type and work on other settings. For example, we add the IDs of the products we want to display in the Include Products field (“10437,10435,10433”).
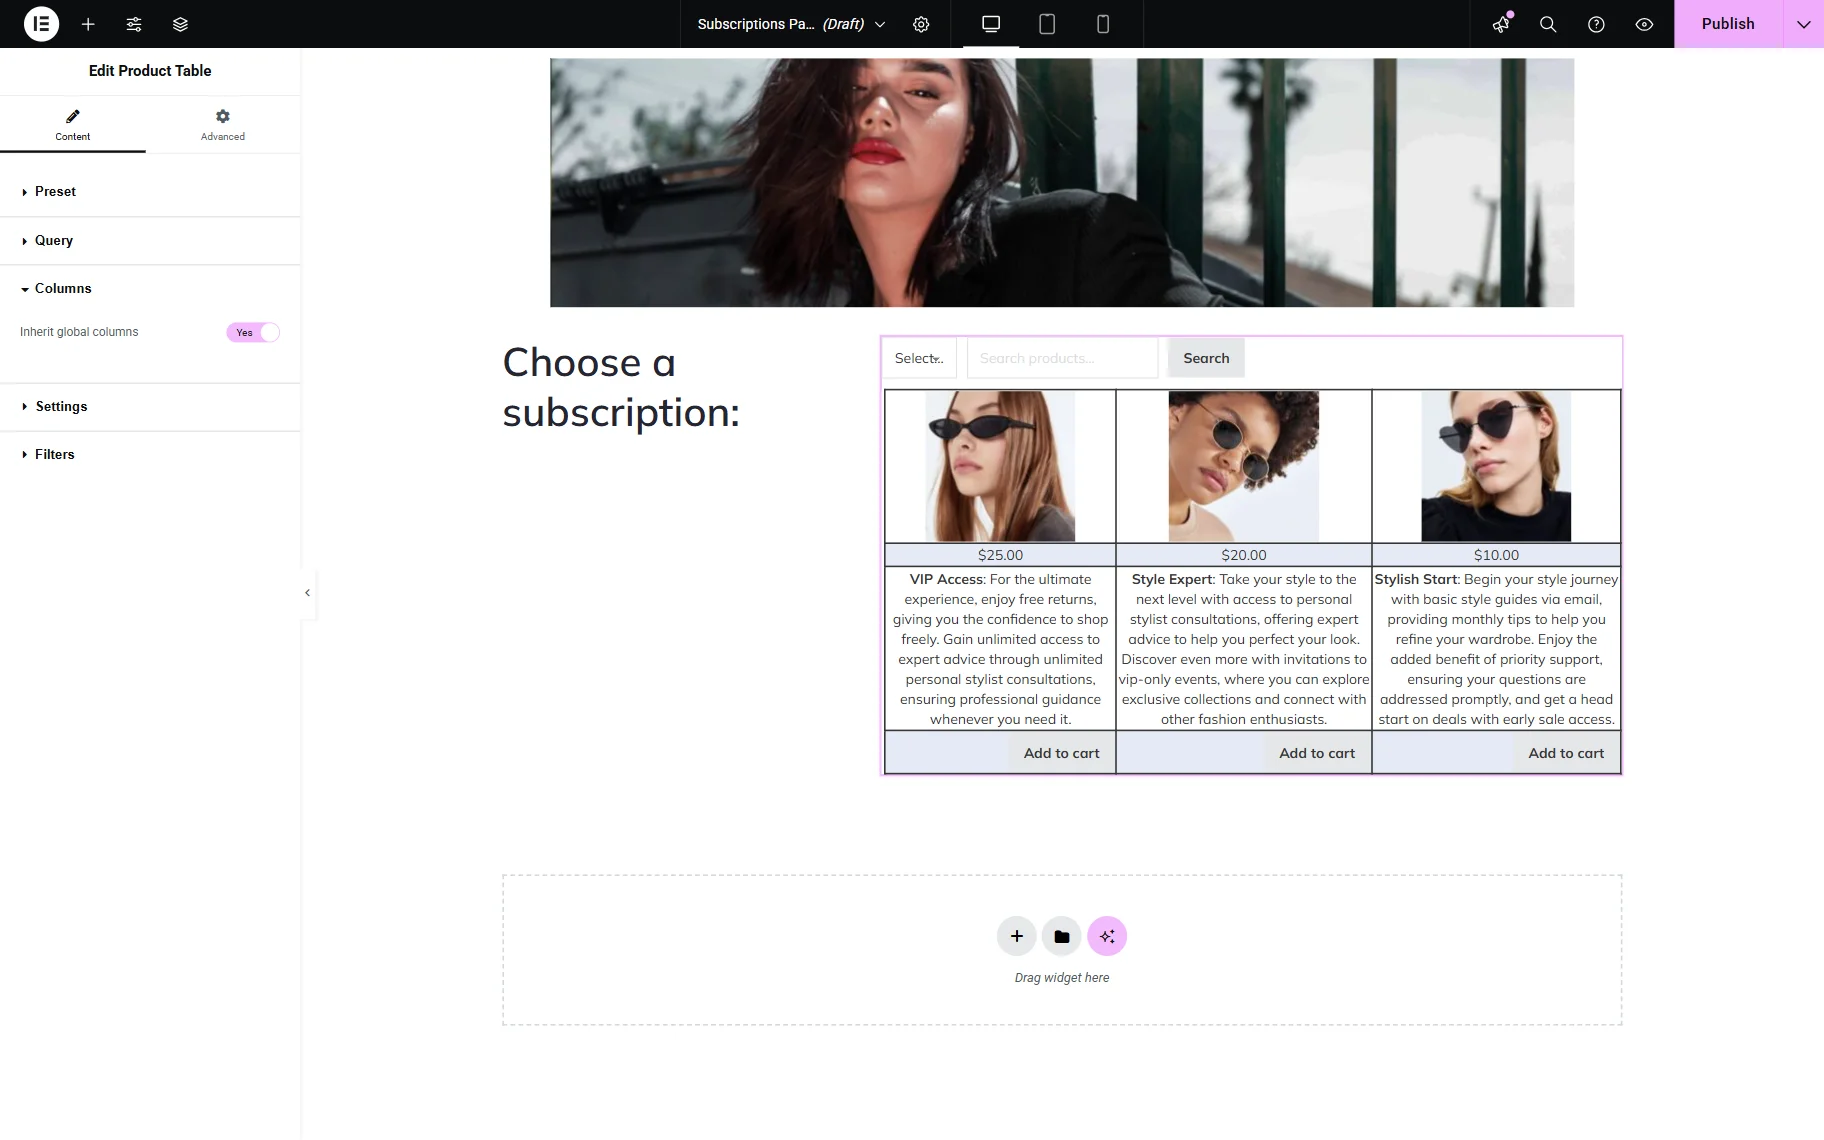
Next, head to the Columns tab.
The Inherit global columns toggle is activated by default, but you can deactivate it to set the columns manually in the widget settings.
In the next Settings tab, we set the Direction to “Vertical”. If needed, you can work on the tab settings.

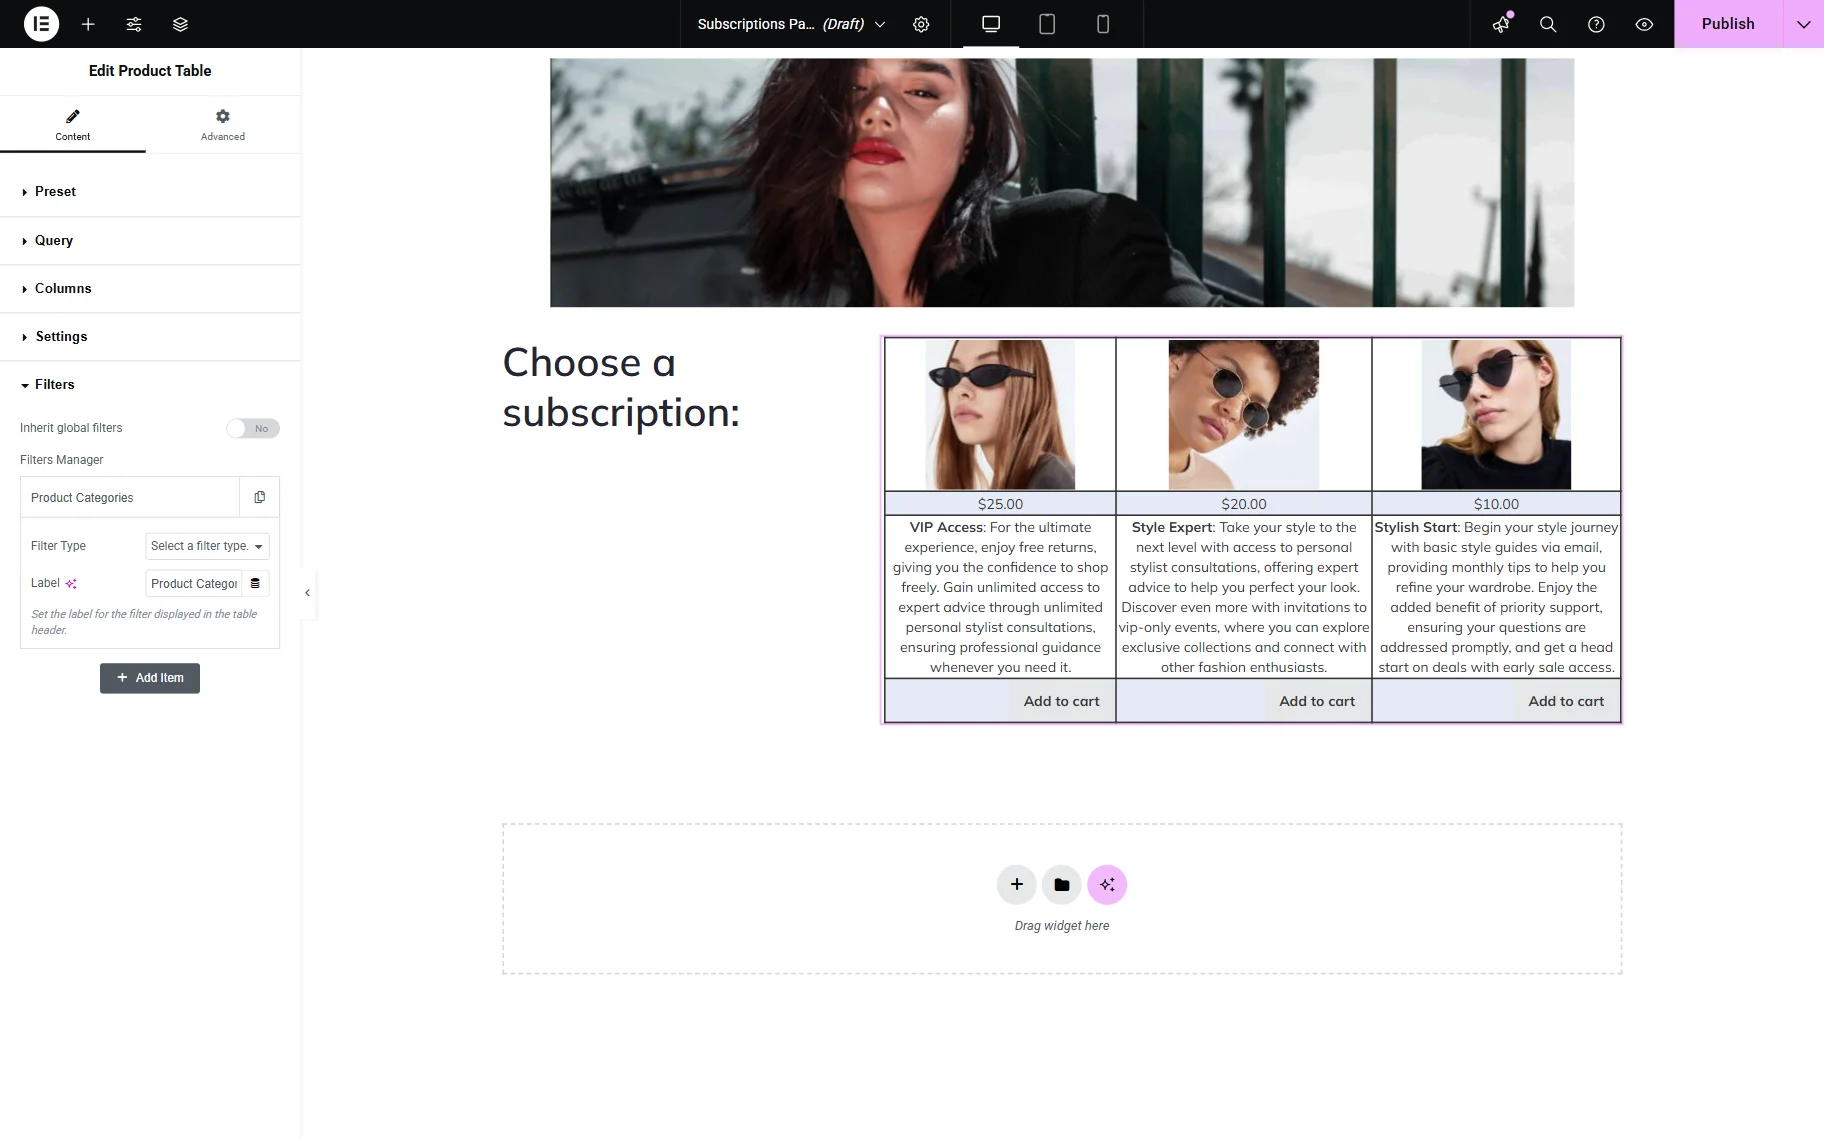
In the following Filters tab, you can adjust the filters that will be displayed next to the table. We don’t want to display filters now, so we deactivate the Inherit global filters toggle, unfold the Product Categories tab, and clear the selected Filter Type.
Now, the filter is not displayed.
Press the “Publish” button to save the result.
Add the Table to an Elementor or Bricks Page/Template with Shortcode Generator
If you want to build an Elementor price table in another way, follow the next steps to generate a shortcode.
After completing the Create a WooCommerce Product and Adjust Table Settings steps of this tutorial, go to WordPress Dashboard > WooCommerce > Settings and open the Product Table tab again.
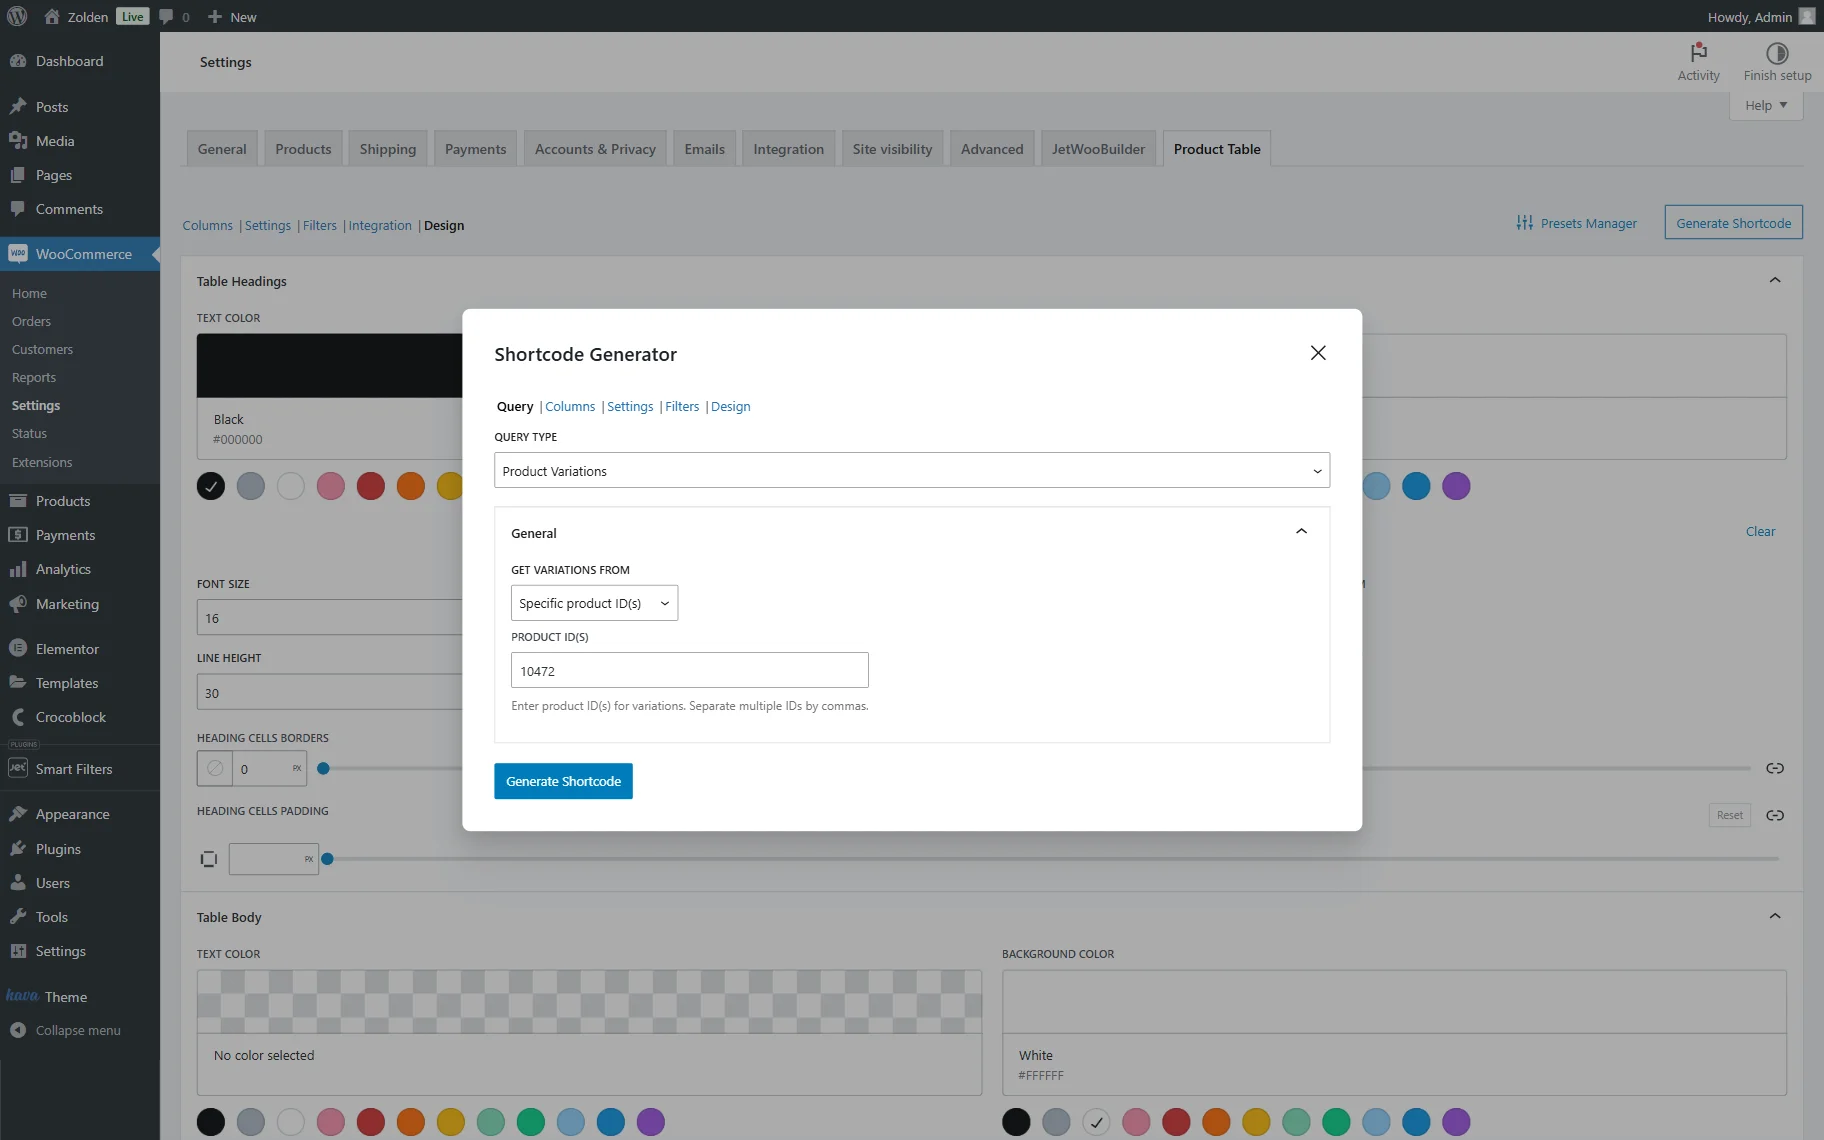
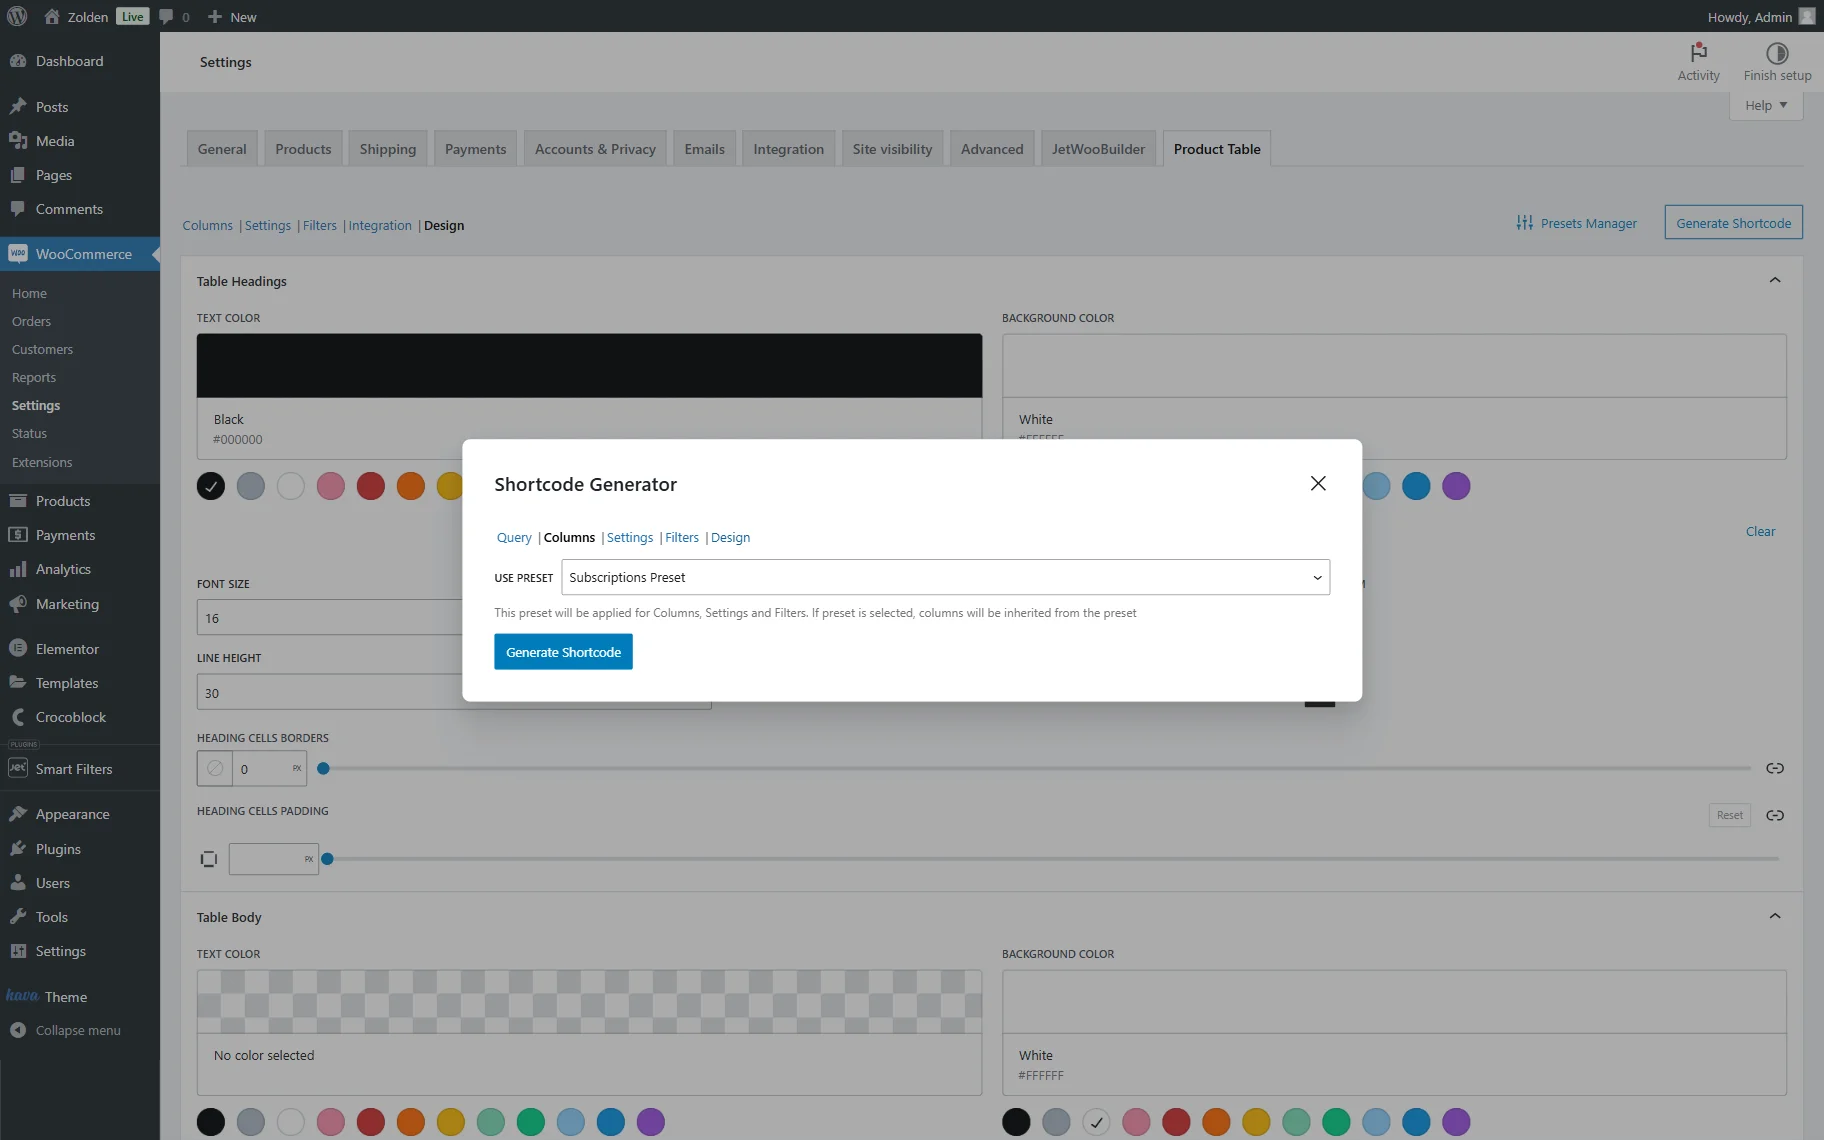
Press the “Generate Shortcode” button to open the pop-up.
Here, we set the QUERY TYPE to “Product Variations” and “Specific product ID(S)” option in the GET VARIATIONS FROM field. Also, set the copied PRODUCT ID(S) of the previously built “Subscription” product.
Open the Columns tab and pick the previously built preset in the USE PRESET drop-down list.
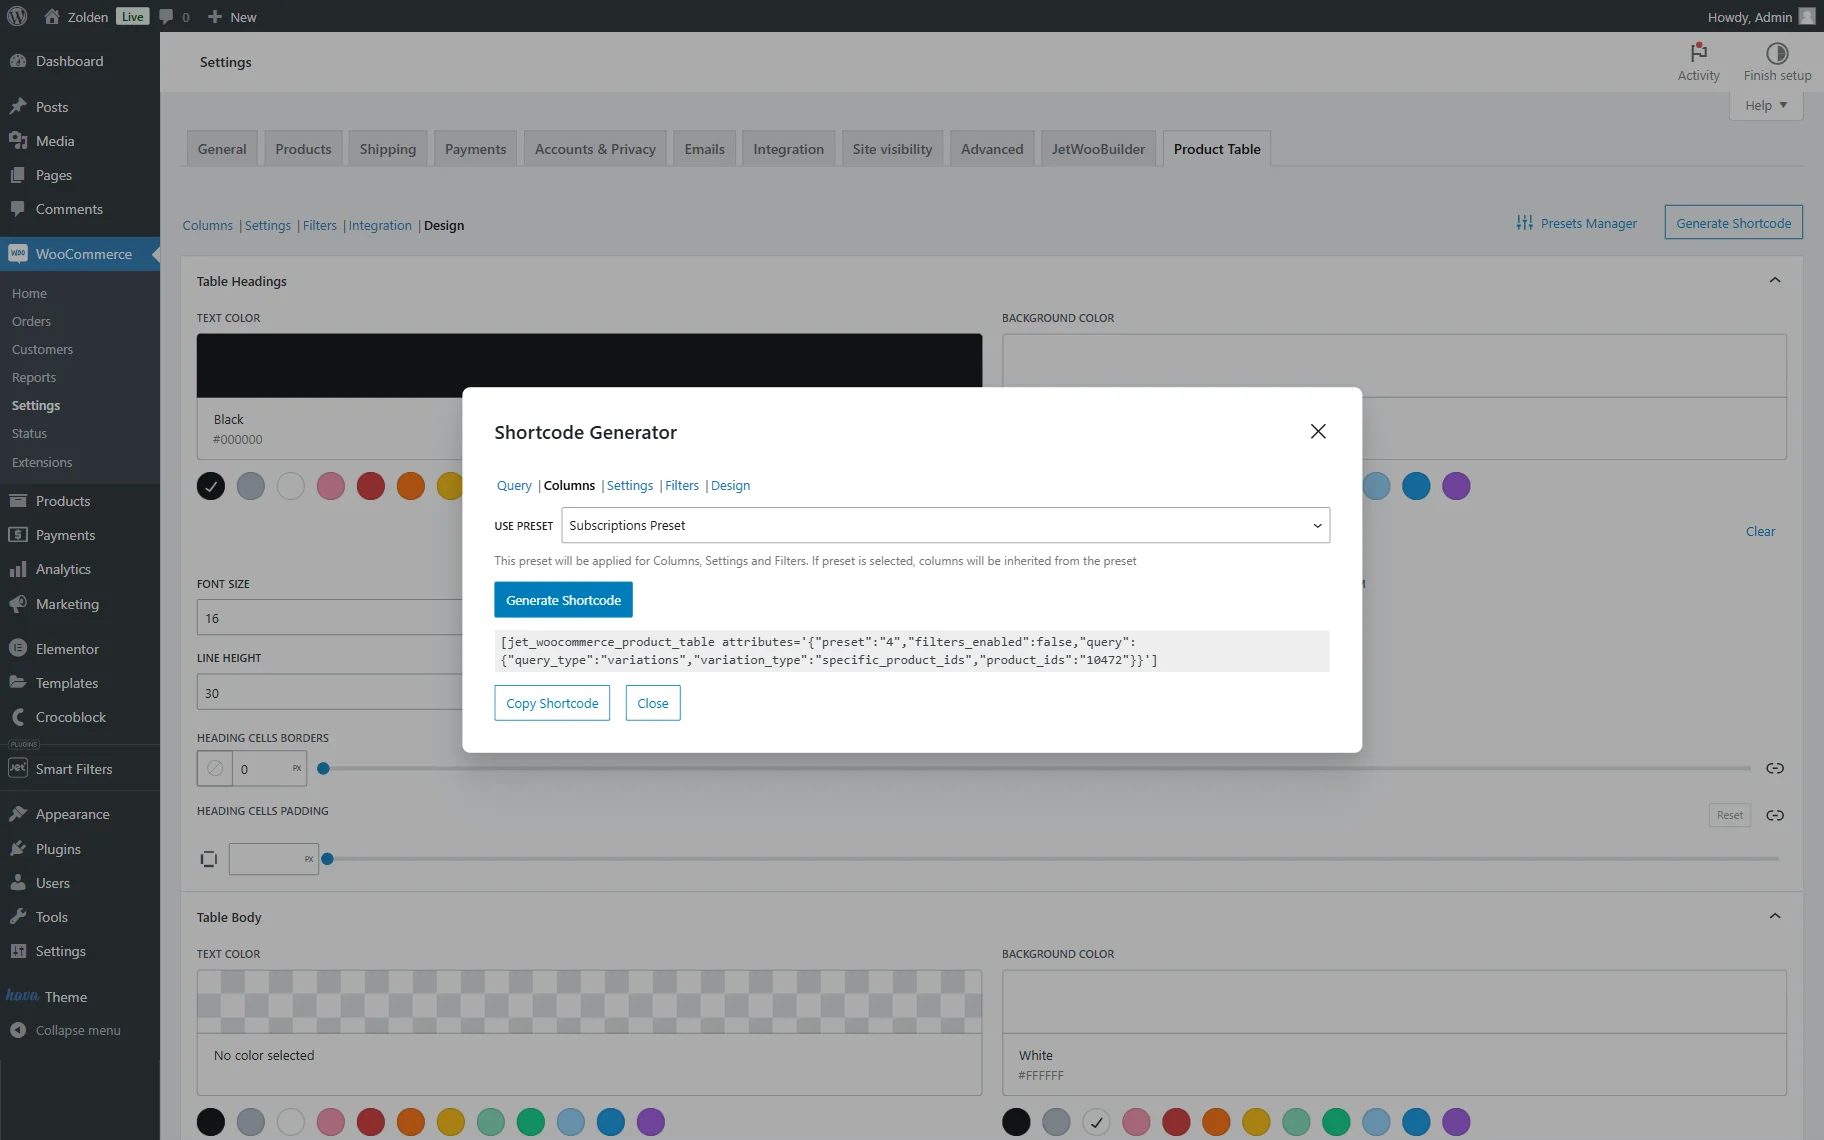
Hit the “Generate Shortcode” button.
Copy the generated shortcode and click the “Close” button.
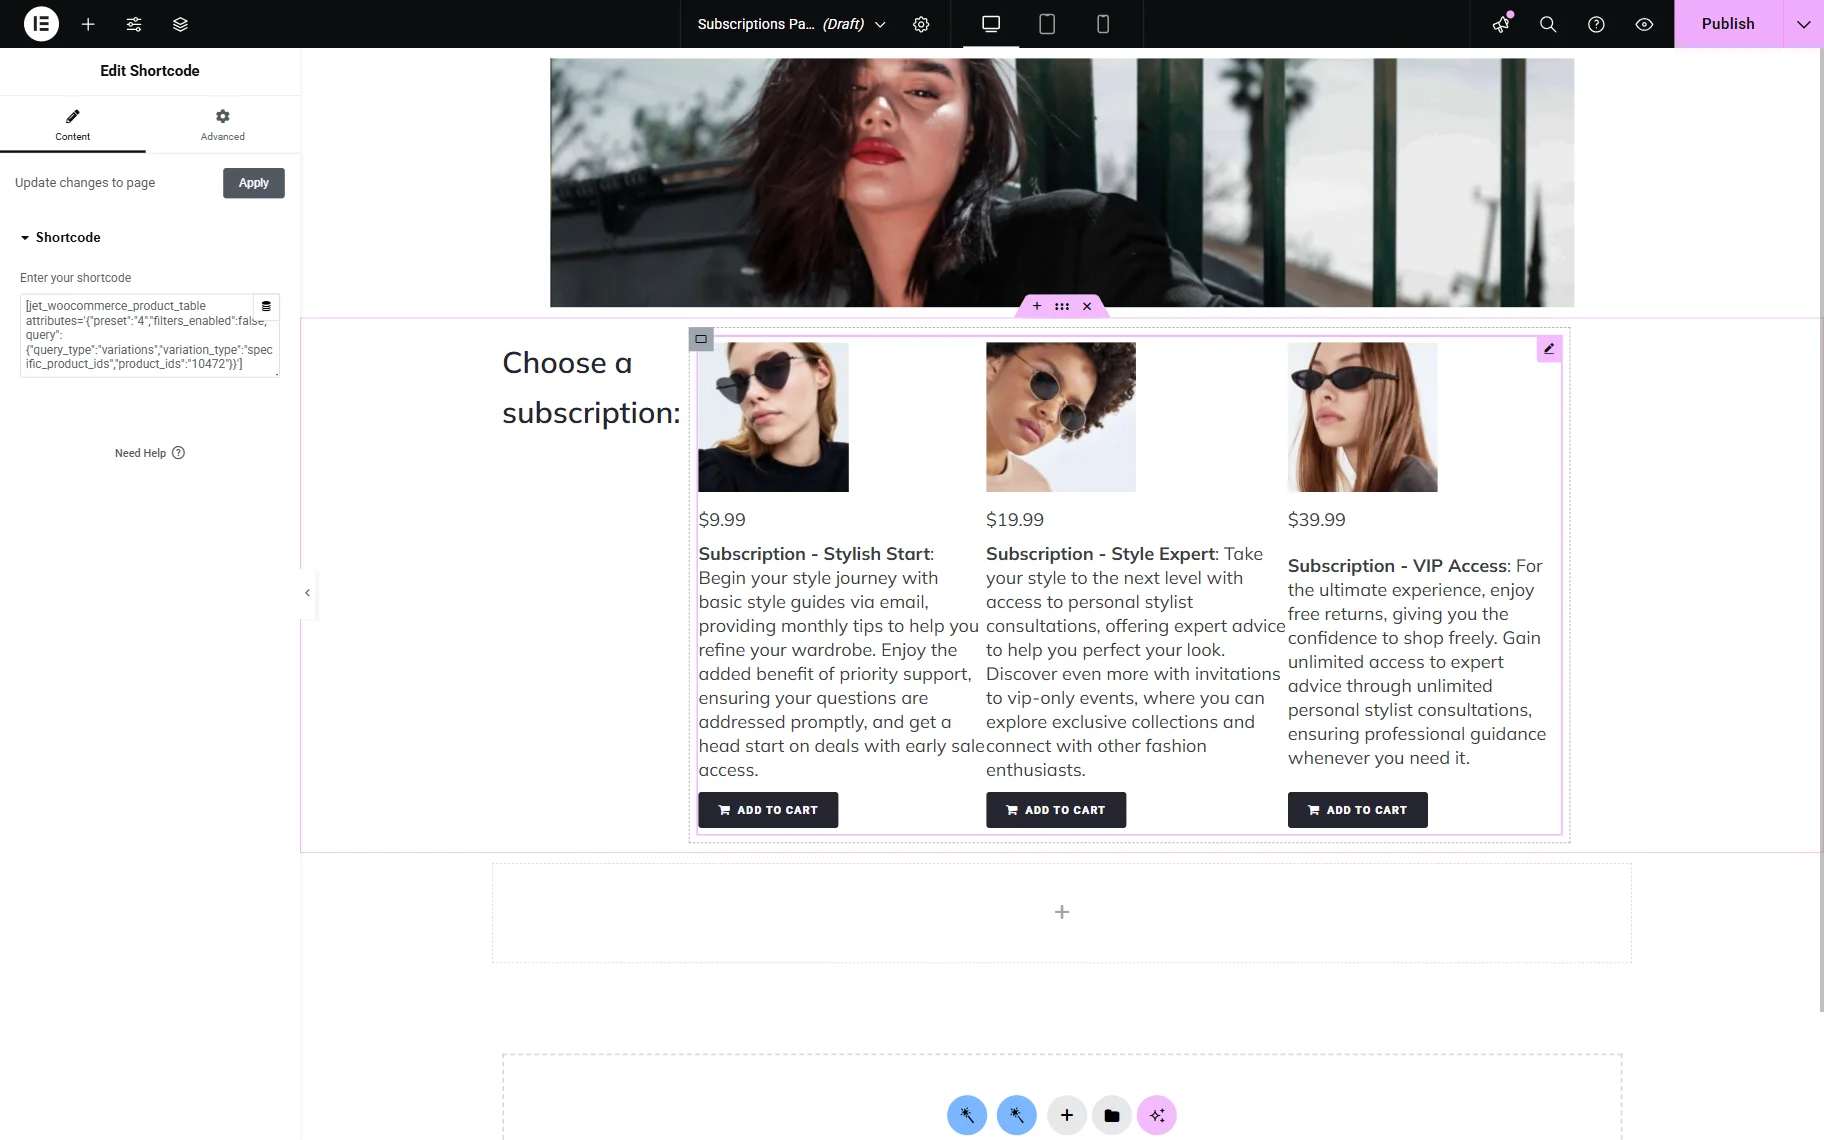
Open the page/template in Elementor, the one where you want to place the built product table. In our case, it is an Elementor-based page.
Add a Shortcode widget to the page and paste the copied shortcode into the corresponding textarea.
Now, adjust other page widgets if needed and press the “Publish” button to save the result.
The pricing table can be added samely to the Bricks editor.
To do so, find the Shortcode element in Bricks and add it to the page. Then, paste the copied shortcode in the Shortcode field.
Save the page.
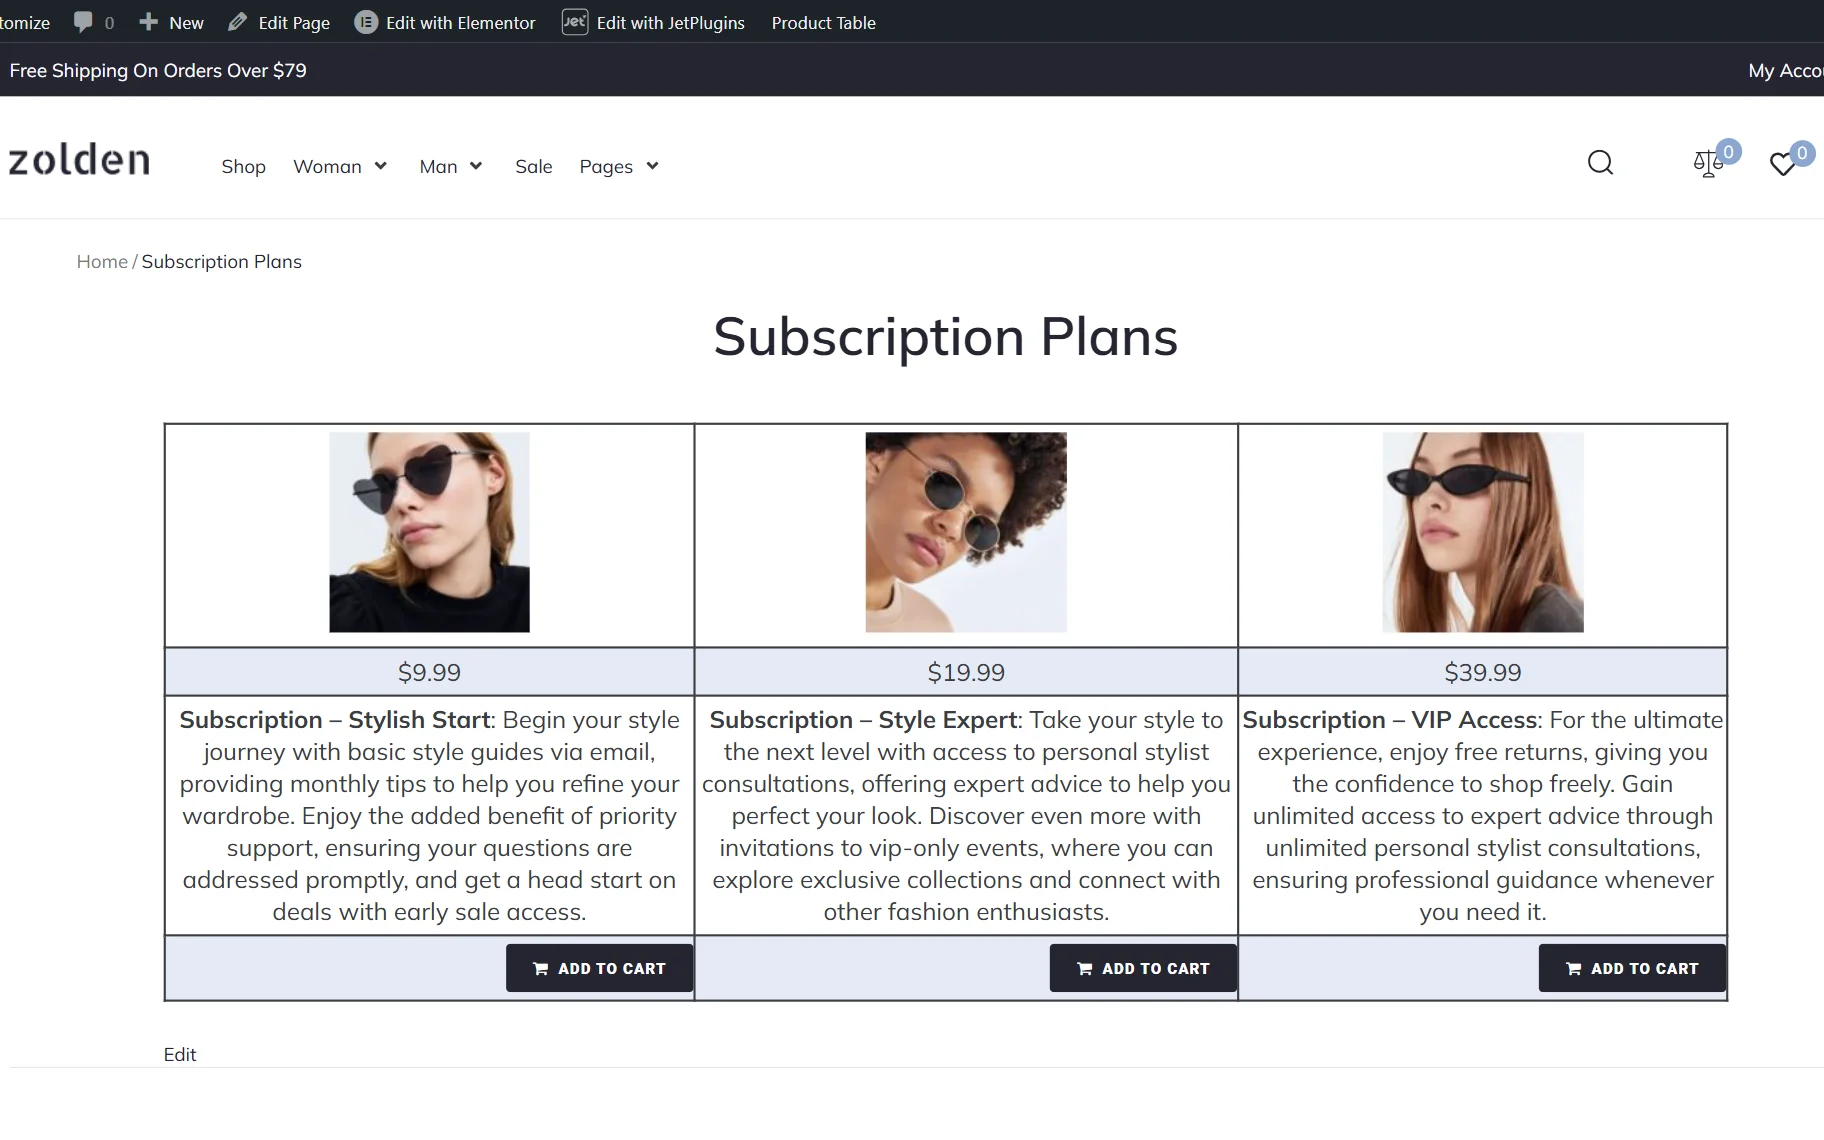
Check the Result
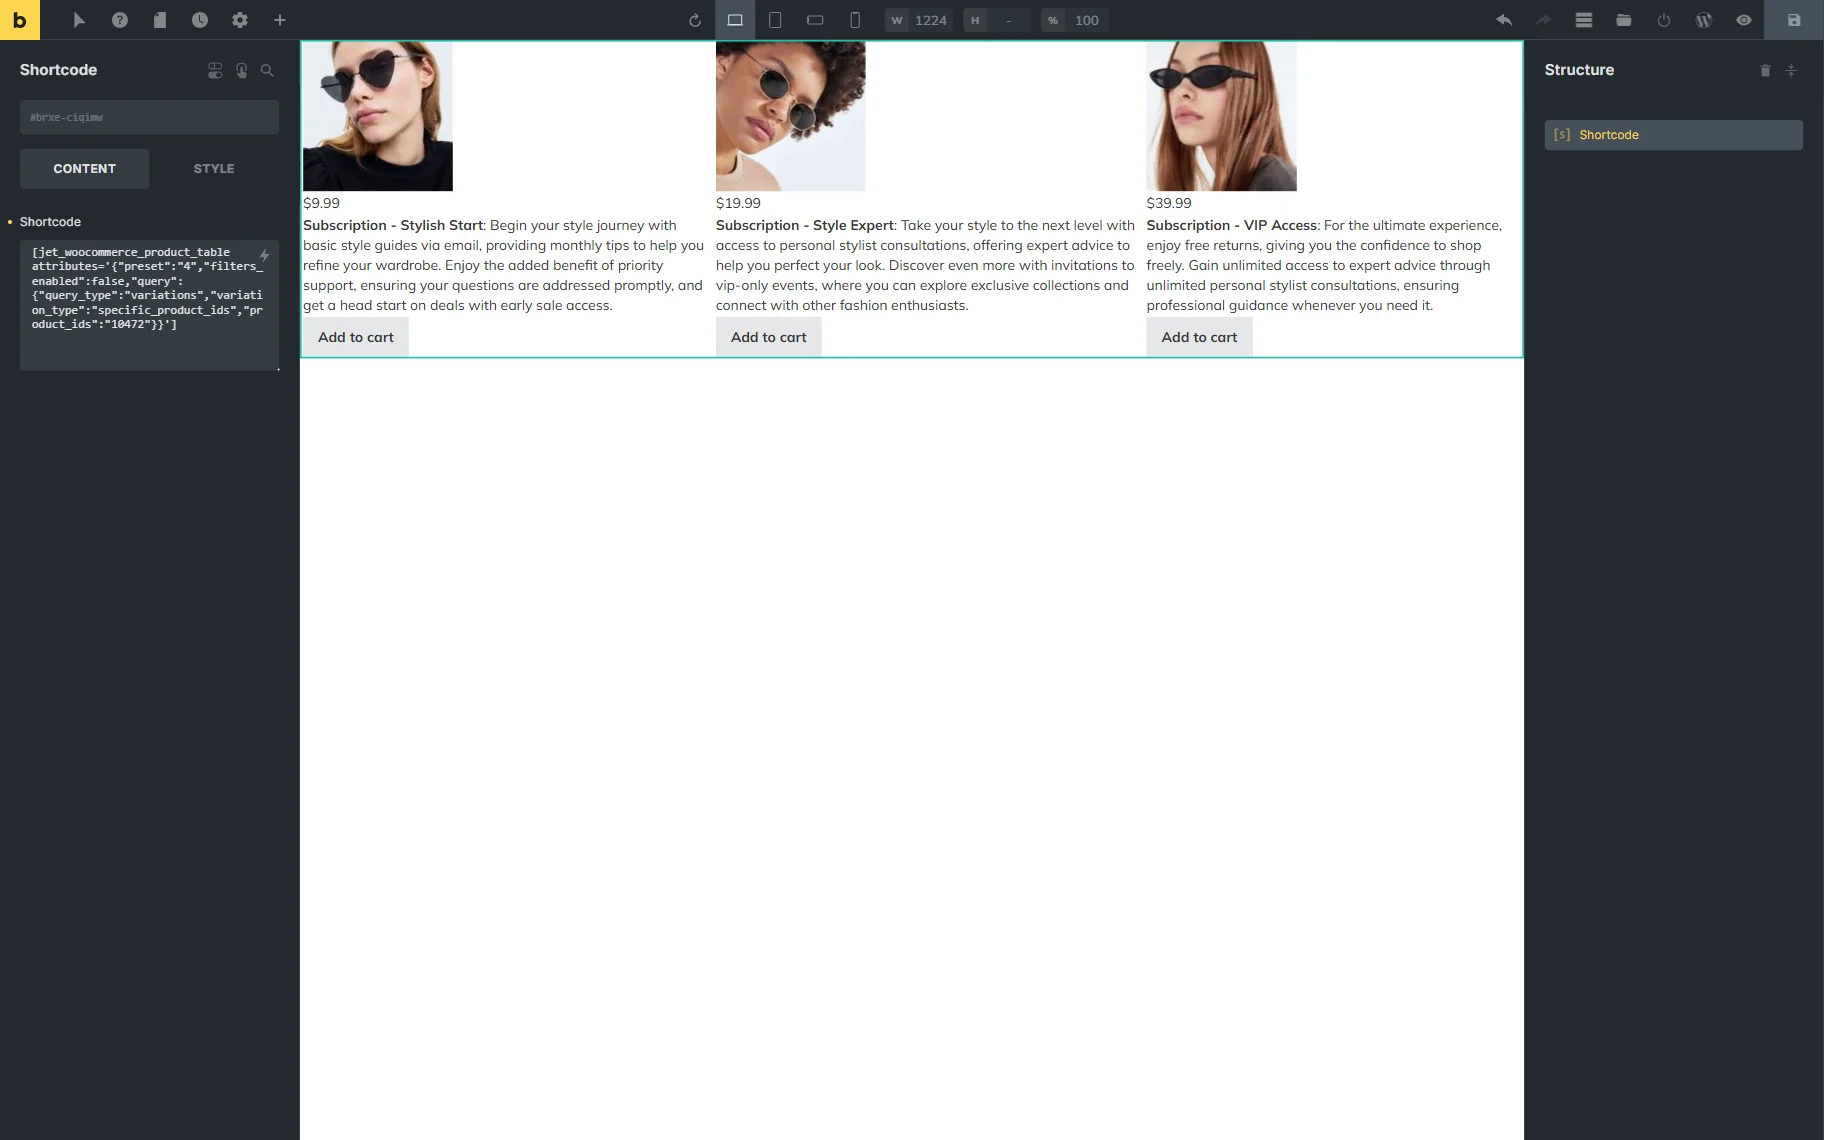
Now, you can check the built product table on the front end.
As you can observe, the subscription plans are now shown on the page and can be added to the cart.
That’s all; now, you know how to build and display a pricing table with the help of the JetProductTables plugin for WordPress.