How to Filter WooCommerce Products by Rating
This tutorial uncovers the way of filtering WooCommerce products by rating with the help of the JetSmartFilters plugin.
JetSmartFilters plugin is a tool for applying filters to WooCommerce and Custom Posts. You can use the Rating filter if you need to allow visitors to sort products or posts according to the rating.
This tutorial explains how to filter WooCommerce products by their rating. Let’s have a closer look at this process.
Add New Filter
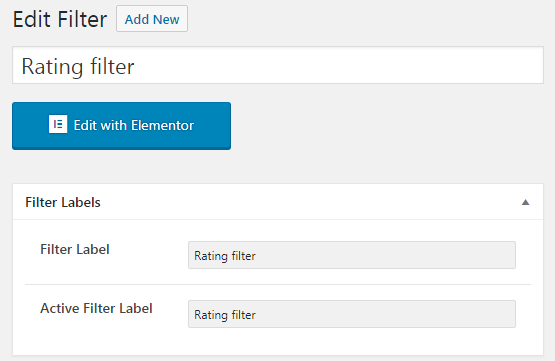
Open your WordPress Dashboard and navigate to the Smart Filters tab. Click the “Add New” button. Here you need to type in Name, Filter Label, and Active Filter Label.

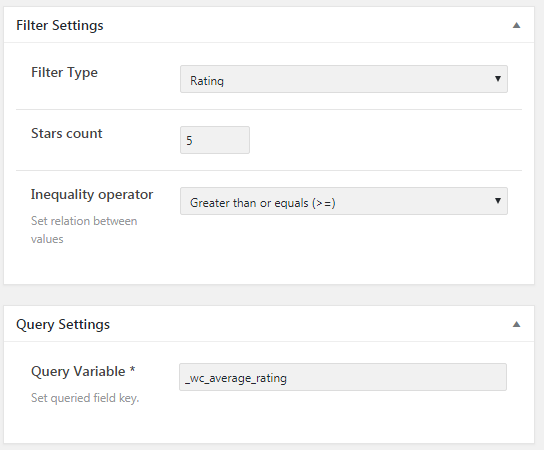
In the Rating Filter Type bar, choose the “Rating” option. The Stars count feature defines the max rating value.
In the Inequality operator field, you can set relations between values. Greater than or equals (>=) means that only the results that are equal or greater will be shown as a result. Less than or equals (<=) will show only the results that are lesser or equal. And the Equals (=) option will make only the results equal to the value chosen by the user be shown.
When you’re done, click on the “Publish” button.

Assign Filter to Product Grid
Open the needed page in Elementor and add a Products Grid or Products List widget to showcase products.
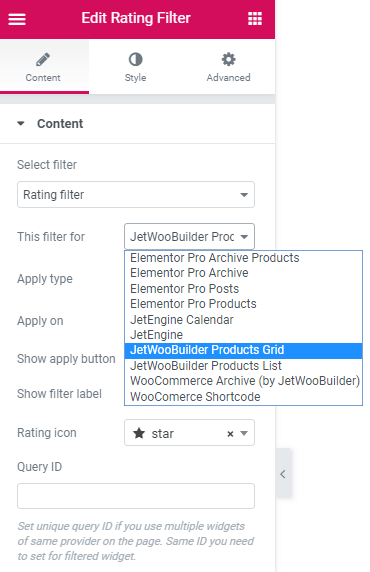
Drag-n-drop the Rating Filter widget to the section where you want to place it. In the Content settings tab, select the Rating filter you’ve created before. Then, apply this filter for JetWooBuilder Products Grid (or another widget with your products).

After you’ve done customization, click on the “Publish” button and check the filter out.
That is all you need to do to filter WooCommerce products by rating.