How to Pick the Load Level of Style Settings in Elementor Editor
This tutorial uncovers how to pick the needed load level of style settings for the JetTabs plugin in the Elementor editor in order to use the settings you need only and therefore optimize Elementor’s working speed.
If you need Elementor editor work faster, you should choose the lower level of settings but the one that will cover your needs and ideas in personalizing the widget’s appearance.
The Load Levels of Style Setting
There are 5 levels available to be applied for the widget’s stylization:
- None;
- Low;
- Medium;
- Advanced;
- Full.
Each of them can be marked by a certain range of settings. Keep reading this tutorial to learn more about how to pick the appropriate level and which options are included for each of them.

How to Pick the Load Level of Style Settings
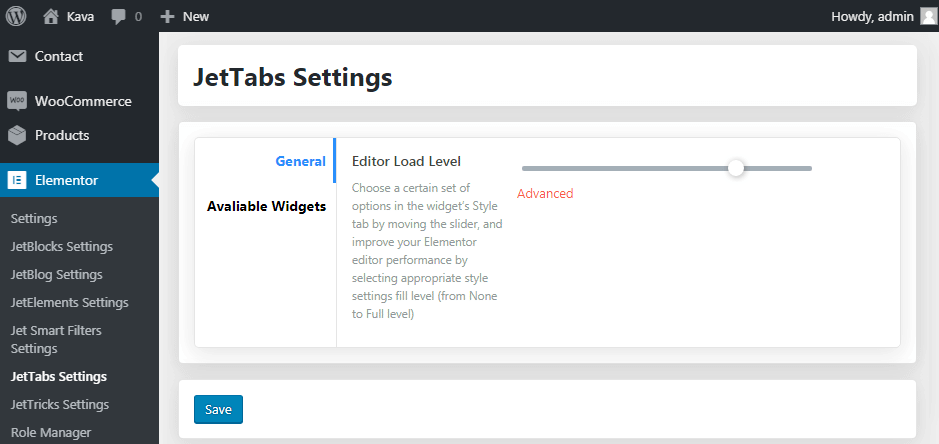
Open WordPress Dashboard and navigate to Elementor > JetTabs Settings option.
In the following screen, you should choose the General tab. Here you will see a moving slider that changes the number of available settings.
After choosing the required level, click the Save button.
Now go to Elementor editor and upload the page to apply the changes.
Customize the content with JetTabs plugin so that it requires your needs. Here you can find the answers to your possibles questions.

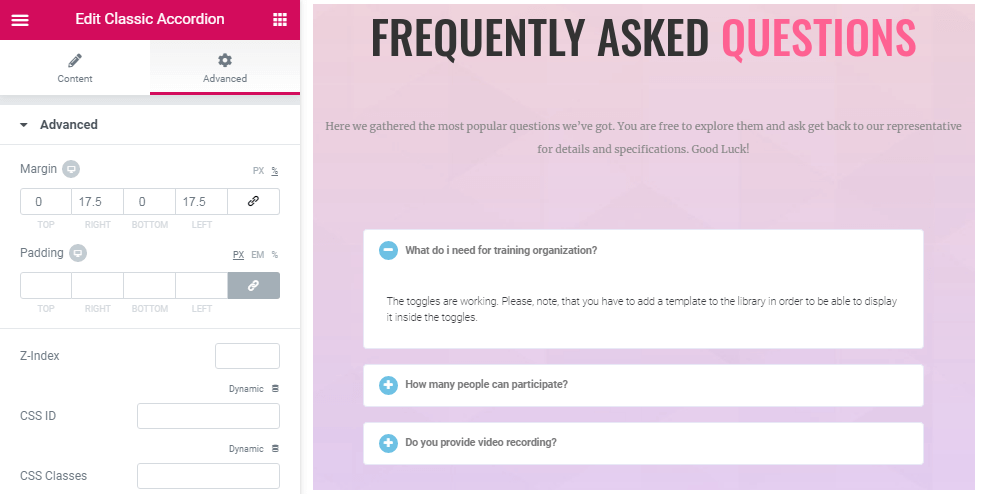
Remember, that the lower the selected level, the fewer opportunities are available. It means, that None level will hide the Style tab at all. The only you need to enable this option is to move the slider.

On the screen you can see the Classic Accordion widget with None load level activated.
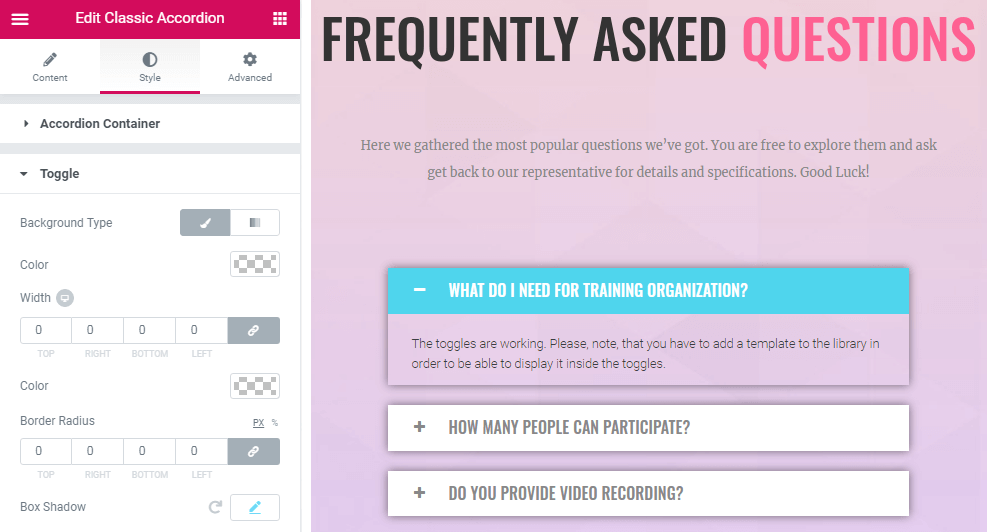
The Full level will provide you with the complete range of settings to customize the view of the tabs.

On the screen, you can see the Classic Accordion widget with Full load level activated.
How to Manage the Load Levels of Style Setting
It may happen, that it’s perfect for you to use one of the half-way levels and its settings meet your requirements. Additionally, you might need one more setting (or maybe several slight ones), but you don’t want to choose another level to save the optimized work of Elementor editor. In this case, you should add the necessary option by adding an appropriate CSS code.
In this way, you will save the lower level of general settings for tabs and at the same time, you will have the option that is needed for your purposes.
It’s essential to keep in mind, that if you customize the Tabs in a magnificent way and turn to None in the Load Level Editor option, your stylization will be dropped to the default ones. The same will happen if you change the level from the lower to the higher one and vice versa. But once you move the slider to the higher level (and save the changes with further page refreshing) the settings return as if they have never been hidden.
In between, there are Low, Medium and Advanced levels that provide the user with settings that will appear progressively depending on the chosen level.
Now you can enjoy the range of stylization settings you need only without any other options that are needless for your requirements.