How to Pick Elementor Style Loading Level to Improve JetTricks Widget Performance
Learn how to pick the needed load level of the Style settings for the JetElements plugin in the Elementor editor to optimize the WordPress site's working speed.
Before you start, check the tutorial requirements:
- Elementor (Free version)
- JetTricks plugin installed and activated
Choose the Load Levels of Style Settings
The Load Level of Style Settings in Elementor affects site performance because the selected option determines how many settings are available. The option is available for the JetElements, JetBlocks, JetBlog, JetTabs, and JetTricks plugins.
It ranges from “None” to “Full” Load Levels, with “None” corresponding to the fastest site performance and “Full” Load Level set by default. Currently, the following five levels are available: “None,” “Low,” “Medium,” “Advanced,” and “Full.”
Each level allows you to use a definite range of settings.
It’s important to remember that the lower the selected level, the fewer opportunities you have while editing. For instance, if you have chosen the “None” Level, you will not have an opportunity to make some changes in the Style tab. Only the basic options will be allowed, such as the Text and Background color. The “Full” Level offers a full range of customization options for the box, including shadow, border radius, and Z-index settings.
Read the How to Speed Up WordPress Website and Crocoblock Plugins tutorial to choose the lower level of settings that will cover your needs and ideas in personalizing the widget’s appearance.
Configure the JetTabs Settings
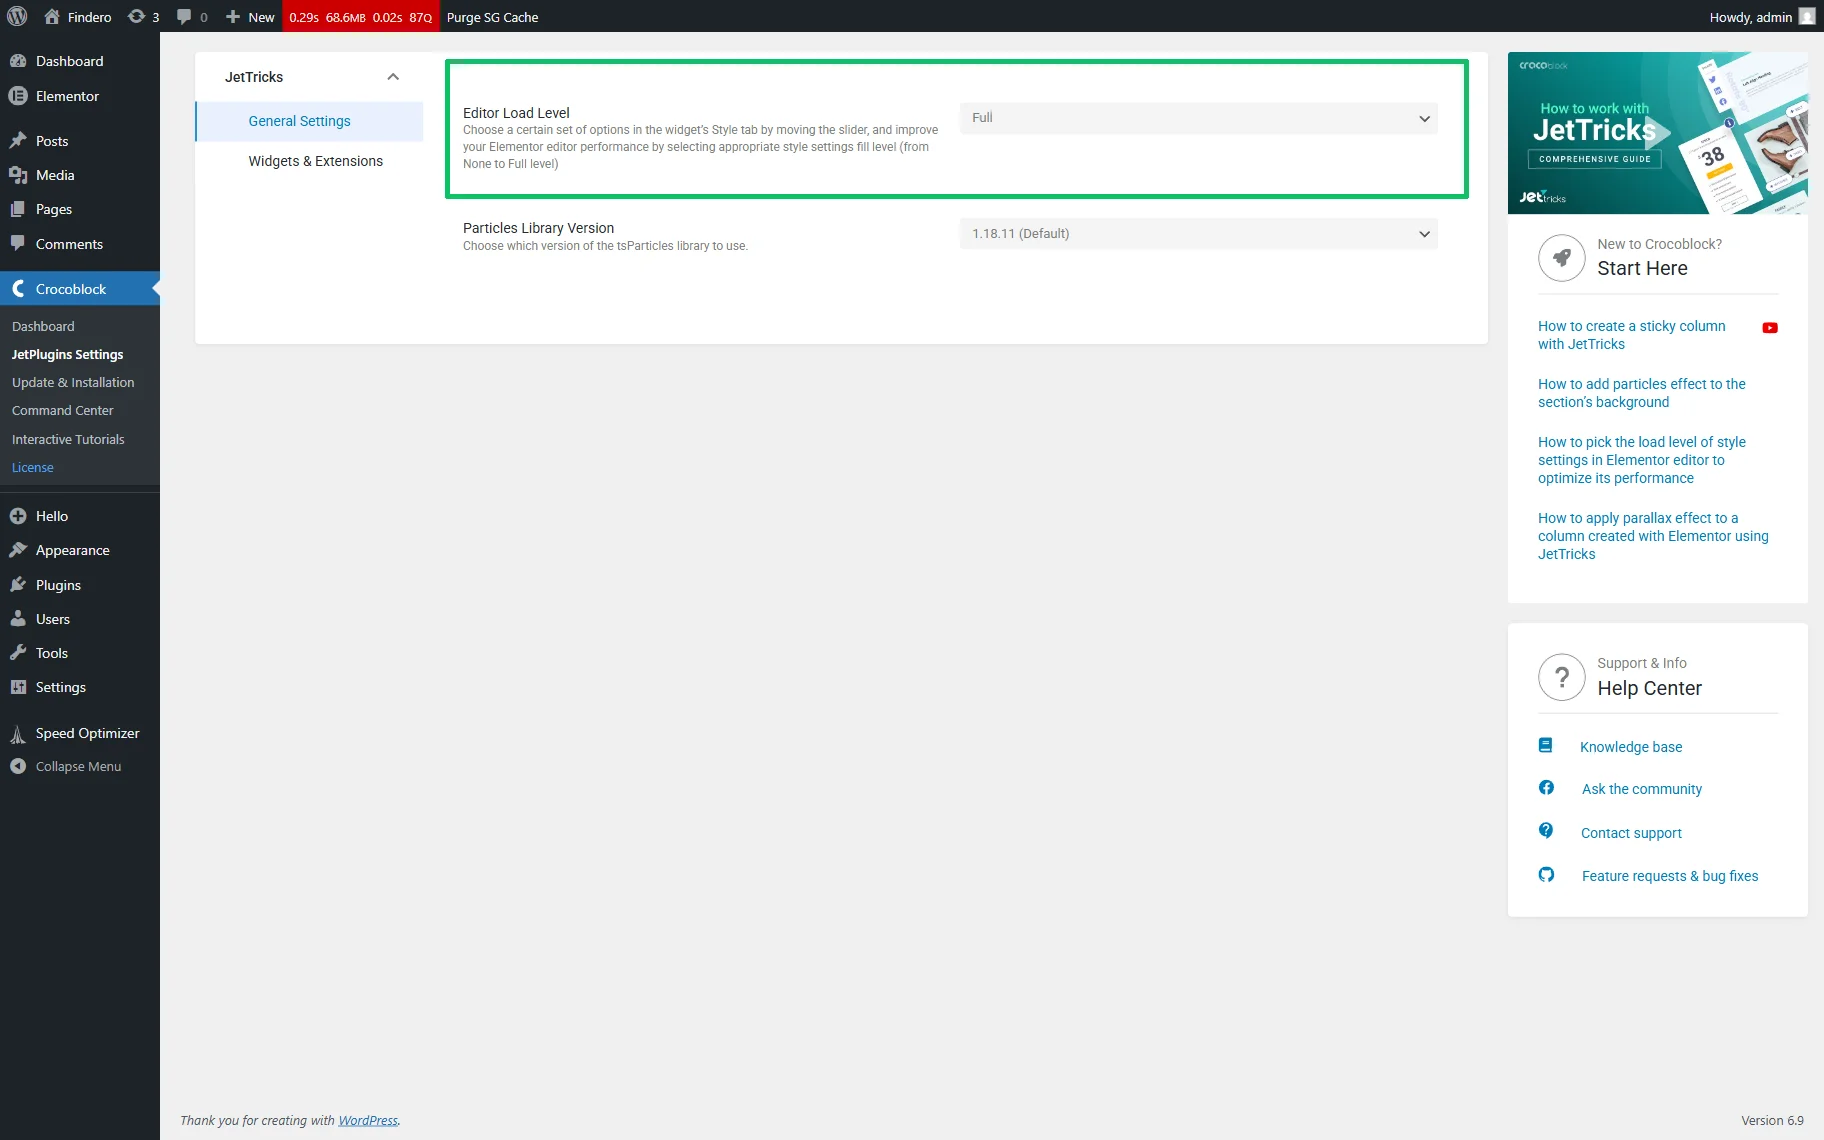
Open the WordPress Dashboard and navigate to Crocoblock > JetPlugins Settings > JetTricks > General tab. Here, select the needed option in the Editor Load Level drop-down (the “Full” Load Level, in this case). Once chosen, the data will be saved automatically.
Affect on the Style Settings
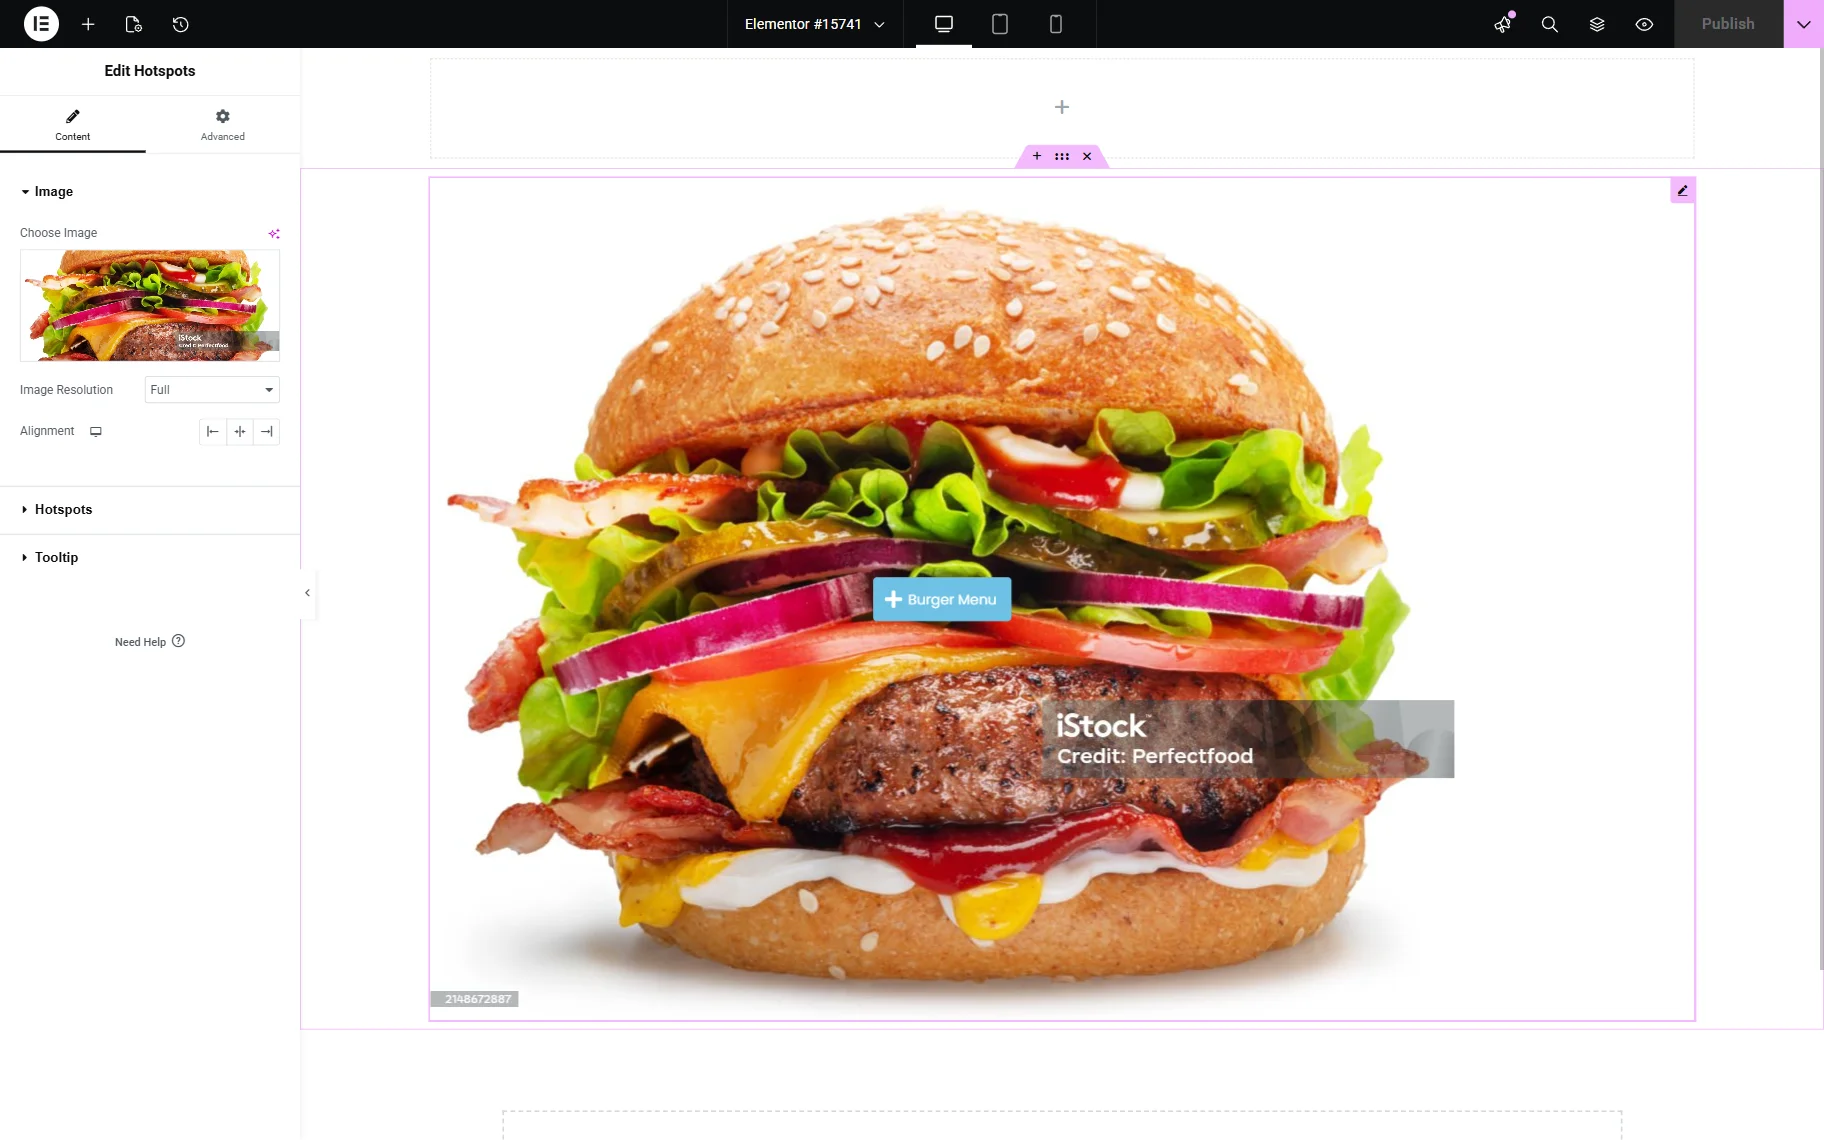
Open a page or post in Elementor. Add any activated JetTricks widget (here, we insert the HotSpots widget).
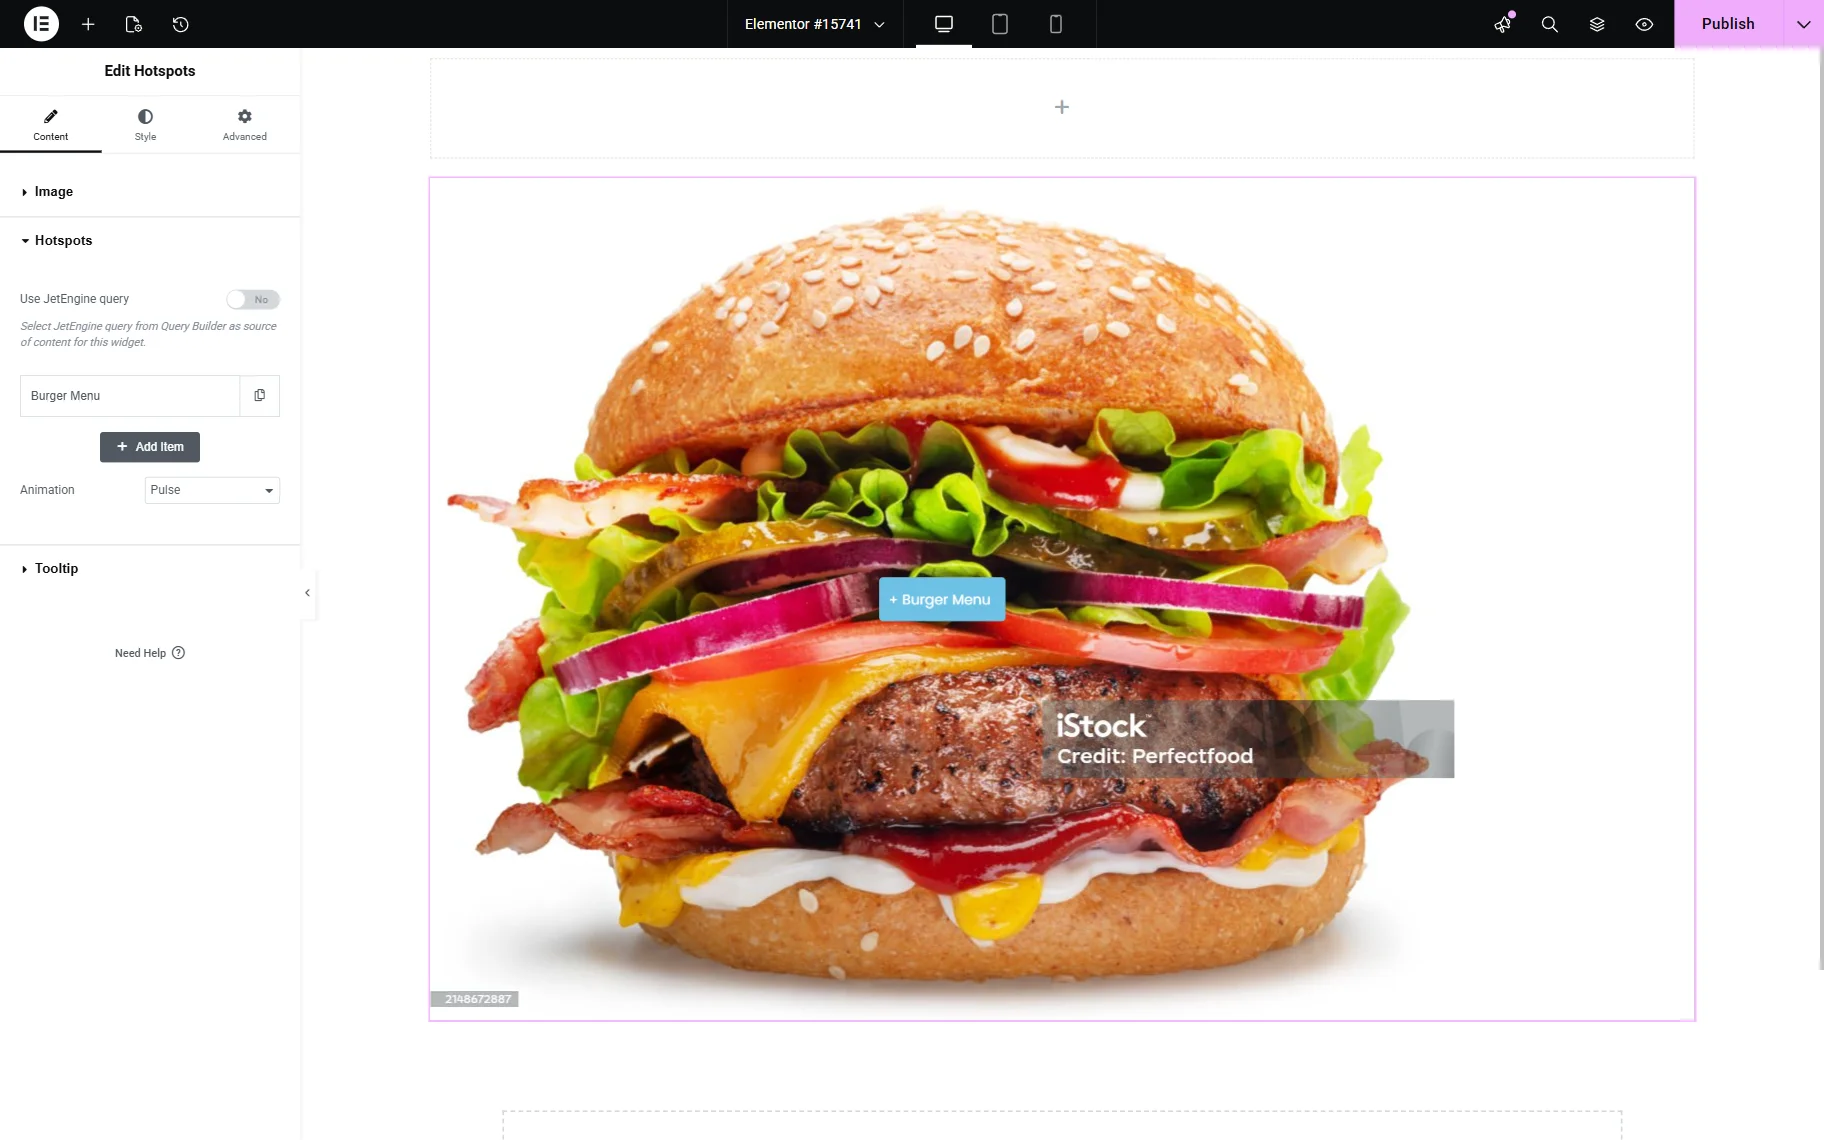
Since we set the “Full” Load Level, the Style settings are available. This means the full range of the Style settings.

In contrast, the “None” Level hides the Style tab and displays the widget with the default options. In addition, there are middle levels, such as “Low,” “Medium,” and “Advanced,” which contain settings to appear progressively depending on the level that has been selected.
Manage the Load Levels of Style Setting
You can use one of the middle levels if its settings meet your requirements. Additionally, you might need one more setting (or maybe several slight ones), but you don’t want to choose another level to save the optimized work of the Elementor editor. In this case, you should add the necessary option using appropriate CSS code.
In this way, you will save the lower-level general settings for widgets while still having the options you need.
It’s essential to keep in mind that if you customize the widgets and set the Load Level Editor option to “None,” your stylization will revert to the default settings. The same will happen if you change the level from lower to higher, and vice versa. But once you choose the higher level, the settings revert to their original state.
That’s it. Now you know how to pick the needed load level of the Style settings for the JetTricks plugin in the Elementor editor to optimize the WordPress site’s working speed.