Indexer Does Not Work and Shows 0
Why does the Indexer show 0 in my filters?
There are multiple reasons why the Indexer can show zeros instead of the actual count of items per filter’s option. Check the possible causes and solutions in this tutorial.
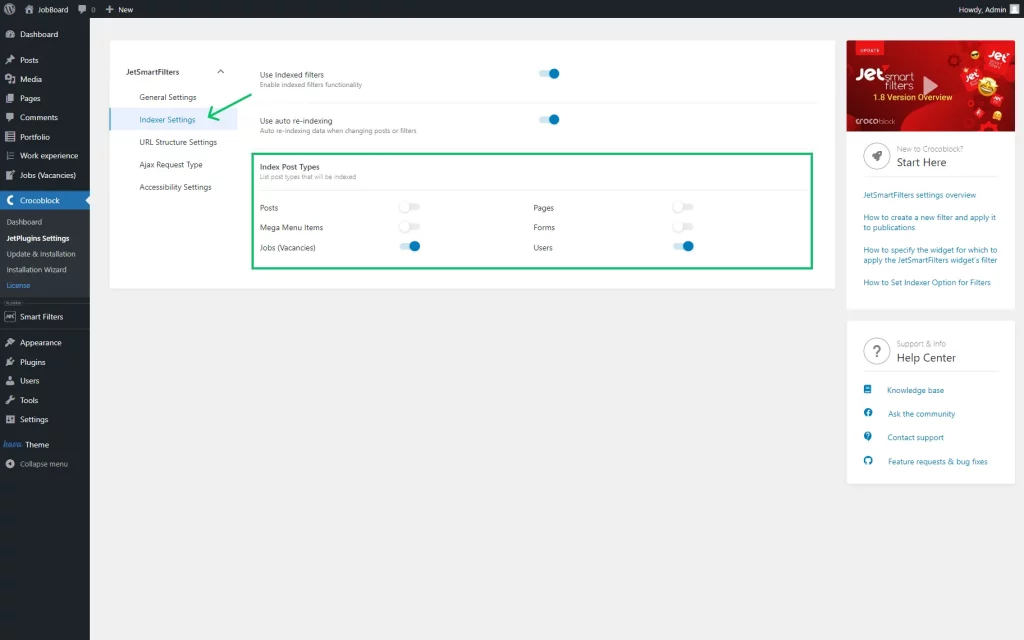
Check Whether the Indexer Is Enabled for Filtered Object
Check if the Query IDs in the Settings Are Identical
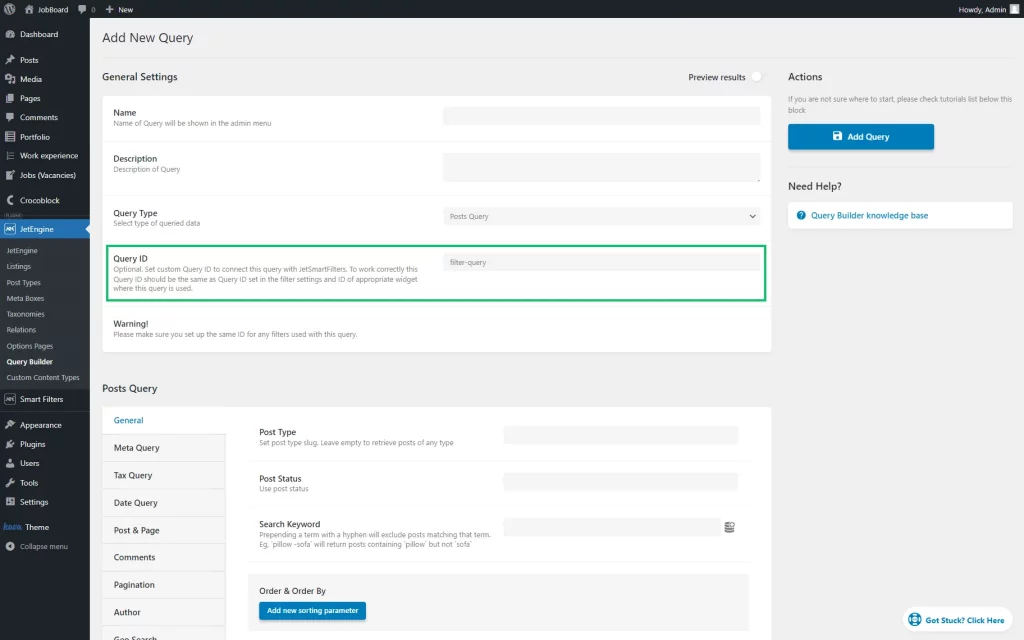
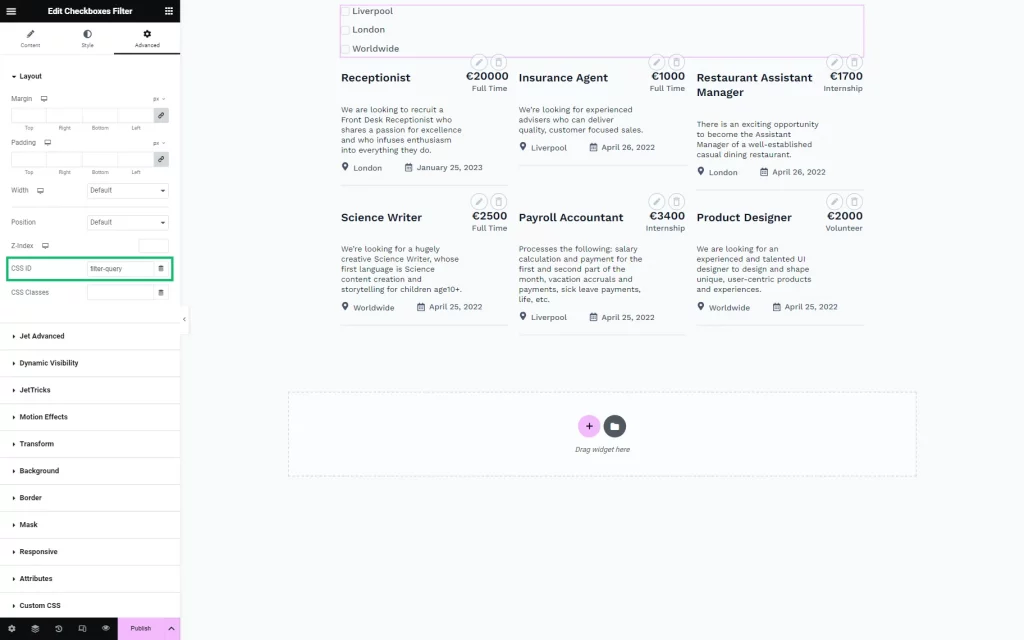
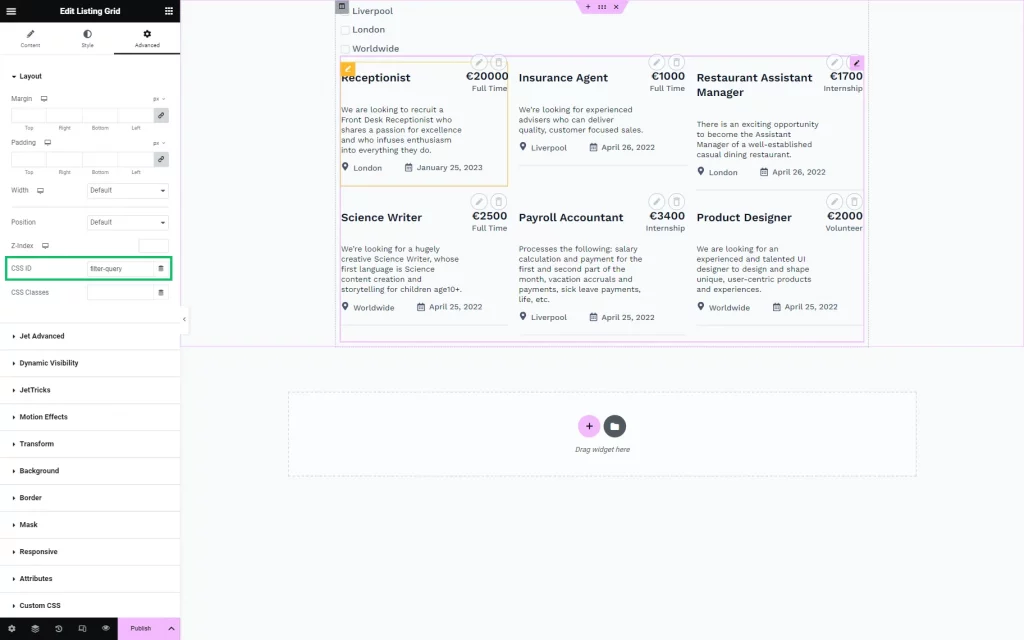
If Query Builder functionality is used, ensure that the CSS ID in the filter widget and posts widget settings are the same as the Query ID set in the Query Builder.
For instance, the Query Builder includes the “filter-query” value in the Query Builder settings.
The same “filter-query” value should be pasted in the CSS ID field of the filter widget’s Advanced tab.
Also, use the same value in the Advanced settings of the posts widget (in the Listing Grid, for instance.)
Check Filter Settings
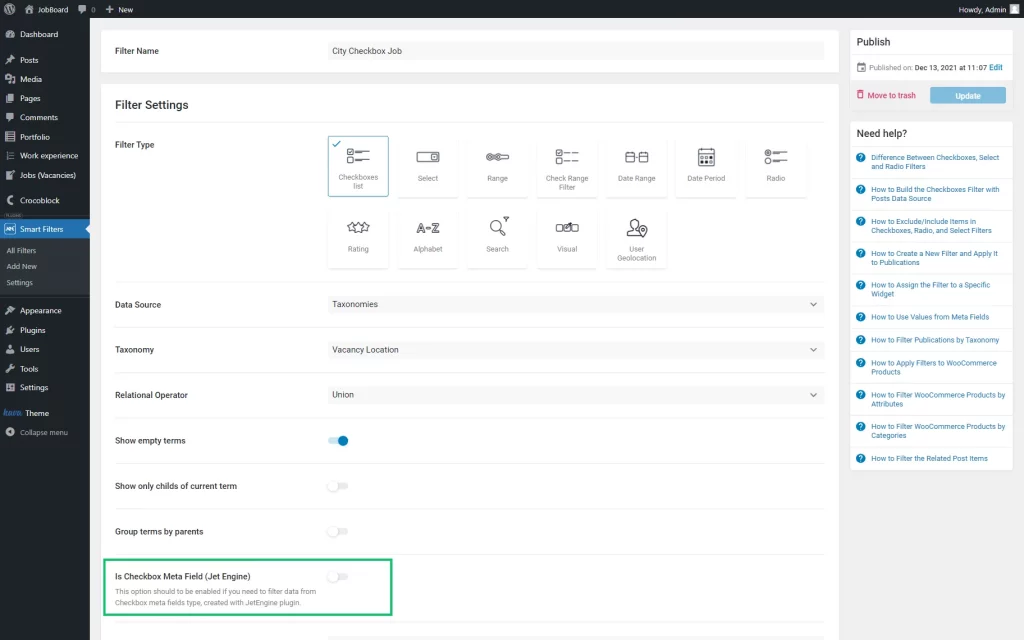
If the “Taxonomies” options are set as Data Source, ensure the Is Checkbox Meta Field (Jet Engine) toggle is disabled. Otherwise, it can be the reason why the indexer is not working. This toggle can be applied for the “Custom Fields” source.
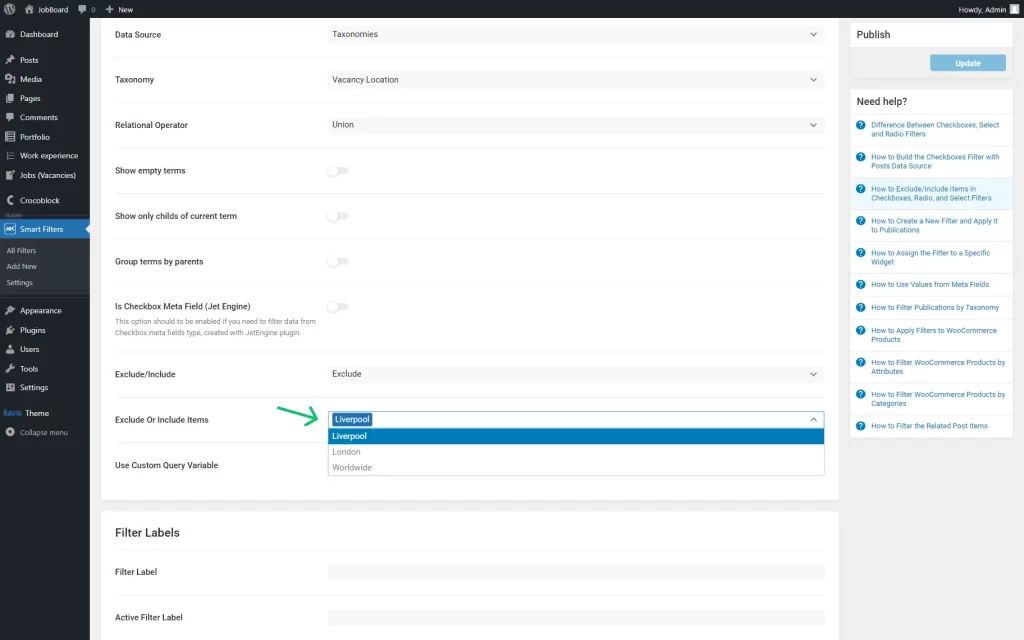
One more thing to check is the Exclude/Include field if you work with “Checkboxes list,” “Select,” or “Radio” Filter Types. If either “Include” or “Exclude” options are selected (not “None”), the following Exclude or Include Items field should not be empty.
Check if the Values Used as a Filter Source Have the Correct Values
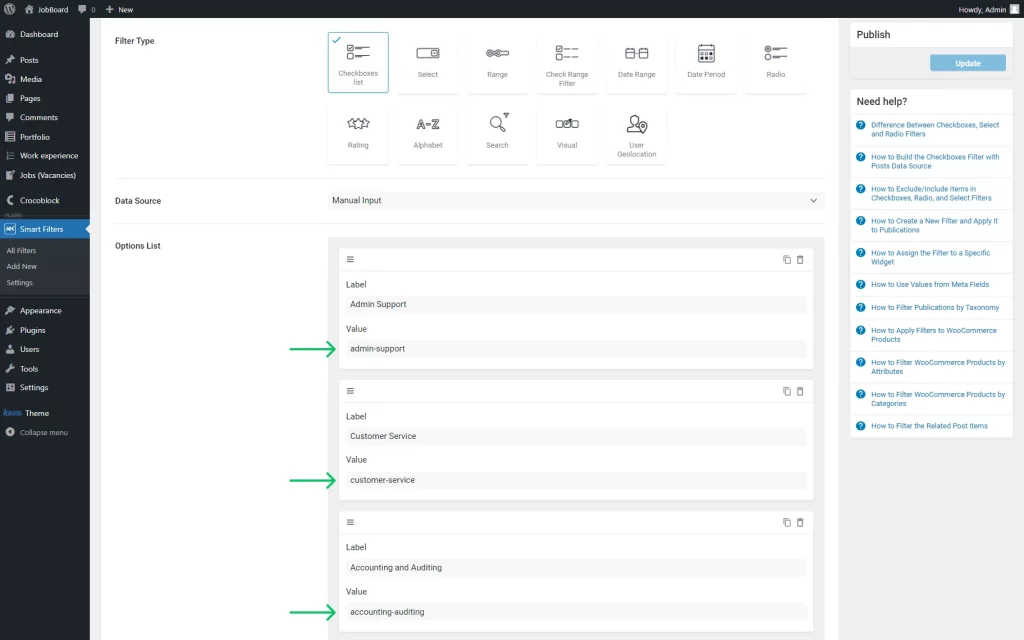
We used the Checkbox Filter as an example of a filter setup. The Checkbox Filter is based on a meta field that has the manual options displayed.
The incorrect work happens because the Indexer request to the database can not be performed correctly if the values do not follow the proper syntax.
However, the Labels can be formatted in any desired way.
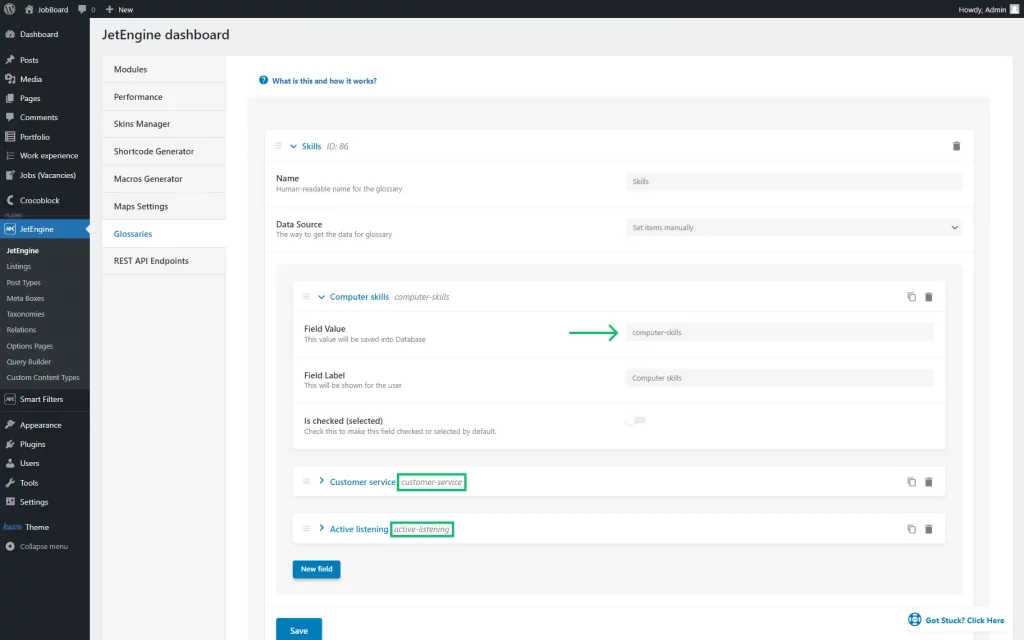
The same applies to the options in a Glossary. If you use a JetEngine Glossary as a filter source, the values in the options must be lowercase, with no spaces to be indexed by the Indexer.
If you use an incorrect glossary as a filter source, you should edit the values to lowercase and remove spaces.
However, additional actions are required to fix the Indexer after editing the values in the meta field options or the glossary.
Resaving each post/CCT item, user, etc., containing a meta field with edited values is crucial.
The process of resaving the values also needs to be done following these steps:
- go to the edit page of an object (post, CCT item, user, etc.) on the backend and uncheck the option or multiple options in the meta field;
- save the object with an empty meta field;
- reselect the needed options in the meta field and save the object again;
- repeat the steps for all other objects.
To ensure the new values are successfully saved in the database after resaving them, you can check the values in the meta fields of the objects via the following two tools.
Via JetEngine Query Builder
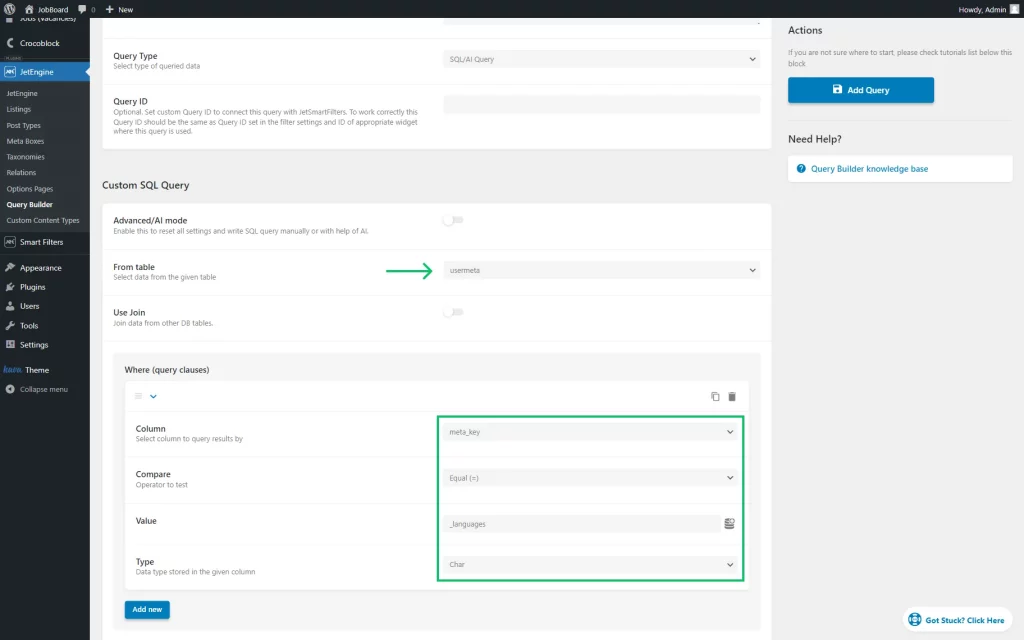
In the Query Builder, you can create a query of an “SQL/AI” Query Type and select a relevant table in which the meta field is saved. It can be postmeta, usermeta, or CCT table.
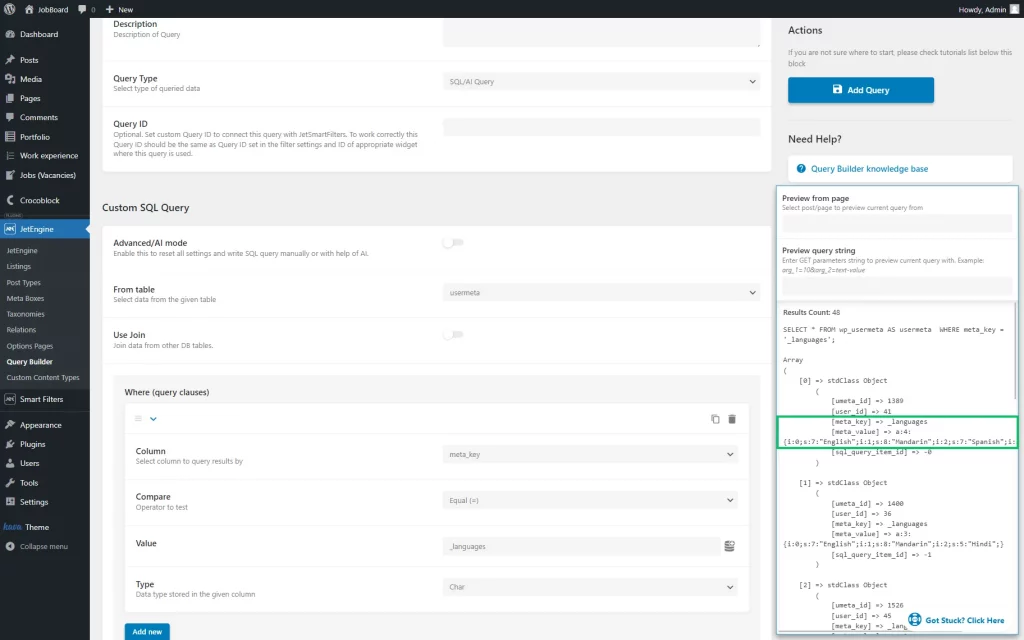
Add the following query clause to see the values of the needed meta field in the “meta_value” column.
Complete the Column field with the “meta_key” value, set the Compare operator to “Equal,” and fill in the Value field with your field name.
Activate the Preview results toggle at the top of the page. If you still see incorrect values in the “meta_value” column, go back to the edit page of the relevant object, reselect, and resave the options in the meta field.
Via phpMyAdmin
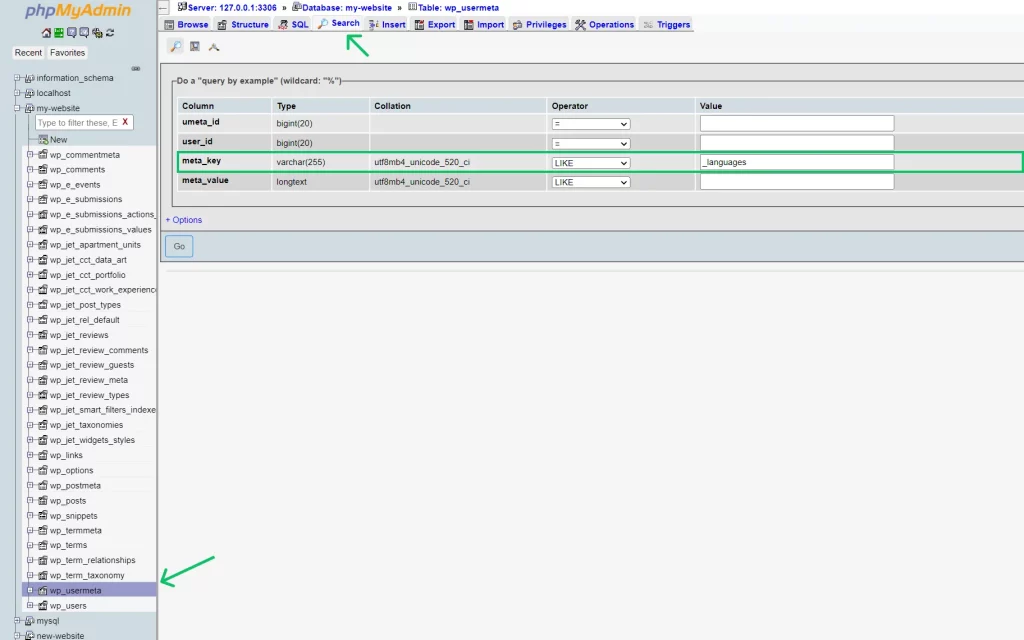
You can use the same approach as in the Query Builder in phpMyAdmin.
Go to a table where the meta field is stored. Click on the table, go to the Search tab, and insert the meta field name into “meta_key” to find users with values in this meta field.
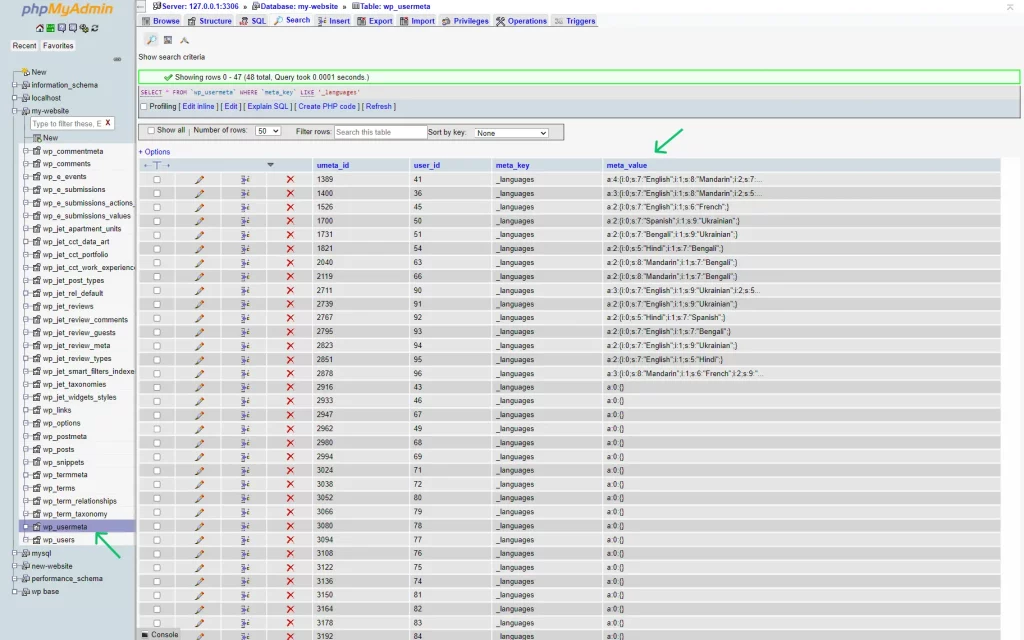
After pressing the “Go” button, you should see the values of the meta field in the “meta_value” column, which helps to understand whether the values have been updated after resaving the objects.
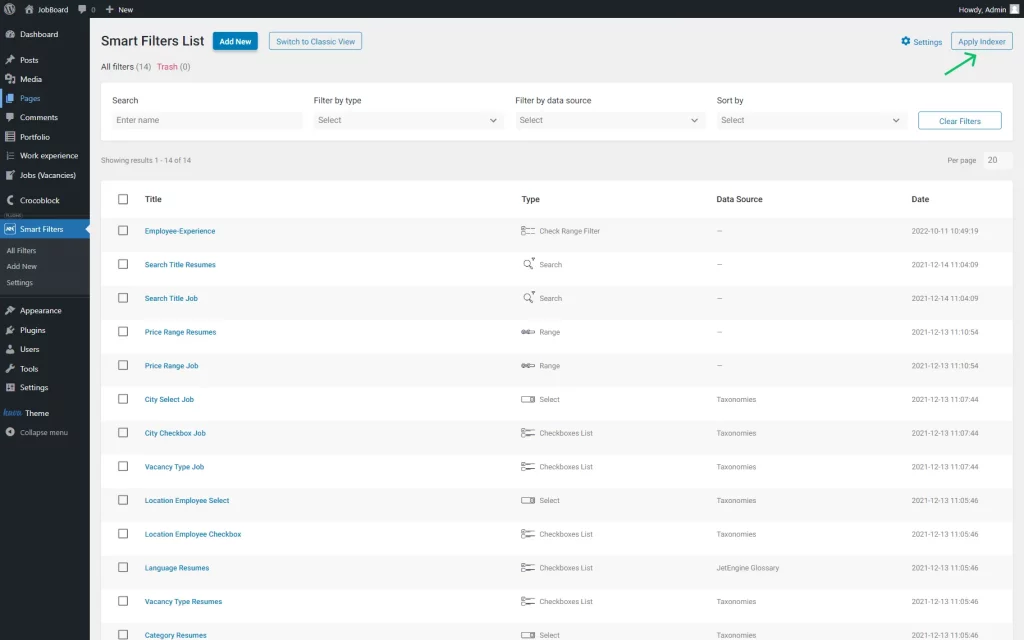
Re-Index Filters With a Button
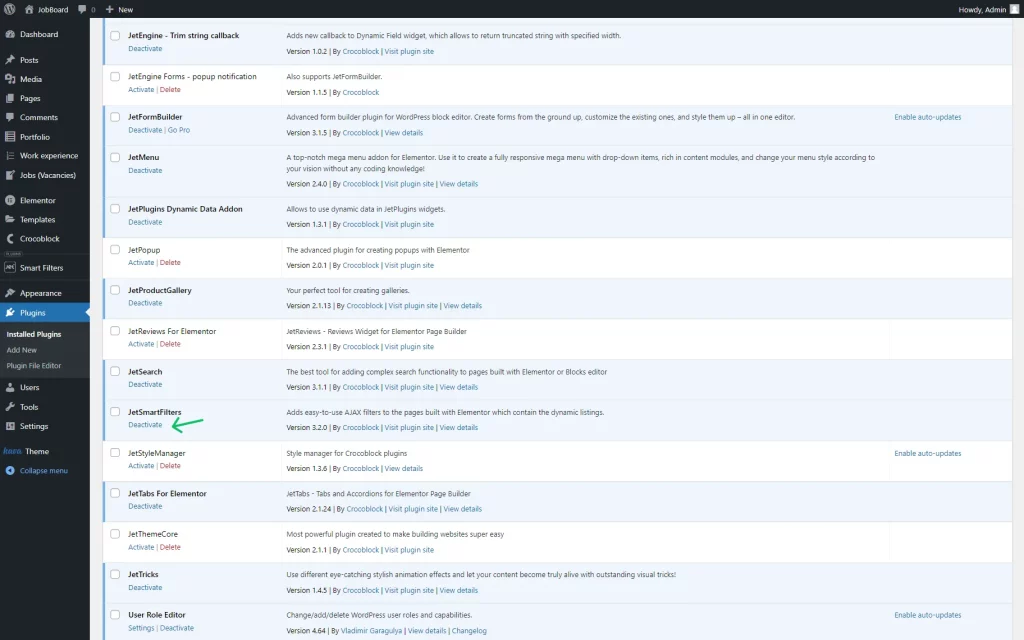
Re-Activate the JetSmartFilters Plugin
If you followed the suggestions above and still experience issues, we recommend contacting our support team for further assistance.
